Advertisement
Quick Links
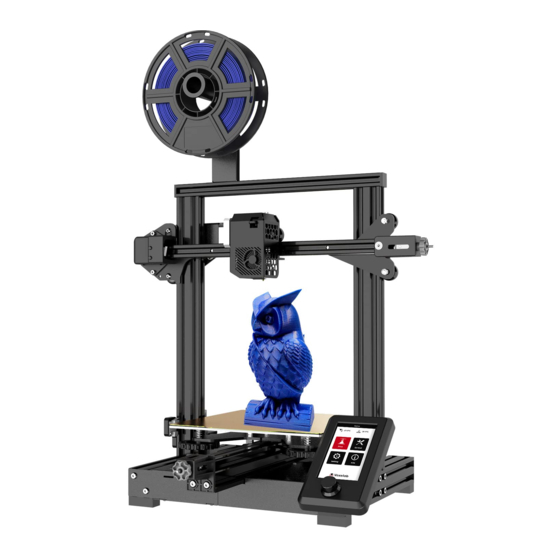
3D Printer User Manual
3D打印机使用说明书
Aquila S2
Note: Each printer is tested before leaving factory. It is normal if there are some
residues in extruder or some tiny scratches on the build plate. It won't affect the
printing quality.
注:每台 3D 打印机在出厂前都经过打印测试,若设备喷头内存在耗材残留或打印平台有
轻微划痕,都属正常现象,不影响使用。
V1.1.2-20211202
Advertisement

Related Manuals for Voxelab Aquila S2


Summary of Contents for Voxelab Aquila S2
- Page 1 3D Printer User Manual 3D打印机使用说明书 Aquila S2 Note: Each printer is tested before leaving factory. It is normal if there are some residues in extruder or some tiny scratches on the build plate. It won’t affect the printing quality. 注:每台 3D 打印机在出厂前都经过打印测试,若设备喷头内存在耗材残留或打印平台有...
- Page 3 Thank you for choosing Voxelab products. For your convenience, please read the manual carefully before using it. Operate the printer accordingly. 使用须知 Voxelab team is always at your service; contact us at any time if you need Product Introduction any assistance.
- Page 4 Notes 使用须知 Do not make any modifications to the printer. To avoid personal injury or property damage please ensure your operation followed by the Guide. Dress properly. Do not wear loose clothing or jewelry. Keeping your hair, clothing and gloves away from moving parts. Do not directly touch the nozzle and build plate to avoid high-temperature burn.
- Page 5 Product Introduction 设备简介 Z-axis right passive block Z轴右侧被动块 Z-axis left passive block Z轴左侧被动块 Y-axis motor Y轴电机 X-axis limit sensor X轴限位传感器 X-axis tensioner X轴张紧器 Power switch and socket 电源开关及插座 Screen 显示屏 Z-axis limit sensor Z轴限位传感器 X-axis motor X轴电机 Knob switch 旋钮开关 Build plate 打印平台...
- Page 6 Equipment Parameters 设备参数 Model | 型号 Voxelab Aquila S2 Print volume | 成型尺寸 220*220*240 mm Forming technology | 成型技术 Extruder quantity | 喷头数量 Layer thickness | 层厚 0.1 mm - 0.4 mm Nozzle diameter | 喷嘴直径 Standard | 标配 0.4 mm Print precision | 精度...
- Page 7 Spare Parts 零部件清单 Printer base *1 Screen kit *1 Extruder kit *1 Z-axis right passive block *1 底座组件 *1 显示屏组件 *1 挤出组件 *1 Z轴右侧被动块 *1 X-axis tensioner *1 Z-axis motor kit *1 X-axis limit sensor kit *1 Z-axis left passive block *1 X轴张紧器...
- Page 8 Spare Parts 零部件清单 2020 profile cover *2 Synchronous belt *1 Material pipe and Material rack *1 nut *1 同步带 *1 2020 型材盖 *2 料架*1 料架筒及螺母 *1 Remove tool *1 Cable tie *1 Needle *1 Storage card and 金属铲刀*1 card reader *1 扎带...
- Page 9 Install Z-axis profiles 安装Z轴型材 Installation video can be found on Voxelab Youtube channel Printer base *1 底座组件 *1 Z-axis profile (left) *1 Z轴型材 (左) *1 Z-axis profile (right) *1 Z轴型材 (右) *1 M5x45 Hexagon socket head spring washer combination screws M5x45 *4 Step: Use four M5x45 screws to fix Z-axis profiles with the base.
- Page 10 Install Z-axis motor kit and T-shaped screw rod 安装Z轴电机组件,T型丝杆 T-shaped screw rod *1 T型丝杆 *1 Z-axis motor kit *1 Z轴电机组件 *1 M4x20 Step 1: Unlock the nut on Z-axis motor kit, insert the T-shaped screw road into the Z-axis motor kit, lock the nut (as showed above).
- Page 11 Install Z-axis left passive block 安装Z轴左侧被动块 X-axis profile X轴型材 Z-axis left passive block *1 Z轴左侧被动块 *1 M5x14 X-axis profile *1 X轴型材 *1 Fix the Z-axis left passive block with two M5x14 screws on X-axis profile. 用2颗M5x14螺钉将Z轴左侧被动块固定在X轴型材上。 Hexagon socket button head screws M5x14 *2 内六角平圆头螺钉M5x14 *2...
- Page 12 Install synchronous belt, extruder kit and Z-axis right passive block 安装同步带,喷头组件和Z轴右侧被动块 Put the synchronous belt into the profile along the V-wheel of the extruder kit (The belt is on the top of the profile and under the V-wheel when pushing extruder kit into the middle). 将同步带放入X轴型材凹槽中,挤出组件沿着V轮推进X轴型材(当把挤出组件推至X轴型材中间时,同步带在X轴型...
- Page 13 Install X-axis tensioner 安装X轴张紧器 1. Disassemble the X-axis tensioner. 将X轴张紧器拆分为三个部分。 X-axis tensioner *1 X轴张紧器 *1 X-axis limit sensor kit *1 X轴限位传感器 *1 2. Insert the synchronous belt into the tensioner block, and reassemble the X-axis tensioner. 将同步带一头穿过张紧轮。 Hexagon socket button head screws M5x14*2 内六角平圆头螺钉M5x14 *2 M5x14...
- Page 14 Install X-axis tensioner 安装X轴张紧器 4. Insert the synchronous belt buckle into the sheet metal slot at the Attention: Please do not tighten the X-axis tensioner screws with too much force. back of the extruder and tighten X-axis tensioner. 注意:切勿用蛮力锁紧张紧器的塑料旋钮。 将同步带两端卡入喷头组件背部的卡槽中,调节张紧轮组件的塑料旋钮直至 同步带达到合适的张紧度。...
- Page 15 Install the X-axis moving kit and adjust the tightness of X-axis and Y-axis tensioners 安装X轴移动组件,调整X轴与Y轴的张紧器 ! Front 正面 Back 背面 The components assembled in the fifth step Tips: Manually rotate the X-axis and Y-axis 第5步装好的组件 tensioners to the appropriate tightness. Reference standard: Press the synchronous belt to feel its tension.
- Page 16 Install the gantry profile and screen kit 安装顶部型材和屏幕组件 M5x25 ST2.9x9.5 Gantry profile *1 顶部型材 *1 Hexagon socket head spring washer combination screws M5x25 *4 内六角圆柱头弹垫组合螺钉 2. Lock screen bracket and screen kit with two pieces M5x25 *4 1. Fix the profile on the upper end of the gantry with four screws ST2.9*9.5.
- Page 17 Install spool holder and profile cover 安装料架和型材盖 Install it on the left 安装在左侧 Material rack *1 料架 *1 Front Material pipe and nut *1 正面 料架筒和螺母 *1 M4x6 T nuts T型螺母 2020 profile cover *2 2020 型材盖 *2 Back 背面 Hexagon socket button head screws M4x6*2 内六角平圆头螺钉M4x6 *2...
- Page 18 Wire connection 设备接线 将6针(4线)端口上带有黄色标签丝印“X”的线与X轴电机连接。 1. Connect the yellow-labled cable with "X" on 6 pin (4wires) port to X-axis motor. 将3针(2线)端口上带有黄色标签丝印“X”的线与X轴限位传感器连接。 2. Connect the yellow-labeled cable with "X" on 3 pin (2wires) port to X-axis limit sensor. 将3针端口上带有黄色标签丝印“Z”的线与Z轴限位传感器连接。 3. Connect the yellow-labeled cable with "Z" on 3 pin port to Z-axis limit sensor. 将6针端口上带有黄色标签丝印“Z”的线与Z轴电机连接。...
- Page 19 Level Leveling operation video can be found on Voxelab Youtube channel 调平 Check the steadiness of the build plate before leveing. If the build plate is unsteady, please use an open-end wrench to adjust the V-wheel to steady it. 调平平台前请确认一下平台有无晃动;若有,请使用开口扳手调节一下左右两侧v型...
- Page 20 Level 调平 1. Move the nozzle to the top of the leveling nut. Screw the nut and adjust the distance between the nozzle and the printing platform to about 0.1 mm (thickness of a piece of A4 paper). 2. We can use a piece of A4 paper to assist in leveling, so that the nozzle only scratches on the A4 paper. Adjust the four leveling nuts in turn until you feel slight resistance from the nozzle when pulling the A4 paper.
- Page 21 Preheat Note: The UI information is only for reference, the actual UI may be different. 预热 注意:界面仅供参考,实际以UI为准。 25/0℃ 26/0℃ 25/0℃ 26/0℃ Method 1 方法 1...
- Page 22 Preheat Note: The UI information is only for reference, the actual UI may be different. 预热 注意:界面仅供参考,实际以UI为准。 25/0℃ 26/0℃ Method 2 Filament Detection Read Configuration Note: If you need to adjust temperature for some reasons, please tap [Settings] - [Tempera- ture] - [Preheat PLA/ABS] to adjust parameter.
- Page 23 Load the filament 装料 Insert the filament into this position 将耗材从该位置穿过 1. When waiting for preheating, please hang the filaments on the material rack. 1. 在等待温度上升时,将耗材挂在料架上。 2. Select [Control]-[Automatic Load], operate it by according the instruction on screen. Pull the filament to the feeding inlet on the extruder, and press the feeding handle, insert the filament into the extruder vertically until feel a slight resistance.
- Page 24 Load the filament 装料 25/0℃ 26/0℃ 25/0℃ 26/0℃ 25/0℃ 26/0℃ 25/0℃ 26/0℃ load Unload 进丝 退丝 Unload: Select [Control]-[Automatic Unload], wait for the extruder heating to the target temperature. Press the feeding handle, and press the filament down for 1-2 seconds, then pull out the filament quickly.
- Page 25 Start printing 开始打印 1. Ensure that the build plate has been leveled before printing. 打印开始前请确保打印机已经完成调平; 2. Ensure that the filament has been loaded in an appropriate approach. 打印开始前请确保耗材安装正确,没有打结或卡住; 3. Please clean extruder before printing (Load the filament for a while to extrude all the melted filament printed last time). 打印开始前请将喷头内的耗材清理干净(喷...
- Page 26 Start printing Note: Notice the distance between the nozzle and the build plate during printing the first layer. If the distance is improper, please select [Setting]-[Z-offset] to perform the Z-axis offset. 开始打印 注意:当打印第一层时若发现喷头与平台之间的距离不合适时,请按压旋钮,选中【设置】-【Z轴补偿】进行Z轴补偿。 100% Print When the offset value is positive, the nozzle Tune and the build plate get farther;...
- Page 27 Motherboard Information 主板信息 X-axis motor port Y-axis motor port Z-axis motor port Extrusion motor port TF card slot X轴电机接口 Y轴电机接口 Z轴电机接口 进丝电机接口 TF卡槽 Micro USB port Micro USB接口 Mainboard cooling fan 主板散热风扇 Screen port 显示屏接口 Fuse Reserved 保险丝 BL-touch port 预留BL-touch接口...
- Page 28 Printing Notice ! 打印注意事项 Please do not apply glue to the PEI platform, lest it affects the printing effect. After printing, do not remove the model with a removal tool to avoid damage to the platform. Do not pick up the printing platform immediately after printing to avoid burns due to high temperature. Please keep a proper distance between the nozzle and the PEI platform to avoid damage.
- Page 29 Trouble shooting 故障检修 Q: What if the screen turns dark? 黑屏或显示不良怎么办? A: 1. Please check whether the screen flat cable has those questions: loose, Q: How to upgrade the firmwares? plugged in reverse, plugged in wrong position, tilted plugging; 固件如何升级? 2.
- Page 30 Trouble shooting 故障检修 Q: What if offset occurs on the printed model? Q: What if the files on the TF card cannot be identified? 模型打印偏移怎么办? TF卡中文件无法识别? A:1. Check the tightness of the synchronous belt and ensure it is correctly installed; A:...
- Page 31 售后服务登记表 Please fill in this form carefully, cut out this form and mail it back to Voxelab together with the printer, or download this form from www.voxelab3dp.com, fill in this form and mail it to support@voxelab3dp.com. After-sales service shall not be provided without this form.
- Page 32 Voxelab grants all end-users a 12-month limited warranty for all Voxelab 3D printers (except the Voxelab extruder) and a 3-month warranty for Voxelab FFF Extruder. If Voxelab 3D printer fails during normal and proper use within the warranty period (judged by Voxelab engineers), Voxelab will provide users with free maintenance services or remote after-sales support.
- Page 33 售后服务卡 <SAC20200804> Voxelab采用谁销售谁服务的原则,如您的3D打印机是在非Voxelab官方平台购买,请向您购买的商家获取相关支持。 1. Voxelab所有3D打印机均为用户提供12个月整机有限质保。其中FFF技术3D打印机的喷头质保时间为3个月。 2. 质保期内若设备出现非人为损坏(由Voxelab工程师评定),您将获得免费配件及售后技术支持。 3. 售后服务周期以产品出厂日期为起始。如能提供清晰的发票,则以发票开具日期为起始。 4. 维修零配件可能为非全新配件,但甲方保证配件功能完全正常。维修配件质保时间与其整机质保时间相同。 以下配件不列入质保范围 以下情况不在质保范围内 · 无法提供有效质保卡或序列号(遗失、涂改、模糊无法确认); 平台贴纸 打印平台 · 整机及部件已经超过质保有效期; 平台金属板 金属铲刀 · 设备曾经在未经Voxelab授权的维修店维修; 平台玻璃 内六角扳手 · 设备在非产品规定的工作环境下使用而造成的设备故障或损坏; U盘、TF卡及读卡器 开口扳手 · 设备正常磨损、老化或因操作造成的外观划痕或瑕疵; USB线 工具配件 · 由于使用非Voxelab指定的软件而造成的设备故障或损坏; 打印耗材 丝盘轴 · 由于使用其它品牌部件造成的设备故障或损坏; · 由于私自对设备进行改装而造成的设备故障或损坏;...
- Page 36 Physical objects and final images might be distinct from the user manual due to differences between printer models. Voxelab reserves final explanation rights. 因每款机型不同,实物可能有所差异,请以实物为准。本说明书最终解释归浙江闪铸三维科技有限公司所有。 Official Website 天猫旗舰店 优酷自频道 Official Website: www.voxelab3dp.com E-mail: support@voxelab3dp.com Address: Xianyuan Road NO.518, Wucheng District, Jinhua, Zhejiang, China.
Need help?
Do you have a question about the Aquila S2 and is the answer not in the manual?
Questions and answers