Table of Contents
Advertisement
Quick Links
Advertisement
Table of Contents

Related Manuals for Kogan KAVACSTV06A


Summary of Contents for Kogan KAVACSTV06A
- Page 1 V6 CORDLESS 29.6V STICK VACUUM CLEANER KAVACSTV06A...
-
Page 3: Safety And Warnings
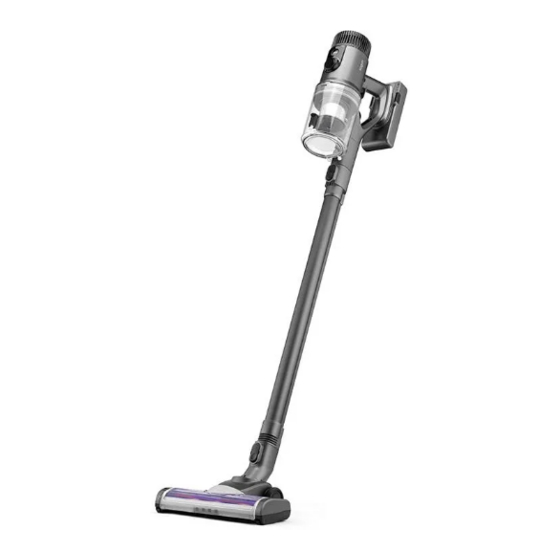
The plug must be removed from the power outlet before performing any maintenance or cleaning on the appliance. • Do not perform electrical repairs by yourself, contact help.kogan.com for support. • The appliance is only to be used with the power supply unit provided with the appliance. - Page 4 OVERVIEW 1 Battery set 10 Dust container 2 Metal tube battery Release for metal tube release button 3 Handle 12 Metal tube 4 On/off switch 13 Release for floor brush 5 Release for dust container 14 Crevice tool 6 Fix for on/off switch 15 Sofa brush 7 Release for brush roller 16 Hairbrush...
-
Page 5: Installation
INSTALLATION Usage of Vacuum Cleaner Connect into position the metal tube to the handy body. Connect into position the floor brush to the body. Put vacuum cleaner and accessories on charging stand. -
Page 6: Operation
OPERATION Vacuum floor operation Step on floor brush and pull-down vacuum cleaner to start cleaning work. Turn on the switch and press the upper button to fix the switch if necessary. - Page 7 Vacuum cleaner smart display A Battery power B Auto mode C Eco mode D Max mode E Brush roller blocked F Motor speed G Mode select...
- Page 8 Using the accessories Instruction for the use of basic accessories: Hairbrush Sofa brush Crevice tool Ideal for: curtains, keysets, Ideal for: bed, sofa, Ideal for: crevices, doorjambs, cold air outlets, etc. cushions, etc. window frame, etc. Optional accessories can be used interactively with basic accessories: Ideal for: Interior and interior cracks and dead corners, narrow areas, drawers, wardrobes, lockers, lockers under upholstery, etc.
-
Page 9: Cleaning And Care
CLEANING & CARE Cleaning the dust cup Turn off the device and unplug before cleaning. Push the release button, then fall off the dust vacuum cleaner can only be used after the dust cup is closed. - Page 10 Clean and maintain filters Please stop working at first before cleaning. Scrubbing with water or neutral detergent, the cleaning cloth must be wrung before scrubbing. Do not penetrate the water into the interior of the vacuum cleaner electrical component. After cleaning, take care not to place the cleaner in the sun or a damp place. Pull the release ring and remove the dust cup.
- Page 11 Takedown floor brush Please make sure the power switch is turned off. According to the manual of taking down the brush, take down the brush. Get out the transparent cover of brush from brush top and then get out the roller to clean.
- Page 12 Clean neck of the floor brush Push down the neck to a straight position. Clean dirt inside the neck regularly to make sure a stable suction power. Bend pipe leveling Visual Dust absorption pipeline...
- Page 13 Clean the PP Hair Roller Brush In order not to affect the rotating flexibility of the roller brush, the hair can be cut and removed if there have hair is wrapped both sides of the shaft. Put the roller brush into the floor brush after cleaning the hair. Pic.
-
Page 14: Specifications
SPECIFICATIONS Battery Lithium 29.6V / 2200mAh Motor Power 130W Dust Capacity 700ml Rated Voltage 100-240V, 50/60Hz Input: AC 100-240V, 50/60Hz, 0.5A; Adaptor Output: DC 36V, 500mA Product Net Weight 2.4Kg Product Gross Weight 3.25Kg Disposal If disposing of this product, take care to dispose of the battery correctly. Do not throw battery in general waste. -
Page 15: Troubleshooting
TROUBLESHOOTING Treatment of common problems: Attention! If you find that the vacuum cleaner is not working properly, turn off the power of the vacuum cleaner before performing the inspection. Trouble phenomenon Cause Treatment method Charging the battery. Battery no power. Buy one new battery and The product does not work Battery ageing. - Page 16 Need more information? We hope that this user guide has given you the assistance needed for a simple set-up. For the most up-to-date guide for your product, as well as any additional assistance you may require, head online to help.kogan.com...
Need help?
Do you have a question about the KAVACSTV06A and is the answer not in the manual?
Questions and answers