Advertisement
Quick Links
Advertisement

Related Manuals for Kogan MX9


Summary of Contents for Kogan MX9
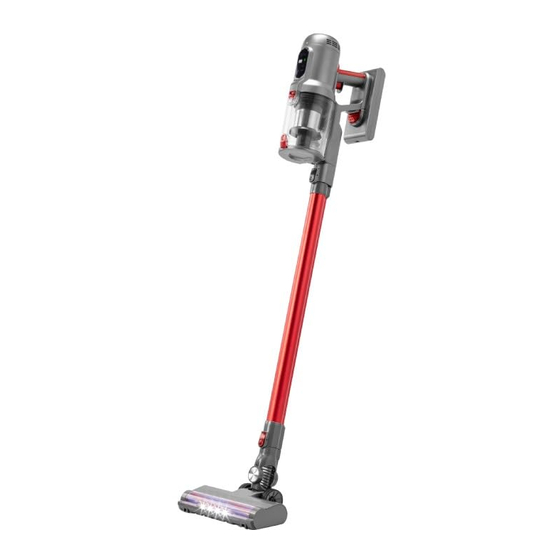
- Page 1 MX9 CORDLESS STICK VACUUM CLEANER KAVACSTM09X...
-
Page 2: Table Of Contents
Safety & warnings Components Overview Assembly Operation Cleaning & care Specifications Troubleshooting... -
Page 3: Safety & Warnings
• Never leave while the vacuum cleaner is working. Battery safety • Only use the original battery supplied by Kogan.com. Do not use any other model or capacity of the battery. • Do not burn or expose the battery for to high temperatures. - Page 4 • Do not use the vacuum cleaner as a toy. Children nearby must be supervised. • Be careful when cleaning stairs. • Only use accessories included with this product and recommended by Kogan.com. • This vacuum cleaner is not suitable for cleaning water or other liquids. Do not vacuum water or wet debris.
- Page 5 • Do not leave the power on when the vacuum is unattended. • Disconnect the charger when not in use, after full charging or before maintenance. • If the power cord is damaged, cease use immediately and contact help.Kogan.com for support.
-
Page 6: Components
COMPONENTS Vacuum body Wall bracket Extension tube Electric brush 2-in-1 bristle brush Crevice tool Battery Charger... -
Page 7: Overview
OVERVIEW Outlet filter cover Charging indicator Control panel Dust cup lock Trigger Battery Dust cup Battery release Dust cup release button button Charging input Extension rod lock Extension tube Brush release button Roller brush... - Page 8 Control Panel Brush blockage indicator Air-duct blockage indicator ECO Speed indicator High Speed indicator Battery level indicator Automatic mode Suction control...
-
Page 9: Assembly
ASSEMBLY Align the roller brush to the extension tube and push it gently. It will connect with an audible click. Align the extension tube with the vacuum cleaner body and push it gently. It will connect with an audible click. The roller brush and other brush heads can be connected directly to the vacuum cleaner body when a more compact unit is desired (for example, cleaning a car interior). - Page 10 Wall Bracket Select a location that is easily accessible and has enough room for the vacuum to be mounted vertically. Ensure that the mounting location is close to an electrical outlet so that you can plug in the vacuum charger. Using the wall bracket as a template, mark the location of the holes that will need to be drilled.
-
Page 11: Operation
OPERATION Turning the Vacuum On/Off Once assembly is complete, press the trigger to turn on the vacuum. Pressing the trigger, a second time will turn the vacuum off. Trigger Suction Control Suction power can be set to two levels (ECO & High) by pressing the suction control button. When the vacuum is turned on, the machine will operate at the suction level set during the previous usage. - Page 12 Auto Mode Press the “Auto” button to place the vacuum into Auto modes. In this mode the vacuum automatically adjusts the suction power depending on the surface that is being cleaned. Extension Tube Used for cleaning high places such as ceilings, roofs, air conditioners and curtains. Compatible with the included brush heads.
- Page 13 Crevice Tool This is suitable for cleaning various crevices and narrow areas in the household and the car. Charging Hang the vacuum on the wall bracket, connect the charger to an electrical outlet and plug the charger into the charging input on the wall bracket. The charger can also be plugged directly into the charging input on the battery.
-
Page 14: Cleaning & Care
CLEANING & CARE • Only the dust cup, outlet filter, 2-in-1 bristle brush and the crevice tool can be washed with warm soapy water. After cleaning, they must be thoroughly dried before being reinstalled into the vacuum. Never immerse any other parts in water or other liquids. •... - Page 15 Cleaning the Dust Cup and Filter Press and hold the dust cup lock to separate the dust cup form the vacuum body. Remove the filter assembly by pulling the handle away from the dust cup. Separate the HEPA filter from the metal filter by rotating it anticlockwise.
- Page 16 Cleaning Outlet Filter On the back of the vacuum body, rotate the outlet filter cover in an anticlockwise direction so the arrow is pointing to the unlock icon. Remove the outlet filter cover from the vacuum body. Note: If the filter is damaged or worn, it must be replaced with a new filter. Separate the outlet filter from the cover and wash the filter with warm water.
- Page 17 Cleaning the Roller Brush To allow for cleaning the roller can be removed from the roller brush by following the below steps: Move the lock (indicated by lock symbols) on the right side of the roller brush to the open lock position and take out the retaining bracket. Remove the roller and clean off any debris.
-
Page 18: Specifications
SPECIFICATIONS Voltage supply 22.2V (Li-ion 2000mAh) Power 120W Charging time Approx. 4-5 hours Operating time Up to 30 mins (when the battery is full charged) Charger Input 100-240V~ 50/60Hz 0.5A MAX Output 26.5V DC, 0.5A Protection Class Disposal This marking indicates that this appliance should not be disposed with other household wastes. -
Page 19: Troubleshooting
Clear the blockage inside of the extension rod. If abnormal noises continue, Abnormal sounds. The extension rod is blocked. cease use and contact help.Kogan.com for support. Brush blockage indicator The roller brush head is dirty. Clean the roller brush. flashes. - Page 20 Need more information? We hope that this user guide has given you the assistance needed for a simple set-up. For the most up-to-date guide for your product, as well as any additional assistance you may require, head online to help.kogan.com...
Need help?
Do you have a question about the MX9 and is the answer not in the manual?
Questions and answers