Advertisement
Quick Links
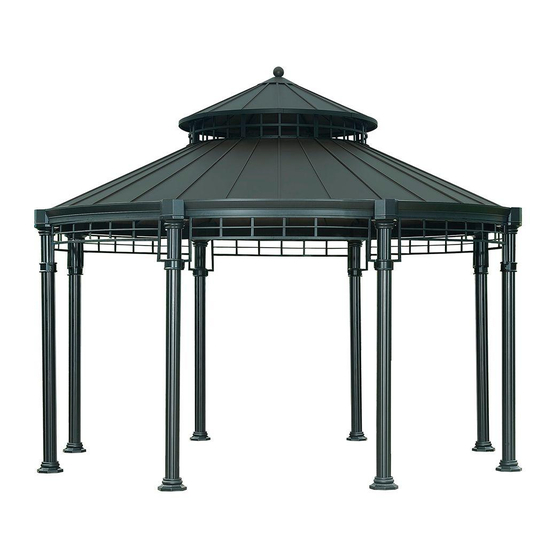
Itme#: D-GZ846PCO-AS-136-N (Black Top With Netting) /D-GZ846PCO-AS-136 (Black Top)
Congratulations on your purchase of our SUNJOY Round Hardtop Gazebo. Our clear, easy to
follow, step-by-step instructions will guide you through the assembly process from start to
finish.
WARNING:
● This unit is heavy. Do not assemble this item alone. 6-8 people are recommended for safe
assembly.
● Keep all children and pets away from assembly area. Children and pets should be
supervised when they are in the area of the Gazebo construction.
● Keep assembly area at least 6 feet from any obstruction such as a fence, garage, house,
overhanging branches, laundry line or electrical wires.
● Some parts may contain sharp edges. When assembling and using this product, basic safety
precautions should always be followed to reduce the risk of personal injury and damage to the
product. Please read all instructions before assembly and use.
● Check all bolts for tightness before use, and periodically check and tighten bolts as
necessary.
● Assemble on level ground.
Please take time to read these instructions thoroughly and follow each step carefully for safe and easy
operation. Keep this manual for future reference.
For technical assistance on assembly or replacement parts. Please call Sunjoy Industries at
1-866-578-6569 from 8:00 am EST to 8:00 pm PST or fax the replacement part form which is in the box to
1-740-283-3549 or Email customer.care@sunjoygroup.com for assistance.
Assembly Instructions
NS#:110102075/110102042/ 110102046
/D-GZ846PCO-AS-236 (Faux Copper Top)
IMPORTANT
Advertisement

Related Manuals for Sunjoy D-GZ846PCO-AS-136-N


Summary of Contents for Sunjoy D-GZ846PCO-AS-136-N
- Page 1 Itme#: D-GZ846PCO-AS-136-N (Black Top With Netting) /D-GZ846PCO-AS-136 (Black Top) /D-GZ846PCO-AS-236 (Faux Copper Top) Congratulations on your purchase of our SUNJOY Round Hardtop Gazebo. Our clear, easy to follow, step-by-step instructions will guide you through the assembly process from start to finish.
-
Page 2: Parts List
Parts List Description Picture Post Base Arch support... - Page 3 Decorative groove Connector Oblique beam Oblique beam Apron piece Inner baffle Small roof frame Small roof crosspiec e spot Small roof oblique beam Small roof connector Big roof cover plate Small roof cover plate Cover Presser Small Roof Cover Hook Finial Netting and Curtain Rods Connecting 1...
-
Page 4: Hardware Pack
Hardware Pack 1 64PCS Bolt M6X20 112PCS Flat Washer M6 16PCS Bolt M6X15 16PCS Bolt M6X35 16PCS Nut M6 2 PCS Wrench M6 Fig.1: Attach Base (B) to Fig.2: Attach Decoration Gutter Fig.3: Insert anot her part of Decoration Gutter Post (A) by Bolt (AA) and Connector (D) to Post (A) by Connector (D) into assembled Decoration... - Page 5 Fig.4: Attach Decoration Gutter Fig.5: Attach Cover (E ) to Decoration Connector (D) to the out er connect plate Gutter Connector (D) by use Screw together by use Bolt (EE), Flat Washer (DD) and Flat Washer (BB). Lock them (BB) and Nut (GG). Lock them tightly. tight.
- Page 6 There need 2 person to lift the Fig.6: Connect Big Roof Frame (J) by Bolt (EE), Flat assembled Big Roof Frame (J) and Washer (BB) and Nut (GG). Lock tightly. need 1 more person to assemble Oblique Beam 1 & 2(F&G). Fig.8: Attach Oblique Beam 1(F) Fig.9: Attach Lock Oblique...
- Page 7 Fig.13:Lock Small Roof Inclined Fig.14:Attach Small Roof Connector (M) to Small Roof Inclined Beam Screw Beam (L) and Big Roof Frame (J) (L) and lock them tightly by (FF), Flat Washer (BB ) and Nut tightly by Bolt (CC) and Flat (GG).
- Page 8 Hardware Pack 3 Flat Washer M6 40PCS Bolt M6X15 40PCS Φ8x260 Stake 16PCS Step 3 Fig.22: Attach Small Roof Fig.21: Lock Small Roof Fig.20: Connect two Small Roof Cover (Q), Finial (S) and Small Sheet Small roof Sheet (O) in order as shown in Roof Connector (M) together as crosspiece spot (K) by using above and insert the last Small...
- Page 9 Fig.24: Connect two Big Roof Fig.25: Fix Big Roof Sheet (N) by Fig.23: Insert one side of Big Sheet (N) in order as shown Cover Presser (P ). Then lock Roof Sheet (N) under Big Roof above. And insert the last Big Cover Presser (P ) with Decoration Frame(J).
- Page 10 IMPORTANT 1. Keep all children and pets away from assembly area. Children and pets should be supervised while gazebo is being assembled. 2. The assembled gaz ebo should be located at least 6 feet (2 m) from any obstruction such as a fence, garage, house, overhanging branches, laundry lines or electrical wires.
- Page 11 Important: Please do not return this product to the store. For technical assistance on assembly or replacement parts. Please call Sunjoy Industries at 1-866-578-6569 from 8:00 am EST to 8:00 pm PST or fax the replacement part form which is in the box to 1-740-283-3549 or Email customer.care@sunjoygroup.com for assistance.
- Page 12 GAZEBO NETTING AND CURTAIN ASSEMBLY INSTRUCTIONS Netting / Curtain is available individually Netting or Curtain Fig.1: Pull the Netting and Curtain Rods (U) out of the Netting and Curtain Rods connecting 1 (T1). (Press the snap hook down firstly before pull the tube out). Fig.2: Disassemble Netting and Curtain Rods (U) from Netting and Curtain Rods connecting 2 (T2).
- Page 13 Netting or Curtain Netting Fig.4: Assemble remain Netting / Curtain to another Netting and Curtain Rods (U). The same flod way as Fig. 4 shows. Fig.5: Lift up the assembled Netitng / Curtain and Netting and Curtain Rods (U). See as the picture shows to inseart Netting and Curtain Rods (U) into Netting and Curtain Rods connecting 2&3 (T2&t3).
Need help?
Do you have a question about the D-GZ846PCO-AS-136-N and is the answer not in the manual?
Questions and answers