Advertisement
Quick Links
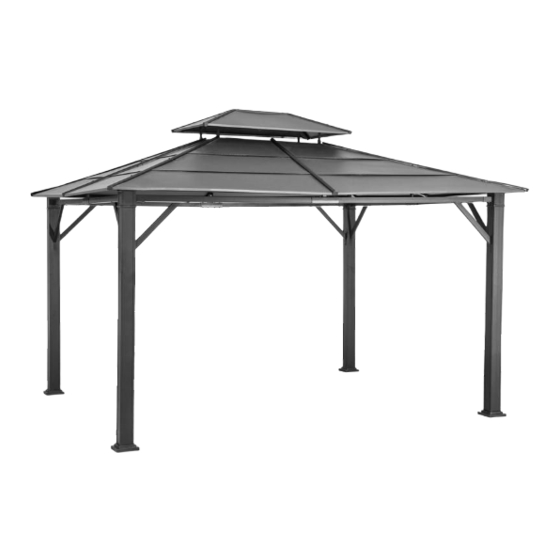
Item#:D-GZ840PST-AS-16S (Black Top) / D-GZ840PST-AS-26S (Faux
Congratulations on your purchase of our SUNJOY 12'x10' Hardtop Gazebo. Our clear, easy to
follow, step-by-step instructions will guide you through the assembly process from start to
finish. All you will need is a screwdriver, a hammer and two ladders (not included) whose
height is no less than 2.5 m.
WARNING:
● THIS UNIT IS
HEAV Y
● Keep all children and pets away from assembly area. Children and pets should be supervised
when they are in the area of the Gazebo construction.
● Keep assembly area at least 6 feet from any obstruction such as a fence, garage, house,
overhanging branches, laundry line or electrical wires.
● Some parts may contain sharp edges. When assembling and using this product, basic safety
precautions should always be followed to reduce the risk of personal injury and damage to the
product. Please read all instructions before assembly and use.
● Check all bolts for tightness before use, and periodically check and tighten bolts as necessary.
● Assemble on level ground
Item Identification: For ease of identification, all parts are labeled to correspond to the Step number
in which the part is used
Please take time to read these instructions thoroughly and follow each step carefully for safe and easy
operation. Keep this manual for future reference.
For technical assistance on assembly or replacement parts. Please call Sunjoy Industries at
1-866-578-6569 from 8:00 am EST to 8:00 pm PST or fax the replacement part form which is in the box to
1-740-283-3549 or Email customer.care@sunjoygroup.com for assistance.
Assembly Instructions
NS#:110102003/110102008
Copper Top)
!. Do not assemble this item alone. 4 people are recommended for safe
.
IMPORTANT
Advertisement

Related Manuals for Sunjoy D-GZ840PST-AS-16S


Summary of Contents for Sunjoy D-GZ840PST-AS-16S
- Page 1 Item#:D-GZ840PST-AS-16S (Black Top) / D-GZ840PST-AS-26S (Faux Copper Top) Congratulations on your purchase of our SUNJOY 12’x10’ Hardtop Gazebo. Our clear, easy to follow, step-by-step instructions will guide you through the assembly process from start to finish. All you will need is a screwdriver, a hammer and two ladders (not included) whose height is no less than 2.5 m.
-
Page 2: Parts List
Parts List Big top frame Big top bar Small top support beam Small top connector Pothook Small top roof panel 1 Small top roof panel 2 Small top cover Small top roof cover Post Beam connector Base cover Base Slanting bar connector Beam connector (upper) Beam connector (down) Short beam... - Page 3 Top slanting bar Top beam Long side left roof panel 1 Long side right roof panel 1 Long side left roof panel Long side right roof panel 2 Long side left roof panel 3 Long side right roof panel 3 Short side roof panel 1 Short side left roof panel 2 Short side right roof panel 2...
-
Page 4: Hardware Pack
Long beam of big roof (long side) (1) Long beam of big roof (long side) (2) Hardware Pack 1 M6*15 Bolt 96 PCS M6 Washer 270 PCS M6*60 Bolt 16PCS M6 Nut 32 PCS M6*35 Bolt 8 PCS M6*15 Bolt 112 P CS M6*70 Bolt 16 PCS... - Page 5 Fig.1: Fix Big top frame A1 and Big top bar B1 by using AA, BB. Fig.2: Fix Small top support beam C1 and Big top frame A1 by using AA, BB. Fig.3: Fix Small top support beam C1 and Small top connector D1 by using DD, BB, CC. Fig.4: Screw the Pot hook E1 into Small top connector D1.
- Page 6 Fig.9: Fix Small top roof panel 1 F1 and Small top roof panel 2 G1 onto small Top support beam C1 by using AA, BB. Fig.10: Fix Small top cover H1 onto Small top support beam C1 by using EE, BB, then fix Small top roof cover I1 and Small top connector D1 by using HH, BB.
- Page 7 Fig.14-1: Connect Long side left roof panel C3 and Long side left roof panel E3 for a whole piece. Fig.14-2: Attach Long side left roof panel C3 and Long side left roof panel E3 onto the top frame by using AA, BB (Repeat the procedure for D3, F3, G3, H3, I3, J3, K3, L3, M3) Fig.15-1: Ins ert Big roof panel cover N3 into the hole of Small top support beam C1.
-
Page 8: Backup Parts
Backup Parts M6*15Bolt 4 PCS M6 Bigger flat washer 10 PCS M6*60 Bolt 2 PCS M6 Nut 3 PCS M6*35 Bolt 2 PCS M6*15 Bolt 4 PCS M6*70Bolt 2 PCS IMPORTANT 1. Keep all children and pets away from assembly area. Children and pets should be supervised while gazebo is being assembled. - Page 9 For technical assistance on assembly or replacement parts. Please call Sunjoy Industries at 1-866-578-6569 from 8: 00 am ES T to 8:00 pm PST or fax the replacement part form which is in the box to 1-740-283-3549 or Email customer.care@sunjoygroup.com for assistance.
- Page 10 GAZEBO NETTING AND CURTAIN ASSEMBLY INSTRUCTIONS Netting or Curatin is available separatley Plastic ring 104 PCS Fig.17: Hang Mosquito netting and curtain onto Long pipe 1 L2a (M2a, L2b, M2b) wit h Plastic ring , keep pipe lay on the inside of curtain.
Need help?
Do you have a question about the D-GZ840PST-AS-16S and is the answer not in the manual?
Questions and answers