Advertisement
Quick Links
We appreciate the trust and confidence you have placed in Hampton Bay through the purchase of this ceiling fan. We strive to continually create
quality products designed to enhance your home. Visit us online to see our full line of products available for your home improvement needs.
USE AND CARE GUIDE
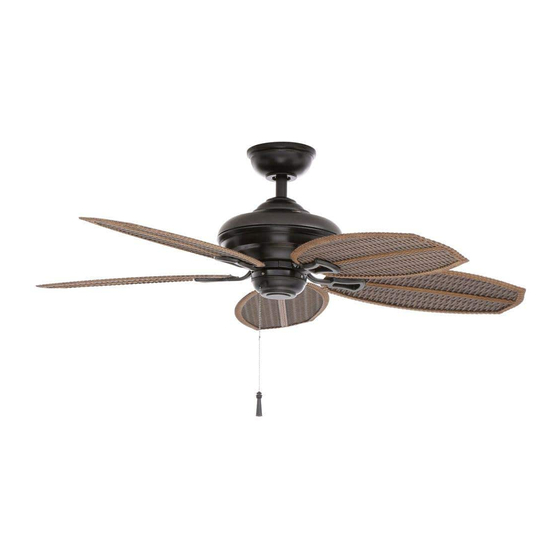
PALM BEACH II 48-INCH CEILING FAN
Questions, problems, missing parts? Before returning to the store,
call Hampton Bay Customer Service
8 a.m. - 6 p.m., EST, Monday-Friday
1-855-HD-HAMPTON
HAMPTONBAY.COM
To view an instructional video on how to install this product:
1. Go to www.homedepot.com and enter either the Item or Model number, found in the top
right corner of the cover of this instruction manual, in the search eld.
2. Click on your product from the list of search results and click on the video link in the
"Product Overview" section.
Thank you for choosing Hampton Bay!
®
THANK YOU
Item #191 410
Model #59299
UL Model #48-PBH
Advertisement

Related Manuals for HAMPTON BAY PALM BEACH II


Summary of Contents for HAMPTON BAY PALM BEACH II
- Page 1 THANK YOU We appreciate the trust and confidence you have placed in Hampton Bay through the purchase of this ceiling fan. We strive to continually create quality products designed to enhance your home. Visit us online to see our full line of products available for your home improvement needs.
-
Page 2: Table Of Contents
Table of Contents Table of Contents ..............2 Assembly ................7 Safety Information ............... 2 Operation ................11 Warranty ................3 Care and Cleaning ............. 12 Pre-Installation ..............3 Troubleshooting ..............12 Installation ................6 Safety Information To reduce the risk of electric shock, ensure the electricity has WARNING: To reduce the risk of personal injury, do been turned off at the circuit breaker or fuse box before you not bend the blade brackets (also referred to as... -
Page 3: Warranty
“wobble” is normal and should not be considered a defect. Servicing performed by unauthorized persons shall render the warranty invalid. There is no other express warranty. Hampton Bay hereby disclaims any and all warranties, including but not limited to those of merchantability and fitness for a particular purpose to the extent permitted by law. - Page 4 Pre-Installation (continued) HARDWARE INCLUDED NOTE: Hardware not shown to actual size. Part Description Quantity Part Description Quantity Blade attachment hardware Rubber gasket for close-to-ceiling mounting Wire connecting nuts Extra blade bracket attachment Hanger pin hardware Locking pin Pull chain...
- Page 5 Pre-Installation (continued) PACKAGE CONTENTS Part Description Quantity Part Description Quantity Slide-on mounting bracket Switch cup (inside canopy) Decorative motor collar cover Ball/downrod assembly Blade bracket (flange), screws Canopy with canopy ring attached pre-installed Fan-motor assembly Blade IMPORTANT: This product and/or components are governed by one or more of the following U.S.
-
Page 6: Installation
Installation MOUNTING OPTIONS WARNING: To reduce the risk of fire, electric shock or NOTE: You may need a longer downrod to maintain personal injury, mount to outlet box marked “acceptable proper blade clearance when installing on a steep, sloped for fan support of 35lbs. (15.9kg) or less” and use screws ceiling. -
Page 7: Assembly
Assembly - Standard Ceiling Mount Preparation for mounting Routing the wires □ □ Remove the canopy ring (JJ) from the canopy (C) by turning the Route the wires exiting the top of the fan-motor ring counter-clockwise until it unlocks. housing (D) into the decorative motor collar cover (F) □... - Page 8 Assembly - Close-to-Ceiling Mount Preparation for mounting Routing the wires □ □ Remove the canopy ring (JJ) from the canopy (C) by turning the Remove three of the six screws and lock washers (LL) (every ring counter clockwise until it unlocks. other one) securing the motor collar (M) to the top of the fan- □...
- Page 9 Assembly - Hanging the Fan (continued) Making the electrical connection Mounting the fan WARNING: When using the standard ball/downrod mounting, the IMPORTANT: Use the wire connecting nuts (BB) supplied with tab in the ring at the bottom of the slide-on mounting bracket your fan.
- Page 10 Assembly - Attaching the Fan Blades Attaching the blades to the blade Fastening the blade assemblies to brackets the motor □ Attach a blade (H) to a blade bracket (G) by inserting screws IMPORTANT: Remove the rubber stopper on the black bracket (AA) into the holes in the blade and through the blade below the motor in order to attach the blade assembly to bracket.
-
Page 11: Operation
Operating Your Fan The pull chain controls the fan speed as follows: 1 pull - High, 2 pulls - Medium, 3 pulls - Low, and 4 pulls - Off Speed settings for warm or cool weather depend on factors such as room size, ceiling height, number of fans, and so on. -
Page 12: Care And Cleaning
Care and Cleaning WARNING: Make sure the power is off before cleaning your fan. □ Because of the fan’s natural movement, some connections may become loose. Check the support connections, brackets, and blade attachments twice a year. Make sure they are secure. It is not necessary to remove the fan from the ceiling. □... - Page 13 ® Questions, problems, missing parts? Before returning to the store, call Hampton Bay Customer Service 8 a.m. - 6 p.m., EST, Monday-Friday 1-855-HD-HAMPTON HAMPTONBAY.COM Retain this manual for future use.
Need help?
Do you have a question about the PALM BEACH II and is the answer not in the manual?
Questions and answers