
Related Manuals for Zanussi ZVENM6X1


Summary of Contents for Zanussi ZVENM6X1
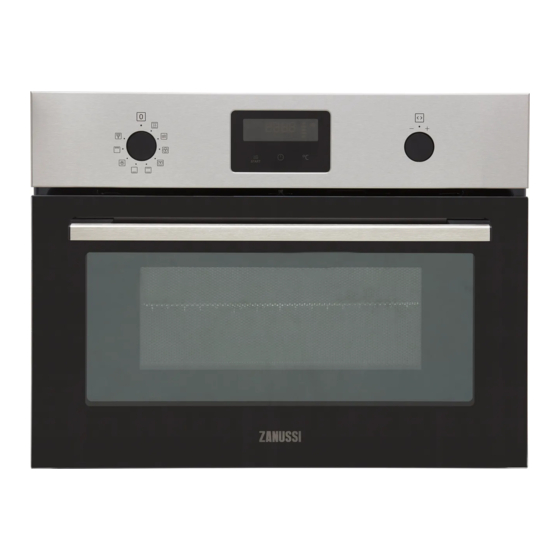
- Page 1 User Manual GETTING STARTED? EASY. ZVENM6X1 ZVENM7X1 EN User Manual Microwave combi-oven...
-
Page 2: Safety Information
VISIT OUR WEBSITE TO: Get usage advice, brochures, trouble shooter, service and repair information: www.zanussi.com/support SAFETY INFORMATION Before the installation and use of the appliance, carefully read the supplied instructions. The manufacturer is not responsible for any injuries or damage that are the result of incorrect installation or usage. - Page 3 WARNING: The appliance and its accessible parts become hot • during use. Care should be taken to avoid touching heating elements. Always use oven gloves to remove or put in accessories or • ovenware. Before carrying out any maintenance, disconnect the appliance •...
-
Page 4: Safety Instructions
slippers, sponges, damp cloth and similar may lead to risk of injury, ignition or fire. If smoke is emitted, switch off or unplug the appliance and keep • the door closed in order to stifle any flames. Microwave heating of beverages can result in delayed eruptive •... -
Page 5: Electrical Connection
Ventilation opening 560x20 mm minimum size. Opening WARNING! Risk of injury, burns and placed on the bottom electric shock or explosion. rear side • This appliance is for household use only. Mains supply cable 1500 mm • Do not change the specification of this length. -
Page 6: Internal Lighting
moisture can build up behind a closed furniture • If you use an oven spray, follow the safety panel and cause subsequent damage to the instructions on its packaging. appliance, the housing unit or the floor. Do not INTERNAL LIGHTING close the furniture panel until the appliance has cooled down completely after use. -
Page 7: Control Panel
ACCESSORIES Baking tray Wire shelf For cakes and biscuits. For cookware, cake tins, roasts. CONTROL PANEL BUTTONS Sensor field / Button Description To set the microwave function. Hold it for more than 3 seconds to turn on or turn off the oven lamp. You can turn on the light also when the oven is turned off. -
Page 8: Daily Use
Step 1 Step 2 Step 3 Remove all accessories and re- Clean the oven and the acces- Place the accessories and the movable shelf supports from sories with a soft cloth, warm removable shelf supports in the oven. water and a mild detergent. the oven. -
Page 9: Heat-Up Indicator
1. Turn the knob for the heating functions to Press to start with the default settings. select the function. 3. Turn the control knob to change the microwave The display shows the default temperature. power. The power setting changes in 100 W 2. - Page 10 HOW TO SET: TIME OF DAY After the first connection to the mains, wait until the display shows: hr, 12:00. 12 - flashes. Step 1 Turn the knob for the temperature to set the hour. Step 2 - press to confirm. The display shows the set hour and: min.
-
Page 11: Using The Accessories
Step 3 Turn the knob for the temperature to set the minutes for the function: Duration. Press: Step 4 Turn the knob for the temperature to set the hour for the function: Duration. Press: The display shows: Step 5 Turn the knob for the temperature to set the hour for the function: End Time. Press: Step 6 Turn the knob for the temperature to set the minutes for the function: End Time. -
Page 12: Additional Functions
Wire shelf: Push the shelf between the guide bars of the shelf support and make sure that the feet point down. Baking tray: Push the baking tray between the guide bars of the shelf support. Wire shelf and baking tray together: Push the baking tray between the guide bars of the shelf support and the wire shelf on the guide bars above. -
Page 13: Hints And Tips
RESIDUAL HEAT INDICATOR When you turn off the oven, the display shows the residual heat indicator if the temperature in the (°C) oven is more than 40 °C.Turn the knob for the temperature left or right to check the oven temperature. -
Page 14: Microwave Suitable Cookware And Materials
Microwave cooking Microwave defrosting Cook food covered. If you want to keep a crust Put the frozen, unwrapped food on a small up- cook food without a cover. turned plate with a container below it, or on a Do not overcook the dishes by setting the power defrosting rack or plastic sieve so that the de- and time too high. -
Page 15: Tips On Baking
Microwave function Microwave Combi func- Cookware / Material tion Heating, Defrosting Cooking Roasting film with microwave safe clo- sure Roasting dishes made of metal, e.g. en- amel, cast iron Baking tins, black lacquer or silicon-coat- Baking tray Wire shelf Cookware for microwave use, e.g. crisp BAKING the temperature setting if an unequal browning occurs. -
Page 16: Baking On One Oven Level
Baking results Possible cause Remedy The cake is not ready in The oven temperature is too Next time set a slightly higher oven the baking time specified low. temperature. in a recipe. BAKING ON ONE OVEN LEVEL BAKING IN TINS Use the first shelf position. - Page 17 BAKING IN TINS Use the function: Conventional Cooking. (°C) (min) Sponge cake 35 - 50 Cheesecake, use a deep pan 160 - 170 60 - 90 Apple pie, 2 tins Ø20 cm 70 - 90 CAKES / PASTRIES Use the first shelf position. Use the function: True Fan Cooking.
- Page 18 CAKES / PASTRIES / BREADS Preheat the empty oven unless specified otherwise. Use the function: Conventional Cooking. Use the baking tray. (°C) (min) Swiss roll 180 - 200 10 - 20 Rye bread first: 230 first: 20 then: 160 - 180 then: 30 - Buttered almond cake / Sugar cakes 190 - 210...
- Page 19 BISCUITS Use the function: True Fan Cooking. (°C) (min) Short pastry biscuits 150 - 160 10 - 20 Biscuits made of sponge cake mixture 150 - 160 15 - 20 Puff pastries, preheat the empty oven 170 - 180 20 - 30 Short bread / Pastry strips 20 - 35 Small cakes, preheat the empty oven...
-
Page 20: Bakes And Gratins
BISCUITS Preheat the empty oven. Use the second shelf position. Use the function: Conventional Cooking. (°C) (min) Rolls 190 - 210 10 - 25 Short bread / Pastry strips 20 - 30 Small cakes 20 - 35 BAKES AND GRATINS Use the first shelf position. -
Page 21: Multilevel Baking
Use the first shelf position. (°C) (min) Sweet bakes Conventional Cooking 180 - 200 40 - 60 Pasta bake Conventional Cooking 180 - 200 45 - 60 MULTILEVEL BAKING Use the first / third shelf position. CAKES / PASTRIES / BREADS CAKES / PASTRIES / BREADS True Fan Cooking. - Page 22 ROASTING Baste meat joints with their own juice several times during roasting. Use the first shelf position. BEEF Use the function: Conventional Cooking. (kg) (°C) (min) Pot roast 1 - 1.5 60 - 80 PORK Use the function: Turbo Grilling. (kg) (°C) (min)
- Page 23 VEAL Use the function: Turbo Grilling. (kg) (°C) (min) Roast veal 160 - 180 50 - 70 Veal knuckle 1.5 - 2 160 - 180 75 - 100 LAMB Use the function: Turbo Grilling. (kg) (°C) (min) Lamb leg / 1 - 1.5 150 - 170 50 - 70...
- Page 24 POULTRY Use the function: Turbo Grilling. (kg) (°C) (min) Poultry, por- 0.2 - 0.25 200 - 220 20 - 35 tions each Chicken, half 0.4 - 0.5 each 190 - 210 25 - 40 Chicken, pou- 1 - 1.5 190 - 210 60 - 80 lard Duck...
- Page 25 DISHES Use the function: True Fan Cooking. (kg) (°C) (min) Sweet dishes 160 - 180 20 - 35 Savoury dishes 400 - 600 160 - 180 20 - 45 with cooked ingre- dients (noodles, vegetables) Savoury dishes 400 - 600 160 - 180 30 - 45 with raw ingredi-...
- Page 26 PIZZA PIZZA Preheat the empty oven before cooking. Preheat the empty oven before cooking. Use the third shelf position. Use the third shelf position. (°C) (min) (°C) (min) Cheesecake 140 - 160 60 - 90 Puff pastry flan 160 - 180 45 - 55 Apple pie, cov- 150 - 170...
-
Page 27: Bread Baking
BREAD BAKING Preheating is not recommended. DEFROSTING Use the second shelf position. Use the third shelf position unless specified otherwise. BREAD (°C) (min) White bread 180 - 40 - Use the function: True Fan Cooking. Baguette 200 - 35 - Brioche 160 - 40 -... - Page 28 DEFROST Do not cover the food, as this can extend the defrost time. Remove the food packaging and put the food on a plate. For large portions of food place an upturned empty plate on the bottom of the oven cavity. Put the food in a deep dish and set it on top of the plate inside the oven.
-
Page 29: Microwave Cooking
DEHYDRATING - TRUE FAN COOKING (min) (min) Use the third shelf position. STONE Cooking time Continue to FRUIT until simmer- cook at 100 °C Peaches / 35 - 45 10 - 15 (°C) Quinces / Plums Beans 60 - 70 6 - 8 Peppers 60 - 70... - Page 30 DEFROSTING MEAT / FISH Set power for 100 W unless specified oth- Standing time (kg) (min) erwise. (min) Steak 5 - 7 5 - 10 Minced meat, set 200 W 7 - 8 5 - 10 Chicken 30 - 35 10 - 20 Chicken breast 0.15...
- Page 31 FRUIT Standing (kg) (min) time (min) Fruit 0.25 5 - 10 10 - 15 REHEATING Standing time (min) (min) Baby food in jars 0.2 kg 1 - 2 Baby milk, put a spoon into the bottle 180 ml 0:20 - 0:40 Milk 200 ml...
- Page 32 COOKING Standing time (min) (min) Whole fish 0.5 kg 8 - 10 2 - 5 Fish fillet 0.5 kg 4 - 7 2 - 5 Vegetables, fresh 0.5 kg + 50 ml of 5 - 15 water Vegetables, frozen 0.5 kg + 50 ml of 10 - 20 water Jacket potatoes...
-
Page 33: Information For Test Institutes
700 - 1000 W Searing at the start of the cook- Cooking vegetables Heating liquids ing process 500 - 600 W Heating one-plate Defrosting and heat- Cooking egg dishes Simmering stews meals ing frozen meals 300 - 400 W Melting cheese, Heating baby Cooking / Heating Continuing... -
Page 34: Care And Cleaning
Use wire shelf unless otherwise specified. MICROWAVE FUNC- TION (kg) (min) Meatloaf 25 - 32 Turn container around by 1/4, halfway through the cooking time. Egg custard Bottom Meat defrosting Bottom 7 - 8 Turn the meat up- side down halfway through the cook- ing time. -
Page 35: Notes On Cleaning
NOTES ON CLEANING Clean the front of the oven with a soft cloth with warm water and a mild detergent. Use a cleaning solution to clean metal surfaces. Clean stains with a mild detergent. Cleaning Agents Clean the cavity after each use. Fat accumulation or other residue may cause fire. Clean the oven ceiling carefully from residue and fat. -
Page 36: Troubleshooting
Top lamp Step 1 Turn the glass cover to remove it. Step 2 Clean the glass cover. Step 3 Replace the lamp with a suitable 300 °C heat-resistant lamp. Step 4 Install the glass cover. TROUBLESHOOTING WARNING! Refer to Safety chapters. WHAT TO DO IF... -
Page 37: Energy Efficiency
SERVICE DATA the oven cavity. Do not remove the rating plate from the oven cavity. If you cannot find a solution to the problem yourself, contact your dealer or an Authorised Service Centre. The necessary data for the service centre is on the rating plate. - Page 40 WWW.ZANUSSI.COM/SHOP...
Need help?
Do you have a question about the ZVENM6X1 and is the answer not in the manual?
Questions and answers