
Related Manuals for Zanussi ZVEKM6K2


Summary of Contents for Zanussi ZVEKM6K2
- Page 1 EN User Manual | Microwave combi-oven ZVEKM6K2 ZVEKM6X2 ZVEKM7X1 zanussi.com\register...
-
Page 2: Table Of Contents
VISIT OUR WEBSITE TO: Get usage advice, brochures, trouble shooter, service and repair information: www.zanussi.com/support Subject to change without notice. CONTENTS 1. SAFETY INFORMATION................2 2. SAFETY INSTRUCTIONS................5 3. PRODUCT DESCRIPTION................8 4. CONTROL PANEL..................9 5. BEFORE FIRST USE..................9 6. - Page 3 • Children should be supervised to ensure that they do not play with the appliance. • Keep all packaging away from children and dispose of it appropriately. • WARNING: The appliance and its accessible parts become hot during use. Keep children and pets away from the appliance when in use and when cooling down.
- Page 4 • Do not activate the microwave function when the appliance is empty. Metal parts inside the cavity can create electric arcing. • Metallic containers for food and beverages are not allowed during microwave cooking. This requirement is not applicable if the manufacturer specifies size and shape of metallic containers suitable for microwave cooking.
-
Page 5: Safety Instructions
• To remove the shelf supports first pull the front of the shelf support and then the rear end away from the side walls. Install the shelf supports in the opposite sequence. • The appliance should be cleaned regularly and any food deposits removed. - Page 6 2.2 Electrical connection 2.3 Use WARNING! WARNING! Risk of fire and electric shock. Risk of injury, burns and electric shock or explosion. • All electrical connections should be made by a qualified electrician. • Do not change the specification of this •...
- Page 7 • Always cook with the appliance door temperature drop may cause immediate closed. breakage of the glass. Broken glass • If the appliance is installed behind a pieces may be extremely sharp and furniture panel (e.g. a door) make sure the difficult to locate.
-
Page 8: Product Description
2.8 Disposal • Disconnect the appliance from the mains supply. • Cut off the mains electrical cable close to WARNING! the appliance and dispose of it. Risk of injury or suffocation. • Remove the door catch to prevent children or pets from becoming trapped in the •... -
Page 9: Control Panel
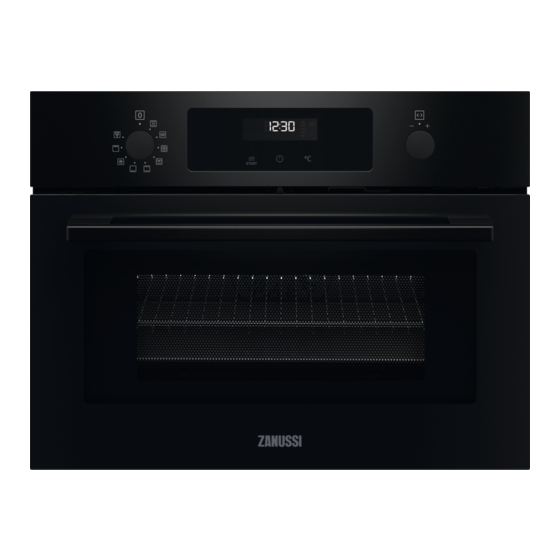
4. CONTROL PANEL 4.1 Retractable knobs To use the appliance press the knob. The knob comes out. 4.2 Sensor fields / Buttons To set the microwave function. Hold it for more than 3 seconds to turn on or turn off the oven lamp. You can turn on the light also when the oven is turned off. -
Page 10: Daily Use
6. DAILY USE WARNING! MICROWAVE POW‐ MAXIMUM TIME Refer to Safety chapters. 6.1 How to set: Heating function >600 6.3 How to set: Microwave Combi Remove microwave bottom glass plate. You can combine the microwave function with Step 1 Turn the knob for the heating functions to select a heating function. -
Page 11: Clock Functions
6.5 Heat-up indicator Heating func‐ Application When the oven function operates, the bars in tion the display appear one by one when the To bake and roast food on one temperature in the oven increases, and shelf position. disappear when it decreases. Conventional 6.6 Heating functions Cooking... - Page 12 Clock function Application Combination of functions: Duration, End Time. Time Delay To set a countdown time. This function has no effect on the operation of the oven. Minute Minder Minute Minder - can be set at any time, also if the oven is off. 7.2 How to set: Time of day After the first connection to the mains, wait until the display shows: hr, 12:00.
- Page 13 Step 3 Turn the knob for the temperature to set the hour. - press to confirm. Step 4 Turn the knob for the temperature to set the minutes. - press to confirm. At the set end time the signal sounds for 2 min. The time setting flashes in the display. The oven turns off automatically.
-
Page 14: Using The Accessories
Step 4 When the set time ends the signal sounds for 2 min. 00:00, - flash. Press any button to stop the signal. 8. USING THE ACCESSORIES A small indentation at the top increases WARNING! safety. The indentations are also anti-tip devices. -
Page 15: Additional Functions
9. ADDITIONAL FUNCTIONS 9.1 How to use: Child lock Refer to "Additional functions" chapter, Using the Child Lock. When the function is on the oven cannot be turned on accidentally. 9.3 Residual heat indicator When you turn off the oven, the display Step 1 Ensure the knob for the heating func‐... - Page 16 10.1 Cooking recommendations The temperature and cooking times in the tables are guidelines only. They depend on the recipes and the quality and quantity of the ingredients used. Your appliance may bake or roast differently to the appliance you had before. The hints below show recommen‐ ded settings for temperature, cooking time and shelf position for specific types of the food.
- Page 17 Cookware / Material Microwave function Microwave Combi function Defrosting Heating, Cooking Glass and glass ceramic made of ovenproof / frost-proof material Ceramic and earthenware without any quartz or metal components and glazes which contain metal Ceramic, porcelain and earthenware with un‐ glazed bottom or with small holes, e.g.
- Page 18 Baking results Possible cause Remedy The cake sinks and becomes The oven temperature is too high. Next time set slightly lower oven tempera‐ soggy or streaky. ture. The oven temperature is too high Next time set a longer baking time and and the baking time is too short.
- Page 19 CAKES / PASTRIES (°C) (min) Cake with crumble topping 150 - 160 20 - 40 Fruit flans (made of yeast dough / sponge cake mixture), use a 150 - 160 35 - 55 deep pan Fruit flans made of short pastry 160 - 170 40 - 80 Preheat the empty oven unless specified otherwise.
- Page 20 Preheat the empty oven. Use the second shelf position. Use the function: Conventional Cooking. BISCUITS (°C) (min) Rolls 190 - 210 10 - 25 Short bread / Pastry strips 20 - 30 Small cakes 20 - 35 10.7 Bakes and gratins Use the first shelf position.
- Page 21 BEEF (kg) (°C) (min) Pot roast 1 - 1.5 60 - 80 Use the function: Turbo Grilling. PORK (kg) (°C) (min) Shoulder / Neck / 1 - 1.5 160 - 180 50 - 70 Ham joint Meatloaf 0.75 - 1 160 - 170 35 - 50 Pork knuckle, pre‐...
- Page 22 FISH (kg) (°C) (min) Whole fish 1 - 1.5 210 - 220 30 - 45 Use the function: True Fan Cooking. DISHES (kg) (°C) (min) Sweet dishes 160 - 180 20 - 35 Savoury dishes with 400 - 600 160 - 180 20 - 45 cooked ingredients (noodles, vegetables)
- Page 23 GRILL (°C) (min) (min) 1st side 2nd side Roast beef, medium 210 - 230 30 - 40 30 - 40 Beef fillet, medium 20 - 30 20 - 30 Pork loin 210 - 230 30 - 40 30 - 40 Veal loin 210 - 230 30 - 40...
- Page 24 Use the first shelf position. (kg) (min) (min) Defrosting time Further defrost‐ ing time Chicken 100 - 140 20 - 30 Turn halfway through. Meat 100 - 140 20 - 30 Turn halfway through. Trout 0.15 25 - 35 10 - 15 Strawberries 30 - 40 10 - 20...
- Page 25 VEG‐ ETABLES (min) (min) (°C) Cooking Continue to Peppers 60 - 70 5 - 6 time until cook at 100 simmering °C Vegetables for 60 - 70 5 - 6 soup Kohlrabi / Peas / 50 - 60 15 - 20 Asparagus Mushrooms 50 - 60...
- Page 26 DAIRY PRODUCTS Set power for 100 W. (kg) (min) Standing time (min) Butter 0.25 4 - 6 5 - 10 Grated cheese 2 - 4 10 - 15 CAKES AND BREAD Set power for 200 W unless specified (min) Standing otherwise.
- Page 27 MELTING (kg) (min) Standing time (min) Chocolate / Chocolate icing 0.15 2 - 4 1 - 2 Butter 0:30 - 1:30 COOKING (min) Standing time (min) Whole fish 0.5 kg 8 - 10 2 - 5 Fish fillet 0.5 kg 4 - 7 2 - 5 Vegetables, fresh...
-
Page 28: Care And Cleaning
Sponge cake 0.475 Bottom 8 - 9 Turn container around by 1/4, halfway through the cooking time. Meatloaf 25 - 27 Turn container around by 1/4, halfway through the cooking time. Egg custard 30 - 33 Meat defrosting Turn the meat upside down halfway through the cooking time. - Page 29 Clean the cavity after each use. Fat accumulation or other residue may cause fire. Clean the appliance ceiling carefully from residue and fat. Do not store the food in the appliance for longer than 20 minutes. Dry the cavity only with a microfibre cloth after each use.
-
Page 30: Troubleshooting
Step 2 Clean the glass cover. Step 3 Replace the lamp with a suitable 300 °C heat-resistant lamp. Step 4 Install the glass cover. 12. TROUBLESHOOTING WARNING! Refer to Safety chapters. Error codes 12.1 What to do if... The display shows... Check if... -
Page 31: Environmental Concerns
Cooking with fan minimum 3 - 10 min before the end of When possible, use the cooking functions cooking. The residual heat inside the with fan to save energy. appliance will continue to cook. Residual heat Use the residual heat to warm up other If a programme with Duration is activated and dishes. - Page 32 867361690-D-322023...
Need help?
Do you have a question about the ZVEKM6K2 and is the answer not in the manual?
Questions and answers