
Related Manuals for Zanussi ZVENM6K3


Summary of Contents for Zanussi ZVENM6K3
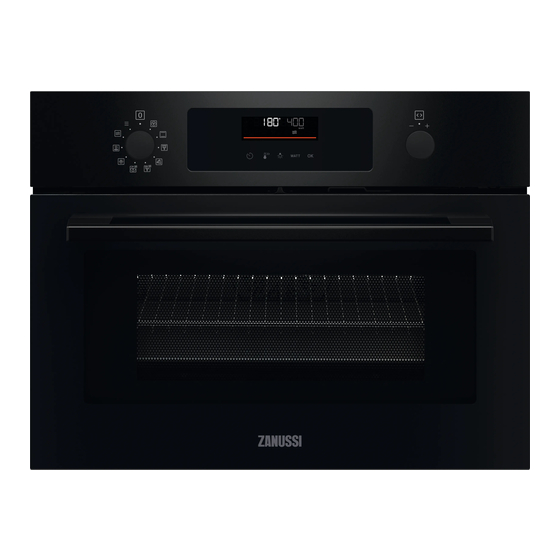
- Page 1 EN User Manual | Microwave combi-oven ZVENM6K3 zanussi.com\register...
-
Page 2: Table Of Contents
VISIT OUR WEBSITE TO: Get usage advice, brochures, trouble shooter, service and repair information: www.zanussi.com/support Subject to change without notice. CONTENTS 1. SAFETY INFORMATION................2 2. SAFETY INSTRUCTIONS................5 3. PRODUCT DESCRIPTION................8 4. CONTROL PANEL..................9 5. BEFORE FIRST USE..................10 6. - Page 3 be kept away from the appliance unless continuously supervised. • Children should be supervised to ensure that they do not play with the appliance. • Keep all packaging away from children and dispose of it appropriately. • WARNING: The appliance and its accessible parts become hot during use.
- Page 4 • Always use oven gloves to remove or insert accessories or ovenware. • Do not activate the microwave function when the appliance is empty. Metal parts inside the cavity can create electric arcing. • Metallic containers for food and beverages are not allowed during microwave cooking.
-
Page 5: Safety Instructions
• Eggs in their shell and whole hard-boiled eggs should not be heated in the appliance since they may explode, even after microwave heating has ended. • To remove the shelf supports first pull the front of the shelf support and then the rear end away from the side walls. Install the shelf supports in the opposite sequence. - Page 6 2.3 Use Mains supply cable length. 1500 mm Cable is placed in the right WARNING! corner of the back side Risk of injury, burns and electric shock or Mounting screws 3.5x25 mm explosion. 2.2 Electrical connection • Do not change the specification of this appliance.
- Page 7 • Always cook with the appliance door temperature drop may cause immediate closed. breakage of the glass. Broken glass • If the appliance is installed behind a pieces may be extremely sharp and furniture panel (e.g. a door) make sure the difficult to locate.
-
Page 8: Product Description
2.8 Disposal • Disconnect the appliance from the mains supply. • Cut off the mains electrical cable close to WARNING! the appliance and dispose of it. Risk of injury or suffocation. • Remove the door catch to prevent children or pets from becoming trapped in the •... -
Page 9: Control Panel
Microwave bottom glass plate To prepare food in microwave mode. 4. CONTROL PANEL 4.1 Retractable knobs To use the appliance press the knob. The knob comes out. 4.2 Control panel overview Fast Heat Microwave Timer Light Confirm setting Press Turn the knob power Select a heating function to turn on the appliance. -
Page 10: Before First Use
5. BEFORE FIRST USE WARNING! Refer to Safety chapters. 5.1 Initial cleaning Before the first use, clean the empty appliance and set the time: 00:00 Set the time. Press 6. DAILY USE WARNING! Refer to Safety chapters. 6.1 How to set: Heating functions Step 1 Turn the knob for the heating functions and select a heating function. - Page 11 MICROWAVE POWER MAXIMUM TIME 100 - 600 59:55 >600 If you open the door, the microwave function stops. To start it again, close the door. Press 6.3 How to set: Microwave combi functions Step 1 Remove all accessories. Insert microwave bottom glass plate. Put the food on the microwave bottom glass plate. Step 2 Turn the knob for the heating functions and select the function: The display shows: temperature and microwave power.
- Page 12 Heating function Application To roast large pieces of meat on one level. To make gratins and to brown.The func‐ tion with MW boost, power range: 100 - 600 W. Turbo Grilling + MW Baking on one shelf position.The function with MW boost, power range: 100 - 600 W. True Fan Cooking + Defrosting meat, fish, cakes, power range: 100 - 200 W Defrost...
- Page 13 Legend Frozen To make convenience food (e.g., Foods french fries, potato wedges or Preheat the appliance before you start spring rolls) crispy. cooking. Conven‐ Baking and roasting food on one Shelf level. tional shelf position. The function with Cooking MW boost, power range: 100 - + MW 600 W.
- Page 14 Dish Weight Shelf level / Accessory Pork roast neck or 1.5 kg 1; ceramic or glass casserole dish on wire shelf, shoulder MW suitable Use your favourite spices. Turn the meat after half of the cooking time. Pulled pork (slow 1.5 - 2 kg 1;...
- Page 15 Dish Weight Shelf level / Accessory Cheesecake 28 cm springform tin on wire shelf Apple cake 2; baking tray Apple tart 1; pie form on wire shelf Apple pie 22 cm pie form on wire shelf Brownies 2 kg of dough 2;...
-
Page 16: Clock Functions
7. CLOCK FUNCTIONS 7.1 Clock functions Clock Function Application When the timer ends, the signal sounds. Minute minder When the timer ends, the signal sounds and the heating function stops. Cooking time To postpone the start and / or end of cooking. Time Delay Maximum is 23 h 59 min. -
Page 17: Using The Accessories
How to set: Cooking time Step 1 Step 2 Step 3 Step 4 The display shows: 0:00 Choose a heating Press repeatedly: function and set the Set the cooking time. Press: temperature. Timer starts counting down immediately. How to set: Time Delay Step 1 Step 2 Step 3... -
Page 18: Additional Functions
Wire shelf: Push the shelf between the guide bars of the shelf support and make sure that the feet point down. Baking tray: Push the tray between the guide bars of the shelf support. Microwave bottom glass plate: Use the microwave bottom glass plate only with microwave function. -
Page 19: Hints And Tips
9.2 Automatic switch-off For safety reasons the appliance turns off after some time, if a heating function works (°C) and you do not change any settings. 200 - 230 The Automatic switch-off does not work with the functions: Light, Time Delay. (°C) 9.3 Cooling fan 30 - 115... - Page 20 a defrosting rack or plastic sieve so that the To cook fruit and vegetables without defrosting liquid can leak out. defrosting them first, you can use a higher microwave power. Remove defrosted pieces subsequently. 10.3 Microwave suitable cookware and materials For the microwave use only suitable cookware and materials.
- Page 21 700 - 1000 W Searing at the start of the cooking process Heating liquids 500 - 600 W Defrosting and Cooking egg Heating one-plate Cooking vegetables Simmering stews heating frozen dishes meals meals 300 - 400 W Melting cheese, Cooking / Heating deli‐ Simmering rice Heating baby food Continuing cooking...
-
Page 22: Care And Cleaning
Meat defrosting Turn the meat upside down halfway through the cooking time. Microwave Combi function Use the wire shelf. Cake, 0.7 kg Conventional 23 - 27 Turn container around Cooking + MW by 1/4, halfway through the cooking time. Potato gra‐ True Fan 38 - 42 Turn container around... - Page 23 Clean all accessories after each use and let them dry. Use only a microfibre cloth with warm water and a mild detergent. Do not clean the accessories in a dishwasher. Do not clean the non-stick accessories using abrasive cleaner or sharp-edged objects. Accessories 11.2 How to remove: Shelf supports Remove the shelf supports to clean the oven.
-
Page 24: Troubleshooting
12. TROUBLESHOOTING WARNING! Refer to Safety chapters. 12.1 What to do if... In any cases not included in this table please contact with an Authorised Service Centre. The appliance does not turn on or does not heat up Problem Check if... You cannot activate or operate the appliance. -
Page 25: Energy Efficiency
13. ENERGY EFFICIENCY 13.1 Energy saving the residual heat. You can use that heat to keep the food warm. Make sure that the appliance door is closed When the cooking duration is longer than 30 when the appliance operates. Do not open min, reduce the appliance temperature to the appliance door too often during cooking. -
Page 26: Environmental Concerns
Settings Key tones 1 - Beep Buzzer volume 1 - 4 2 - Click 3 - Sound off Uptimer On / Off Light On / Off Demo mode Activation code: Software version Check 2468 Reset all settings Yes / No 15. - Page 28 867380251-A-062023...
Need help?
Do you have a question about the ZVENM6K3 and is the answer not in the manual?
Questions and answers