Table of Contents
Advertisement
Quick Links
Advertisement
Table of Contents

Related Manuals for Zanussi ZVENM7XN


Summary of Contents for Zanussi ZVENM7XN
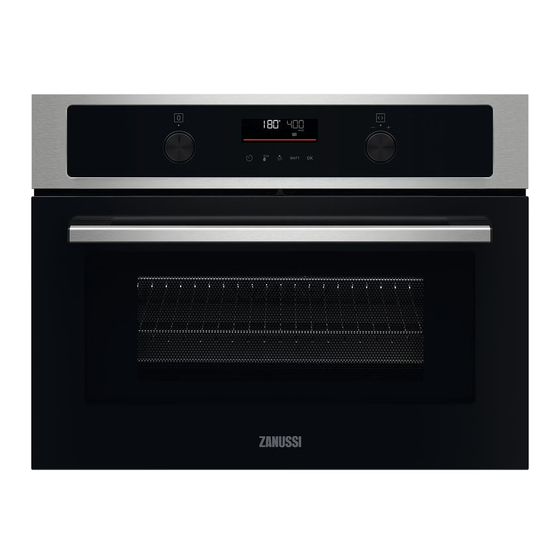
- Page 1 EN User Manual | Microwave combi-oven ZVENM7XN...
-
Page 2: Table Of Contents
VISIT OUR WEBSITE TO: Get usage advice, brochures, trouble shooter, service and repair information: www.zanussi.com/support Subject to change without notice. CONTENTS 1. SAFETY INFORMATION................2 2. SAFETY INSTRUCTIONS................5 3. PRODUCT DESCRIPTION................8 4. CONTROL PANEL..................8 5. BEFORE FIRST USE..................9 6. - Page 3 be kept away from the appliance unless continuously supervised. • Children should be supervised to ensure that they do not play with the appliance. • Keep all packaging away from children and dispose of it appropriately. • WARNING: The appliance and its accessible parts become hot during use.
- Page 4 • Always use oven gloves to remove or insert accessories or ovenware. • Do not activate the microwave function when the appliance is empty. Metal parts inside the cavity can create electric arcing. • Metallic containers for food and beverages are not allowed during microwave cooking.
-
Page 5: Safety Instructions
• Eggs in their shell and whole hard-boiled eggs should not be heated in the appliance since they may explode, even after microwave heating has ended. • To remove the shelf supports first pull the front of the shelf support and then the rear end away from the side walls. Install the shelf supports in the opposite sequence. - Page 6 2.3 Use Mains supply cable length. 1500 mm Cable is placed in the right WARNING! corner of the back side Risk of injury, burns and electric shock or Mounting screws 3.5x25 mm explosion. 2.2 Electrical connection • Do not change the specification of this appliance.
- Page 7 2.5 Internal lighting • Always cook with the appliance door closed. • If the appliance is installed behind a WARNING! furniture panel (e.g. a door) make sure the Risk of electric shock. door is never closed when the appliance operates. Heat and moisture can build up •...
-
Page 8: Product Description
3. PRODUCT DESCRIPTION 3.1 General overview Control panel Knob for the heating functions Display Control knob Heating element Microwave generator Lamp Shelf support, removable Shelf positions 3.2 Accessories Wire shelf For cookware, cake tins, roasts. Grill- / Roasting pan To bake and roast or as a pan to collect fat. 4. -
Page 9: Before First Use
4.2 Control panel overview Fast Heat Microwave Timer Light Confirm setting Press Turn the knob power Select a heating function to turn on the appliance. Turn the knob for the heating functions to the off position to turn the appliance off. 4.3 Display Display with key functions. -
Page 10: Daily Use
5.1 Initial cleaning Before the first use, clean the empty appliance and set the time: 00:00 Set the time. Press 6. DAILY USE WARNING! Refer to Safety chapters. 6.1 How to set: Heating functions Step 1 Turn the knob for the heating functions and select a heating function. Step 2 Turn the control knob to set the temperature. - Page 11 If you open the door, the microwave function stops. To start it again, close the door. Press 6.3 How to set: Microwave combi functions Step 1 Remove all accessories. Step 2 Turn the knob for the heating functions and select the function: The display shows: temperature and microwave power.
- Page 12 Heating function Application Baking on one shelf position.The function with MW boost, power range: 100 - 600 W. True Fan Cooking + Defrosting meat, fish, cakes, power range: 100 - 200 W Defrost Heating up pre-prepared meals and delicate food, power range: 300 - 700 W Reheat Heating up, cooking, power range: 100 - 1000 W Microwave...
- Page 13 Grill To grill thin pieces of food and to Conven‐ Baking and roasting food on one toast bread. tional shelf position. The function with Cooking MW boost, power range: 100 - Bottom To bake cakes with crispy bottom + MW 600 W.
- Page 14 Dish Weight Shelf level / Accessory Loin, fresh 1 - 1.5 kg; 5 - 6 cm 1; roasting dish on wire shelf thick pieces Use your favourite spices. Spare Ribs 2 - 3 kg; use raw, 2 2; deep pan - 3 cm thin spare Add liquid to cover the bottom of a dish.
-
Page 15: Clock Functions
Dish Weight Shelf level / Accessory Brownies 2 kg of dough 2; deep pan Chocolate muffins 2; muffin tray on wire shelf Loaf cake 1; loaf pan on wire shelf Baked potatoes 1 kg 1; baking tray Put the whole potatoes with skin on baking tray. Wedges 1 kg 2;... - Page 16 Clock Function Application When the timer ends, the signal sounds and the heating function stops. Cooking time To postpone the start and / or end of cooking. Time Delay Maximum is 23 h 59 min. This function has no effect on the operation of the oven. To turn on and off the Uptimer select: Menu, Settings.
-
Page 17: Using The Accessories
How to set: Cooking time Timer starts counting down immediately. How to set: Time Delay Step 1 Step 2 Step 3 Step 4 Step 5 Step 6 The dis‐ play The display shows: the shows: time of day --:-- STOP Select the Press repeat‐... -
Page 18: Additional Functions
Deep pan: Push the tray between the guide bars of the shelf support. 9. ADDITIONAL FUNCTIONS 9.1 Lock This function prevents an accidental change of the appliance function. Turn it on when the appliance works - the set cooking continues, the control panel is locked. Turn it on when the appliance is off - it cannot be turned on, the control panel is locked. -
Page 19: Hints And Tips
10. HINTS AND TIPS 10.1 Cooking recommendations The temperature and cooking times in the tables are guidelines only. They depend on the recipes and the quality and quantity of the ingredients used. Your appliance may bake or roast differently to the appliance you had before. The hints below show recommen‐ ded settings for temperature, cooking time and shelf position for specific types of the food. - Page 20 Cookware / Material Ovenproof glass and porcelain with no metal components, e.g. heat-proof glass Non-ovenproof glass and porcelain without any silver, gold, platinum or other metal decorations Glass and glass ceramic made of ovenproof / frost-proof material Ovenproof ceramic and earthenware without any quartz or metal compo‐...
- Page 21 500 - 600 W Defrosting and Cooking egg Heating one-plate Cooking vegetables Simmering stews heating frozen dishes meals meals 300 - 400 W Melting cheese, Cooking / Heating deli‐ Simmering rice Heating baby food Continuing cooking chocolate, butter cate food 100 - 200 W Defrosting cheese, cream, Defrosting bread...
-
Page 22: Care And Cleaning
Cake, 0.7 kg Conventional 23 - 27 Turn container around Cooking + MW by 1/4, halfway through the cooking time. Potato gra‐ True Fan 38 - 42 Turn container around tin, 1.1 kg Cooking + MW by 1/4, halfway through the cooking time. -
Page 23: Troubleshooting
Step 2 Carefully pull the shelf supports up and out of the front catch. Step 3 Pull the front end of the shelf support away from the side wall. Step 4 Pull the supports out of the rear catch. Install the shelf supports in the opposite sequence. 11.3 How to replace: Lamp Always hold the halogen lamp with a cloth to prevent grease residue from burning on the... -
Page 24: Energy Efficiency
The appliance does not turn on or does not heat up You cannot activate or operate the appliance. The appliance is correctly connected to an electrical supply. The appliance does not heat up. The automatic switch-off is deactivated. The appliance does not heat up. The fuse is not blown. -
Page 25: Menu Structure
Keep breaks between baking as short as cooking. The residual heat inside the possible when you prepare a few dishes at appliance will continue to cook. one time. Use the residual heat to warm up other Cooking with fan dishes. When possible, use the cooking functions Keep food warm with fan to save energy. -
Page 26: Environmental Concerns
15. ENVIRONMENTAL CONCERNS appliances marked with the symbol with Recycle materials with the symbol . Put the the household waste. Return the product to packaging in relevant containers to recycle it. your local recycling facility or contact your Help protect the environment and human municipal office. - Page 28 867371357-B-062023...
Need help?
Do you have a question about the ZVENM7XN and is the answer not in the manual?
Questions and answers
Do you have to remove the shelf supports to use the microwave function
The Zanussi ZVENM7XN oven features removable shelf supports for easy cleaning and flexibility in arranging shelves. However, the provided information does not state that the shelf supports need to be removed to use the microwave function.
This answer is automatically generated