Table of Contents
Advertisement
Quick Links
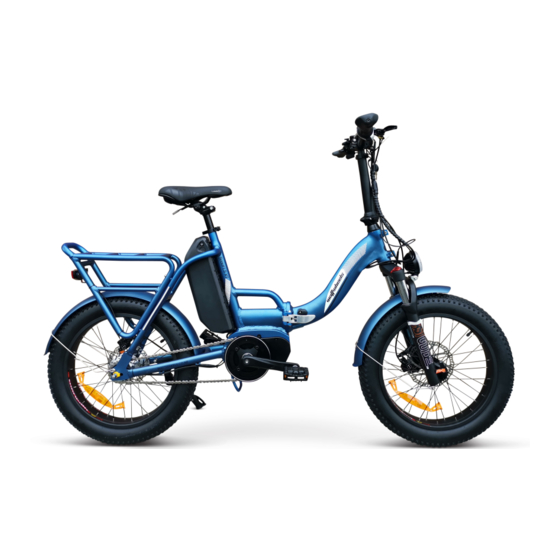
SCOUT LS XT ELECTRIC BIKE 2018
MANUAL
Welcome
First off, welcome to the Wattwheels family! We're so happy to have you on board! You've picked a
great model and, in this manual, we're going to break down the basics to make sure that your bike
remains in top shape and performs to the highest standard.
You're about to experience the ride of your life. In order to get you out and having fun as quickly and
as safely as possible please read the all the manual carefully, paying close attention to the safety
section.
Also, we highly recommend familiarizing yourself with local laws for e-bikes and the components of
the model that you have before your first ride.
Wattwheels assumes that all persons involved in: using, repairing, maintaining, cleaning, or disposing
of this or any Wattwheels product must have fully read and understood the content and meaning of
these operating instructions.
Additionally, Wattwheels claims no responsibility for any injury or damage resulting in improper use of
any electric bike.
READY TO GET STARTED? LETS RIDE!
USING THIS MANUAL
This manual contains details of the product, its equipment, and information on its operation and
maintenance. Read it carefully and familiarize yourself with the Scout before using it to ensure a safe
use and prevent tragic accidents. Be sure to retain this manual as your convenient Scout information
source.
This Manual contains many Warnings and Cautions concerning the safe operation and consequences,
Advertisement
Table of Contents

Subscribe to Our Youtube Channel
Related Manuals for WattWheels SCOUT LS XT 2018


Summary of Contents for WattWheels SCOUT LS XT 2018
- Page 1 MANUAL Welcome First off, welcome to the Wattwheels family! We’re so happy to have you on board! You’ve picked a great model and, in this manual, we’re going to break down the basics to make sure that your bike remains in top shape and performs to the highest standard.
- Page 2 Visit www.wattwheels.co.nz to download the latest version. Wattwheels makes every effort to ensure accuracy of its documentation and assumes no responsibility of liability if any errors or inaccuracies appear within. Assembly and first adjustment of your Scout Bike requires special tools and skills and it is recommended that this should be done by a trained bicycle mechanic if possible.
- Page 3 LCD display and operation please refer to the manual included. This is also on located on our website at www.wattwheels.co.nz/manuals LIGHTS The front light is activated by pressing the remote button located under the throttle. Due to the power of the front light a seperate switch is needed.
- Page 4 PAS (Pedal assist modes) Pedal assist modes start from 1 and go up to 5 . PAS level 1 is the first pedal assist level and will give you some slight assistance. The rider however will still be doing most of the work. As you select the higher levels, the assistance will increase with level 5 basically doing all the work for you.
- Page 5 Expected Range Operating Conditions o Hilly Terrain o Heavy Payload 45 Km o Windy o High Speeds o High PAS levels o Flat Terrain o Normal Payload 68 Km o Not Windy o Medium Speeds o Moderate PAS levels o Flat Terrain o Normal Payload 90 Km + o Not Windy...
- Page 6 Keep both the battery and charger out of the reach of children and If there appears to be an issue with the charger or battery, stop use immediately and contact either the manufacturer or Wattwheels at admin@wattwheels.co.nz...
- Page 7 Charging: •Firstly, insert plug of the charger into charging socket of the battery box. •Second, Insert the charger into the socket of the home power supply. It shows the power has already been put through when the indicator lamp of the charger is on. •It is charging when the indicator light is red.
- Page 8 (document included) so any standard repairs please contact Wattwheels and we will arrange a service agent close to you to look at the bike. We carry spare parts so anything electrical that a standard bike shop doesn’t have we will ship to you.
- Page 9 SAFETY CHECK Safety Check Basic Steps o Ensure front and rear brakes work properly. o Ensure brake pads are not over worn and are correctly positioned in relation to the rims. 1. Brakes o Ensure brake control cables are lubricated, correctly adjusted and display no obvious wear.
- Page 10 If your bike has an error code displayed at any time it is recommended that you cease operation and contact Wattwheels immediately. FINALLY, WE WOULD LIKE TO SAY THANKS AGAIN AND ENJOY YOUR NEW E-BIKE! AND PLEASE CONTACT YOUR LOCAL DEALER OR WATTWHEELS IF YOU HAVE ANY ISSUES OR QUESTIONS. “POWER TO THE PEOPLE”...
-
Page 11: Table Of Contents
LCD-P Instructions Content About the User Manual ....................2 Outlook and Size......................2 Material and Color ....................2 Button Definition ......................3 Function Summary......................4 Function Summary....................4 Full View Area ......................5 Normal View Area ....................6... - Page 12 www.dapumotors.com Normal Operation ......................6 1. ON/OFF ......................6 2. Current Display....................6 3. Riding Mode Selection ..................7 4. Speed Display ..................... 7 5. KM/H & MPH ....................7 6. Backlight Indicator....................7 7. 6KM/H Work ...................... 8 8. PAS Level Selection.................... 8 9.
-
Page 13: About The User Manual
www.dapumotors.com About the User Manual Dear users: To ensure better performance of your e-bike, please read through the LCD-P product introduction carefully before using it. We will inform you all the details concisely(including hardware installation, setting and normal operations)when using our display. Meanwhile, the introduction will also help you solve possible confusion and malfunction. -
Page 14: Button Definition
www.dapumotors.com Button Definition LCD-P has four buttons, including ON/OFF、SET、UP and DOWN “ON/OFF” names to “ ”, “SET” names to “SET”; “UP” names to “ + + + + ” and “DOWN” names to “- - - - ”. page 3 Address:6101 Long Dong Road,Pudong New Area Shanghai,China Tel:+86 21 58970723-166 Fax:+86 21 58979066... -
Page 15: Function Summary
www.dapumotors.com Function Summary Function Summary LCD-P provides a wide range of functions and indicators to fit the users’ needs. The indicated contents are as below. 1. ON/OFF 2. Current display 3. Riding mode selection 4. Speed display 5. KM/H & MPH 6. -
Page 16: Normal View Area
www.dapumotors.com Normal View Area With the display on ,the default display are riding speed、trip 2、PAS level、battery indicator as show in fig below. Press SET to switch the display information. Normal Operation 1. ON/OFF Hold ON/OFF and start the display. The display will provide power for the controller. -
Page 17: Riding Mode Selection
www.dapumotors.com 3. Riding Mode Selection There is only one default mode on this display now and "power" is the option. Normal mode is not available 4. Speed Display , The speed display is as below and user can select KM/H or MPH in SET3. -
Page 18: Km/H Work
www.dapumotors.com ※ If the e-bike has headlight, the controller will turn on/off the headlight at the same time of the backlight on/off (without this function by default) 7. 6KM/H Work Hold the UP UP UP UP for 2 seconds to get in 6km PAS work, and with your hand off, the 6km PAS work is released. -
Page 19: Error Code Indicator
www.dapumotors.com 9. Error Code Indicator If there is something wrong with the electronic control system, the display will flash at 1 HZ and show the error code automatically. Different error code is corresponding with different fault information, please see the last page Error code table for details. ※... - Page 20 www.dapumotors.com 10.1. SET0: Riding mode selection There are two modes for selection: POWER and NORMAL. 、 、 、 、 10.2 SET1: Reset trip 1 distance Click the DOWN to reset the trip 1, then the TRIP1 icon will flash at 1 HZ, meanwhile the trip 1 will be cleared.
-
Page 21: Distance Indicator
www.dapumotors.com 11. Distance Indicator With the display on, press SET to switch the display information, in turn shows: ODO, trip 1and trip 2. 11.1 ODO The ODO records the driving mileage from using, the accumulated value cannot be cleared. 11.2 Trip 1 Trip 1 can be reset by hand in the SET 1 interface.(when the riding mileage >=500km, it will be reset automatically. -
Page 22: Trip Time Indicator
www.dapumotors.com 12. Trip Time Indicator The riding time parameter is automatically reset after shut down. 13. Battery Indicator 13.1 Battery residual capacity indicator The battery frame have five segments, each segment represent 20% battery capacity. When the capacity is full, the five segments are all light. In low battery, the battery frame will flash, it indicates that the battery is severely low and needs to be recharged immediately. -
Page 23: Cable Definition
www.dapumotors.com 13.2 Battery voltage It displays the current voltage of the battery. 13.3 Battery capacity percentage (without this function by default) It displays the percentage of battery capacity. This function needs to be customized. 13.4 Battery charging and discharging times (without this function by default) This function needs customization. -
Page 24: Common Problems & Solutions
www.dapumotors.com sleep automatically. Common Problems & Solutions Q:Why the display is not able to start up? A:Checking the connector that between display and controller. Q:How to deal with the error code? A:Fix it to the maintenance place immediately. If cannot be resolved, you can go to the electric vehicle repair points repair it in a timely manner. - Page 25 www.dapumotors.com communication display receiving error page 15 Address:6101 Long Dong Road,Pudong New Area Shanghai,China Tel:+86 21 58970723-166 Fax:+86 21 58979066...
Need help?
Do you have a question about the SCOUT LS XT 2018 and is the answer not in the manual?
Questions and answers