Table of Contents
Advertisement
Quick Links
Models:
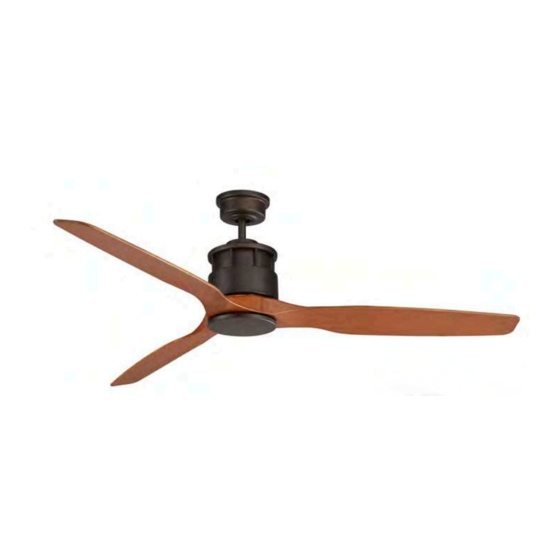
MGF153OT, MGF153TS, MGF153WS,MGF1533OT, MGF1533TS, MGF1533WS
OT=Oil Rub Bronze /Teak, WS=White Satin/White Satin, TS=Titanium Satin / Titanium Satin
NOTE: REMOTE CONTROLLER IS NOT INCLUDED WITH THIS MODEL BUT CAN BE
Model No:(MPAPP) Prince Smart Remote Controller Kit
70W
Indoor
Powerful
& Covered
AC Motor
Outdoor Use
Governer
SERIES
70W AC Motor
Ceiling Fan Installation Manual
with and without Light Models
Remote Control Compatible
PURCHASED FROM YOUR RETAILER
Tricolour
Tropical
For Light
Rated
Model
www.martecaustralia.com.au | 02 8778 7500 | sales@martecltd.com.au
Industrial Robust
Design
YEAR
In -Home
Summer/Winter
Warranty
Reverse Function
N974
3
13˚ Blade
Pitch
Aerodynamic
Designed ABS Blades
Non Rusting
Page 1
Advertisement
Table of Contents

Related Manuals for Martec Governer Series


Summary of Contents for Martec Governer Series
- Page 1 Governer SERIES 70W AC Motor Ceiling Fan Installation Manual with and without Light Models Industrial Robust Design N974 Models: MGF153OT, MGF153TS, MGF153WS,MGF1533OT, MGF1533TS, MGF1533WS OT=Oil Rub Bronze /Teak, WS=White Satin/White Satin, TS=Titanium Satin / Titanium Satin Remote Control Compatible NOTE: REMOTE CONTROLLER IS NOT INCLUDED WITH THIS MODEL BUT CAN BE PURCHASED FROM YOUR RETAILER Model No:(MPAPP) Prince Smart Remote Controller Kit YEAR...
-
Page 2: General Information And Safety Instructions
• This fan is tropical rated and can be used under cover in an outdoor covered alfreco / patio , must not be exposed to direct WATER or MOISTURE. • DO NOT connect the fan to a dimmer switch . This may cause damage to the motor . ONLY use the Martec :MAPP Remote Control. -
Page 3: Cleaning And Maintenance
WARNINGS If unusual oscillating movement is observed , immediately stop using the ceiling fan and contact Martec Australia. NORMAL WEAR AND TEAR Threaded components working slightly loose or blades carriers even bent due to vigorous cleaning or bumping can cause wobble and noise. THIS IS NOT COVERED UNDER WARRANTY but a little care and maintenance can reduce or prevent this problem. - Page 4 CONTENTS LIST: DESCRIPTION QUANTITY Motor assembly Instruction manual Screw kit Balancing kit Hanging bracket Wall control kit Blades With Light model Plastic Shade www.martecaustralia.com.au | 02 8778 7500 | sales@martecltd.com.au Page 4...
- Page 5 Without Light model www.martecaustralia.com.au | 02 8778 7500 | sales@martecltd.com.au Page 5...
-
Page 6: How To Assemble
Secure the hanger bracket to ceiling beam or a suitable piece of timber inserted between the ceiling beams. Martec Pty Ltd recommends the bracket to be attached with two long screws as supplied within the package. There is a ball seat rubber cover need to be pressed into the bracket.(See Fig.1.) Place circular shockproof gasket above the hanger bracket. - Page 7 HOW TO INSTALL THE LIGHT KIT(Version with light model ) 1. Remove 3 screws on the connective plate, align the holes, then lock back the 3 screws removed previously on the light kit .(See Fig.6. ) 2. Connect the 2 ways plugs from the motor to the 2 ways plugs from the LED light kit . (See Fig.7. ) Fig.7 Fig.6 www.martecaustralia.com.au | 02 8778 7500 | sales@martecltd.com.au...
- Page 8 HOW TO INSTALL/REMOVE THE GLASS SHADE/METAL CAP Align the shade as shown in the figures below, and place the Plastic shade/metal cap. Spin it clockwise. To remove turn the shade anticlockwise. With light without light Tricolour CCT (Colour changeable temperature) Please make sure the light switch is off before changing the colour temperature.
- Page 9 www.martecaustralia.com.au | 02 8778 7500 | sales@martecltd.com.au Page 9...
- Page 10 Trouble Shooting Checklist : Technical Data www.martecaustralia.com.au | 02 8778 7500 | sales@martecltd.com.au Page 10...
-
Page 11: Warranty Statement
2. The 3 year “In Home” warranty does not extend to the Martec Product accessories such as remote controller kits and/or light fittings (including glass light shades) that have been fitted during or after the original Martec Product installation. - Page 12 11. This warranty does not cover electrical humming noises, wobbling or any other external influences. 12. Martec Pty Ltd reserves the right to change or amend any or all parts of this warranty statement at any time and without notice.
- Page 13 IMPORTANT: PLEASE DO NOT PHONE THE RETAILER FOR WARRANTY WORK. INSTEAD PHONE THE CUSTOMER SERVICE NUMBER FOUND ABOVE. MARTEC PTY LTD | 6 AUSTOOL PL, INGLEBURN NSW 2565 | PH: 02 8778 7500 | FAX: 02 8778 7555 www.martecaustralia.com.au | 02 8778 7500 | sales@martecltd.com.au...
- Page 14 I, the Customer, acknowledge that I will be liable for this charge should the authorised Martec Service Agent determine this to be the case. Failure to pay warranty recovery charges issued by Martec Pty Ltd will result in the termination of any remaining warranty, in addition to possible debt collection procedures.
Need help?
Do you have a question about the Governer Series and is the answer not in the manual?
Questions and answers