Table of Contents
Advertisement
Quick Links
INSTALLATION INSTRUCTIONS AND HOLE-CUTTING TEMPLATE
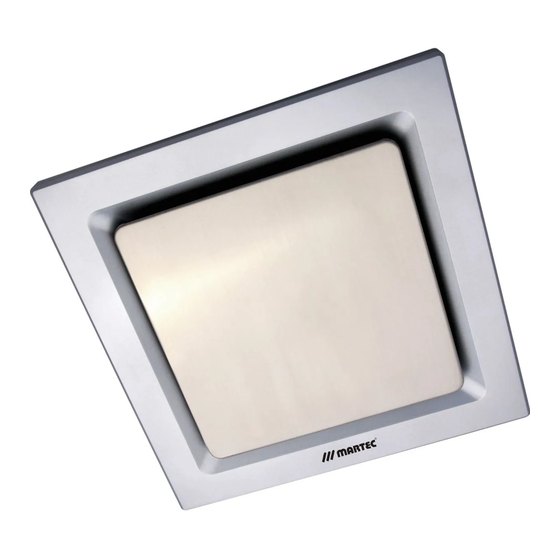
CEILING MOUNTED EXHAUST FAN/ FAN & LIGHT
Dear customers,
Thank you for selecting Marlee ceiling mounted Exhaust Fan or Fan & Light.
Please read all instructions before commencing installation.
IMPORTANT: This unit must be installed to comply with the appropriate council regulations
and the Australia and New Zealand wiring rules AS/NZS3000:2000 or lastest edition thereof.
This unit is fitted with a plug(Exhaust Fan model only), however, any interconnecting wiring
and switches used or use of another plug must be fitted by a licensed Electrician. The plug
supplied must be connected to the socket that is above the ceiling or in roof cavity, any other
use is not permitted.
The main supply, switches and interconnecting cables required for installation of this unit are
not included.
WARNING
1. Use this unit only as described in this manual. Any other use not recommended by the
manufacturer may cause fire, electric shock, or injury to persons. If you have any question,
contact the manufacturer or local agent.
2. All wiring must be carried out by a Licensed Electrician in accordance with all applicable
National / local codes and standards. Also check with the local council regulations regarding
installation of exhasut fans.
3. Make sure the power is off before installation.
4. When cutting into the ceiling, do not damage electrical wiring and other hidden utilities.
5. The unit must be properly earthed.
6. For the purpose of avoiding any dangerous gas leaking into your bathroom, the ventiduct of
the unit must not be laid together with the ventiduct of air-fueled water heater or other open
fire appliances into the same flue.
7. The unit must be isolated from the power by means of a plug or all-pole disconnection
switch with a contact separation of at least 3mm in each pole.
8. The power cable must withstand a minimum 1 0A load.
9. The unit is not intended for use by young children or infirm persons unless they have been
adequately supervised by a responsible person to ensure that they can use the unit safely.
10. Young children should be supervised to ensure that they do not play with the unit.
IMPORTANT CONSIDERATIONS BEFORE INSTALLING
A few minutes planning can make a big difference to the installation time and also to your
satisfaction with the function of the unit.
1. Generally the unit should be mounted outside the shower cubicle.
2. For the exhaust fan to work efficiently, replacement air of a volume equivalent to what is
being extracted must be able to enter the room. In general this air would be drawn under the
door, or through a slightly open window. If the room is airtight, the fan will function poorly.
3. This unit is designed for installation in flat ceiling only. Do not mount it on a sloping ceiling
or a vertical wall.
4. Before commencing any cutting, check in the ceiling space that there are no obstructions
such as ceiling joists and that there is sufficient height clearance for the housing. Check that
the electrial wiring can be routed from the wall switch to the mounting location.
READ AND SAVE THESE INSTRUCTIONS!
INSTALLATION
1) Cutting a vent (when required)
For installation where external venting is required or is your choice, locate a suitable
location in either the roof or exterior wall to vent out the exhausted air/ steam and cut out
a 105mm diameter hole.
2) Ducting
Put one end of a 100mm diameter ventiduct (not
supplied) into the vent hole and seal space
wall
around the hold using a suitable sealand and
cowling where necessary. (Figure1)
3) Locating the unit
For the fan to work efficiently, from the grill there
should be about a 2.3m overall height to gound.
4) Prepare the ceiling
Use this card as a template, mark the ceiling with
a pencil outline and cut out a hold in the ceiling at
the chosen area.
Make sure a distance between the edges and
wall no less than 250mm.
Also from the rooftop there should be a minimum
250mm height to the ceiling. (Figure 2)
Ensure that the intended hole will have suitable
room to the unit and will not foul on joists or not fit
in the headroom provided.
5) Remove the fascia
Pull the fascia a little, press the fascia retaining
springs backside and remove the fascia.
Remove the LED globe first if the unit is an
Exhaust Fan & Light model.
M:Motor C:Capacitor
6) Wiring (Ensure the power is turned off)
K: All-pole disconnection switch
Please comply with the local wiring rule when
wiring.
Wiring the unit as per the wiring diagram.
For Exhaust Fan model, please refer to Figure 3.
For Exhasut Fan & Light model, please refer to
Figure 4.
M:Motor C:Capacitor
K: All-pole disconnection switch
HOLE-CUTTING SIZE 245 x 245mm
INSTALLATION INSTRUCTIONS AND HOLE-CUTTING TEMPLATE
7) Position the housing into the hole
Choose an optimal direction to put the housing into the hole in accordance with the position
of fan outlet. Fit the fan outlet to the in-house end of the ventiduct, then put the body of the
unit into the hole in the ceiling.
Note: Try to keep the redundant wire away from the housing.
Note: The shortest, smooth surface ventiduct with the least elbows will provide optimum fan
performance. Please keep the ventiduct as straight as possible. (Figure 5)
Note: Ensure the 4 clips are drawn back so the unit can be easily pushed into the hole in the
ceiling.
Note: It is highly recommended that interconnected wire be laid into the wall beforehand for
the purpose of keeping an integrated look in the bathroom.
'
X
.
6
I
2
( F i g u r e s )
8) Fasten the unit on the ceiling
Push the 4 clips outwards and then tighten the screws until the clips can clamp the ceiling
tightly. (Figure 6)
9) Replace the fascia
Put the two fascia retaining springs into the two slots i n the unit and make sure the fascia
is well fixed. Install the LED 5W globe onto the product if the unit is an Exhaust Fan &
(Flgure2)
Light model.
USE
Running the fan can exhaust odours and steam in a quick and efficient way.
Note: Shut off power urgently when any abnormalities occur in operation. Then call your
local licensed electrician for inspection or necessary service work.
Note: It is absolutely prohibited to insert finger or thin bar to the fascia for avoiding being
injured or damaging the unit.
MAINTENANCE
1. Cleaning
1) Shut off power before cleaning or maintenance.
(Figure 3)
2) Wipe fascia with care using a soft cloth soaked with water or neutral detergent. Ensure
the motor or other electrical parts can not touch the water.
3) Replace the fascia after it is dry thoroughly.
2. Lamp replacement
1) Make sure the lamp is sufficiently cool down before replacement.
2) USE LED 5W globe maximum.
2 Year Replacement Warranty
This unit is warranted against defects in manufacturing and workmanship for a period of 2
years. The replacement warranty does not extend to installation of the unit or any
( F i g u r e 4)
associated wiring or any damage caused by installation or wiring.
READ AND SAVE THESE INSTRUCTIONS!
The installation must be conducted by a licensed electrician and a suitable certificate of
safety is to be issued by the electrician who installed the unit. Warranty claims will be
voided unless a certificate of safety can be produced when required, prior to service or
repair.
This warranty does not cover damages or loss caused by:
1) Light lamp or failure of light lamp.
2) Any consequential losses arising from incorrect installation or operation or maintenance
of this product.
3) Any consequential losses arising from incorrect wiring of this product.
4) Any modifications or changes make to the unit, other than those recommended by the
Manufacturer.
ACCC Required Statement
Our goods come with guarantees that cannot be excluded under the Australian Consumer
Law. You are entitled to Marlee replacing the product in home with parts and labour for a
major failure. You are also entitled to have the goods repaired or replaced if the goods fail
to be of acceptable quality and the failure does not amount to a major failure. Marlee offers
an in home warranty that includes parts and labour so the end consumer is not out of
pocket.
L
MAIN TECHNICAL PARAMETERS
fa"'.'ia r e t a i n i n g - : " \
spnng
fascia
Model No.
Input
(Figure&)
MXFT25S
MXFT25W
230-240V-
MXFA25S
50Hz
MXFP25S
MXFP25W
MXFLT25S
230-240V-
MXFLT25W
50Hz
SAA CE
It indicates product should not be disposed with other household wastes in order to prevent
possible harm to the environment or human health, take this product for environment safe
recycling.
-
LIST OF COMPONENTS SUPPLIED
Main fascia with body
Installation instruction and hole-cutting template
Warranty card
LED 5W globe (Fan & Light model)
FIii out the following details and file along with your purchase receipt and certificate of safety.
Model No.:
Purchased from:
Purchased date:
We reserve the rights to revise this instruction without any prior notice.
HOLE-CUTTING SIZE 245 x 245mm
Hole-cutting
Power
Noise
Air volume
size
28-30W
45dB(A)
240m'/h
245x245mm
32-35W
45dB(A)
240m'/h
245x245mm
1 piece each
1 piece
1 piece
1 piece
M A R T E C Pty Ltd
ABN: 82 599 302 308
Advertisement
Table of Contents

Related Manuals for Martec MXFT25S


Summary of Contents for Martec MXFT25S
- Page 1 Make sure a distance between the edges and ( F i g u r e s ) (Figure&) MXFT25S MXFT25W 2. All wiring must be carried out by a Licensed Electrician in accordance with all applicable 230-240V- wall no less than 250mm.
- Page 2 2. The 2 year “Replacement ” warranty does not extend to the Martec Product accessories such as ceiling fan remote controller kits and/or ceiling fan light fittings (including glass light shades) that have been fitted during or after the original Martec Product installation.
- Page 3 11. This warranty does not cover electrical humming noises, wobbling or any other external influences. 12. Martec Pty Ltd reserves the right to change or amend any or all parts of this warranty statement at any time and without notice.
- Page 4 IMPORTANT: PLEASE DO NOT PHONE THE RETAILER FOR WARRANTY WORK. INSTEAD PHONE THE CUSTOMER SERVICE NUMBER FOUND ABOVE. MARTEC PTY LTD | 6 AUSTOOL PL, INGLEBURN NSW 2565 | PH: 02 8778 7500 | FAX: 02 8778 7555 www.martecaustralia.com.au | 02 8778 7500 | sales@martecltd.com.au...
- Page 5 I, the Customer, acknowledge that I will be liable for this charge should the authorised Martec Service Agent determine this to be the case. Failure to pay warranty recovery charges issued by Martec Pty Ltd will result in the termination of any remaining warranty, in addition to possible debt collection procedures.
Need help?
Do you have a question about the MXFT25S and is the answer not in the manual?
Questions and answers