FlowLine EchoSafe XP88 Series Quick Start Manual
Hide thumbs
Also See for EchoSafe XP88 Series:
- Owner's manual (9 pages) ,
- Quick start (4 pages) ,
- Quick start manual (9 pages)
Table of Contents
Advertisement
Quick Links
Advertisement
Table of Contents

Related Manuals for FlowLine EchoSafe XP88 Series


Summary of Contents for FlowLine EchoSafe XP88 Series
- Page 1 EchoSafe ® Ultrasonic Level Transmitter XP88 & XP89 Series Quick Start ©2016 Flowline, Inc. All Rights Reserved Made in USA Flowline, Inc. | 10500 Humbolt Street, Los Alamitos, CA 90720 p 562.598.3015 f 562.431.8507 w flowline.com QS300600 Rev B...
- Page 2 If you have a non-standard installation or setup requirement that is not addressed here, ® please refer to the EchoSafe Manual or support documentation at flowline.com. WE DO YOUR LEVEL BEST™ ® Thank you for purchasing EchoSafe .
- Page 3 8” tall to 4” wide) ratio. At the most, 2" diameter risers should be no taller than 5", and larger diameter risers should be no taller than 12". Side Mount Bracket Installation Use Flowline's LM50-1001 side mount bracket. • LM50-1001 QS300600 Rev B...
- Page 4 Mounting Guidelines 1. Never mount the sensor at an angle. 2. Liquid should never enter the sensor dead band. 3. Mount the sensor at least 2” from the side wall. 4. Never mount the sensor in a vacuum. 5. Do not obstruct the sensor beam width. Stand-Pipe Installation A stand-pipe may be used to dampen turbulence, separate surface foam from the point of measurement or increase performance in heavy vapor.
- Page 5 WIRING ECHOSAFE ® ® The following wiring diagram can be used to wire the 4-20 mA output of the EchoSafe Electrical Connections, Usage and Safety Where personal safety or significant property damage can occur due to a spill, the installation must •...
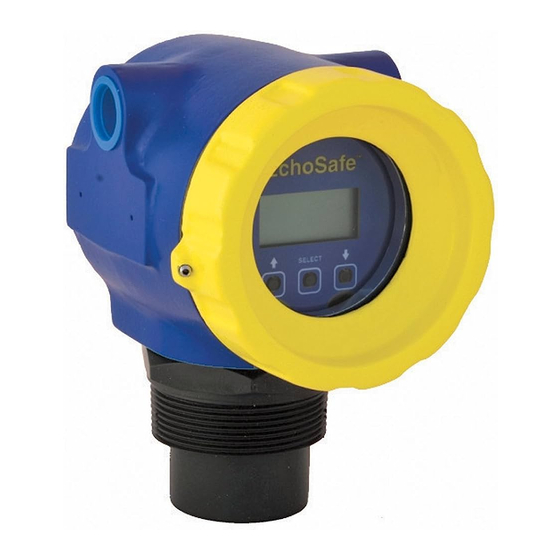
- Page 6 CONFIGURING ECHOSAFE ® ® is configured using the three buttons on the sensor faceplate (UP, DOWN EchoSafe and SELECT) and the LCD. To access the sensor’s TOP-LEVEL MENU, hold down the SELECT button for five seconds. The display menu will automatically begin to scroll through the TOP-LEVEL MENU.
- Page 7 2) Select 4mA, 20mA, 21mA, 22mA or HOLD. SAVED will display. 3) Select EXIT to return to the TOP-LEVEL MENU. TROUBLESHOOTING If you face issues not addressed in this Quick Start, please refer to ® the EchoSafe Manual located at flowline.com. QS300600 Rev B...
- Page 8 WARRANTY Flowline warrants to the original purchaser of its products that such products will be free from defects in material and workmanship under normal use and service in accordance with instructions furnished by Flowline for a period of two years from the date of manufacture of such products. Flowline's obligation under...
Need help?
Do you have a question about the EchoSafe XP88 Series and is the answer not in the manual?
Questions and answers