
Related Manuals for Eneo MPD-64A0003P0A


Summary of Contents for Eneo MPD-64A0003P0A
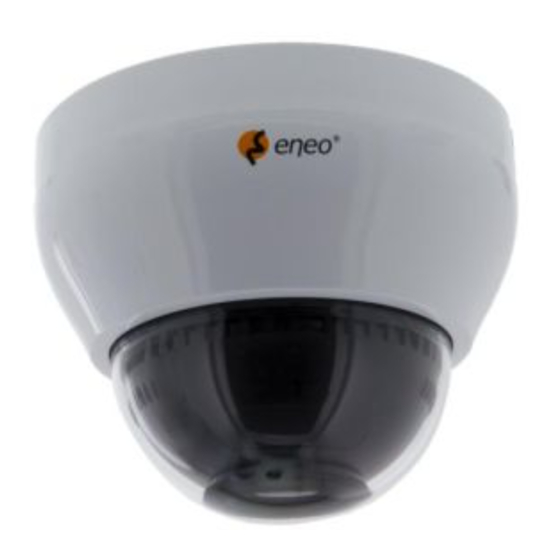
- Page 1 User Manual 1/2.9” Dome, Fixed, 2560x1440, Day&Night, Zoom, WDR, 3.2-9mm, Infrared, Indoor MPD-64A0003P0A...
-
Page 2: Table Of Contents
Table of content Parts supplied ....................... 5 Part names ......................6 Installation instructions ..................7 Detach the dome camera from the easy adaptor ................8 Open the dome cover ..........................8 Pan & Tilt adjustment ..........................9 Power Supply connections ........................9 Operating instructions .................. - Page 3 Safety instructions General safety instructions • Before switching on and operating the system, rst read this safety advice and the operating instructions. • Keep the operating instructions in a safe place for later use. • Installation, commissioning and maintenance of the system may only be carried out by authorised individuals and in accordance with the installation instructions - ensuring that all applicable standards and guidelines are followed.
- Page 4 Class A device note This is a Class A device. This device can cause malfunctions in the living area; in such an event, the operator may need to take appropriate measures to compensate for these. WEEE (Waste Electronical & Electronic Equipment) Correct Disposal of This Product (Applicable in the European Union and other European countries with separate collection systems).
-
Page 5: Parts Supplied
Parts supplied • Indoor Dome camera • Operating instruction • Mounting Template • Easy Adaptor (Flat type) • Easy Adaptor (Tilted type) • Plastic Anchor: 6 x 30mm (3x) • Mounting Screw: 3.5 x 25mm (3x) • Open Driver (1pc) •... -
Page 6: Part Names
Part names Tilted Easy Adaptor Power Cable Easy Adaptor (Flat type) Dome Base Lens 3-Axis Gimbal OSD Menu Control board Dome Cover Bubble Shield Light Sensor Bubble Dome SMD LEDs... -
Page 7: Installation Instructions
Installation instructions CAUTION: The camera’s base should be attached to a structural object, such as concrete, hard wood, wall stud or ceiling rafter that supports the weight of the camera. If necessary use appro- priate mounting material (e.g. anchors) instead of the material enclosed with the camera. -
Page 8: Detach The Dome Camera From The Easy Adaptor
CAUTION: Extreme care should be taken NOT to scratch the window in front of lens. Extreme care should be taken NOT to apply force to IR LEDs. Care should be taken the cable is NOT to be damaged, kinked or exposed in the hazardous area. -
Page 9: Pan & Tilt Adjustment
Pan & Tilt adjustments 1. Pan limit: Pan is limited to +/- 165°. Do NOT force to rotate the gimbal over the limit to prevent from the internal damage. 2. Tilt limit: Tilt is limited to 25° min ~ 90° max. with reference to the ceiling when the inclination of camera module is 0°, that is, the image is aligned horizontally. -
Page 10: Operating Instructions
Operating Instruction Using OSD controller Setup menu can be accessed and controlled by OSD control joystick on the rear of the camera unit. Five commands are available with the joystick. EX-SDI↔HD-SDI Video Format DIP Switch OSD Control Joy Stick Video Sub-out Connector HD-SDI or EX-SDI is selectable by Video format switch only. -
Page 11: Osd Menu Table
OSD menu table MENU SUB Menu Con guration ZOOM ZOOM SPEED SLOW, MID, FAST POI ZOOM H/V-POINTER PRESET ZOOM ZONE NUM, ZONE VIEW, H/V POS, ZOOM RATIO SMART MOTION ZOOM ZONE NUM, WINDOW USE, MOTION WIN SET, H/V POINTER, ZOOM/FOCUS ZOOM RATIO, DURATION, SENSITIVITY HOME POSITION O-ZOOM RATIO, DURATION... - Page 12 SPECIAL CAM TITLE OFF, RIGHT UP, LEFT DOWN TV SYSTEM EU(PAL), US(NTSC) RESOLUTION 1440 30P/25P, 1080 30P/25P, 720 30P/25P SDI MODE HD-SDI, EX-SDI 1.0, EX-SDI 2.0, OFF ANALOG MODE TVI MODE UTC TYPE (PELCO-C, HIK-C), HD ANALOG GAIN SYSTEM AHD MODE HD ANALOG GAIN LANGUAGE ENG, CHN(S), CHN, JPN, KOR, GER...
-
Page 13: Osd Menu Setup
OSD Menu Startup Press the ‘OSD menu SET key’ down to access the setup menu mode. • RETURN : Returns to the previous menu. • EXIT : Exits the current menu with SAVE or CANCEL. MENU V1. XX 1. ZOOM/FOCUS 2. - Page 14 POI ZOOM PRESET ZOOM H-POINTER ZONE NUM V-POINTER ZONE VIEW RETURN H-POINTER V-POINTER ZOOM RATIO OZ X1.1 RETURN SMART MOTION ZOOM ZONE NUM WINDOW USE MOTION WIN SET H-POINTER V-POINTER ZOOM RATIO OZ X1.0 DURATION 5 SEC SENSITIVITY llllllllllllllllllllll RETURN 1-1-4.
- Page 15 1-1-6. RATIO DISP : ON enables to display the zoom ratio on the bottom right corner. OZx.x appears during the optical zoom and DZx.x will display by multiplying the optical zoom ratio and the actual digital zoom ratio. 1-2. FOCUS FOCUS FOCUS FOCUS MODE...
-
Page 16: Exposure
2. EXPOSURE 2. EXPOSURE MODE AUTO BRIGHTNESS DAY llllllllllllllllllllll BRIGHTNESS NIGHT llllllllllllllllllllll SENS-UP llllllllllllllllllllll RETURN 2-1. MODE Selects EXPOSURE MODE to AUTO, IRIS PRIOR, SHUT. PRIOR, MANUAL and Flickerless. If you set to WDR in SCENE ENHANCE menu, SHUT. PRIOR, MANUAL and FLICKERLESS modes are disabled. -
Page 17: Scene Enhance
2-4. SENS-UP The brighter video can be obtained by increasing the exposure time in the night with SENS-UP. It can be set to O , x2, x4, x8, x16 or x32. Higher setting can get the brighter video but the slower frame rates with more white pixels. - Page 18 3-1-1. WDR MODE • DOL (Digital OverLap): It is compensated video image by 3 layer data of low, middle and high shutter. • FRAME : It is conventional WDR mode. 3-1-2. ROI MODE (Region Of Interest) : Sets speci c area of WDR by window setting. Select window zone number from 0 to 3 and window use set to on.
-
Page 19: D-Nr
4. 3D-NR (Digital Noise Reduction) DNR function improves picture quality by ltering out signal noise which is generated under the low light conditions. Sets o , low, middle or high level. 3DNR(3-dimensional noise reduction) which reduces the noise by the multi frames. It is e ective at low light. - Page 20 5-1-3. DELAY D→N DELAY is time in second while camera maintains its status before Day to Night switches. DELAY can avoid the unwanted/frivolous switching by a short term lights such as light from the passing car. Sets delay term low, middle or high.
-
Page 21: Pict. Adjust
5-3. COLOR The camera is always in COLOR mode. Forcibly DAY/NIGHT is disabled and outputs color video. 5-4. COLOR DN Forcibly Color mode, optimized for night condition. It is available to recognize colors of car, people and moving objects even at night. Parameters can be controllable & programmable according to circumstance. -
Page 22: Special
6-2. SHARPNESS Sets the Sharpness level 0~10. Increases or decreases the sharpness of the picture. Too much sharpness can make image harsh and show more noise as well as line icker at the edge of object in the picture. 6-3. COLOR GAIN DAY Sets the color gain control level in DAY mode. - Page 23 7-1. MIRROR/FLIP Reverses the video left and right and/or up and down by MIRROR/FLIP. When the video is reversed by Ver. or HV, then the joystick directions are reversed accordingly. This feature is very useful when a camera in installed in upside down. •...
-
Page 24: System
7-2-2. POLYGON • ZONE NUM : Selects mask zone number from 0 to 3 to be adjusted. • ZONE DISP: Displays OFF/ON for the mask area which you selected zone. • POS0-X,Y~POS3-X,Y : Adjusts the mask area H, V position and make polygon shape which you selected zone. -
Page 25: Exit
: Exits SETUP MENU and returns to the normal display. 9-1. SAVE : Save all the setting and exit the setup menu. 9-2. CANCEL : Exit the setup menu without save. Further information The manual is also available from the eneo web site at www.eneo-security.com. - Page 28 VIDEOR E. Hartig GmbH Exclusive distribution through specialised trade channels only. VIDEOR E. Hartig GmbH Carl-Zeiss-Straße 8 63322 Rödermark/Germany Tel. +49 (0) 6074 / 888-0 Technical changes reserved Fax +49 (0) 6074 / 888-100 www.videor.com...
Need help?
Do you have a question about the MPD-64A0003P0A and is the answer not in the manual?
Questions and answers