
Summary of Contents for Barco XPR-600
- Page 1 ® Barco Media Server XPR-Series User Guide Part number: 60600325 Version: 00.00 January 22, 2016...
- Page 2 Barco. If the purchaser or a third party carries out modifications or repairs on goods delivered by Barco, or if the goods are handled incorrectly, in particular if the systems are operated incorrectly or if, after the transfer of risks, the goods are subject to influences not agreed upon in the contract, all guarantee claims of the purchaser will be rendered invalid.
- Page 3 This software and the accompanying files are sold “as is” and without warranties as to performance or mer- chantability or any other warranties whether expressed or implied. In no event shall Barco be liable for damage of any kind, loss of data, loss of profits, business interruption or other pecuniary loss arising directly or indirectly.
- Page 4 製品変更に対する警告 High End Systems 製品はアメリカ合衆国及び、国際安全基準の必要条件を満たすよう設計及び製造されてい ます。この為、製品に対する変更は安全に対して影響を及ぼす場合及び、関連安全基準に満たない状態にす る場合があります。 Barco Pn: 60600325...
- Page 5 Barco Media Server XPR-Series User Guide Declaration of Conformity Manufacturer's Name: Barco Lighting Systems Inc. Manufacturer's Address: 2105 Gracy Farms Lane Austin, Texas 78758 USA Distributor's Name: Barco Lighting Systems Inc. Distributor's Address: 2105 Gracy Farms Lane Austin, Texas 78758 USA...
-
Page 6: Table Of Contents
2.4 Connections ................34 2.4.1 Main connections ............34 2.4.2 Output, video capture, and genlock connections ..... 34 2.5 Powering ON the Barco Media Server .......... 35 2.6 Software startup ................ 35 2.7 Licensing .................. 36 2.7.1 CodeMeter Control Center ..........36 2.7.2 Launching CodeMeter Control Center ...... - Page 7 ® Barco Media Server XPR-Series User Guide Barco Media Server 2.9.4 Reconfiguring RAID ............50 3: Hardware ................... 61 3.1 XPR-600 series ................61 4: Software ..................... 63 4.1 Requirements ................63 4.1.1 Hardware ................ 63 4.1.2 Disk space ..............63 4.1.3 Distributed deployment ............
- Page 8 ® Barco Media Server Barco Media Server XPR-Series User Guide 6.1 Content Production ..............129 6.1.1 Viewpoints ..............129 6.1.2 Viewpoint properties ............130 6.1.3 Viewpoint template exportation ........130 6.2 Projection Study Wizard ............130 6.2.1 Using the Projection Study Wizard ........131 6.2.2 Projection Study Wizard interface ........
- Page 9 8.8 X-Agora Agent ................ 226 8.8.1 Requirements ..............226 8.8.2 Agent interface ............226 A Specifications ..................229 A.1 Barco Media Server specifications ..........229 A.2 Standard connection specifications .......... 230 B Replacing a power-cord cap .............. 233 Barco Pn: 60600325...
- Page 10 I.2 Timeline keyboard and mouse shortcuts ........281 I.3 Global keyboard shortcuts ............282 J Trouble shooting ................. 283 J.1 Barco Media Server trouble shooting .......... 283 J.2 X-Agora trouble shooting ............287 J.2.1 Project recovery ............287 J.2.2 Viewing logs ..............291 J.2.3 Restarting X-Agora Service ..........
- Page 12 2.14 Confirmation screen ................. 45 2.15 Sample Status screen ............... 45 2.16 Completion screen ................46 2.17 Barco Media Server Full System Restore Menu ........47 2.18 Rufus utility ..................49 2.19 BIOS EZ Mode screen ................ 50 2.20 EZ Tuning Wizard ................51 2.21 RAID storage configuration ...............
- Page 13 ® Barco Media Server XPR-Series User Guide Barco Media Server 4.7 X-Agora start screen ................72 4.8 X-Agora Programming workflow layout ..........73 5.1 Study on the menu bar ..............77 5.2 Import 3D model ................79 5.3 Create a 3D object ................80 5.4 3D Object Properties pane ..............
- Page 14 ® Barco Media Server Barco Media Server XPR-Series User Guide 5.49 SMPTE device configuration ............121 5.50 SMPTE signal strength gauge ............122 5.51 MTC device configuration ............... 123 5.52 Global Color control ............... 124 5.53 Playback workflow layout Players pane ......... 126 5.54 Timeline controls ................
- Page 15 ® Barco Media Server XPR-Series User Guide Barco Media Server 7.35 Input variables ................181 7.36 DMX properties ................182 7.37 DMX events ..................182 7.38 Moving a "blob" using its x and y positions ......... 183 7.39 Detecting a "blob" that will trigger a Timeline ........183 7.40 Viewport ..................
- Page 16 ® Barco Media Server Barco Media Server XPR-Series User Guide C.4 Select a group layout ..............239 C.5 Display group complete ..............240 C.6 Eyefinity group spanning multiple screens .......... 240 C.7 "Arrange Eyefinity Display Group" ............241 C.8 "Disable Eyefinity Display Group" ............242 C.9 Two screens in one Eyefinity group ............
-
Page 18: Revision History
Barco Media Server XPR-Series User Guide Revision history Revision Date Remarks number 00.00 January 22, Initial release 2016 Barco Pn: 60600325... -
Page 20: 1: Introduction
1.1.1 This guide This user guide describes how to operate a Barco Media Server. The user guide is de- signed to be a reference tool in the everyday work of the user with the product. It contains a complete description of the hardware components and the software suite. The manual also includes all the necessary instructions on how to upgrade and reinstall the software. -
Page 21: Symbols, Pictures, And Fonts
Standards and safety This section lists standards that apply to Barco Media Servers and describes safety precautions that must be observed when installing and operating a product from Barco. Barco Pn: 60600325... -
Page 22: General Safety Instructions
—immunity: EN55022/CISPR22 Class A ITE (Information Technology Equipment) Barco Media Servers are products of class A ITE. ITE stands for Information Technology Equipment. ITE is subdivided into two categories denoted class B ITE (products intended primarily for use in domestic environment) and class A ITE (all other ITE which satisfies the class A ITE limits but not the class B ITE limits). -
Page 23: Precautions
• Observe all warnings and instructions printed on the devices! • Barco Media Servers do not require any maintenance work or servicing. Servicing should never be carried out by unauthorized personnel! • Never open the case of the unit without first disconnecting the power supply cord! •... -
Page 24: Nema 5-15 Plug
• Never spill liquid of any kind on the product. Should any liquid or solid object fall into the case, unplug the Barco Media Server immediately and have it checked by qualified service personnel before resuming operations. -
Page 25: Cee 7/7 Plug
Barco Media Server XPR-Series User Guide Section 1: Introduction green or yellow + green earth (ground) blue or white neutral brown or black line (live) • The cord set must be UL approved and CSA certified. • The minimum specification for the flexible cord is No. 16 AWG, type SJT, 16 A, 60°C, 4.5 m long max., 125 V, 3-conductor. -
Page 26: Additional Information
1.3.4 Additional information Servicing Barco Media Servers do not require any servicing or regular maintenance work. Cleaning Unplug this product from the wall outlet before cleaning. Do not use liquid or aerosol cleaners. -
Page 27: Disposal Of Batteries
For more information about recycling of this product, please contact your local city office or your municipal waste disposal service. For details, please visit the Barco website at: http://www.barco.com/en/AboutBarco/weee. 1.4.2... -
Page 28: Rohs Compliance
Section 1: Introduction Barco Media Server XPR-Series User Guide RoHS compliance 中国大 RoHS (Chinese Mainland RoHS) 1.5.1 Barco Pn: 60600325... - Page 29 Barco Media Server XPR-Series User Guide Section 1: Introduction 零件项目(名称) 有毒有害物质或元素 Component name Hazardous substances or elements 铅 汞 镉 六价铬 多溴联苯 多溴二苯醚 Cr6+ PBDE 印制电路主要配件 Main printed circuit as- sembly 插入式印制电路配件 Plug-in printed circuit assembly 外接电(线)缆 External Cables 內部线路...
-
Page 30: Turkey Rohs Compliance
“Electronic Information Products Pollution Control Labeling Standard” of Chinese Mainland, marked with the Environmental Friendly Use Period (EFUP) logo. The number inside the EFUP logo that Barco uses (see the figure) is based on the “Standard of Electronic Information Products Environmental Friendly Use Period” of Chinese Mainland. - Page 31 Barco Media Server XPR-Series User Guide Section 1: Introduction Master Power Switch Power switch on the rear panel of a Barco Media Server. The Master Power switch removes power from the unit, without performing a shutdown. Power switch on the front panel of a Barco Media Power Switch Server.
-
Page 32: 2: Installation
Pro and must be at least version 01.06.00. Windows 7 is not supported. Verify that the Barco Media Server is loaded with the latest Windows image available on the Barco website. Refer to Restore (p.42) for more information about upgrading the Barco Media Server Windows image. -
Page 33: Initial Inspection
2.2.2 Unpacking At delivery the Barco Media Server is packed in a cardboard box. Place the box on a stable (solid), flat, and insulated support during all the unpacking. Open the box from the top. Remove the Barco Media Server from its antistatic bag. Check the box content. -
Page 34: Rack-Mount Procedure
You may also use a passive DisplayPort-to-DVI adapter for the desktop display (primary video card) conversion. Rack-mount procedure The Barco Media Server chassis is designed to be rack mounted. Please note the following important points: • The Barco Media Server is 4RU in height. -
Page 35: Chassis Rack-Mount Bracket Installation
• Connect the Barco Media Server only to a properly rated supply circuit. • Maintain reliable grounding (earthing) of rack-mounted equipment. • Mount the Barco Media Server in a four-post rack, using the following steps. -
Page 36: Rear Support Brackets
Section 2: Installation Barco Media Server XPR-Series User Guide Figure 2.2. Rear support brackets Install the XPR-Series server into the rack enclosure, ensuring that the chassis rack-mount brackets fully engage through the rear support brackets for proper support. See “A” in Figure 2.3, Rear-post and front-post attachment”. -
Page 37: Connections
Barco Media Server XPR-Series User Guide Section 2: Installation Caution At a minimum, an XPR-600 Series server chassis weighs 18.4 kg (40 lbs.). To avoid injury, we recommend that two people rack mount the chassis. Connections Make the following connections to the rear panel of the Barco Media Server. Installations may vary, having different requirements. -
Page 38: Powering On The Barco Media Server
If the system is powered off any time after it has been initially powered on, you can power on the system again using the power switch on the front panel. If the Barco Media Server does not start, ensure that the master power switch on the rear panel is ON. -
Page 39: Licensing
Server software on another machine. Generally, proper operation and license function- ality requires no user interaction. Barco Media Server software can be downloaded from the Barco website. Go to ht- tp://www.barco.com/ → Products & Solutions → Image Processing → Media Servers. -
Page 40: Xpr-Series Licensing
2.7.3 XPR-Series licensing This section describes how to check current licenses and request an update for an existing license issued by Barco for a Barco Media Server XPR-Series server. Checking current licenses Launch the CodeMeter Control Center. Find the XPR-Series license listed in CodeMeter Control Center (See Figure 2.5, CodeMeter Control Center overview for XPR-Series license.”.) -
Page 41: Webadmin License Page For Xpr-Series Licenses
Section 2: Installation Figure 2.6. WebAdmin license page for XPR-Series licenses XPR-Series licenses must have the Product Codes shown in Figure 2.7, XPR-Series product codes” to properly work with Barco Media Server software. Figure 2.7. XPR-Series product codes Requesting an update for an existing XPR-Series license Launch CodeMeter Control Center. -
Page 42: Xdg-100 Designer Licensing
Section 2: Installation Barco Media Server XPR-Series User Guide Send the resulting .WibuCmRac file to Barco. 2.7.4 XDG-100 Designer licensing This section describes how to check a current license and request an update for an existing XDG-100 license issued by Barco. -
Page 43: Webadmin License Page For Xdg-100 Licenses
Barco Media Server XPR-Series User Guide Section 2: Installation Figure 2.8. CodeMeter Control Center overview for XDG-100 license. Click on WebAdmin to see more details. This opens a webpage. Navigate to the License pane under Content. (See Figure 2.9, WebAdmin License page for XDG-100 licenses”.) -
Page 44: Shutdown And Restart
Send the resulting .WibuCmRac file to Barco. Shutdown and restart The Barco Media Server can be shut down and restarted from Windows or by means of the hardware power switches on the front and rear panels of the Barco Media Server box. Note X-Agora always opens with the most recently saved data. -
Page 45: Software Shutdown
Figure 2.11. Windows shutdown menu 2.8.2 Hardware shutdown The Barco Media Server box can be powered down by means of the power switch, the reset button, or the master power switch. Only the power switch performs a shutdown. Hardware shutdown options •... -
Page 46: Barco Media Server Validation Screen
Section 2: Installation Barco Media Server XPR-Series User Guide The Barco USB Recovery drive is a USB 3.0 device; you may reduce recovery time by using this drive in a USB 3.0 port. Caution Ensure that only the USB Recovery drive is inserted in the system and all other removable devices have been re- moved. -
Page 47: Barco Media Server System Restore Menu
The System Restore menu takes a few minutes to load. During this time, a number of small windows appear and disappear. Wait until you see a full-screen menu titled Barco Media System Restore Menu. Figure 2.13. Barco Media Server System Restore Menu Select the System Restore option or Exit to cancel the operation. - Page 48 Section 2: Installation Barco Media Server XPR-Series User Guide Figure 2.14. Confirmation screen Select Confirm, and the Restore begins. Allow the Restore to run. The Restore process takes between 10 and 30 minutes. The system displays status throughout the Restore.
-
Page 49: Full System Restore
C: drive, but it erases any data on the D: drive, restoring the system to its original con- dition. Plug the USB Recovery drive into one of the USB 3.0 ports on the Barco Media Server. The Barco USB Recovery drive is a USB 3.0 device; you may reduce recovery time by using this drive in a USB 3.0 port. -
Page 50: Barco Media Server Full System Restore Menu
The System Restore menu takes a few minutes to load. During this time, a number of small windows appear and disappear. Wait until you see a full-screen menu titled Barco Media System Restore Menu. Select the Full System Restore option or Exit to cancel the operation. -
Page 51: Re-Creating A Flash-Drive
X-Agora Installer, and the Barco Media Server XPR-Series User Guide. The most recent versions of the X-Agora Installer and the Barco Media Server XPR- Series User Guide are available on the Technical Downloads tab of the Barco Media Server, XPR-600 Series webpage. -
Page 52: Rufus Utility
Section 2: Installation Barco Media Server XPR-Series User Guide Figure 2.18. Rufus utility Note the Selected USB Disk in the Device filed. Note that Create a bootable disk using is checked, and ISO Image is selected. Click the “CD” button ( ) to point Rufus to the source of the ISO that was stored. -
Page 53: Reconfiguring Raid
Restart the Barco Media Server, and wait for the Barco splash screen to be displayed. Press the Del key or the F2 key when the Barco splash screen is dis- played at startup to enter BIOS. The EZ Mode screen appears by default. - Page 54 Section 2: Installation Barco Media Server XPR-Series User Guide Figure 2.20. EZ Tuning Wizard Select RAID, and then click Next. Figure 2.21. RAID storage configuration Select Super Speed as the type of storage for your RAID. Barco Pn: 60600325...
- Page 55 Barco Media Server XPR-Series User Guide Section 2: Installation Figure 2.22. RAID Storage Function Selection 1 of 2 Select Super Speed (RAID 0). Figure 2.23. RAID Storage Function Selection 2 of 2 Click Next, and then click Yes to continue the RAID setup.
-
Page 56: Backup Warning
Section 2: Installation Barco Media Server XPR-Series User Guide Figure 2.24. Configuration warning The system warns that all data on the selected disks will be permanently deleted. Be sure to use only the disks meant for the RAID. Note The manufacturer and the size of the disks listed indicate the disks to be used. -
Page 57: System Reset
Barco Media Server XPR-Series User Guide Section 2: Installation The system warns that all data on these selected drives will be perman- ently deleted. All content and show data should be backed up before continuing; this step cannot be undone. - Page 58 Section 2: Installation Barco Media Server XPR-Series User Guide Creating and formatting simple volumes for RAID Use the New Simple Volume Wizard to create and format the volumes for the RAID storage disks. Right-click the Windows icon in the lower left-hand corner of the screen.
-
Page 59: New Simple Volume
Barco Media Server XPR-Series User Guide Section 2: Installation Figure 2.29. Initialize Disk 1 Right-click on Disk 1, and select New Simple Volume. Figure 2.30. New Simple Volume The system opens the New Simple Volume Wizard. Click Next to continue. -
Page 60: New Simple Volume Wizard Welcome Screen
Section 2: Installation Barco Media Server XPR-Series User Guide Figure 2.31. New Simple Volume Wizard welcome screen Use the auto-filled default value for Simple volume size in MB to use the maximum size. Figure 2.32. Simple volume size Assign D as the drive letter. - Page 61 Barco Media Server XPR-Series User Guide Section 2: Installation Figure 2.33. Specify drive letter Format the partition. See Figure 2.34, Format Partition dialog box”. Use the following settings: File system: NTFS Allocation unit size: Default Volume label: Data Check the Perform a quick format box.
- Page 62 Section 2: Installation Barco Media Server XPR-Series User Guide 11. Click Finish to close the wizard. 12. Click the X in the upper right-hand corner of the Disk Management window to close the Disk Management utility. The quick-format completes automatically, and once the newly created D: drive appears in Windows Explorer, the process is complete.
-
Page 64: 3: Hardware
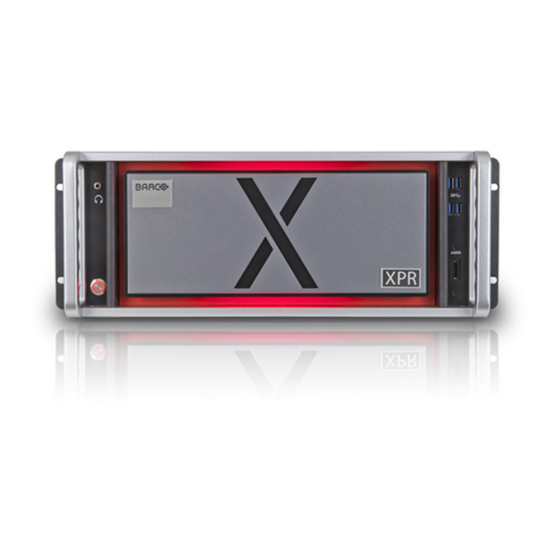
Barco Media Server XPR-Series User Guide Section 3: Hardware X-Agora runs on various models of Barco Media Server. This chapter describes the hardware configuration of the XPR-600 Series servers. Although the different models of the XPR-600/2/4 Series server have different config- urations for the rear panel, they have the same buttons, switches, LED indicators, and USB 3.0 ports on the front panel. - Page 65 Barco Media Server XPR-Series User Guide Section 3: Hardware Figure 3.3. XPR-602 server rear panel • XPR-602 (same 4u chassis as XPR-600) • Outputs – 6 DisplayPort 1.2a • Inputs – 2 single-link DVI capture Figure 3.4. XPR-604 server rear panel •...
-
Page 66: 4: Software
Barco Media Server XPR-Series User Guide Section 4: Software The X-Agora software suite is a unified software environment designed to facilitate the workflow of 2D and projection mapping projects from design to playback and operation. Requirements 4.1.1 Hardware X-Agora machines run Windows Embedded 8.1 x64. -
Page 67: The X-Agora Architecture
Barco Media Server XPR-Series User Guide Section 4: Software tioning, and that within the X-Agora network it is recommended to leave all communic- ation open. The X-Agora architecture The X-Agora system operates according to a client-server architecture to allow maximum scalability. -
Page 68: X-Agora Server
Section 4: Software Barco Media Server XPR-Series User Guide Hardware and software licenses protect each X-Agora Player with regard to managing the number of outputs that can be connected to a physical machine and validating the number of live input devices that can be used. - Page 69 Barco Media Server XPR-Series User Guide Section 4: Software Figure 4.2. Launch the installer, and select Next Select Accept to accept the license; then select Next. Barco Pn: 60600325...
- Page 70 Section 4: Software Barco Media Server XPR-Series User Guide Figure 4.3. Accept the license, and select Next Select either Install, Uninstall, or Update in the drop-down menu; then select Next. If the software is already installed, select Uninstall or Update in the drop-down menu and select Next.
- Page 71 Barco Media Server XPR-Series User Guide Section 4: Software Figure 4.4. Start the Installation or Update Select Next to start the Installation or Update. You may have to confirm to some prompts for X-Agora requirements. Barco Pn: 60600325...
-
Page 72: Network Setup
Section 4: Software Barco Media Server XPR-Series User Guide Figure 4.5. X-Agora Select Close to exit the Installation Wizard. Note Uninstalling the software removes all the files that were placed on the computer at installation: binary files, some configuration files, and the demo project. -
Page 73: Connections
4.4.2 Connections The rear panel of the Barco Media Server has two 10 Gigabit Ethernet (10 GbE) ports. The 10 GbE ports are on the right-hand side of the rear panel. The top port is Port #1, and the other is Port #2. See Figure 4.6, 10 Gigabit Ethernet (10 GbE) Ports #1 and #2”. -
Page 74: Configuring Agent
Section 4: Software Barco Media Server XPR-Series User Guide Configuring Agent X-Agora Agent is configured by default to connect to its local X-Agora Server service. When changing the Master Player in your project, all the required instances of X-Agora Agent point to the new Master Player. You can also change the default configuration manually. -
Page 75: X-Agora Interface
Barco Media Server XPR-Series User Guide Section 4: Software Note The Windows service xagoraServer MUST be running for X-Agora to launch. It is enabled by default and launched automatically at Windows boot time. Also make sure that you have the proper license for running the software. - Page 76 Section 4: Software Barco Media Server XPR-Series User Guide Figure 4.8. X-Agora Programming workflow layout The interface comprises a menu bar, divided into left-hand and right-hand halves, and a workspace containing various panes. Menu bar The left-hand side of the menu bar has five menus: File, Edit, Window, Tools, and Help.
- Page 77 Barco Media Server XPR-Series User Guide Section 4: Software Projection Study Wizard X-Agora Media Encoder Export Projectors Textures Logs From the Help menu you may select About to open the X-Agora splash screen, which displays the copyright and the software release number. You can also select Help (or press the F1 key) to open the X-Agora Designer User Guide.
-
Page 78: The X-Agora Designer User Guide
Section 4: Software Barco Media Server XPR-Series User Guide Media pane: X-Agora supports various types of video, image, sound, and real-time media formats (such as live inputs and dynamic text). See Supported 3D, audio, image, and video formats (p.265). The Media pane allows you to import, preview, and refresh media. -
Page 80: 5: Workflow Layouts
Barco Media Server XPR-Series User Guide Section 5: Workflow layouts The right-hand side of the menu bar at the top of the X-Agora interface allows you to choose from among the four workflow layouts in X-Agora: Study, Programming, Out- puts, and Playback. -
Page 81: Layout Purpose And Workflow
Barco Media Server XPR-Series User Guide Section 5: Workflow layouts 5.1.1 Layout purpose and workflow The Projection Study workflow layout is mostly used in the initial phases of a production. It is the layout best suited for creating your 3D scene and arranging your displays. You can create multiple display configurations, and produce a study document to detail and evaluate each configuration. - Page 82 Section 5: Workflow layouts Barco Media Server XPR-Series User Guide Figure 5.2. Import 3D model Make sure that the imported model's scale is in proportion to the X- Agora 3D space and that it is properly positioned. The default unit scale of the X-Agora 3D space is 1 unit = 1 m.
-
Page 83: Create A 3D Object
Barco Media Server XPR-Series User Guide Section 5: Workflow layouts Figure 5.3. Create a 3D object Figure 5.4. 3D Object Properties pane Create projectors to cover the imported projection surfaces using the Create Projector Array function. If you select a single object and click on Create Projector Array in the Properties pane, X-Agora automatically detects the projection area by choosing the biggest surface of the selected model. -
Page 84: Importing 3D Objects
Section 5: Workflow layouts Barco Media Server XPR-Series User Guide Note In the event that you are using X-Agora to project onto a traditional flat surface (screen or otherwise), you can use the Projection Study Wizard from the Tools menu. This creates a projector array and also a screen that can be used as a projection surface. -
Page 85: Using The Projection Study Wizard
Barco Media Server XPR-Series User Guide Section 5: Workflow layouts Modeling software format files can also contain UV information about how to apply content to the object. The .obj format contains only a single UV set (UV Set 0). The .fbx format can contain up to four different UV sets. -
Page 86: Create A 3D Object
Section 5: Workflow layouts Barco Media Server XPR-Series User Guide Figure 5.6. Create a 3D Object Use the + button to create a 3D primitive (a plane, sphere, or cube), to create a light or Measure, or to import a 3D model created with third- party 3D modelling software. -
Page 87: Displays
Barco Media Server XPR-Series User Guide Section 5: Workflow layouts Click on the target icon next to the field for the Second object and then select another object in the 3D view to pick the second point. Clicking on an object in the 3D view causes the measurement to appear automatically between the two objects in the 3D view. -
Page 88: New Study
Section 5: Workflow layouts Barco Media Server XPR-Series User Guide Figure 5.7. New Study • To switch between Projection Studies, click on the Default Study tab in the upper left-hand corner of the Viewport, and select a study from the drop-down menu. -
Page 89: New Page
Barco Media Server XPR-Series User Guide Section 5: Workflow layouts Figure 5.9. New Page Pages have different properties, which the Properties pane displays, when you click on the Page tab in the Viewport. Pages can be printed or exported to PDF from the Properties pane of the page. -
Page 90: Visualization Mode
Section 5: Workflow layouts Barco Media Server XPR-Series User Guide Figure 5.10. Visualization mode Luminosity Visualization mode indicates the luminosity quality across the projection surface. Resolution Visualization mode indicates the resolution quality (or pixel density) across the projection surface. You may select the unit used for the visualization mode from a list of common units. -
Page 91: Heat Map
Barco Media Server XPR-Series User Guide Section 5: Workflow layouts Figure 5.11. Heat map Print Layout Two different layouts are available in the Viewport. The default layout is the Study Layout, which is 3D-manipulation friendly. The other layout is the Print Layout, which is the layout used to prepare a page for printing. -
Page 92: New Note
Section 5: Workflow layouts Barco Media Server XPR-Series User Guide More print-specific features are available in the Print layout. • The Projector Specifications appear, showing the specifications of all the projectors in the projection study. • The Cartouche appears on the right of the Viewport. -
Page 93: Edit View Styles
Barco Media Server XPR-Series User Guide Section 5: Workflow layouts View styles View styles allow you to customize how content is visualized, and can be used in either Print mode or Study mode. A view style defines the colors to be used for the background, the edges, and the objects. -
Page 94: Exporting Templates With The Content Production Tool
Section 5: Workflow layouts Barco Media Server XPR-Series User Guide The View Styles window, shown in Figure 5.17, View Styles window”, allows for the selection or creation of view styles. Figure 5.17. View Styles window 5.1.9 Exporting templates with the Content Production tool For a description of the Content Production tool, see Content Production (p.129). - Page 95 Barco Media Server XPR-Series User Guide Section 5: Workflow layouts Create cropping templates for motion graphics and video artists tasked with creating content for large-scale, multi-screen or multi-projector pixel spaces. Visualize the relationship between content pixels and projected pixels with a special shading, in order to find the optimal resolution for the templates.
- Page 96 Section 5: Workflow layouts Barco Media Server XPR-Series User Guide To apply this content back onto the selected surface, make sure to select the same viewpoint in the Mapping section of the Timeline element properties. If the viewpoint has split content enabled, crops are also exported in a crops.xml file, and an image de- fining all the crop regions is output.
-
Page 97: Uv Export Template
Barco Media Server XPR-Series User Guide Section 5: Workflow layouts Select the viewpoint in the Viewpoints pane to expose its properties in the Properties pane. Click on the Export Template button in the Properties pane. Save your template *.xml file in a folder, from which you can retrieve it for use with the Media Encoder tool. -
Page 98: Uv-Mapping Wireframe
Section 5: Workflow layouts Barco Media Server XPR-Series User Guide This results in an image that shows the UV mapping as a green wireframe. See Figure 5.21, UV-mapping wireframe”. Figure 5.21. UV-mapping wireframe Working with UV mapping The use of content viewpoints can be limiting in the following situations: Video projectors surround the projection surface on which you expect to project from all angles. - Page 99 Barco Media Server XPR-Series User Guide Section 5: Workflow layouts difference is that a custom-made UV map allows coverage of ALL desired angles for the projection surface. Figure 5.22. 3D cube Barco Pn: 60600325...
-
Page 100: Programming Workflow Layout
Section 5: Workflow layouts Barco Media Server XPR-Series User Guide Figure 5.23. Cube UV map unfolded X-Agora does not include a UV Editor, and the "unfolding" process (called UV mapping) of the 3D model should be done in a specialized 3D authoring software like 3DsMax, Maya, Blender, etc. -
Page 101: Layout Purpose And Workflow
Barco Media Server XPR-Series User Guide Section 5: Workflow layouts 5.2.1 Layout purpose and workflow The Programming tool allows you to build content Timelines. X-Agora allows you to create as many Timelines as you want in each X-Agora project. Because it was designed for large-scale installations, X-Agora also allows you to playback multiple Timelines simultaneously. -
Page 102: Outputs Workflow Layout
Section 5: Workflow layouts Barco Media Server XPR-Series User Guide Outputs workflow layout Use the Outputs workflow layout to connect individual projectors and displays to the physical outputs of the graphic cards on your Player computers. The Outputs layout also allows you to tweak settings, such as the position of windows and the amount of anti-aliasing. -
Page 103: Display Map Controls
Barco Media Server XPR-Series User Guide Section 5: Workflow layouts When Players are running, their related Displays show periodically refreshed output previews, so you can see the visual output from those Displays. When you click on a Display, the Properties pane shows you all its attributes. When this Display is assigned to a Player Output, the properties of this Player Output are also shown. -
Page 104: Display Properties
Section 5: Workflow layouts Barco Media Server XPR-Series User Guide 5.3.3 Display properties In addition to its name, a Display has properties related to its orientation, resolution, and model, which are shown in the Properties pane. Projectors, LED screens, and LCD screens each have their own properties on top of these, for example, for the projector lens or LED pixel pitch. - Page 105 Barco Media Server XPR-Series User Guide Section 5: Workflow layouts Remap Image (Projectors only): A Remap Image allows per-Projector pixel remapping. This texture contains information for where each pixel is supposed to be in the final image. (Red and green stand for X and Y positions in the destination image.) This feature allows you to perform advanced projector-specific adjustments that are impossible with a PNG mask or regular Projector calibration.
-
Page 106: Outputs Properties Pane For A Projector
Section 5: Workflow layouts Barco Media Server XPR-Series User Guide Figure 5.27. Outputs Properties pane for a projector Barco Pn: 60600325... -
Page 107: Outputs Properties Pane For An Led Display
Barco Media Server XPR-Series User Guide Section 5: Workflow layouts Figure 5.28. Outputs Properties pane for an LED display Barco Pn: 60600325... -
Page 108: Players
Section 5: Workflow layouts Barco Media Server XPR-Series User Guide Figure 5.29. Outputs Properties pane for an LCD display 5.3.4 Players Players Map The bottom part of the Output Control layout is the Players Map. It is a visual repres- entation of all the Players in the current projection study. - Page 109 Barco Media Server XPR-Series User Guide Section 5: Workflow layouts Figure 5.30. Outputs Players Map Player Types and Licenses: X-Agora Players with different numbers of outputs are available. In order to launch X-Agora Player on a Player machine, its host needs to have the right local license, either as an embedded software license or a physical USB dongle.
-
Page 110: Player Performance
Section 5: Workflow layouts Barco Media Server XPR-Series User Guide Figure 5.31. Player performance Figure 5.32. Player performance CPU usage Individual Player controls Shutdown Restart Wake-on-LAN (available only when the Player is offline) Play/Stop (available only when the Player is ready and has outputs... -
Page 111: Player Map Controls
Barco Media Server XPR-Series User Guide Section 5: Workflow layouts Figure 5.33. Player controls Player Map controls Figure 5.34. Player Map controls The controls in the top-right corner of the Player Map allow the following operations: All Logs: Displays all the information logged by X-Agora, including useful debugging information for your project, the software, or your licenses. -
Page 112: Player Properties
Section 5: Workflow layouts Barco Media Server XPR-Series User Guide 5.3.5 Player properties A Player has properties related to its physical host and connected projectors. These properties are grouped into different expandable menus. Figure 5.35, Expandable menus of the Player Properties pane” shows the expandable menus in the Properties pane. -
Page 113: Master Player
Barco Media Server XPR-Series User Guide Section 5: Workflow layouts Figure 5.36. Master Player Automatic mode When a Player is configured to use automatic mode, its operating system monitors are reconfigured for optimal performance. If all the Displays connected to a Player have the same resolution and orientation, their monitors are merged in the operating system, and the vertical sync as well as dedicated fullscreen options are enabled. - Page 114 Section 5: Workflow layouts Barco Media Server XPR-Series User Guide Figure 5.37. Mismatched configuration warning Figure 5.38. Apply Output Config Barco Pn: 60600325...
- Page 115 Barco Media Server XPR-Series User Guide Section 5: Workflow layouts If a Player uses the automatic mode and the system detects that one of the expected physical outputs is not connected, a warning icon appears with the label shown in Fig- ure 5.39, Display Disconnected warning”.
-
Page 116: Apply Output Config
Section 5: Workflow layouts Barco Media Server XPR-Series User Guide Licensing restricts the number of physical live inputs that should be on a computer. See Player Types and Licenses in Players Map (p.105), and see Licensing (p.36) for more in- formation on licensing. -
Page 117: Advanced Player Option Menu
Barco Media Server XPR-Series User Guide Section 5: Workflow layouts Figure 5.40. Advanced Player Option menu Anti Aliasing: Set the size of the anti-aliasing window (“none,” “low,” “medium,” and “high”). More anti-aliasing means more smoothing of sharp lines. Use Fixed EDID:... -
Page 118: Player Outputs
Section 5: Workflow layouts Barco Media Server XPR-Series User Guide between the screen refresh rate and the video feed rate. Refresh Rate (Hz) (when VSync Specify a target frame rate for X-Agora Player. Use value 0 for the maximum frame rate possible. -
Page 119: Player Genlock
Barco Media Server XPR-Series User Guide Section 5: Workflow layouts Genlock This section of the Properties pane displays the support for generator locking a Player. Figure 5.42. Player Genlock The following properties can be configured: Toggles genlock between enabled and disabled. -
Page 120: Live Inputs Sdi
Section 5: Workflow layouts Barco Media Server XPR-Series User Guide Hardware restrictions To work properly, genlock must work within the following hardware restrictions: • A genlock card must be present and properly plugged in the graphics card. • All genlocked displays must be plugged in when the machine boots, and they should not be unplugged after that. -
Page 121: Live Inputs Dvi
Barco Media Server XPR-Series User Guide Section 5: Workflow layouts Figure 5.43. Live inputs SDI Figure 5.44, Live inputs DVI” shows live input mappings for a DVI video-capture card. Figure 5.44. Live inputs DVI Figure 5.45, No live inputs” shows the live input mappings for a machine without a video-capture card. -
Page 122: Live Input Mappings: Designer
Section 5: Workflow layouts Barco Media Server XPR-Series User Guide Live input mappings: Designer X-Agora Designer can also use live input devices, which is useful when you build a project and do not have Players available. When you create a new project, the Designer mappings use the matching physical devices. - Page 123 Barco Media Server XPR-Series User Guide Section 5: Workflow layouts Figure 5.47. Sample Live-Input Timeline Audio and MIDI devices The Audio devices section of the Properties pane lists all the sound inputs on the Player machine, and allows you to pick the input that is used for SMPTE, on the Master Player.
- Page 124 Section 5: Workflow layouts Barco Media Server XPR-Series User Guide Figure 5.48. SMPTE device Auto SMPTE configuration Perform SMPTE configuration in the Outputs workflow layout. Select the Master Player, which should be the Player with a tab labeled "Master," from the Output control.
-
Page 125: Smpte Signal Strength Gauge
Barco Media Server XPR-Series User Guide Section 5: Workflow layouts Launch the Master Player. Figure 5.50. SMPTE signal strength gauge In the Outputs layout you should see the SMPTE signal strength gauge moving. If you don't see anything, it means that either the signal is too dim or the chosen audio device has to be changed. - Page 126 Section 5: Workflow layouts Barco Media Server XPR-Series User Guide Figure 5.51. MTC device configuration Note You must launch the Master Player to see any effect. If the Master Player is not running, the Timeline does not react to the MTC signal. Running only the designer does not cause the signal quality gauge to react to the MTC signal, even if the Master Player is set to run on the same machine.
-
Page 127: Global Color Correction Settings
Barco Media Server XPR-Series User Guide Section 5: Workflow layouts The Sync Status indicates whether or not the Player has already received all the files required to run the project. The two synchronization options are: Synchronize Timeline Medias: This option synchronizes 3D objects and media that are used on Timelines inside the project. -
Page 128: Playback Workflow Layout
Section 5: Workflow layouts Barco Media Server XPR-Series User Guide Max Input: the maximum input value (white) Hue Offset: the hue offset represented, as an angle between −180 and 180 on a hue wheel the saturation boost factor, between −100% and +100%... -
Page 129: Timeline Control
Barco Media Server XPR-Series User Guide Section 5: Workflow layouts Figure 5.53. Playback workflow layout Players pane 5.4.3 Timeline control Figure 5.54. Timeline controls Timelines pane The Timelines pane provides a list of all Timelines in your project. Each one can be played, paused, or stopped with individual buttons. -
Page 130: Monitoring Outputs
Section 5: Workflow layouts Barco Media Server XPR-Series User Guide • Move forward one frame • Seek to the end of the timeline Note The length of a frame is determined by the frame rate of the Timeline. It is also possible to move the playhead within individual Timelines with your mouse cursor. -
Page 132: 6: Tools
Barco Media Server XPR-Series User Guide Section 6: Tools This chapter contains information on several X-Agora tools. Content Production The Content Production tool allows you to produce image sequences for X-Agora De- signer. Figure 6.1. Content Production tool The Content Production tool allows you to: •... -
Page 133: Viewpoint Properties
Barco Media Server XPR-Series User Guide Section 6: Tools ive templates. Most of the time you can use ISO, unless you are creating visual effects to be seen from a specific perspective. 6.1.2 Viewpoint properties Viewpoints share many properties with projectors: Projector position, Target position, Roll, Portrait or Landscape orientation, Color, Show cone, and Show measurements. -
Page 134: Using The Projection Study Wizard
Section 6: Tools Barco Media Server XPR-Series User Guide 6.2.1 Using the Projection Study Wizard To open the Projection Study Wizard, select the Tools in the menu bar, and select Pro- jection Study Wizard from the Tools menu. (See Figure 6.2, Projection Study wizard”.) You can also select an object (plane, curved plane, screen, curved screen, or imported object) from your scene and click the Create Projector Array button in its properties. -
Page 135: Projection Study Wizard Interface
Barco Media Server XPR-Series User Guide Section 6: Tools 6.2.2 Projection Study Wizard interface Figure 6.3. Projection Study Wizard interface Projector surface Use these settings to simulate the physical surface that will be projected upon. Type: This setting, Wall or Floor, defines the orientation of created project- ors. -
Page 136: Standalone Visualizer
Section 6: Tools Barco Media Server XPR-Series User Guide Projector Use these settings to simulate the physical surface that is to be projected upon. Simulates real-world projector brightness setting. Brightness: Stack Count: Represents the number of projectors per stack. Distance: Measures the distance of the projectors from the projection surface. -
Page 137: Standalone Visualizer Wizard
Barco Media Server XPR-Series User Guide Section 6: Tools Select Tools from the menu bar, and select Create Standalone Visual- izer from the Tools menu. Figure 6.4. Standalone Visualizer Wizard Select the 3D object that you want to export from the drop-down list in the 3D Object field on the right-hand side of the Standalone Visualizer Wizard dialog box. - Page 138 Section 6: Tools Barco Media Server XPR-Series User Guide Double-click on the launchPreviz_Windows.bat (the launchPreviz_Mac file on a Mac) to launch the previsualization tool. The previsualization tool opens a window that contains instructions and a prompt. Select a web browser.
-
Page 139: Navigation And Control In The Previsualization
Barco Media Server XPR-Series User Guide Section 6: Tools Figure 6.6. Restart or Cancel Type a 1 at the prompt to select Quit and restart. Type a 2 at the prompt to select Cancel. The previsualization tool generates and launches a previsualization in your chosen browser. -
Page 140: Supported Media
Section 6: Tools Barco Media Server XPR-Series User Guide Figure 6.7. Previsualization 6.3.4 Supported media The Standalone Visualizer supports the following media. Pictures: JPEG (JPG) and PNG Videos: MPEG-4 (MP4) and Ogg X-Agora Media Encoder X-Agora Media Encoder is a tool meant for encoding videos—either from image se- quences or from existing videos—to eventually re-encode them. -
Page 141: X-Agora Media Encoder
Barco Media Server XPR-Series User Guide Section 6: Tools You can also use the Media Encoder to crop full-resolution image sequences or videos, creating video packages that conform to the crop definitions generated in your study. See the section Content Production for details on how to generate cropping templates to split your high-resolution media files for multi-screen output. -
Page 142: Application Preferences
Section 6: Tools Barco Media Server XPR-Series User Guide The list on the left contains all the input files—either videos or image sequences—to process along with the detected color space and frame rate. The Output properties pane allows you to choose the desired quality and frame rate for each job. -
Page 143: Single Video Encoding
Barco Media Server XPR-Series User Guide Section 6: Tools Default FPS for Sequences: the default frame rate to use when encoding image sequences. Encoding presets The X-Agora Media Encoder offers four encoding presets. • SQ: Standard Quality (MPEG-4). This is the default preset, and it is the first one you should try, because it is the optimal tradeoff between compression quality and disk space. -
Page 144: Encoding With Transparency
Section 6: Tools Barco Media Server XPR-Series User Guide Select the package on the Timeline to expose its properties. Enable the Canvas Texturing option. 6.4.4 Encoding with transparency X-Agora Media Encoder automatically detects the transparency in source media. For most encoding presets, the resulting media is split between a background media and a black and white mask to provide support for transparency. -
Page 146: 7: Window Menu Panes
Barco Media Server XPR-Series User Guide Section 7: Window menu panes The X-Agora interface offers several panes for viewing aspects of your project. You can access these panes by using the Window menu on the menu bar at the top of the screen. -
Page 147: Display Groups
Barco Media Server XPR-Series User Guide Section 7: Window menu panes Figure 7.2. Displays groups Open the Displays pane and select the projectors or screens the attrib- utes of which you wish to modify. (See Figure 7.2, Displays groups”.) Selecting a display (either in the Displays pane or in a Viewport) causes the Properties pane to show the parameters of the selected display. -
Page 148: Add Display
Section 7: Window menu panes Barco Media Server XPR-Series User Guide Figure 7.3. New group 7.1.2 Add display To add a display, you can use the menu shown in Figure 7.3, New group”. If you want to add a display to an existing display group, use the + icon of that group. See Figure 7.4, Add display to an existing group”. -
Page 149: Display Properties
Barco Media Server XPR-Series User Guide Section 7: Window menu panes 7.1.3 Display properties Selecting a display (either in the Displays pane or in a Viewport) causes the Properties pane to show the properties of the selected display. You can also modify multiple dis- plays, if they belong to the same display group, by selecting that display group. -
Page 150: Projector Properties
Section 7: Window menu panes Barco Media Server XPR-Series User Guide Projector properties Figure 7.5. Projector properties Barco Pn: 60600325... - Page 151 Barco Media Server XPR-Series User Guide Section 7: Window menu panes The Properties pane of a projector is divided into several sections. Name a display. (A display's name should be unique within a Name: project.) Modify the position of a projector and its target, as well as its Position: Roll and Orientation (Portrait or Landscape) attributes.
- Page 152 Section 7: Window menu panes Barco Media Server XPR-Series User Guide LCD screen and curved LCD screen properties Figure 7.6. LCD screen properties Barco Pn: 60600325...
- Page 153 Barco Media Server XPR-Series User Guide Section 7: Window menu panes Figure 7.7. Curved LCD screen properties LCD screen and curved LCD screens share the following properties: • Name • Dimension (M) • Scale • Position (M) • Rotation • Specifications •...
- Page 154 Section 7: Window menu panes Barco Media Server XPR-Series User Guide For curved LCD screens you can also define properties related to the curvature of the screen. LED screen and curved LED screen properties Figure 7.8. LED screen properties Barco Pn: 60600325...
- Page 155 Barco Media Server XPR-Series User Guide Section 7: Window menu panes Figure 7.9. Curved LED screen properties LED screen and curved LED screens share the following properties: • Name • Dimension (M) • Scale • Position (M) • Rotation • Specifications •...
-
Page 156: Library Pane
Section 7: Window menu panes Barco Media Server XPR-Series User Guide • Pixel Pitch (mm) For curved LED screens you can also define properties related to the curvature of the screen. Library pane 7.2.1 Importing media All media files that are part of an X-Agora project are located inside the project folder in a medias/Media Files sub-folder. -
Page 157: Operations On Media
Barco Media Server XPR-Series User Guide Section 7: Window menu panes The media controls include a search bar for searching media names, a toggle button to switch between tree view and tile view, a refresh button to manually scan the medias folder, and a + button to import external media. -
Page 158: Files Operations Menu
Section 7: Window menu panes Barco Media Server XPR-Series User Guide Files operations Figure 7.13. Files operations menu Replace Media allows you to replace a media file with another media file, and updates all Timeline elements that were using the original file. Replace Media avoids repetitive tasks and can save time. -
Page 159: Tree View And Tile View
Barco Media Server XPR-Series User Guide Section 7: Window menu panes 7.2.4 Tree view and tile view Figure 7.14. Tree view The tree view shows the media files as a tree, as would a common file explorer. This view is convenient for having a global overview of all available media files. -
Page 160: Importing, Managing, And Refreshing Media
Section 7: Window menu panes Barco Media Server XPR-Series User Guide Figure 7.15. Tile view Both views show missing media—and folders with missing media—by displaying warning icons. 7.2.5 Importing, managing, and refreshing media To add media files, simply drag and drop media files from Windows Explorer onto a Timeline or onto the Media Tab itself. -
Page 161: Timelines Pane
Barco Media Server XPR-Series User Guide Section 7: Window menu panes Figure 7.16. Media preview Timelines pane The Timelines pane contains all the Timelines and Timeline Groups in a given scene. Note Do not confuse the Timelines pane with the Timeline pane, in which you as- semble media assets to compose a show or multimedia installation. -
Page 162: Actions Pane
Section 7: Window menu panes Barco Media Server XPR-Series User Guide To open a Timeline: Expand the Group by clicking the arrow next to it in the Timelines tab in the bottom left-hand corner, and double-click a Timeline. To create a new Timeline Group: Click the + symbol in the top right corner of the Timelines pane. -
Page 163: Lighting
Barco Media Server XPR-Series User Guide Section 7: Window menu panes 7.4.1 Lighting Action Description Move and Changes the position, color, scale, and attenuation of a light. Change Light Table 7.1. Lighting 7.4.2 Outputs Action Description Art-Net Transmits Art-Net values to a specific IP, Port, DMX universe and channel(s). -
Page 164: Presets
Section 7: Window menu panes Barco Media Server XPR-Series User Guide Action Description Ambient Occlu- Applies ambient occlusion on the image. sion Color Correction Modifies saturation, min and max (black and white) levels, gamma, hue offset, and brightness. Fade In Fades in from plain black to the scene. -
Page 165: Sound
Barco Media Server XPR-Series User Guide Section 7: Window menu panes 7.4.6 Sound Action Description Play Sound from Plays a specific sound on an event. Folder on Event Play Sound on Plays a specific sound on an event. Event Submix Sound Mixes a sound from different channels. -
Page 166: Transformations
Section 7: Window menu panes Barco Media Server XPR-Series User Guide 7.4.8 Transformations Action Description Move Object Moves an object in the 3D space over time. Position Object Positions a node on a plane, according to normalized x and y coordin- on Plane ates. -
Page 167: Timeline Pane
Barco Media Server XPR-Series User Guide Section 7: Window menu panes Figure 7.20. 3D Object Properties pane Timeline pane The Timeline is where you compose the show or multimedia installation by assembling media assets in time. Create as many Timelines as you want, and add video, image, sound, or real-time graphics in layers. -
Page 168: Manual Time Manipulation
Section 7: Window menu panes Barco Media Server XPR-Series User Guide From left-to-right the Timeline playback and element-manipulation controls are: Moves the Playhead to the start of the Timeline. Go to Start: Last Frame: Moves the Playhead to the last (previous) frame. -
Page 169: Timecue
Barco Media Server XPR-Series User Guide Section 7: Window menu panes From left-to-right the Timeline zooming controls are: Zooms out on the Timeline. Zoom out: You can also zoom out by using the mouse scroll button. Keeps the center of the Timeline fixed while zoom- Keep Center while Zooming: ing. -
Page 170: Keyframing
Section 7: Window menu panes Barco Media Server XPR-Series User Guide Figure 7.26. Enable/disable Timeline layers 7.6.6 Keyframing A Keyframe is a property value of a Timeline element, mapped to a specific time on the Timeline. Keyframing allows the smooth transition from one value to another. For more information on Keyframing, see Keyframing (p.215). -
Page 171: Video Properties For A Timeline Element
Barco Media Server XPR-Series User Guide Section 7: Window menu panes Properties Figure 7.27. Video properties for a Timeline element Barco Pn: 60600325... - Page 172 Section 7: Window menu panes Barco Media Server XPR-Series User Guide Video properties Name: Displays the name of the corresponding media. Shows the time at which the element starts playing on the Start Time: Timeline. Length: Shows the duration of the element.
- Page 173 Barco Media Server XPR-Series User Guide Section 7: Window menu panes Figure 7.28. Image properties for a Timeline element The image properties are the same as the video properties, except the image properties have no Slicing, Loop Mode, Free Running, or Frame Blending options.
- Page 174 Section 7: Window menu panes Barco Media Server XPR-Series User Guide Video properties Name: Displays the name of the corresponding media. Shows the time at which the element starts playing on the Start Time: Timeline. Length: Shows the duration of the element.
-
Page 175: Text Properties For A Timeline Element
Barco Media Server XPR-Series User Guide Section 7: Window menu panes Figure 7.29. Text properties for a Timeline element Text properties Text: Type the text that is to appear. Bold/Italic/Under- Enable or disable these text format options. line/Strikethrough: Barco Pn: 60600325... - Page 176 Section 7: Window menu panes Barco Media Server XPR-Series User Guide Font: Choose the font from the list of available fonts on your system. Font Size: Choose the size of the font to use for this element. Choose the color of the text (the letters themselves).
- Page 177 Barco Media Server XPR-Series User Guide Section 7: Window menu panes Figure 7.30. Media Effects subpane Table 7.10, Media effects descriptions” provides a quick reference of the effects. For more detailed information see Effects (p.253). Barco Pn: 60600325...
- Page 178 Section 7: Window menu panes Barco Media Server XPR-Series User Guide Effect Description RGB Add Add RGB Values. Invert inverts the final result. Non Black Only applies this operation only to non-black pixels. RGB Multiply Multiply RGB Values. Multiplies all values by the Factor. In- vert inverts the final result.
- Page 179 Barco Media Server XPR-Series User Guide Section 7: Window menu panes Effect Description Blur XY Applies a Gaussian blur on the image. Amount X and Amount Y specify the number of adjacent of pixels to use for the blur. Crop Crops the image in a box from (left, top) to (right, bottom).
-
Page 180: Properties Pane For An Input
Section 7: Window menu panes Barco Media Server XPR-Series User Guide Brightness: the brightness boost factor, between −100% and +100% Red Dimmer: the red gamma boost factor, between −100% and +100% Green Dimmer: the green gamma factor, between −100% and +100% the blue gamma factor, between −100% and +100%... -
Page 181: Timeline Properties
Barco Media Server XPR-Series User Guide Section 7: Window menu panes Type: The type of variable can be float, int, or bool. Default Value: The default value of the variable. Range: Enter the values received in the text boxes and select to what they are remapped with the slider. -
Page 182: Inputs Pane
Section 7: Window menu panes Barco Media Server XPR-Series User Guide Timecode: Displays the Timecode. Choose Internal to use an internal clock to synchronize all the players. Choose SMPTE to control the Timeline by using an SMPTE signal. Choose MTC to control the Timeline by using an MTC signal. -
Page 183: Input Variables
Barco Media Server XPR-Series User Guide Section 7: Window menu panes Figure 7.34. Inputs pane 7.8.1 Input variables Once an input is created and receives input through the specified port, real-time feedback concerning the input's contents is displayed. Each TUIO or OSC input displays a list of incoming variables, each of which can be dragged and dropped onto action parameters. -
Page 184: Input Variables
Section 7: Window menu panes Barco Media Server XPR-Series User Guide Figure 7.35. Input variables OSC and TUIO inputs Configuring TUIO To configure TUIO, select the input from the list and the properties will appear in the properties pane on the right. You can set the Name, Type and Port of the input. If the TUIO input is feeding data on the selected port, information will appear automatically under the input in the list. -
Page 185: Connecting Variables To Actions
Barco Media Server XPR-Series User Guide Section 7: Window menu panes Input properties See Input properties (p.177) for examples of the Properties pane for inputs and input variables. For a DMX input, you can choose a Universe and Channels. See Figure 7.36, DMX properties”. - Page 186 Section 7: Window menu panes Barco Media Server XPR-Series User Guide Figure 7.38, Moving a "blob" using its x and y positions” shows an example using the x and y positions of a detected moving object ("a blob") to move a 3D object in X-Agora's 3D environment (using the moveNode behavior).
-
Page 187: Viewport
Barco Media Server XPR-Series User Guide Section 7: Window menu panes Viewport The Viewport pane provides up to four distinct views of the 3D scene in order to facil- itate viewing and moving 3D objects and displays. Figure 7.40. Viewport 7.9.1... -
Page 188: Camera And Controls
Section 7: Window menu panes Barco Media Server XPR-Series User Guide Figure 7.41. Views template 7.9.2 Camera and controls To change the Camera assigned to a Viewport, click the Camera name to the right of the icon in the top left-hand corner of a Viewport frame. The projectors and screens listed in the Displays pane, as well as default cameras such as Top, Front, Back, Left, Right, Bottom, Perspective, and Orthographic, are available here. -
Page 189: Presets Pane
Barco Media Server XPR-Series User Guide Section 7: Window menu panes Figure 7.42. List of cameras 7.10 Presets pane Use presets to store and restore different property values at runtime. The two families of presets are position presets and calibration presets. A preset can include one or more elements, allowing easy control of multiple projectors or objects at the same time. -
Page 190: Position Presets
Section 7: Window menu panes Barco Media Server XPR-Series User Guide Figure 7.43. Add a preset 7.10.2 Position presets Position presets define multiple configurations for projectors and 3D objects, meaning they can be placed in and looking at different locations; they can also be hidden or not. - Page 191 Barco Media Server XPR-Series User Guide Section 7: Window menu panes Projectors • Position of the lens • Position of the target • Orientation • Roll • Throw ratio • Reflection mode • MMS distance/roll/tilt • Vertical and horizontal lens shift •...
-
Page 192: Calibration Presets
Section 7: Window menu panes Barco Media Server XPR-Series User Guide Figure 7.45. Position presets expander 2D project Position presets in a 2D project include Displays only, because there are no 3D objects in a 2D project. Displays • Position in the canvas •... -
Page 193: Calibration Presets Expander
Barco Media Server XPR-Series User Guide Section 7: Window menu panes list of the included items also shows a quick Calibrate button, so you can directly calibrate each item and save the preset. See Figure 7.46, Quick Calibrate”. Figure 7.46. Quick Calibrate The calibration window also shows the list of all calibration presets—including the... -
Page 194: 8: Features
Barco Media Server XPR-Series User Guide Section 8: Features This chapter contains information on several X-Agora features. 2D mode Use the 2D mode to create projects that do not need to include 3D elements. The 2D mode uses a simplified workflow, removes some of the more complex concepts from the 3D mode, and is optimized for 2D performance. -
Page 195: 2D Concepts
Barco Media Server XPR-Series User Guide Section 8: Features Create a new 2D project. Define the canvas dimensions based on what is needed for the project. Create displays and position them in the canvas. Add timelines and media as in 3D mode. 2D media manipulation and Keyframing can be used if needed. -
Page 196: Controls
Section 8: Features Barco Media Server XPR-Series User Guide Displays Figure 8.3. Displays A display is the equivalent of projectors or screens in 3D mode. It is an output that can be connected to a player. In 2D mode, the concept of display is more abstract than in 3D mode;... -
Page 197: Media Manipulation
Barco Media Server XPR-Series User Guide Section 8: Features Figure 8.4. Toolbar A toolbar is also available to handle Viewport manipulation, along with other 2d-mode features. The Select, Pan, Zoom In, and Zoom Out tools allow you to use their respective manipulation modes. - Page 198 Section 8: Features Barco Media Server XPR-Series User Guide Figure 8.5. 2D media manipulation To add media to a Timeline in 2D mode, you can still drag the media on the Timeline, but it is also possible to drag the media directly in the Viewport. Doing so adds the media at the current playhead time on the current Timeline at the 2D position at which it was dropped in the Viewport.
-
Page 199: Fit And Align
Barco Media Server XPR-Series User Guide Section 8: Features Figure 8.6. Adorner manipulation When multiple elements are selected, fit or align options are available to move and resize your media by using a right-click menu in the Viewport. The align options allow you to align multiple elements to the top, middle, bottom, left, right, or center of the selection. -
Page 200: Differences From 3D Mode
Section 8: Features Barco Media Server XPR-Series User Guide When Keyframing is enabled for a media's position, dimension, or rotation, using the 2D adorner instead applies the operation for the current time's Keyframe. For more details, see Keyframing (p.215). 8.1.5 Differences from 3D mode •... -
Page 201: Hog Connectivity
Barco Media Server XPR-Series User Guide Section 8: Features Once your Art-Net server has been properly configured, create the matching inputs in the Inputs Pane of the Programming workflow layout. Once these inputs have been defined and values are being sent, you can see the matching inputs display the updated values in X-Agora. -
Page 202: Calibration Interface Elements
Section 8: Features Barco Media Server XPR-Series User Guide Figure 8.8. Calibration workflow layout 8.3.2 Calibration interface elements The main Panes used in Calibration are the Viewport pane, showing the projector's image, and the Options pane. 8.3.3 General calibration Some of the general calibration and masking options available in the Options pane are: •... -
Page 203: 3D Calibration
Barco Media Server XPR-Series User Guide Section 8: Features 8.3.4 3D calibration Reverse mapping Reverse Mapping is the preferred mapping tool when projecting onto a surface that is not flat. This mapping tool requires you to have an accurate 3D model of the projection surface onto which you are projecting. - Page 204 Section 8: Features Barco Media Server XPR-Series User Guide Click Target Creation Mode and place additional targets on the geo- metry. These targets can then be moved the same way as the initially created targets. If you need to delete a target, select it and press the Del key.
-
Page 205: Projector Calibration
Barco Media Server XPR-Series User Guide Section 8: Features When enabled, the following options can additionally be set. Identifies a specific rendering mode for calibration purposes View Mode: Auto Edge Blending: Toggles the automatic blending between enabled and not enabled for a projector. -
Page 206: Edge Warping Workflow
Section 8: Features Barco Media Server XPR-Series User Guide Figure 8.9. Edge Warping workflow Edge Warping workflow Select Point Creation Mode and place points on the image in the Viewport pane. Points should be placed at edge intersections, image corners, or at the edge of content that is to be displaced. - Page 207 Barco Media Server XPR-Series User Guide Section 8: Features Repeat Steps 1 to 3 as needed to create the points and shapes that you need. To delete a point or a shape, select it and press the Del key. Move the points and shapes until the projected image fits accurately on the surface.
- Page 208 Section 8: Features Barco Media Server XPR-Series User Guide Original Position X/Y: Sets the position in pixels of the selected point in the source-camera image. Reset to Current Position: Sets the current position of the selected point as the source position in the camera image.
- Page 209 Barco Media Server XPR-Series User Guide Section 8: Features Figure 8.10. Calibration pane Manual Blending Different blending properties can be defined for each of the projector's edges (left, right, top, and bottom). Adjusts the brightness of the projected image. Brightness: Contrast: Adjusts the contrast of the projected image.
- Page 210 Section 8: Features Barco Media Server XPR-Series User Guide A higher sharpness results in a well-defined border for an edge's blending, while a lower sharpness results in a smoother effect. Warping The Warping tool applies distortions to the image projected by the camera. It can apply small distortions, or it can warp an image to match a curved surface.
-
Page 211: Warping Workflow Layout
Barco Media Server XPR-Series User Guide Section 8: Features Figure 8.11. Warping workflow layout Warping workflow Select a preset that fits your needs. See Preset: in Warping controls (p.209). Disable Perspective Correction if it is not needed, for example, if you are using warping only to correct some content inaccuracies. - Page 212 Section 8: Features Barco Media Server XPR-Series User Guide Selected points are shown in blue and display the tangent manipulators, unselected points are shown in white. In perspective mode, corners cannot be multi-selected. Points can be added to the selection using the Shift key.
- Page 213 Barco Media Server XPR-Series User Guide Section 8: Features Preset Description Keystone Creates four points in the corners of the image. Use this default preset to do a simple keystone. Horizontal Creates four points in the corners of the image and two points at the centers of the horizontal borders.
- Page 214 Section 8: Features Barco Media Server XPR-Series User Guide Warping shortcuts Creates a row and a column of control points at the Ctrl+Click: specified location. Creates a column of control points at the specified Ctrl+Shift+Click: location. Ctrl+Alt+Click: Creates a row of control points at the specified loca- tion.
- Page 215 Barco Media Server XPR-Series User Guide Section 8: Features Figure 8.12. Live Masking tool Live Masking workflow Draw a shape using the appropriate tool in the toolbar (rectangle, el- lipse, or polygon). For a polygon, place points and click again on the first point to close the shape.
-
Page 216: Multiple-Users Calibration
Section 8: Features Barco Media Server XPR-Series User Guide Optional—Add more stops to a gradient fill by clicking in the Stops control. Delete stops by selecting them and pressing delete. Move stops by dragging them. For feather fill, an option specifying the radius in pixels can be modified. -
Page 217: Timeline Playback Control Mode
Barco Media Server XPR-Series User Guide Section 8: Features 8.4.1 Timeline playback control mode This feature allows you the control and playback of timelines from a DMX board, and it is available for both 2D and 3D projects. This feature is disabled by default and must be activated by clicking on the Enable External Control check box in the Properties pane of a Timeline. -
Page 218: Keyframing
Section 8: Features Barco Media Server XPR-Series User Guide Note For now, only the Cue ID major is taken into consideration, minor and patch will be used in later releases. If the Cue number is 0, the Timeline plays or pauses where it currently is. If the Cue number is not 0, the Timeline jumps to the specified Cue. -
Page 219: Keyframes Editor
Barco Media Server XPR-Series User Guide Section 8: Features Figure 8.15. Keyframe activation Once activated, a keyframe layer appears on the lower section of the Timeline in the keyframes editor. Each keyframe is represented by a diamond. Figure 8.16. Keyframes editor... -
Page 220: Animating An Element's Position
Section 8: Features Barco Media Server XPR-Series User Guide Figure 8.17. Eye icon in keyframes editor Elements can also be added in the keyframes editor by right clicking on the element and choosing Show in Keyframes Editor. This also works on a multiple selection. -
Page 221: Inserting Keyframes
Barco Media Server XPR-Series User Guide Section 8: Features Figure 8.19. Animated position trail 8.5.2 Inserting keyframes For the position property, new keyframes can be inserted directly in the canvas by hovering the cursor over the path. When the cursor is over the path, a + appears next to the cursor, indicating that the next click will insert a keyframe at this location. -
Page 222: Tangent Control
Section 8: Features Barco Media Server XPR-Series User Guide Figure 8.22. Inserting a keyframe by hovering Notes to Figure 8.22, Inserting a keyframe by hovering” Unfold the layer. Hover and click to insert keyframe. You can move the keyframe left and right anywhere on the Timeline. Whenever a key- frame-enabled property is modified, the value of the keyframe at the current playhead position is updated. -
Page 223: Live Input
Barco Media Server XPR-Series User Guide Section 8: Features Figure 8.24. Symmetric tangent property Figure 8.25. Curve with non-symmetric keyframe tangents Live input X-Agora allows you to integrate live video feeds into your show. Simply place a Live Feed media element on your Timeline and configure it to read your live video-capture hardware. -
Page 224: Remote Mode
Section 8: Features Barco Media Server XPR-Series User Guide Figure 8.26. Live input on the Timeline Make sure you have a player configured in the Outputs layout and that the player s live inputs are properly mapped to the physical live- capture hardware that is connected to the Player machine. -
Page 225: To Enter Remote Server Mode
(See Figure 8.28, Media Share Master Connection”.) This does not happen between two Barco machines (or any other machines that have saved authentication). Figure 8.28. Media Share Master Connection... -
Page 226: Remote Server Mode Limitations
Section 8: Features Barco Media Server XPR-Series User Guide Make sure that the user account (listed in the User field of the Media Share Master Connection dialog box) has permissions to at least Read, Write, and Execute in your chosen project folder. (See Figure 8.29, Required properties”.) To avoid confusion, a user account that has full control is recommended. -
Page 227: Downloading Media In Remote Mode
Barco Media Server XPR-Series User Guide Section 8: Features • Restore snapshots If you try to connect to a server that is already connected to another X-Agora Designer, you are warned that the other Designer will be kicked off the server. By ensuring that only one X-Agora Designer at a time is connected to a server, unexpected behaviors are avoided. -
Page 228: Error Messages
Section 8: Features Barco Media Server XPR-Series User Guide Figure 8.31. Download from Master 8.7.5 Error messages If while trying to connect to a remote server, you receive the error message "This server has no valid license. You may only connect to a valid remote server." you are attempting to connect to a server that does not have an X-Agora Server license. -
Page 229: X-Agora Agent
Barco Media Server XPR-Series User Guide Section 8: Features X-Agora Agent The X-Agora Agent runs on each computer in the X-Agora network, coordinating and synchronizing each player application in the network with the central server. In short, the agent links each machine with the brains of the operation—the server. -
Page 230: Agent Interface
Section 8: Features Barco Media Server XPR-Series User Guide Figure 8.33. Agent Interface Clicking the Agent Logs tab exposes logs of the activities of the Agent, as well as its communication with the server. Logs are useful for debugging connection problems, or identifying missing media files. -
Page 231: Agent Logs
Barco Media Server XPR-Series User Guide Section 8: Features Figure 8.34. Agent logs For information about configuring the X-Agora Agent, see Configuring Agent (p.71). Barco Pn: 60600325... -
Page 232: A Specifications
Barco Media Server XPR-Series User Guide Appendix A: Specifications This appendix contains specifications for Barco Media Servers and specifications and pinouts for standard connectors. Barco Media Server specifications Specification XPR-600 Series Channel outputs 6× DP 1.2 Designer outputs 2× DVI-D... -
Page 233: Standard Connection Specifications
Barco Media Server XPR-Series User Guide Appendix A: Specifications Standard connection specifications Specification Description Main (Display- • Display Connectors: DVI-I DL and DP 1.2 Port) and Exten- • Maximum Simultaneous Displays: 2 direct, 4 DP 1.2 ded (DVI) Multi-Stream Desktop •... - Page 234 Appendix A: Specifications Barco Media Server XPR-Series User Guide Specification Description DVI video cap- • DVI-I (DL) connector ture • Input channels: 2 • Output channels: 0 • Supports HDMI, DVI, and composite video capture • PCIe ×4 half size plug-in card (110 mm × 170 mm) SD/HD/3G SDI •...
-
Page 236: B Replacing A Power-Cord Cap
Barco Media Server XPR-Series User Guide Appendix B: Replacing a power-cord cap The Barco Media Server ships with an IEC power cord. Different locations (even within the same country) may require a different power cord cap to connect the server to a power outlet. -
Page 238: Control Center
Barco Media Server XPR-Series User Guide ™ Appendix C: AMD FirePro Control Center Using Dedicated Fullscreen Using Dedicated Fullscreen assures optimal video playback by taking full control of the GPU and bypassing desktop composition similar to what they do in video games. - Page 239 ™ Barco Media Server XPR-Series User Guide Appendix C: AMD FirePro Control Center Figure C.1. "Create Eyefinity Display Group" Click on Use a new arrangement. Barco Pn: 60600325...
- Page 240 ™ Appendix C: AMD FirePro Control Center Barco Media Server XPR-Series User Guide Figure C.2. Use a new arrangement Select the screen from which you want to create the Eyefinity group and click on Next. The other screens will be disabled.
- Page 241 ™ Barco Media Server XPR-Series User Guide Appendix C: AMD FirePro Control Center Figure C.3. Create the Eyefinity group Select the layout type—for now, X-Agora supports only horizontal layouts (2x1, 3x1, 4x1, etc.)—and click on Next. Barco Pn: 60600325...
- Page 242 ™ Appendix C: AMD FirePro Control Center Barco Media Server XPR-Series User Guide Figure C.4. Select a group layout Barco Pn: 60600325...
- Page 243 ™ Barco Media Server XPR-Series User Guide Appendix C: AMD FirePro Control Center Figure C.5. Display group complete Click on Next twice. The Eyefinity group should now span across multiple screens, as shown in Figure C.6, Eyefinity group spanning multiple screens”.
-
Page 244: Disable Eyefinity Group
™ Appendix C: AMD FirePro Control Center Barco Media Server XPR-Series User Guide If the screens are not in the proper order, click on Arrange Eyefinity Display Group and follow the screen indications to set up the correct screen order. -
Page 245: Manage Eyefinity Group In Designer
™ Barco Media Server XPR-Series User Guide Appendix C: AMD FirePro Control Center Figure C.8. "Disable Eyefinity Display Group" Manage Eyefinity Group in Designer In X-Agora Designer, an Eyefinity Group is considered as one display so using the Identify Monitors button shows only one large number for the group. The displays that are part of the Eyefinity Group, however, are also identified individually with smaller numbers from 1 to 6, depending of the number of displays in the group. -
Page 246: Eyefinity Group Spanning Two Outputs
™ Appendix C: AMD FirePro Control Center Barco Media Server XPR-Series User Guide Figure C.9. Two screens in one Eyefinity group If the X-Agora Player is in Dedicated Fullscreen, the Eyefinity group is also represented by a rectangle that spans across the correct number of displays in the group. In the fol- lowing screen capture, the group spans across two outputs: Figure C.10. -
Page 248: D Edid Management
Barco Media Server XPR-Series User Guide Appendix D: EDID management Extended display identification data (EDID) is managed through either the AMD FirePro™ Control Center or the NVIDIA Control Panel. Removing an emulated EDID through the AMD FirePro™ Control Center Right-click anywhere on the desktop to summon the desktop menu. -
Page 249: Removing An Emulated Edid Through The Nvidia Control Panel
Barco Media Server XPR-Series User Guide Appendix D: EDID management Figure D.2. AMD FirePro™ Control Center display connections The four icons at the right-hand side of the selected connection allow you to… View the selected EDID in HEX format. Save the selected EDID to a file. - Page 250 Appendix D: EDID management Barco Media Server XPR-Series User Guide Figure D.3. Select NVIDIA Control Panel Select Workstation and View system topology from the Select a Task pane of the NVIDIA Control Panel. Figure D.4. NVIDIA Control Panel Figure D.4, NVIDIA Control Panel” shows that the DVI port of the Quadro K620 is not connected, but the DisplayPort port is connected to an ASUS monitor.
- Page 251 Barco Media Server XPR-Series User Guide Appendix D: EDID management Figure D.5. NVIDIA Manage EDID window The NVIDIA Manage EDID screen has three tabs. Export allows you to create an EDID file based on the current display. Load allows you to load an EDID file to use as an emulated EDID.
-
Page 252: E Input Check
Barco Media Server XPR-Series User Guide Appendix E: Input check The Barco Media Server has two applications that allow you to check whether or not the video capture card is receiving input. The dREC application checks the SDI input on the video capture card in the Barco Media Server XPR-604, and the Vision window application checks the DVI input on the video capture card in the Barco Media Server XPR-602. -
Page 253: Sdi Video Input Check
Barco Media Server XPR-Series User Guide Appendix E: Input check Figure E.1. Vision Window output SDI video input check Use the dREC application check the SDI input on the DeltaCast video-capture card in the Barco Media Server XPR-604. Click the Windows icon at the lower left-hand corner of the screen to access the Windows Apps screen. - Page 254 Appendix E: Input check Barco Media Server XPR-Series User Guide If there is no input signal, the Video Preview panel displays the message, "NO SIGNAL." Figure E.2. dREC Record module, showing "NO SIGNAL" Barco Pn: 60600325...
-
Page 256: F Effects
Barco Media Server XPR-Series User Guide Appendix F: Effects The following actions are applied on the effects. Effect ID: # Description Para- Para- Para- Para- Para- Para- Para- Para- Para- meter 1 meter 2 meter 3 meter 4 meter 5... - Page 257 Barco Media Server XPR-Series User Guide Appendix F: Effects Effect ID: # Description Para- Para- Para- Para- Para- Para- Para- Para- Para- meter 1 meter 2 meter 3 meter 4 meter 5 meter 6 meter 7 meter 8 meter 9 Category: B&W...
- Page 258 Appendix F: Effects Barco Media Server XPR-Series User Guide Effect ID: # Description Para- Para- Para- Para- Para- Para- Para- Para- Para- meter 1 meter 2 meter 3 meter 4 meter 5 meter 6 meter 7 meter 8 meter 9...
- Page 259 Barco Media Server XPR-Series User Guide Appendix F: Effects Effect ID: # Description Para- Para- Para- Para- Para- Para- Para- Para- Para- meter 1 meter 2 meter 3 meter 4 meter 5 meter 6 meter 7 meter 8 meter 9...
- Page 260 Appendix F: Effects Barco Media Server XPR-Series User Guide Effect ID: # Description Para- Para- Para- Para- Para- Para- Para- Para- Para- meter 1 meter 2 meter 3 meter 4 meter 5 meter 6 meter 7 meter 8 meter 9...
- Page 261 Barco Media Server XPR-Series User Guide Appendix F: Effects is the average between the original value and the swapped value). Add variants perform an RGB Add effect after the swap, with the appropriate parameters. Multiply variants perform an RGB Multiply effect after the swap, with appropriate parameters. Invert in- verts the final result.
-
Page 262: G Project Settings
Barco Media Server XPR-Series User Guide Appendix G: Project settings Whenever you open a project in X-Agora Designer, X-Agora initially populates the Properties pane with the project settings. These settings are project-specific. Accessing project settings To view the project settings in a project at any time, click on the project name from the central pane of any layout. -
Page 263: Project Settings In The Properties Pane
Barco Media Server XPR-Series User Guide Appendix G: Project settings Figure G.3. Window menu Properties Project settings in the Properties pane Figure G.4, Properties pane showing project settings” shows a project's settings in the Properties pane. Barco Pn: 60600325... - Page 264 Appendix G: Project settings Barco Media Server XPR-Series User Guide Figure G.4. Properties pane showing project settings Barco Pn: 60600325...
-
Page 265: Project Name
Barco Media Server XPR-Series User Guide Appendix G: Project settings G.2.1 Project name X-Agora displays the name of the project at the top of the Properties pane. G.2.2 SMPTE The SMPTE settings allow you to tweak the project when the SMPTE signal is noisy or weak. -
Page 266: Preferences
Appendix G: Project settings Barco Media Server XPR-Series User Guide • Surface gain: Shows the amount of light that is reflected by all the objects in your project. (The standardized default value is 1.) G.2.6 Preferences • Hide projectors in Programming layout: Uncheck this box to see the project- ors when in the Programming layout. -
Page 268: H Supported 3D, Audio, Image, And Video Formats
Barco Media Server XPR-Series User Guide Appendix H: Supported 3D, audio, image, and video formats Supported 3D model formats H.1.1 General information Supported formats for import X-Agora supports .fbx, .obj, .dwg, .dxf, and .svg. Those file types can be separated in two categories: modeling software formats (.fbx, .obj) and CAD drawing formats (.dwg,... -
Page 269: Using Sketchup
Barco Media Server XPR-Series User Guide Appendix H: Supported 3D, audio, image, and video formats Figure H.1. Project properties units H.1.3 Using Sketchup Before exporting a file from Sketchup, the units must be in meters. Go to Window → Model Info. -
Page 270: Sketchup Export 3D Model
Appendix H: Supported 3D, audio, image, and video Barco Media Server XPR-Series User Guide formats Figure H.3. Sketchup export 3D model Choose the Export type in the Export type field of the Export Model. The recommended formats are OBJ and FBX. For either format you must click on the Options button for more parameters and check the Swap YZ coordinates (Y is Up) check box. -
Page 271: Sketchup Obj Export Options
Barco Media Server XPR-Series User Guide Appendix H: Supported 3D, audio, image, and video formats Sketchup Exporting OBJ format Figure H.4. Sketchup OBJ Export Options Barco Pn: 60600325... - Page 272 Appendix H: Supported 3D, audio, image, and video Barco Media Server XPR-Series User Guide formats Sketchup Exporting FBX format Figure H.5. Sketchup FBX Export Options The export options for the FBX format are a bit different. You can choose either to sep- arate disconnected faces or not to separate them.
-
Page 273: Using Autodesk 3Ds Max
Barco Media Server XPR-Series User Guide Appendix H: Supported 3D, audio, image, and video formats Figure H.6. Sketchup AutoCAD (DWG) Export Options For more information on Sketchup, see the [Sketchup] website at http://www.sketchup.com/. H.1.4 Using Autodesk 3DS Max Before exporting a file from Autodesk 3DS Max, the units must be in meters. - Page 274 Appendix H: Supported 3D, audio, image, and video Barco Media Server XPR-Series User Guide formats Figure H.7. 3DS Max Units setup 3DS Max Exporting OBJ format To export in OBJ format, make sure that the project has the correct scale by changing the system unit.
- Page 275 Barco Media Server XPR-Series User Guide Appendix H: Supported 3D, audio, image, and video formats Figure H.8. 3DS Max System Units Setup This helps ensure that your exports have the same size as your import into X-Agora. To scale the whole project to those values, change the value of the grid spacing.
-
Page 276: 3Ds Max Obj Export Options
Appendix H: Supported 3D, audio, image, and video Barco Media Server XPR-Series User Guide formats Figure H.9. 3DS Max OBJ Export Options The precision is at your discretion, but it affects the size of the exported file. If you changed the project settings to match the size, you can export your OBJ file with the same settings as before, but make sure you set the Scale to 1. -
Page 277: Using Autodesk Maya
Barco Media Server XPR-Series User Guide Appendix H: Supported 3D, audio, image, and video formats 3DS Max Exporting DWG format To export with the DWG or DXF format, choose AutoCAD 2013 DWG in the Export version field. The rest of the parameters are at your discretion. See Figure H.11, Exporting to AutoCAD File”. - Page 278 Appendix H: Supported 3D, audio, image, and video Barco Media Server XPR-Series User Guide formats Figure H.12. Maya Plug-in Manager Files of types will now have OBJ export available in the list of possible formats. You can export with the default parameters.
-
Page 279: Maya Fbx Export
Barco Media Server XPR-Series User Guide Appendix H: Supported 3D, audio, image, and video formats Figure H.13. Maya OBJ export default parameters Maya Exporting FBX format For Maya, the default values are correct for exporting FBX files. Figure H.14. Maya FBX export... -
Page 280: Using Maxon Cinema 4D
Appendix H: Supported 3D, audio, image, and video Barco Media Server XPR-Series User Guide formats H.1.6 Using Maxon Cinema 4D Before exporting a file from Maxon Cinema 4D you must set your project scale to 1. See Figure H.15, Cinema 4D—Project Scale”. -
Page 281: Supported Audio Formats
Barco Media Server XPR-Series User Guide Appendix H: Supported 3D, audio, image, and video formats Figure H.17. Cinema 4d FBX export Cinema 4d Exporting DWG/DXF format Cinema 4D does not support the DWG format. For more information on Cinema 4D, see the [Cinema 4D Prime] page at the Maxon website at http://www.maxon.net/products/cinema-4d-prime. -
Page 282: Supported Image Formats
Appendix H: Supported 3D, audio, image, and video Barco Media Server XPR-Series User Guide formats Supported image formats X-Agora supports several image file formats, including... • DPX • JPG • OpenEXR • PNG • TIFF Image sequences can be converted to video files using X-Agora Media Encoder (p.137). - Page 283 Barco Media Server XPR-Series User Guide Appendix H: Supported 3D, audio, image, and video formats Note Media Encoder assumes media is gamma-corrected (as opposed to linear or log). Encoding with X-Agora Media Encoder helps ensure that your video files...
-
Page 284: I Keyboard Shortcuts
Barco Media Server XPR-Series User Guide Appendix I: Keyboard shortcuts Viewport keyboard and mouse shortcuts Manipulation of 3D objects Scale: Translate: Viewport camera Center camera on selected ob- ject: Orbit: Pan: Toggle object/world axis: Space+O (alpha O) Reset View: Home... -
Page 285: Global Keyboard Shortcuts
Barco Media Server XPR-Series User Guide Appendix I: Keyboard shortcuts Zoom a specific part of the Alt and drag Timeline Global keyboard shortcuts Exit Alt+F4 (Alt+F4 gives you the option of saving or not saving your work, before exiting the X-Agora Designer.) -
Page 286: J Trouble Shooting
Barco Media Server XPR-Series User Guide Appendix J: Trouble shooting This appendix offers help in trouble shooting both the hardware of the Barco Media Server and the X-Agora software that runs on it. Barco Media Server trouble shooting Use Table J.1, Trouble-shooting matrix” to trouble-shoot problems with the Barco Media Server. - Page 287 Barco Media Server XPR-Series User Guide Appendix J: Trouble shooting Problem Possible cause Remedy The Master Power switch is not Make sure that the Master Power switch on the rear panel is ON. The power supply is not connec- Make sure power supply is connec- ted to a valid power source.
- Page 288 Appendix J: Trouble shooting Barco Media Server XPR-Series User Guide Problem Possible cause Remedy The connections may be incorrect. Make sure that the cable is seated correctly and that the thumb- screws are tight. The suggested cable length has Be sure not to exceed maximum been exceeded.
- Page 289 Barco Media Server XPR-Series User Guide Appendix J: Trouble shooting Problem Possible cause Remedy This is a possible cable or network Check all of the Ethernet cables switch issue. and verify that they are plugged If you are using a network switch,...
-
Page 290: X-Agora Trouble Shooting
Appendix J: Trouble shooting Barco Media Server XPR-Series User Guide X-Agora trouble shooting This section offers help with project recovery, viewing logs, restarting X-Agora service, generated reports, and synchronizing Players. J.2.1 Project recovery Concepts related to project recovery include: taking snapshots, autosaving, and importing and exporting projects. -
Page 291: Snapshot Name
Barco Media Server XPR-Series User Guide Appendix J: Trouble shooting Type a name for your custom snapshot in the Snapshot Name field, and click OK. Figure J.2. Snapshot Name Recovering snapshots To recover a snapshot, follow these steps: Open a project from X-Agora Designer. -
Page 292: Restore Snapshot Dialog Box
Appendix J: Trouble shooting Barco Media Server XPR-Series User Guide Figure J.4. Restore Snapshot dialog box Wait for X-Agora Designer to load the restored project. The restored snapshot overwrites the working copy. Autosave Use the Project Settings to set the period between automatic saves of your project. This helps ensure that, for example, in the case of a power outage, you do not lose too much unsaved work. - Page 293 Barco Media Server XPR-Series User Guide Appendix J: Trouble shooting Figure J.5. Export project menu Figure J.6. Export project dialog box Figure J.7. Import project menu Barco Pn: 60600325...
-
Page 294: Viewing Logs
Appendix J: Trouble shooting Barco Media Server XPR-Series User Guide Figure J.8. Import project dialog box J.2.2 Viewing logs Go to the Outputs layout. Click on the All Logs button in the Player map to view all logs. Click on the LOG button directly on a player to view the log of that player. -
Page 295: Report Export
Barco Media Server XPR-Series User Guide Appendix J: Trouble shooting Select Report. Choose the start date and end date. Make sure that you choose a small enough period, so the problem can be assessed appropriately. See Figure J.10, Report Export”. -
Page 296: Synchronizing Players
If the two machines see each other, but they still cannot sync, it is possible that they have a network share issue. By default, all Barco Media Servers are pre-configured to connect to other Barco Media Servers correctly, so this problem should not happen unless the share permissions or user account settings were modified manually. - Page 297 Barco Media Server XPR-Series User Guide Appendix J: Trouble shooting To fix the issue: Open the X-Agora Agent on the Player machine (double-click on the Agent icon in the notification area). Enter the username and password of the Server machine, and click on Connect to Network Share.