Table of Contents
Advertisement
TM
www.coolicam.com
User's Manual
1. Introduction
Congratulations on purchasing the Stylus 1000. Using the latest innovations in technology the Stylus 1000 offers fun,
affordable and easy to use digital imaging.
Although you probably want to get started right away, please take a few minutes to read this guide and familiarise yourself
with your new Stylus 1000. Your new Stylus 1000 will take approximately 20 Hi-Res (High Resolution) or 80 Low-Res
(Low Resolution) images, which you upload to your PC (Personal Computer) running Windows® 98 and Windows® Me or
Macintosh™ running OS 8.6 - 9.1 via the USB (Universal Serial Bus) port.
You can also use your Stylus 1000 to capture not only snaps of your family and friends, but also video of them in action.
Your Stylus 1000 can also be used as a Web Cam. If you have an internet connection and microphone (not supplied) you
can chat face-to-face with friends and colleagues, conferencing in real time.
Please note that your images are stored on your Stylus 1000's internal memory. When you have taken your images, the
Stylus 1000 will wait for 30 seconds and then automatically switch to Stand-by mode, which draws a constant trickle of
power from the battery.
1
Advertisement
Table of Contents

Subscribe to Our Youtube Channel
Related Manuals for Cool-Icam CIC-101


Summary of Contents for Cool-Icam CIC-101
-
Page 1: Introduction
www.coolicam.com User’s Manual 1. Introduction Congratulations on purchasing the Stylus 1000. Using the latest innovations in technology the Stylus 1000 offers fun, affordable and easy to use digital imaging. Although you probably want to get started right away, please take a few minutes to read this guide and familiarise yourself with your new Stylus 1000. -
Page 2: Table Of Contents
System Requirements Package Contents Software Installation For Windows® Users: 5.1 How to install the Digital Camera Manager Software 5.2 How to install ArcSoft® Softwares 5.3 How to install Microsoft® NetMeeting™ 5.4 How to install Adobe® Acrobat® Reader For Macintosh™ Users: 5.5 How to install the Digital Camera Driver Software... -
Page 3: System Requirements
If the setup screen doesn’t appear after loading the CD, then you can manually start it by double clicking the “My Computer” Icon on your desktop, then double-clicking the icon for the CD-ROM drive. When the CD-ROM window opens, double-click the “digital camera” icon. -
Page 4: How To Install Arcsoft® Softwares
5.2 How to Install ArcSoft® Software Introduction to the Software PhotoStudio® 2000 PhotoStudio® 2000 is a full-featured, easy-to-use digital image-editing program that provides a complete set of photo editing and retouching tools, plus a wide selection of special effects and enhancements. Its powerful features include a wide variety of input and output options, layers, multiple undo and redo functions, image management tools, editable text, multiple le format support and a lot more. -
Page 5: How To Install Adobe® Acrobat® Reader
For Macintosh™ Users: You are now able to enhance the resolution of your taken images by using the Digital Camera Driver. The images can be converted to higher resolution automatically by using a driver named “WWL Mac Installer”. Or you can use the “Digital Camera Driver”... -
Page 6: How To Install Arcsoft® Softwares
5.5.4 How to Uninstall Digital Camera Driver (with enhancement): To uninstall the Digital Camera Driver (with enhancement), you have to remove 3 les located in different folders and restart your Mac. The 3 les are listed below. “WWL Mac” in Control Panel Folder “WWL Mac”... -
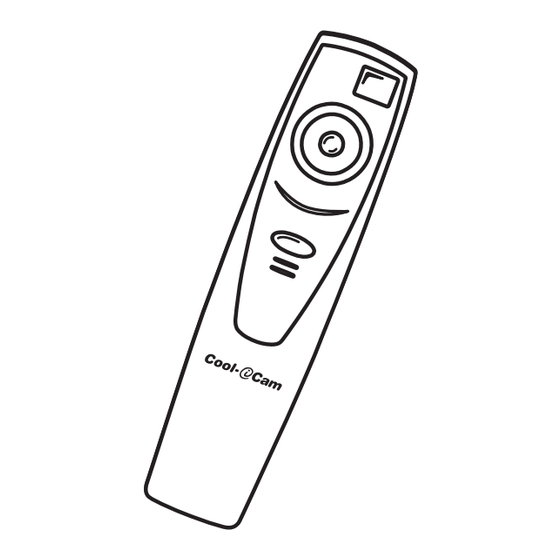
Page 7: Getting To Know Your Stylus 1000
7. Getting to Know Your Stylus 1000 Front View Refer to the picture below for a quick overview for your Stylus 1000. 7.1 Shutter Button The Shutter Button has 5 functions. Although these are covered in more detail later in this manual, please nd below a brief description. -
Page 8: Power
7.5 Power 7.5.1 Stand-by Mode After a period of 30 seconds inactivity, the Stylus 1000 will switch to Stand-by Mode automatically and the LCD will go blank. All images taken will not be lost as they are stored in the Stylus 1000’s memory. Simply press the Mode Button to reactivate your Stylus 1000. -
Page 9: Self-Timer Mode
For Windows® Users: 10.1 Running the Digital Camera Manager • Select the Digital Camera Manager icon from the Digital Camera Manager program group on the Windows Start Menu or double-click the Digital Camera Manager short-cut icon on the desktop. • You can now start to upload your images from your Stylus 1000 by following the steps in Section 10.3:... -
Page 10: Quick Reference
Important Notes: You can use the Digital Camera Manager to upload images taken by your Stylus 1000 at any time whether or not the Stylus 1000 is full. Connect your Stylus 1000 to your PC via the USB cable. Plugging the USB connector into the Stylus 1000 will cause it to reset and issue a double beep but all stored images will remain. -
Page 11: Creating & Uploading Movie Clips
Resolution supports 20 frames of video. • When the Stylus 1000 is full, attach it to your PC via USB and run the Digital Camera Manager. • You can now start to create your own movie clips by following these steps: Switch the interface to DSC (Digital Still Camera) Mode by clicking the images stored in your Stylus 1000. -
Page 12: For Macintosh™ Users: Mac
1. Switch the interface to Live Video Mode by clicking the 2. During your Digital Camera Manager installation a folder called “Album” has been automatically created in the bottom right section of the Digital Camera Manager. Highlight the le called “C:/Windows/Desktop/Album” in the bottom right hand corner. -
Page 13: How To Use Other Software
11. How to Use Other Software For Windows® Users: Alternatively you can upload your images directly from your Stylus 1000 into ArcSoft PhotoStudio®, PhotoFantasy™, PhotoPrinter® and VideoImpression™. 11.1 How to use PhotoStudio® 2000 1. Select the “PhotoStudio® 2000” icon from the “ArcSoft Camera Suite” program group on the Windows® Start Menu. You can now start to download your stored images from your Stylus 1000 by the following steps: 2. -
Page 14: How To Use Arcsoft Photoprinter® 2000
11.3 How to use ArcSoft PhotoPrinter® 2000 1. Select the “PhotoPrinter® 2000” icon from the “ArcSoft Camera Suite” program group on the Windows® Start Menu. 2. Choose the “Page Layout”. The selected page layout will on shown. 3. Click “Get Photo” and then “Acquire”. Select “STV0680 Camera” as source. The capture interface will show up. To capture 1 image, select the wanted image and click “Capture”. -
Page 15: How To Use Adobe® Acrobat® Reader
11.6 How to use Adobe® Acrobat® Reader Adobe® Acrobat® Reader enables you to view document in.pdf format For more details go to www.adobe.com/acrobat For Macintosh™ Users 11.7 How to use PhotoStudio® 2000 1. Before you use PhotoStudio® 2000, make sure the “STV0680 Capture”/”WWL Mac Import” is placed in the Plug-ins folder in the PhotoStudio folder. -
Page 16: How To Use Arcsoft Videoimpression
11.10 How to use ArcSoft VideoImpression™ 1.5 Lets make a video! Follow these basic steps to make your rst video. Step 1 Click on new Icon. Step 2 Using the Step 3 Double click on the Static.avi screen in the video template selection and a copy will appear in the rst large frame on the storyboard on the bottom. -
Page 17: Customer Support
12. Customer Support Summit Technology Group 13E Easy Street Bound Brook, NJ 08805 Helpline: 888-235-0808 Website: http://www.coolicam.com Fill in the registration card now! See your local customer support details on the registration card enclosed. 13. ArcSoft World Wide Customer Support For Japan ArcSoft Japan Support Center (Tokyo) Tel: +81-03-3834-5256... -
Page 18: Troubleshooting
Take your images in better light condition. Upload saved images immediately, then replace battery. Put “Digital Camera” CD in CD ROM drive. Go to the computer desktop. Right click on “My Computer”. Click “Properties”. Select “Device Manager”. Double click on “CD-ROM”, double click on “CD-R”... -
Page 19: Battery Guidance
Take your images in better light condition. Put “Digital Camera” CD in CD ROM drive. Upload all images to your Mac and replace batteries. http://www.coolicam.com... -
Page 20: Technical SpeciCations
16. Technical Specications • Memory: 2Mbyte SDRAM • Image Performance for Video on Web-cam: • 9fps (frame per second) for Normal Resolution - 352 x 288 pixels • 16fps for Low Resolution - 176 x 144 pixels • Still Image Resolution: •...
Need help?
Do you have a question about the CIC-101 and is the answer not in the manual?
Questions and answers