Table of Contents
Advertisement
Advertisement
Table of Contents

Related Manuals for B meters MAG


Summary of Contents for B meters MAG
- Page 1 ELECTROMAGNETIC FLOW METERS INSTRUCTION MANUAL User Manual v2.0...
- Page 2 This document must be delivered to the user before machine installation and commissioning. Symbols used in this manual In order to draw the attention of all personnel working with the equipment supplied by B METERS srl, the points of particular importance described in this manual are highlighted with graphic signs and different colors that will make them easily identifiable.
- Page 3 2.8.1 Hart protocol available for compact version ..................12 3. TECHNICAL SPECIFICATIONS ......................13 OVERALL DIMENSIONS ..........................13 3.1.1 Version MAG-C (POWERED VERSION) ....................13 3.1.2 Version MAG-C (BATTERY VERSION) ...................... 13 3.1.3 Version MAG-S (POWERED VERSION) ....................14 3.1.4 Version MAG-S (BATTERY VERSION) ...................... 14 CERTIFICATES AND APPROVALS ......................
- Page 4 METAL PIPES WITH INSULATING ADAPTERS ..................51 METAL AND PLASTIC PIPES ........................52 PIPES EQUIPPED WITH CATHODIC PROTECTION ................... 52 7. MAG CONVERTER PROGRAMMING ....................53 CONVERTER CONFIGURATION METHODS....................53 7.1.1 Software MCE configuration ......................... 53 7.1.2 Converter Password............................54 PROGRAMMING ..............................
-
Page 5: Manufacturer's Statement
For applications that require high working pressures or use of substances that may be dangerous for people, the environment, equipment or anything else: In case of pipe breakage, B METERS srl recommends to take the necessary precautions such as adequate positioning, protection or installation of a guard or safety valve, before installing the CONVERTER in the COMPACT version. -
Page 6: Preliminary Notes
NOTE: All B METERS srl software packages are available on the USB flash drive key that accompanies the product. The software can also be downloaded from the website www.bmeters.com by accessing the Download Area. A free registration will be required after which you can download the configuration software for your product. - Page 7 1.5 APPLICATIONS The MAG flow meter is widely used for purposes in which it is important to measure the flow rate of electrically conductive liquids.
- Page 8 2. PRODUCT DESCRIPTION 2.1 OPERATING PRINCIPLE The MAG has been designed with the aim of fulfillment of all the requirements of modern water management systems, through a flexible and hybrid electronics which, depending on the model, offers various power supply solutions.
-
Page 9: Available Versions
2.2 AVAILABLE VERSIONS The MAG converter is available in 2 versions, and can cover all the different types of applications depending on the category of system to be monitored. Specifically, B METERS srl produces the converter in the following versions:... -
Page 10: Power Batteries
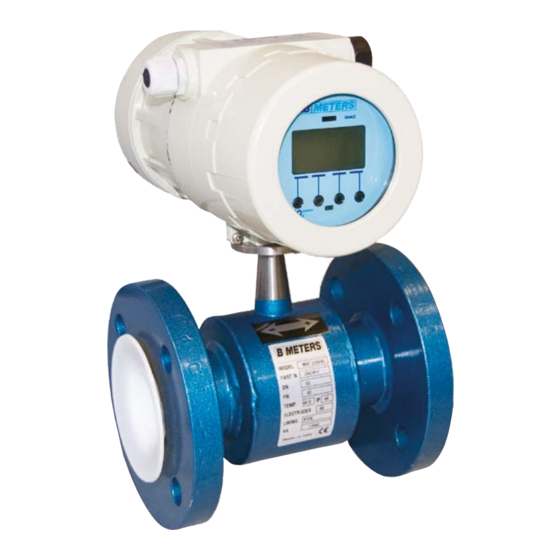
2.3 CONVERTER INSTALLATION TYPES Depending on the version of the MAG converter, it can be installed in the system in two different ways: COMPACT VERSION REMOTE VERSION (Fig. 3) (Fig. 4) Fig. 3 | Compact Version Fig. 4 | Remote version... -
Page 11: Data Safety
MAG via IrCOM or RS485 Modbus serial interfaces, that can be connected to any PC, laptop and/or tablet with a Windows operating system. -
Page 12: Remote Data Reading
The converter can be equipped with an optional module (installable only by the manufacturer) which acquires the Hart connectivity on the 4-20mA output, granting the access to all quantities measured by the device as well as to the operating parameters. A MAG converter equipped with Hart connectivity has no Modbus connectivity on RS485. -
Page 13: Technical Specifications
3. TECHNICAL SPECIFICATIONS 3.1 OVERALL DIMENSION The overall dimensions of single versions of the MAG converters are shown below. 3.1.1 Version MAG-C (MAINS POWERED VERSION) 170,85 105,5 67,5 90° 90° Fig. 5 | Dimensions MAG-C (MAINS POWERED VERSION) 3.1.2 Version MAG-C (BATTERY VERSION) - Page 14 3.1.3 Version MAG-S (MAINS POWERED VERSION) 170,85 2" Mounting Pole 105,5 67,5 90° 90° 178,85 Fig. 7 | Dimensions MAG-S (MAINS POWERED VERSION) 3.1.4 Version MAG-S (BATTERY VERSION) 2" Mounting Pole 170,85 105,5 141,5 90° 90° 178,85 Fig. 8 | Dimensions MAG-S (BATTERY VERSION)
-
Page 15: Certificates And Approvals
NMI M 10: Meters Intended for the Metering of Water in Full Flowing Pipes Depending on the sensor connected to the MAG converter, other certifications could be applicable; refer to the documentation on the specific sensor for more information:... -
Page 16: General Technical Features
3.3 GENERAL TECHNICAL FEATURES The table below contains the technical data of the MAG converter in all versions produced by B METERS. Features Mains Powered version Battery version Aluminium Aluminium Casing IP68 IP68 90...264 Vac √ 12/24 Vac/dc √ Power supply Battery powered [estimated √... - Page 17 Features Mains Powered version Battery version Graphic LCD 128x64 px, Display viewable area 50x25mm, √ √ white backlight Through 4 onboard buttons Through IRCOM / RS485 interface with √ √ Programming relevant software Memory 4 MB flash, √ √ Process memory 200.000 data lines •...
- Page 18 Upstream diameter ≥ 5 DN Downstream diameter ≥ 3 DN The following accuracy class refers to the measurement conditions during the calibration at the B METERS test benches: Model Accuracy class Mains Powered version Class 02 2 ±0,2 % ± 2mm/s...
- Page 19 Model Accuracy class Battery version Class 05 5 ±0,5 % ± 5mm/s CLASS 05 3,00 2,50 2,00 1,50 1,00 0,50 0,00 -0,50 -1,00 -1,50 -2,00 -2,50 -3,00 10,0 Speed [m/s] Fig. 10 | Battery version User Manual v2.0...
-
Page 20: Installation
4. INSTALLATION 4.1 MOVING Given the small size and the low weight of the REMOTE version of the MAG converter, there are no particular precautions/indications that need to be followed in order to carry out its movement and/ or installation at the place of use. - Page 21 4.2 CONVERTER POSITIONINIG 4.2.1 Positioning/installation of the converter in COMPACT version For the correct positioning of the converter in the COMPACT version, refer to the INSTALLATION manual of the sensors where all correct and incorrect mounting positions are described and illustrated.
- Page 22 4.2.2 Positioning/installation of the converter in REMOTE version The converter in REMOTE (distant) version can be installed on a pole/tube (Fig. 16 or on a wall (Fig. 17) panel or control panel using the special brackets/flanges that were supplied with the converter. Installation on a tube: The device is designed to be fixed to a 2-inch diameter tube (see 1, Fig.
- Page 23 4.2.3 Relation between conductivity and cable length Relations between the conductivity of the liquid and the maximum allowed cable length for MAG Mod. powered Mod. battery Permissible length Conductivity (es/cm) Relations between the conductivity of the liquid and the maximum allowed cable length for battery version...
-
Page 24: General Installation Requirements
4.3 GENERAL INSTALLATION REQUIREMENTS IMPORTANT NOTE! THE SENSOR MUST ALWAYS BE COMPLETELY FULL OF LIQUID! Fig. 19 | The pipe must always be completely full of liquid 4.3.1 Vibrations DO NOT expose the flowmeter to vibrations and/or movements that could affect its performance and duration. - Page 25 4.3.3 Negative pressure Avoid vacuum conditions in the pipe. These can damage the coating of the flowmeter and move the electrodes from their correct position. 4.3.4 Protection from direct sunlight Protect the flowmeter if exposed to direct sunlight. Fig. 23 | Avoid direct exposure to sunlight 4.3.5 Operating temperatures •...
-
Page 26: Installation Conditions
4.4 INSTALLATION CONDITIONS 4.4.1 Positioning in relation to the plant To ensure optimal working conditions, the flowmeter must be installed correctly inside the system. Correct and incorrect installation positions are described and illustrated below. The flowmeter must remain below the hypothetical blue line (piezometric level line), which connects the two levels of fluid to be measured (Fig. - Page 27 “T” connection downstream of the flowmeter Fig. 28 | Installation on U-shaped tube Three-dimensional curves Fig. 29 | Installation near three-dimensional bends User Manual v2.0...
- Page 28 IMPORTANT NOTE: THE SENSOR MUST ALWAYS BE COMPLETELY FULL OF LIQUID! To ensure that the sensor is always completely filled with liquid, it is important to install it in the correct position ( √ ) and avoid all possible incorrect positions ( This installation DOES NOT guarantee a pipe √...
- Page 29 √ The position on the left secures the sensor full Central and right positions DO NOT guarantee of liquid. a pipe full of liquid. Fig. 34 | Correct (LH) and incorrect installation (central and RH) We recommend installing gate valves downstream of the meter. Fig.
- Page 30 DO NOT install the sensor on vertical pipes with a free outlet or at the highest point of the pipe system. Fig. 37 | Incorrect installation 4.5 INSTALLATION 4.5.1 Important instructions on installation In case of inadequate distance between the sensor and the pipe, use elastic pipe fittings (Fig. 38). Do not try to move the pipe closer to the sensor by tightening the bolts (Fig.
- Page 31 Maximum allowable deviation of the pipe flange faces is 0.5 mm. Fig. 43 | Maximum allowable deviation 4.5.2 Sensor support √ DO NOT USE the sensor as a support for the pipe. The pipe must be the support for the flowmeter. Fig.
- Page 32 All the values are theoretical and have been calculated for optimal conditions and with the use of carbon steel flanges. Fig. 46 | Flange tightening Maximum tightening torque [Nm] Sensor MAG BOLTS PTFE Ebonite 4xM12 4xM12...
- Page 33 4.5.4 Underground installations The remote sensor is protected by IP68/ NEMA 6P and can be positioned underground. We recommend the use of gravel for at least 300mm (12 inches) around the sensor. This provides drainage and prevents dirt solidification on the sensor. In addition, it facilitates the location of the same if new excavations are required.
- Page 34 4.6 HOW TO AVOID AIR POCKETS IN THE PIPELINES This paragraph is intended to help the designers and users of electromagnetic flowmeters to create the best installation layout that guarantees optimum performance of the meter, taking into particular consideration the problem of the presence of air pockets in the pipe. Fig.
- Page 35 Fig. 49 | Air pockets inside the pipe The greater the diameter of the pipe, the higher the speed of the liquid will be required to move the air pockets away from the flowmeter. It is also important to understand what kind of effect the water pressure has on the nature of the air pocket inside the pipe.
- Page 36 A minimum slope in an ascending flow of 1 : 500 or higher is recommended in order to stimulate the entrapped air pocket to move away from the meter. Drawings are made with an exaggerated slope for greater clarity Fig. 52 | Flowmeter with slight ascending slope with air vent at the top A second solution is to mount the flowmeter vertically with an upward flow stream, which ensures that the air always moves quickly past the meter.
- Page 37 The design of the vent valve is essential to ensure that the entrapped air pockets are released. Pneumatic valves or vacuum switches should be avoided. Instead, it is preferable to use combined pneumatic valves that incorporate an automatic orifice, as well as a large kinetic orifice. These valves ensure that the largest volumes of air are released quickly and effectively while filling the pipe.
- Page 38 4.7 INSTRUCTIONS FOR DIAMETER REDUCTION In the case of diameter reduction, please refer to the indications shown in the figure below. REFERENCES Vent Recommended maximum vertex angle: 15° Flow rate meter Flow Discharge Flowmeter type Full Bore Fig. 55 | Installation on pipes with diameter reduction The diameter reduction introduces a pressure drop in the system.
-
Page 39: Electrical Connection
5. ELECTRICAL CONNECTION In order to properly connect electrical elements of the MAG converter to the power supply, and to the junction box (in REMOTE version), please refer to the wiring diagram shown in paragraph 5.3.1 (Fig. 56). The use of cables not supplied or certified by B METERS may jeopardize the correct functioning of the system, and it will void the warranty. - Page 40 5 mm up to a maximum diameter of 12 mm (see 4, Fig. 57). Note: The cables supplied by B METERS srl are not suitable for being run directly underground and/or underwater, and must not have direct exposure to sunlight. The technician in charge must therefore provide suitable protections such as: corrugated pipes, raceways, or shielded cables.
- Page 41 The cables that protrude from the sensor must be connected to the junction box positioned under the converter. The MAG converter can be installed on a wall or on a pole by using the brackets supplied with the remote version as shown in figures 16 and 17, pag. 22.
- Page 42 The connected instrument (PLC/external pulse counter) is an active 1 1 2 digital input which supplies the voltage required to detect the pulses. The MAG acts as a digital switch (logical level). [Maximum voltage: 5-30Vdc; maximum electrical current 50mA]. Fig. 61...
- Page 43 Active powered version The receiver 4…20mA connected to the instrument is a passive 1 1 2 milliamp-meter; the internal MAG 24Vdc power supply must be connected as shown in Figure 65. [Loop voltage 24Vdc; maximum impedance 800 ohm]. Fig. 65 Note 1: The pulse output and the output 4...20 mA is available only in loop powered mode in converters...
- Page 44 Absent or incorrect grounding will result in unpredictable failure (Fig. 67). Note: In the MAG REMOTE version, the sensor and the converter must be grounded using two separate wires (Fig. 67). Avoid placing the signal and power cables close together to minimize interference.
-
Page 45: Connection To The Power Supply
5.5 CONNECTION TO THE POWER SUPPLY THE ELECTRICAL CONNECTION OF THE DEVICE MUST BE CARRIED OUT BY QUALIFIED TRAINED PERSONNEL. Make sure that all electrical connections have been made correctly before connecting the unit to the power supply. Check the supply voltage on the plate. The unit may be supplied with voltage: VERSION POWER SUPPLY TYPE... - Page 46 Info: If cables in the coil are used, always use the ferrules for the connections in the terminal board and adequately insulate the shields. Info: use only cables supplied by B METERS srl. ATTENTION: After making all the necessary connections, make sure to properly tighten the cable glands and the cover, in order to protect the insulation of the cables and the electrical/electronic boards from humidity and water in case the converter is installed outdoors.
-
Page 47: Electrical Diagrams
5.7 ELECTRICAL DIAGRAMS 5.7.1 Connection with standard single-shielded electrode cable The shields must ONLY be connected on the converter side. Cavo Bobine Coils cable Electrodes cable Cavo Elettrodi Scatola separazione sensore Convertitore Separation box of the sensor Converter Fig. 69 | Standard single-shielded cables - C022 5.7.2 Connection with standard double-shielded electrode cable The shield of the coil cable must be connected ONLY on the converter side, as well as the INTERNAL shield of the electrode cable. - Page 48 5.8 SEPARATION CABLES Optional single-shielded electrode cables - C022 PVC outer jacket Shield Fig. 71 | Standard single-shielded electrode cables - C022 Optional double-shielded electrode cables - C028 C028 cables are provided with double shielding, one external, and one additional shielding of the single signal cables of the measuring electrodes only.
-
Page 49: Potential Equalization
6. POTENTIAL EQUALIZATION 6.1 GENERAL INDICATIONS The sensor must be grounded, as shown in the figures below, using the cables with a minimum section of 2.5 mm (recommended: 4 mm ). This will assure the potential bonding, noise reduction, and, in the case of a metal pipe, it will guarantee electrical continuity. - Page 50 Compact version grounding connections The sensor must be earthed using the appropriate ground screw placed on the converter casing. Grounding rod Fig. 74 | Compact version grounding connection 6.2 PLASTIC PIPES PLASTIC PIPE PLASTIC PIPE GROUNDING RINGS GROUNDING RINGS Grounding rod Fig.
- Page 51 6.3 METAL PIPES METAL PIPE METAL PIPE Grounding rod Fig. 76 | Grounding of sensor on metal pipes In the case of metal pipes with an insulating coating, follow the instructions for plastic pipes. 6.4 METAL PIPES WITH INSULATING ADAPTERS METAL PIPE METAL PIPE Grounding rod...
- Page 52 6.5 METAL AND PLASTIC PIPES METAL PIPE PLASTIC PIPE Grounding rod Fig. 78 | Grounding of the sensor on metal and plastic pipes (with grounding rings) 6.6 PIPES EQUIPPED WITH CATHODIC PROTECTION Particular attention must be paid when installing the product in the pipeline with cathodic protection. Isolate it from the pipeline by installing isolation bushings and washers on the bolts of the flange and connect a wire between the pipes, large enough to handle the cathodic current and the environmental effect.
- Page 53 To recall the unit for the next programming, use the magnetic key (see 1, Fig. 83) provided only with the MAG and slide it vertically on the front panel of the converter, to the point marked with: “ACTIVATE” (Fig. 84). As an alternative, push one of the 4 configuration buttons.
- Page 54 Select the communications RS485 (see 1, Fig. 85) or infra-red (see 2, Fig. 85) and click the button CONNECT (see 3, Fig. 85). Fig. 85 | Connection Window B METERS MAG It is possible to change the display language of the software menu by following this path: “Settings”...
- Page 55 Figure 87 shows the main screen of the MCE-link software properly connected to the converter. By accessing various pages, it is now possible to view the data and modify the operating parameters. Fig. 87 | Main Screen 7.2 PROGRAMMING As already described in the previous paragraph, the converter can be programmed by connecting the instrument to a PC on which the “MCE-Link”...
- Page 56 7.2.1 Data display description With reference to Figure 89, the converter display is divided into 3 main areas: • The top area (see 1, Fig. 89) contains the status information symbols, with indicators of battery life, power supply or power supply and battery recharge, as well as the alarm symbols and instantaneous reading of the flow rate (for more information on the icons that can be displayed and their meanings see paragraph “8.2.2 Identification and description of status icons”).
- Page 57 7.2.2 Status icons identification and description The icons shown on the display offer the user immediate information on the power supply status and on the possible problems that may occur during the operation. It is therefore very important to know in advance the meaning of each symbol. POWER SUPPLY ICON STATUS Main power supply Battery power supply (remaining)
- Page 58 Flow rate unit » Flow rate time base » Counters unit • TECHNICAL UNITS » Pulses unit » Specific weight » Temperature unit • MEASUREMENT FREQ » Measuring time OPTIONS » LCD backlight level (See Par. 7.3.1) • DISPLAY » Backlight off »...
- Page 59 » Pulse quantity » Pulses time ON • PULSES OUTPUT » Reverse flow rate » Active pulses output » Full scale frequency • FREQUENCY OUTPUT » Active frequency output » Enabled/disabled » Reverse flow » Max flow rate threshold » Min flow rate threshold •...
-
Page 60: Menu Preferences
8 0 seconds. » Measuring time Warning! Factory set time is 45 seconds. Any reduction of this factor will affect battery life when using the MAG in battery mode. • SCREEN Valid only for battery-powered versions; allows you to set the display backlight. - Page 61 MENU PREFERENCES • VISUALIZATION Allows you to define the display default information with following options: - T+ : Total positive counters - P+ : Partial positive counters - T- : Total negative counters » Last line - P- : Partial negative counters - NET : Net totalizer - Board date time/temperature - Process temperature/pressure (with optional module)
- Page 62 Only partial counters can be set to zero. To set the counters to zero from the MAG software, access the screen “READ” and press the button “ZERO” (see 1, Fig. 90) that refers to the partial counter that you want to reset.
-
Page 63: Menu Parameters
7.3.3 MENU PARAMETERS MENU PARAMETERS • KA ADJUSTMENT It allows the adjustment of the calibration factor KA. Caution! Changes to the KA factor can only be made by authorized persons. The KA factor must be the same as the coupled sensor; check it on the flow meter plate. - Page 64 It allows the setting of the local power supply frequency (50Hz o 60Hz) in order to minimize interference. To read and change the filter values from the MAG software program, access the screen “FILTERS” (Fig. 91) and change the filter values within indicated range.
- Page 65 • PULSE OUTPUT It allows the selection of the pulse volume. For MAG converters battery version, during the maximum flow rate of the process select a volume large enough so that the time interval between two consecutive pulses is greater than 1 second in order to preserve the battery life.
- Page 66 MENU I / O Select to disable the pulse output (which becomes PWM, pulse width modulation) » Active output freq. and frequency enable output. • PROGRAMMABLE OUTPUT It is possible to choose among the following options for the programmable output: - Enabled/disabled - Reverse Flow - Max flow threshold...
- Page 67 Displays the diagram of the measured flow rate. • SIMULATION MAG converter has an integrated flow simulator which checks and sets the pulse output to any connected device system. When the flow simulator is being used, the counter values are not increased.
-
Page 68: Menu Memory
Deletion of the converter memory. Select the log interval. Minimum 1 minute / Maximum 120 minutes. In battery powered MAG versions, priority is determined by measurement interval: (LOGGING>=MEASUREMENT). To read and change information stored in the memory in the program of the MAG converter, go to the screen “DATA LOG”... - Page 69 MENU MEMORY Fig. 93 | LOG interval To view the last line generated by the converter, select “Last log Settings.” The number of the last stored line will then be displayed. Then select “download log” to see the history of the available data. To save the data in a readable format in Excel, click on “save CSV.”...
-
Page 70: Maintenance
8.2 BATTERY INSTALLATION/REPLACEMENT ON BATTERY VERSION The battery pack is usually supplied SEPARATELY from the converter, therefore, before the MAG battery version is put into operation, the battery pack must be inserted in its housing and connected to the instrument according to the instructions provided below. - Page 71 BATTERY INSTALLATION/REPLACEMENT Insert the battery pack (see 1, Fig. 95) into the battery holder (see 2, Fig. 95) so that the power cable (see 3, Fig. 95) comes out of the bottom of the holder. When inserting the battery pack, be careful to match the grooves on the battery to the anti- rotation stops provided on the holder.
-
Page 72: Troubleshooting
9.1 MALFUNCTIONING AND POSSIBLE SOLUTIONS The following table summarizes the possible malfunctions that may occur during the use of the MAG converter, for which the possible causes and solutions to be adopted in order to restore correct operation of the flowmeter are listed. - Page 73 MALFUNCTIONING POSSIBLE CAUSE SOLUTION Check for the minimum required Caused by HYDRAULIC failure: linear distances upstream and Air bubbles or unstable flow downstream of the device. (vortex motion). The minimum Check for the presence and required linear distances correct installation of vents on upstream and downstream of the the pipe to avoid the presence of device were not complied with.
- Page 74 » Converter damaged. In case of remote configuration check for the electrical connections of [Interrupted excitation] separation cables. Refer to the procedure “DI10D_SENSORTEST” available from B METERS support (ticket@bmeters.com). » Empty pipe. » Air bubbles in the liquid. » Incorrect grounding.
-
Page 75: Repair Request Form
10.1 REPAIR REQUEST FORM The RMA module (MOD. 013 A) must be requested to the B METERS support (ticket@bmeters.com). It must necessarily be filled in all its parts and attached to the delivery note document. 11. PRODUCT DISPOSAL... -
Page 76: Contact Info
CONTACT INFO B METERS srl Via Friuli, 3 • Gonars 33050 (UD) • ITALY Tel: +39 0432 931415 Fax: +39 0432 992661 E-mail (sales/info): info@bmeters.com E-mail (support): ticket@bmeters.com Web: www.bmeters.com User Manual v2.0...
Need help?
Do you have a question about the MAG and is the answer not in the manual?
Questions and answers