Advertisement
Quick Links
Operation / 操作 / 작동
Electric Airless Sprayers
电动无气喷涂机
전기식 에어리스 도장기
- For portable spray applications of architectural paints and coatings -
- 适用于建筑涂料和涂层的便携喷涂应用 -
- 구조적 도장 및 코팅에 대한 휴대용 스프레이 분야 -
3300 psi (227 bar, 22.7 MPa) Maximum Working Pressure /
Important Safety Instructions / 重要安全说明 / 중요 안전 정보
Read all warnings and instructions in this manual. Save these instructions.
请阅读本手册的所有警告及说明。妥善保存这些说明。
이 설명서의 모든 경고와 지침을 읽고 , 이러한 지침을 보관해 두십시오 .
最大工作压力
™
ASM Zip-Spray
2700 Plus 110V: 247558
ASM AllPro Mach 8600 Plus 110V: 247561
™
ASM Zip-Spray
2700 Plus 240V: 247565
ASM H2700 Plus 110V: 247564
ASM H2700 Plus 240V: 247563
ASM AllPro Mach 11000 Plus 110V: 247562
™
ASM Zip-Spray
3100 Plus 110V: 247559
312536A
최대 허용 압력
/
Related Manuals
312537
312363 (English)
312364 (French)
312365 (Spanish)
310643
Advertisement

Related Manuals for ASM AllPro Mach 8600 Plus


Summary of Contents for ASM AllPro Mach 8600 Plus
- Page 1 312364 (French) 312365 (Spanish) 310643 ™ ASM Zip-Spray 2700 Plus 110V: 247558 ASM AllPro Mach 8600 Plus 110V: 247561 ™ ASM Zip-Spray 2700 Plus 240V: 247565 ASM H2700 Plus 110V: 247564 ASM H2700 Plus 240V: 247563 ASM AllPro Mach 11000 Plus 110V: 247562 ™...
-
Page 2: Fire And Explosion Hazard
Warnings Warnings The following are general warnings related to the setup, use, grounding, maintenance and repair of this equipment. Additional, more specific warnings may be found throughout the body of this manual where applicable. Symbols appearing in the body of the manual refer to these general warnings. When these symbols appear throughout the manual, refer back to these pages for a description of the specific hazard. -
Page 3: Personal Protective Equipment
Read fluid and solvent manufacturer’s warnings. For complete information about your material, request MSDS from distributor or retailer. • Check equipment daily. Repair or replace worn or damaged parts immediately with genuine ASM replacement parts only. • Do not alter or modify equipment. - Page 4 警告 警告 以下为与本设备的设置、使用、接地、维护及修理有关的一般性警告。此外,在本手册的其它适当地方还有更明确的 警告。本手册各处出现的标志系指这些一般性警告。当本手册的某处出现这些标志时,请回到以下各页以了解对具体 危险的说明。 警告 火灾和爆炸危险 工作区内的溶剂及涂料烟雾等易燃烟雾会点燃或爆炸。为避免火灾及爆炸: 仅在通风良好的地方使用此设备。 • 清除所有火源,如引火火焰、烟头、手提电灯及塑胶遮蔽布 (可产生静电火花) 。 • 当喷涂机使用易燃液体或在其附近使用易燃液体或用易燃液体进行冲洗或清洗时,要让喷涂机离开爆 • 炸性蒸气至少 20 英尺 (6 m) 。 保持工作区清洁,无溶剂、碎片、汽油等杂物。 • 存在易燃烟雾时不要插拔电源插头及开关电灯。 • 将工作区内的设备及导电物体接地。请阅读 接地 说明。 • 只能使用导电的软管。 • 朝桶内扣动扳机时,要握紧喷枪靠在接地桶的边上。 • 如果出现静电火花或感到有电击,要立刻停止操作。在找出并纠正问题之前,不要使用设备。 • 工作区内要始终备有灭火器。 • 皮肤注射危险 从喷枪、软管泄漏处或破裂的部件射出的高压流体会刺破皮肤。伤势看起来会象 " 只划了一小口 ",其实 是严重受伤,可能导致肢体切除。应即刻进行手术治疗。...
- Page 5 警告 警告 设备误用危险 误用设备会导致严重的人员伤亡。 • 不要超过额定值最低的系统部件的最大工作压力或温度额定值。请阅读所有设备手册中的技术数据。 • 请使用与设备的流体部件相适应的流体或溶剂。请阅读所有设备手册中的技术数据。 阅读流体及溶 剂生产厂家的警告。有关涂料的完整资料,请向涂料分销商或零售商索要材料安全数据表 (MSDS) 。 要每天检查设备。已磨损或损坏的零部件要立刻修理或更换,只能使用 ASM 的原装替换用零部件进 • 行修理或更换。 • 不要对设备进行改动或修改。 只能将设备用于其特定的用途。有关资料请与 ASM 公司的经销商联系。 • 让软管和电缆远离公共区域、尖锐边缘、移动部件及热的表面。 • • 不要扭绞或过度弯曲软管或用软管拽拉设备。 • 儿童和动物要远离工作区。 要遵照所有适用的安全规定进行。 • 疲劳时或在吸毒或酗酒之后不得使用此设备。 • 个体防护用品 在操作或维修设备时,或在进入设备的工作区时,必须穿戴适当的防护用品,以免受到严重损伤 (包括眼睛损伤) 、吸入有毒烟雾、烧伤以及听力损失。这些用品包括但不限于: 护目镜 • 流体和溶剂生产厂家所推荐的防护衣及呼吸器...
- Page 6 경고 경고 다음은 이 장비의 설정 , 사용 , 접지 , 유지보수 및 수리에 관한 일반적인 경고입니다 . 더 구체적인 경고가 이 설명서의 관련 부분에 추가로 제공될 수 있습니다 . 설명서 본문에 나타나는 기호는 이러한 일반 경고를 의미합 니다 . 설명서를 읽는 도중 이러한 기호를 만나면 이 페이지로 돌아와서 관련 위험에 대한 설명을 참조하십시오 . 경고...
- Page 7 명서의 기술 자료를 읽고 , 유체 및 솔벤트 제조업체의 경고를 읽으십시오 . 재료에 대한 전체 정보가 필요하면 유통업체 또는 대리점에게 MSDS 를 요청하십시오 . 장비는 매일 점검하십시오 . 마모되었거나 손상된 부품이 있으면 즉시 수리하거나 정품 ASM 부 • 품으로 교체하십시오 .
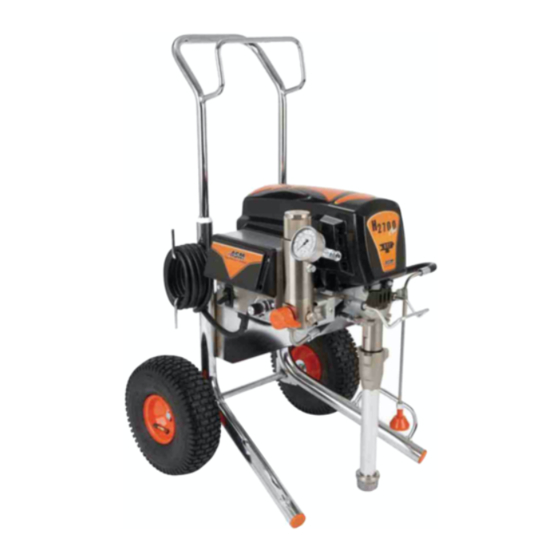
- Page 8 部件辨认 구성품 식별 Component Identification / Component Identification / 部件辨认 / 구성품 식별 English 中文 한국어 ON/OFF switch ON/OFF 开关 온 / 오프 스위치 Pressure control 压力控制器 압력 조절기 Prime / Spray valve 填料 / 喷涂阀 주입 / 스프레이 밸브 过滤器...
- Page 9 接地 접지 Grounding / Grounding / 接地 / 접지 English 中文 한국어 The sprayer must be 必须将喷涂机接地。 도장기는 반드시 접지 grounded. Grounding 通过接地,可给电流 해야 합니다. 접지를 提供静电聚集时或发 하면 정전기 축적으로 reduces the risk of static and electric 生短路时逃逸的通路, 인해 또는 회로 단락 shock by providing an 减少出现静电和电击...
- Page 10 接地 접지 Grounding / Ground 120 volt plug ti4297a ti4295 Power Requirements Extension Cords • Do not modify plug! If it will • 100-120V units require • Use an extension cord with an • If an extension cord is not fit in outlet, have grounded 100-120 VAC, 50/60 Hz, undamaged ground contact.
- Page 11 接地 접지 Grounding / Pails • Solvent and oil/based flu- • Do not place pail on a noncon- • Grounding a metal pail: con- • To maintain grounding ids: follow local code. Use only ductive surface such as paper nect a ground wire to the pail continuity when flushing conductive metal pails, placed or cardboard which interrupts...
- Page 12 泄压步骤 압력 해제 절차 Pressure Relief Procedure / Pressure Relief Procedure / 泄压步骤 / 압력 해제 절차 ti4272a ti4265a WASTE RESÍDUOS À JETER DESECHO ti2595a Pressure Relief Turn power OFF. Wait Lock gun trigger safety. Turn pressure to lowest Put drain tube in pail. Turn 7 seconds for power Remove guard and setting.
- Page 13 设置 설치 Setup / Setup / 设置 / 설치 Connect ASM airless hose Connect other end of hose Tighten securely. Remove tip guard. to sprayer. to gun. Tighten securely. 将 ASM 无气软管连接到喷涂 将软管的另一端连接到喷 牢牢拧紧。 取下喷嘴护罩。 机上。 枪上。 牢牢拧紧。 ASM 에어리스 호스를 도장...
- Page 14 Check inlet strainer for clogs Fill throat packing nut with Turn power OFF. Plug power supply cord into and debris. ASM Packing Seal to prevent a properly grounded premature packing wear. electrical outlet. Do this each time you spray. 检查入口过滤器是否有堵塞...
- Page 15 设置 설치 Setup / Turn prime valve down. Place siphon tube set in grounded metal pail partially filled with flushing fluid. Attach a ground wire to pail and to true earth ground. Do 1. - 5. of Startup to flush out storage oil shipped in sprayer. Use water to flush water-base paint and mineral spirits to flush oil-base paint and storage oil.
- Page 16 起动 시작 Startup / Startup / 起动 / 시작 ti4266a 15sec Turn pressure control to Turn power ON. Increase pressure 1/2 to Turn prime valve up to close lowest pressure. start motor and allow fluid drain valve.Take spray gun to circulate through drain trigger safety OFF.
- Page 17 起动 시작 Startup / ti4271a Hold gun against grounded Inspect for leaks. Do not stop Place siphon tube in paint Trigger gun again into metal flushing pail. Trigger leaks with hand or a rag! If leaks pail. flushing pail until paint gun and increase fluid occur, do Pressure Relief.
- Page 18 起动 시작 Startup / Move gun to paint pail and trigger for 20 Screw tip assembly onto gun. Tighten. seconds. Set gun safety ON. For gun assembly instructions, see gun manual, 312363, 312364, 312365. 将喷枪移向涂料桶并扣动扳机 20 秒钟。 将喷嘴组件旋到喷枪上。拧紧。有关喷枪 锁上喷枪的安全销。 的装配 说明,请参见喷枪手册 312363, 312364, 312365。...
- Page 19 起动 시작 Startup / heavy edges ti2757a ti2758a Spray test pattern. Adjust Use smaller tip size if Hold gun perpendicular, Trigger gun before moving. pressure to eliminate heavy pressure adjustment cannot 10-12 in. from surface. Release before stopping. edges. eliminate heavy edges. Spray back and forth;...
- Page 20 清除堵塞物 막힌 곳 뜷 Clearing Clogs / Clearing Clogs / 清除堵塞物 / 막힌 곳 뜷 Release trigger, put safety ON. Rotate Spray Tip. Take safety Put safety ON. Return Spray Tip to original position. Take safety OFF. Trigger gun to clear clog. OFF and continue spraying.
- Page 21 清洗 청소 Cleanup / Cleanup / 清洗 / 청소 Relieve Pressure, Remove guard and Spray Remove siphon tube set Place siphon tube in page 12. Tip. For additional from paint. Wipe excess flushing fluid. Use water information, see gun paint off outside of tubes. for water base paint and manual 312363, 312364, mineral spirits for oil base...
- Page 22 清洗 청소 Cleanup / Turn prime valve horizontal. Hold gun against paint pail. Stop triggering gun. Move While continuing to trigger Take trigger safety OFF. gun to waste pail, hold gun gun, turn prime valve down. Trigger gun and increase against pail, trigger gun to Then, release gun trigger.
- Page 23 清洗 청소 Cleanup / Raise siphon tube above Close drain valve. Trigger Turn pressure control knob If you have a filter installed flushing fluid. gun into flushing pail to all the way down and power on your sprayer, remove purge fluid from hose. switch OFF.
- Page 24 ti2776a Pump Armor Remove filter from gun if If flushing with water, flush Wipe sprayer, hose and gun installed. Clean and inspect. again with mineral spirits or with a rag soaked in water or Install filter. See gun manual Pump Armor to leave a mineral spirits.
-
Page 25: Technical Data
Technical Data Technical Data Power requirements 100/120V AC, 50/60 hz, 14.9 A, 1 phase (247558, 247561, 247563, 247564, 247565) ....240V AC, 50/60 hz, 8.4 A, 1 phase Generator required. - Page 26 技术数据 技术数据 电源要求 交流 100/120V,50/60 Hz, 14,9 A, 单相 (247558, 247561, 247563, 247564, 247565) ..交流 240V,50/60 Hz, 8,4 A, 单相 所需发电机 ..... . 至少...
- Page 27 기술 자료 기술 자료 전기 사양 100/120V AC, 50/60 hz, 14,9 A, 단상 (247558, 247561, 247563, 247564, 247565) ..240V AC, 50/60 hz, 8,4 A, 단상 필요한 발전기 ..... 최소...
- Page 28 With the exception of any special, extended, or limited warranty published by ASM, ASM will, for a period of twelve months from the date of sale, repair or replace any part of the equipment determined by ASM to be defective.
Need help?
Do you have a question about the AllPro Mach 8600 Plus and is the answer not in the manual?
Questions and answers