Table of Contents
Advertisement
Quick Links
π
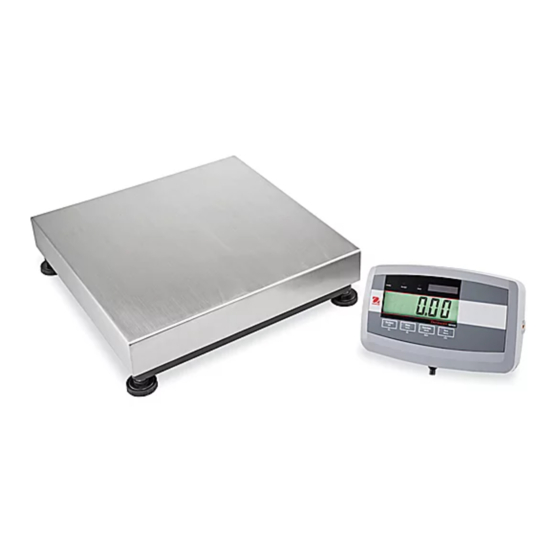
H-2289, H-2290, H-2291
OHaus DefenDer™
5000 DIGITaL scaLe
COntrOl Panel
COntrOl funCtiOns
ButtOn
Primary funCtiOn
(Short Press)
seCOnDary funCtiOn
(Long Press)
menu funCtiOn
(Short Press)
PAGE 1 OF 8
Overview Of COntrOls
1 2 3
8
On/Zero
Off
Yes
On/ZerO
Turns the indicator ON
Sends the current value to
the COM port if AUTOPRINT
If indicator is ON, sets
is set to off.
zero.
Off
Turns the indicator off.
Changes the weighing
unit.
yes
Accepts the current
Advances to the next
setting on the display.
menu or menu item.
Rejects the current setting
on the display and
advances to the next
available setting.
Increments the value.
1-800-295-5510
uline.com
4
5
6
7
Print
Units
No
Print
Initiates an application mode.
Temporarily displays the active
mode's reference data.
In Weigh mode, temporarily
displays 10x expanded resolution
units
Allows changing the application
mode.
Press and hold allows scrolling
through modes.
nO
Moves back to previous menu
item.
Decrements the value.
COntrOl Panel Parts
#
DesCriPtiOn
1
Under LED
2
Accept LED
3
Over LED
4
Capacity Label Window
5
TARE Menu Button
6
FUNCTION Mode Button
7
PRINT Units Button
8
ON/ZERO Off Button
function
Mode
Back
funCtiOn
Performs a tare
operation.
mODe
Enter the User Menu.
BaCK
Exits the User Menu.
Aborts the calibration
in progress.
tare
Menu
Exit
tare
menu
eXit
1214 IH-2289
Advertisement
Table of Contents

Related Manuals for U-Line OHAUS DEFENDER H-2289


Summary of Contents for U-Line OHAUS DEFENDER H-2289
- Page 1 π H-2289, H-2290, H-2291 1-800-295-5510 uline.com OHaus DefenDer™ 5000 DIGITaL scaLe Overview Of COntrOls COntrOl Panel 1 2 3 COntrOl Panel Parts DesCriPtiOn Under LED Accept LED Over LED Capacity Label Window TARE Menu Button FUNCTION Mode Button PRINT Units Button ON/ZERO Off Button COntrOl funCtiOns On/Zero...
-
Page 2: Turning Indicator On/Off
OPeratiOn turning inDiCatOr On/Off CaliBratiOn menu Three calibration processes are available: 1. To turn the Indicator on, press the ON/ZERO OFF button. The Indicator Zero Calibration, Span Calibration and Linearity ‹ performs a display test followed by a Calibration. (See Figure 1) series of informational displays and Figure 1 then enters the active weighing mode. -
Page 3: Span Calibration
OPeratiOn COntinueD 4. When zero calibration is completed, When LINEAr is displayed, press L IN dONE the display shows dONE. the YES button to initiate linearity calibration. 5. The scale exits to the active 2. The display flashes the full ... -
Page 4: Calibration Test
OPeratiOn COntinueD 4. The display shows --C-- while the Press the ON/ZERO OFF button to zero the weight display. --C-- span point is established. The scale must be stable to accept zero operation. manual tare 5. When span adjust is completed, When weighing an item that must be dONE the display shows dONE. - Page 5 OPeratiOn COntinueD Printing Data ESTABLISHING A NEW APW Press the NO button to increment Printing the displayed data to a printer or sending the the sample size. Choices are 5, 10, data to a computer requires that the communication 20, 50 and 100. parameters in the Print and Communication Menu are set.
-
Page 6: Dynamic Weighing
OPeratiOn COntinueD referenCe weight COntinueD EDITING THE OVER SETTING 1. The display shows SEt.HI. Press the ESTABLISHING A NEW REFERENCE WEIGHT SEt.HI YES button to edit setting. The display shows Put.rEF %. Settings: Put.rEF -999950 to 999950 Refer to Menu Navigation 1. -
Page 7: Legal For Trade
OPeratiOn COntinueD Begin DynamiC weighing COntinueD 8. Reconnect power and turn the indicator on. nOte: when legal for trade is set to On and the nOte: when using manual security switch is set to On, the following menu 5 SEC mode, it is not necessary settings cannot be changed: Zero Calibration, for the display to be at zero... -
Page 8: Maintenance
maintenanCe CLEANING CautiOn! Disconnect the unit from the power supply before cleaning. • The housing may be cleaned with a cloth dampened with a mild detergent if necessary. • Do not use solvents, chemicals, alcohol, ammonia or abrasives to clean the housing or control panel. trOuBleshOOting OPERATING ISSUE CAUSES...
Need help?
Do you have a question about the OHAUS DEFENDER H-2289 and is the answer not in the manual?
Questions and answers