Table of Contents
Advertisement
Quick Links
What's in the shipping package?
The package includes the following items:
Installing Windows Driver
Step 1: Setup the Windows driver. The driver is located at:
PEX-1202 and PCI-1202/1602/180x Series Quick Start Guide
1
WebSite: http:// www.icpdas.com.tw
For PEX-1202 Series
PCI-1202/1602/180x Series
English/ Oct. 2013/ Version 1.2
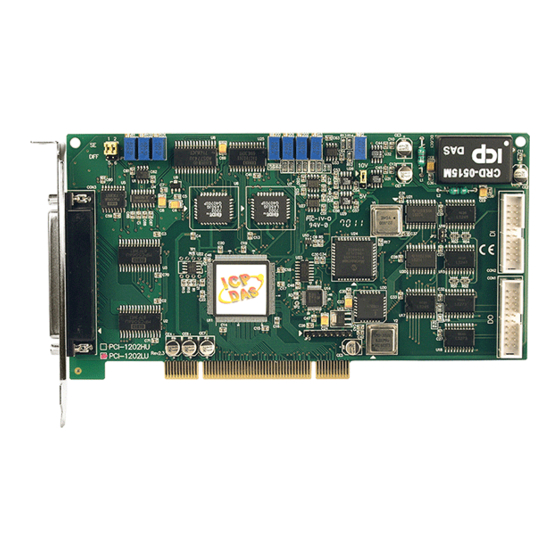
One PCI-1202/1602/180x series board as follows:
PEX-1202L/1202H, PCI-1202LU/1202HU
PCI-1602U/1602FU
PCI-1800LU/1800HU, PCI-1802LU/1802HU
One Software Utility CD (V5.2 or later)
One Quick Start Guide (This Document)
One CA-4002 D-Sub connector
The UniDAQ driver supports 32-/64-bit Windows 2K/XP/2003/Vista/7/8; it
is recommended to install this driver for new user:
CD: \NAPDOS\PCI\UniDAQ\DLL\Driver
http://ftp.icpdas.com/pub/cd/iocard/pci/napdos/pci/unidaq/dll/driver/
E-Mail: service@icpdas.com , service.icpdas@gmail.com
ICP DAS CO., LTD.
Advertisement
Table of Contents

Related Manuals for ICP DAS USA PEX-1202 Series


Summary of Contents for ICP DAS USA PEX-1202 Series
- Page 1 For PEX-1202 Series PCI-1202/1602/180x Series English/ Oct. 2013/ Version 1.2 What’s in the shipping package? The package includes the following items: One PCI-1202/1602/180x series board as follows: PEX-1202L/1202H, PCI-1202LU/1202HU PCI-1602U/1602FU PCI-1800LU/1800HU, PCI-1802LU/1802HU One Software Utility CD (V5.2 or later) One Quick Start Guide (This Document)
- Page 2 The PCI-1202/1602/180x series classic driver supports Windows 98/NT/2K and 32-bit XP/ 2003/ Vista/7/8. Recommended to install this driver for have been used PCI-1202/1602/180x series boards of regular user, please refer to : http://ftp.icpdas.com/pub/cd/iocard/pci/napdos/pci/pci-180x/manual/quicksta rt/classic/ Step 2: Click the “Next>” button to start the installation.
- Page 3 Please make sure JP1 jumper and SW1 is kept in default setting before self-test, as follows: Jumper JP1: Analog Input Type Selection DIFF DIFF Differential Inputs Single-Ended Inputs (Default) Switch SW1: Card ID Setting Card ID (*) 0 (*) Default setting Installing Hardware on PC Step 1: Shut down and power off your computer.
- Page 4 Pin Assignments PEX-1202 and PCI-1202/1602/180x Series Quick Start Guide ICP DAS CO., LTD. WebSite: http:// www.icpdas.com.tw E-Mail: service@icpdas.com , service.icpdas@gmail.com...
- Page 5 Self-Test DIO Test Wiring: 1. Use CA-2002 (optional) to connect the CON1 with CON2. Analog Input Test Wiring: 2. Prepare for device: DN-37 (optional) Wiring terminal board. Provide a stable signal source. (For example, dry battery) 3.
- Page 6 4. Wire the signal source to channel 0, and then keep set the JP1 jumper to Single-Ended (page 3), and wire the signals as follows: The PEX-1202 and PCI-1202/1602/1802 Series: Connect the AI 0 (Pin01) to signal positive (+) Connect the A.GND (Pin17) to signal negative (-) The PCI-1800 Series: ...
- Page 7 6. Get DIO function test result. Click “Digital Output” item. Check channel 0, 2, 4, 6 Select the “Port 0”. Click “Digital Input” item. The corresponding D/I becomes red for channel 0, 2, 4, 6 of D/O is ON. PASS Select the “Port 0”...
- Page 8 7. Get A/D function test result. Click “Analog Input” item. Check analog input on Channel 0 textbox. The other channels value for floating number. PASS Click this button to start test. Confirm the configuration setting. Related Information PEX-1202 and PCI-1202/1602/180x Series Card Product Page: ...
Need help?
Do you have a question about the PEX-1202 Series and is the answer not in the manual?
Questions and answers