Polycom G7500 User Manual
Hide thumbs
Also See for G7500:
- Administrator's manual (123 pages) ,
- Reference manual (103 pages) ,
- User manual (34 pages)
Table of Contents
Advertisement
Quick Links
Advertisement
Table of Contents

Related Manuals for Polycom G7500


Summary of Contents for Polycom G7500
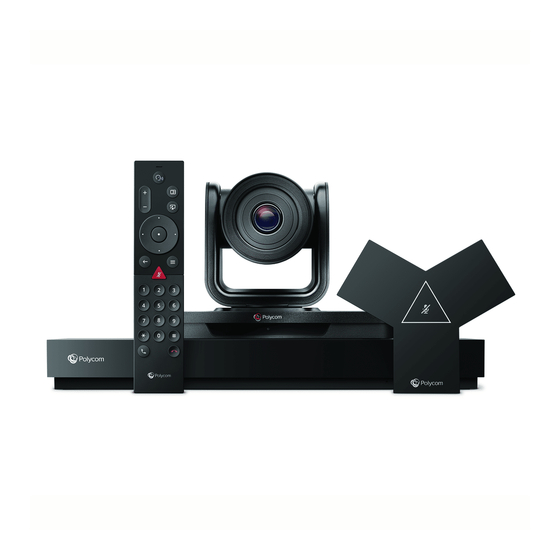
- Page 1 USER GUIDE 2.0 | May 2019 | 3725-85853-001A ® Polycom G7500...
- Page 2 Open Source Software Used in this Product This product may contain open source software. You may receive the open source software from Polycom up to three (3) years after the distribution date of the applicable product or software at a charge not greater than the cost to Polycom of shipping or distributing the software to you.
-
Page 3: Table Of Contents
Product Overview....................5 General Features and Capabilities..................5 Screen Reference....................... 5 Getting Started....................8 Home Screen Quick Reference..................8 LED Status Indicators for the G7500 System..............9 ® LED Status Indicators for the Polycom Microphone Adapter........9 LED Status Indicators for IP Microphones............. 10 Using a Remote Control.................. - Page 4 Change Participant Layouts....................25 Sharing Content from a Computer or Device..........26 View Content Help Tips.....................26 Polycom Content App....................... 26 Share Content Casted from AirPlay or Miracast............... 27 Share Content Using an HDMI Connection..............27 Sharing Content on a Blackboard or Whiteboard......... 28 Annotating on a Blackboard or Whiteboard..............
- Page 5 Status Settings Reference....................35 Diagnostic Settings Reference..................36 Perform a Monitor Test................... 37 Perform a Speaker Test..................37 Test Audio Meter Levels..................38 Accessibility Features..................39 Features for Hearing-Impaired Users................39 Features for Vision-Impaired and Blind Users..............39 Features for Mobility-Impaired Users................40 Polycom, Inc.
-
Page 6: Before You Begin
Participate in discussion forums to share ideas and solve problems with your colleagues. To register with the Polycom Community, simply create a Polycom online account. When logged in, you can access Polycom support personnel and participate in developer and support forums to find the latest information on hardware, software, and partner solutions topics. -
Page 7: Product Overview
Viewing and joining scheduled calendar meetings ▪ Managing contacts, call lists, and directories Screen Reference The following tables provide screen layouts for the G7500 home screen and content screen. Note: Some elements of your screen may be different depending on the system configuration. Polycom, Inc. - Page 8 Home Screen Number Description System information bar, shows system information such as date/time and system name. Task buttons, opens screens for placing calls, sharing content, or creating a blackboard. Menu, opens navigation menus to access features. Local camera view. Polycom, Inc.
- Page 9 Content Screen Number Description System information bar, shows system information such as system name and time. Camera views of call participants. Opens presentation mode (full screen). Content toolbar, provides tools to annotate and work with content. Content management functions. Polycom, Inc.
-
Page 10: Getting Started
Content When content is available, the system displays a list of available content. Otherwise, opens a help screen that describes how to set up content sharing using HDMI, the Polycom Content App, or an AirPlay or Miracast-certified device. Blackboard Creates a new blackboard, where you can share annotations or drawings. -
Page 11: Led Status Indicators For The G7500 System
Opens new menu selections for calling, sharing content, camera control, and more. LED Status Indicators for the G7500 System There’s an LED on the front right corner of the codec to help you understand the state of your G7500 system. Figure 1: G7500 LED Status Indicator Location... -
Page 12: Led Status Indicators For Ip Microphones
LED Status Indicators for IP Microphones There’s an LED on the IP table and ceiling microphones to help you understand the state of each device. Figure 3: Polycom IP Table Microphone LED Status Indicator Location IP Microphone LED Status Indicators... - Page 13 Getting Started Indicator Status Blinking amber Factory reset in progress Blinking blue Ready to pair Solid blue Paired successfully Polycom, Inc.
-
Page 14: Using A Remote Control
If you’re using a touch monitor, tap the screen. Remote Control Button Reference The following table shows the G7500 system remote control and descriptions for each button. Many remote control buttons have dual functions depending on what screen your cursor is in. - Page 15 Or generates dual-tone multi-frequency (DTMF) touch tones. Press this button followed by DTMF keys to send. Call: Opens the Place a Call screen (outside of a content session). Hang up or End session: Hangs up a call or ends a content session. Polycom, Inc.
-
Page 16: Pair Your Remote Control
Using a Remote Control Pair Your Remote Control Out of the box, your remote control is paired with the G7500 system, so no setup is required. To use a different remote control, you must pair it with the system. Procedure 1. -
Page 17: Using A Touch Monitor
▪ Wake Your Touch Monitor If you have a touch monitor, you can tap, touch, and swipe items to interact with the G7500 system. Configure a Touch Monitor In a dual-monitor setup, you must configure any touch monitors to work with your G7500 system. -
Page 18: Placing Calls
2. Enter the letters for your contact. For dialing format examples, refer to the following: ▪ IPv4 address: 192.0.2.0 ▪ Host name: room.company.com ▪ SIP address: user@domain.com ▪ H.323 or SIP extension: 2555 ▪ ISDN or phone number: 9782992285 Polycom, Inc. -
Page 19: Place A Conference Call
» In an incoming call notification, select Answer. Ignore a Call You can choose to ignore a call. If your administrator has configured your system to answer calls automatically, this option is not available. Procedure » In an incoming call notification, select Ignore. Polycom, Inc. -
Page 20: Adjust Volume
When your audio is muted and you’re ready to speak in a call, unmute your local microphones. Procedure 1. Select Menu 2. Select Unmute Mute Video Turn off your camera so that other sites in a call can’t see you. Procedure 1. Select Menu 2. Select Camera. 3. Select Camera Off. Polycom, Inc. -
Page 21: Unmute Video
Hang up your call to end the current meeting. If you have content such as blackboards, whiteboards, or snapshots, the system asks if you want to keep them. Procedure » In a call, do one of the following: ▪ Select Hang Up on your remote control. ▪ Select Menu and Hang Up. Polycom, Inc. -
Page 22: Calling Contacts
▪ Call a Recent Contact Manage Contacts You can add contacts individually or in bulk in the G7500 system web interface. You need local administrator access for this feature. Procedure 1. On the Dashboard or Place a Call page, select Contacts. -
Page 23: Call A Recent Contact
Procedure 1. Select Place a Call. 2. Select Recent. 3. Scroll through the list of recent contacts, sorted by date. 4. Select a recent contact. The call automatically dials. Related Tasks Call a Frequent Contact on page 20 Polycom, Inc. -
Page 24: Calling Favorite Contacts
To quickly call a contact, you select a favorite card. Procedure » Do one of the following. ▪ Select a favorite from the home screen. ▪ Go to the Place a Call > Favorites screen and select a favorite card. The call automatically dials. Polycom, Inc. -
Page 25: Joining Meetings From The Calendar
All-day meetings display as the first meeting card. Select a card for focus to display the contact’s SIP, email, telephone, and mobile phone details. When a meeting is ongoing, the card displays In Session. Procedure » Do one of the following. Polycom, Inc. -
Page 26: Join An Overbooked Meeting
Place a Call screen. Procedure 1. From the home screen, select Place a Call A keypad displays. 2. Use the keypad to enter the meeting room number or address. Your call joins the meeting. Related Tasks Join a Password-Protected Meeting Polycom, Inc. -
Page 27: Customizing Calls For Your Site
3. Select from one of the following layouts. ▪ Equal: All participants are the same size. ▪ Gallery: Participants display at the top of the screen and the speaker displays in the main frame. ▪ Fullscreen: The active speaker is full screen. Polycom, Inc. -
Page 28: Sharing Content From A Computer Or Device
3. To go back to the previous screen, select Back Polycom Content App The Polycom Content App allows you to share content from a computer connected to a G7500 system over an IP network. For information on using this application, refer to the Polycom Content App User Guide on Polycom Support. -
Page 29: Share Content Casted From Airplay Or Miracast
Procedure 1. Navigate to AirPlay or Miracast on your device. 2. From the list of available devices, select the name of your G7500 system. 3. Begin casting from your AirPlay or Miracast device. For casting information for your device, refer to the product documentation. -
Page 30: Sharing Content On A Blackboard Or Whiteboard
You can now annotate on the blackboard. 2. Do one of the following to add another board. ▪ To add a blackboard: In the toolbar, select Blackboard ▪ To add a whiteboard: In the toolbar, long press Blackboard and select Whiteboard Polycom, Inc. -
Page 31: Take A Snapshot
You can take a picture of your current content. Then you can annotate on the snapshot or download it ® using the Polycom Content App. A limited number of snapshots are available. A prompt notifies you when you have reached the snapshot limit. - Page 32 The call ends and you are asked if you want to keep content. 3. Select Yes, Keep Content or No, End Session. If you keep content, the content session continues. 4. When ready to stop content, select Menu > End Session > End Session. Polycom, Inc.
-
Page 33: Cameras
(if available). 5. Press or tap + to zoom in or - to zoom out. Press or tap the arrows to tilt up or down, or to pan left or right. 6. To exit the control screen, select Back. Polycom, Inc. -
Page 34: Turn Your Camera Off
1. Select Menu 2. Select Camera 3. Select Tracking On. Turn Camera Tracking Off To stop automatically tracking the speaker during a call, turn off camera tracking. Procedure 1. Select Menu 2. Select Camera 3. Select Tracking Off. Polycom, Inc. -
Page 35: Camera Presets
Save the current camera position as a preset for later use. You can use saved presets to change the near camera position in or out of a call. Far camera saved presets are available only in a call. Procedure 1. Select Menu 2. Select Camera 3. Select Presets Polycom, Inc. -
Page 36: Delete A Preset
3. Select Presets 4. Long touch the preset image you want to delete. 5. Select Delete. The preset is removed from the control panel. After you restart the G7500, the former preset position changes to Add a Preset. Polycom, Inc. -
Page 37: System Settings
Displays the Gatekeeper and SIP Registrar Server Servers status. ▪ Displays the active Global Directory Server, LDAP Server, or Microsoft Server status. ▪ If enabled, displays the Provisioning Service or the Calendaring Service status. Peripheral Devices Lists the connection status of peripheral devices. Polycom, Inc. -
Page 38: Diagnostic Settings Reference
If you run this test during a call, the far site hears the tone. You can test the left or right speaker. If Start Both is displayed, you can also test both speakers at the same time. Polycom, Inc. -
Page 39: Perform A Monitor Test
> Diagnostics > Speaker Test 2. Select Speaker Test. 3. To begin the test, select Start Left, Start Both, or Start Right. Note that Start Both, which allows you to test both speakers at the same time, might not display. Polycom, Inc. -
Page 40: Test Audio Meter Levels
System Settings Test Audio Meter Levels To monitor the real-time audio signal your G7500 system, you can use audio meter levels. Procedure 1. Do one of the following: ▪ In a call: Select Menu > More > Settings > Diagnostics. -
Page 41: Accessibility Features
Polycom products include a number of features to accommodate hearing-, vision-, mobility-, or cognitively-impaired users. Features for Hearing-Impaired Users There are features that allow those with hearing impairments to use the G7500 system. If needed, contact your administrator to enable the following features. Features for Hearing-Impaired Users... -
Page 42: Features For Mobility-Impaired Users
Features for Mobility-Impaired Users There are features that allow those with mobility impairments to use the G7500 system. If needed, contact your administrator to enable the following features. Features for Mobility-Impaired Users...
Need help?
Do you have a question about the G7500 and is the answer not in the manual?
Questions and answers