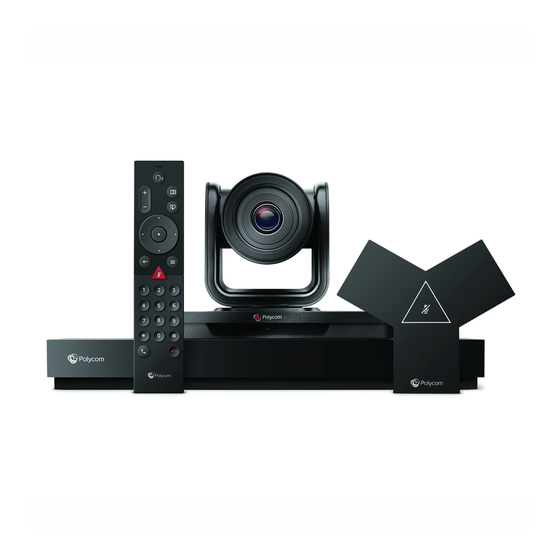
Polycom G7500 User Manual
Hide thumbs Also See for G7500:
Table of Contents

Advertisement

USER GUIDE
2.1 | August 2019 | 3725-85853-002A
Polycom G7500

Advertisement

Table of Contents
loading
Need help?

Need help?

Do you have a question about the G7500 and is the answer not in the manual?

Questions and answers

neil
January 24, 2025

Stuck in a teams loop - powering down does not help

Summary of Contents for Polycom G7500

  • Page 1 USER GUIDE 2.1 | August 2019 | 3725-85853-002A Polycom G7500...
  • Page 2 Open Source Software Used in this Product This product may contain open source software. You may receive the open source software from Polycom up to three (3) years after the distribution date of the applicable product or software at a charge not greater than the cost to Polycom of shipping or distributing the software to you.
  • Page 3: Table Of Contents

    Documentation Feedback..................5 Getting Started....................6 Polycom G7500 Overview....................6 LED Status Indicators......................6 LED Status Indicators for the G7500 System............6 LED Status Indicators for the Microphone Adapter..........7 LED Status Indicators for IP Microphones............... 8 Navigating the G7500 System.................... 9 Remote Control Button Reference................
  • Page 4 Join a Password-Protected Meeting...............20 Sharing Content....................21 Sharing Content from a Computer or Device..............21 Polycom Content App.....................21 Cast Content from an AirPlay- or a Miracast-Certified Device....... 21 Share Content Using an HDMI Connection............22 Sharing Content on a Blackboard or Whiteboard..............22 Add a Blackboard or Whiteboard................
  • Page 5 Contents Diagnostic Settings Reference................29 Test Monitors......................29 Test Speakers......................30 Test Audio Levels....................30 Pair a Remote Control.......................30 Configure a Touch Monitor....................31 View Content Help Tips.....................31 View Blackboard Help Tips....................32 Polycom, Inc.
  • Page 6: Before You Begin

    ▪ Related Documentation ▪ Getting Help The Polycom G7500 User Guide contains overview information, procedures, and references you can use to perform tasks with the Polycom G7500 system. This guide covers the following products: ▪ Polycom G7500 system (Model: P011) ▪...
  • Page 7: Polycom And Partner Resources

    Participate in discussion forums to share ideas and solve problems with your colleagues. To register with the Polycom Community, simply create a Polycom online account. When logged in, you can access Polycom support personnel and participate in developer and support forums to find the latest information on hardware, software, and partner solutions topics.
  • Page 8: Getting Started

    LED Status Indicators for the G7500 System Use the LED on the front right corner of the codec to get information on the state of your G7500 system. Polycom, Inc.
  • Page 9: Led Status Indicators For The Microphone Adapter

    Blinking red Error preventing normal operation LED Status Indicators for the Microphone Adapter Use the LED to get information on the state of your microphone adapter. Figure 2: Polycom Microphone IP Adapter LED Location Microphone Adapter LED Status Indicators Indicator Status...
  • Page 10: Led Status Indicators For Ip Microphones

    LED Status Indicators for IP Microphones Use the LED on the IP table and ceiling microphones to get information on the state of each device. Figure 3: Polycom IP Table Microphone and Polycom IP Ceiling Microphone LED Locations IP Microphone LED Status Indicators...
  • Page 11: Navigating The G7500 System

    Getting Started Navigating the G7500 System The G7500 system has icons and user screens to help you navigate and understand important information about your system. Remote Control Button Reference The following table shows the G7500 system remote control and descriptions for each button.
  • Page 12 If configured, generates DTMF tones. Press this button followed by numeric keys to send DTMF tones. Call: If you’re outside of a content sharing session, opens the Place a Call screen. Hang up or End session: ▪ Hangs up a call. ▪ Ends a content session. Polycom, Inc.
  • Page 13: Home Screen

    Task buttons, opens screens for placing calls, sharing content, or creating a blackboard. Menu, opens navigation menus to access features. Local camera view. Home Screen Elements Some of the following interactive and read-only elements might not display on your system depending on the system configuration. Polycom, Inc.
  • Page 14: Content Screen

    Security Code Displays after you attempt a content sharing connection. Use the four-digit code to set up wireless connections through the Polycom Content App or an AirPlay- or a Miracast-certified device. IP Address IP address, SIP, H.323, and secondary network configured for your system.
  • Page 15: Powering The System On And Off

    Don’t power off the system during maintenance activities (for example, while a software update is in progress). Wake the System After a period of no activity, the system enters sleep mode (if configured by your administrator). You can wake it using the remote control or a touch monitor. Procedure Polycom, Inc.
  • Page 16: Accessibility Features

    ▪ If you’re using a touch monitor, tap the screen. Accessibility Features Polycom products include a number of features to accommodate hearing-, vision-, mobility-, or cognitively-impaired users. Features for Hearing-Impaired and Deaf Users Certain features enable users with hearing impairments to use the G7500 system.
  • Page 17: Features For Mobility-Impaired Users

    Getting Started Features for Mobility-Impaired Users Certain features enable users with mobility impairments to use the G7500 system. If needed, contact your administrator to enable the following features. Features for Mobility-Impaired Users Accessibility Feature Description Remote control The Bluetooth remote control enables you to control the system and to perform tasks such as placing calls, starting a sharing session, and configuring some settings.
  • Page 18: Calling

    3. Enter a number on the dialpad or select Keyboard to enter letters. 4. Select Call. Answer a Call The way the system handles incoming calls depends on how your administrator configured it. The system either answers the call automatically or prompts you to answer manually. Polycom, Inc.
  • Page 19: Ignore A Call

    You can access and call contacts, recent contacts, and frequent contacts on your system. If configured by your administrator, contacts display on the Place a Call screen. Contact cards can display the following information: ▪ Contact name ▪ Contact number ▪ Contact email address ▪ Contact IP address Polycom, Inc.
  • Page 20: Call A Contact

    Favorite cards display on the Favorites, Contacts, or Home screens, depending upon your system configuration. Procedure 1. Go to Place a Call > Contacts. 2. Select a contact card, then select Favorite. The contact now displays a star icon, and displays in the Contacts and Favorites lists. Polycom, Inc.
  • Page 21: Unfavorite A Contact

    On the Home screen, you can view meeting cards that show your calendar event details. Meeting cards display meeting times, subjects, and organizers. Note: Private meetings are labeled Private Meeting. Except for the time, meeting details are hidden. Polycom, Inc.
  • Page 22: Join An Overbooked Meeting

    1. Do one of the following: ▪ Manually dial in to a meeting. ▪ Join a meeting from a meeting card. 2. Enter the meeting password and select Join. If you enter an incorrect password, the password prompt displays again. Polycom, Inc.
  • Page 23: Sharing Content

    Polycom Content App The Polycom Content App enables you to share content from a computer connected to a G7500 system over an IP network. For information on using this application, see the Polycom Content App User Guide.
  • Page 24: Share Content Using An Hdmi Connection

    Blackboards and whiteboards provide blank canvases to write on so you can share your ideas and collaborate with others. Note: The Blackboard button only displays if a mouse or touchscreen is connected to the G7500 system. Add a Blackboard or Whiteboard You can create a blackboard or whiteboard at any time.
  • Page 25: Delete Snapshots Or Content

    2. Do one of the following: ▪ Select Yes, Keep Content. ▪ Select No, End Session. If you keep content, the content session continues. 3. When you are ready to stop content, select Menu > End Session > End Session. Polycom, Inc.
  • Page 26: Cameras

    2. Select Control 3. Select Switch to select the Far camera. 4. Press or tap + to zoom in or - to zoom out. Press or tap the arrows to tilt up and down or to pan left to right. Polycom, Inc.
  • Page 27: Turn Your Camera On Or Off

    Use saved presets to change the near camera position in or out of a call. Far camera presets are available only in a call. Procedure 1. Select Menu > Camera 2. Select Presets 3. Adjust the camera to the desired position. 4. On the screen, long press the image. 5. Select Save. Polycom, Inc.
  • Page 28: Select A Preset

    Delete a Preset You can delete a camera preset that you no longer need. Procedure 1. Select Menu > Camera 2. Select Presets 3. On the screen, long press the preset image you want to delete. 4. Select Delete Polycom, Inc.
  • Page 29: Settings

    You can mute your audio in or out of a call. Procedure » Do one of the following: ▪ On your remote control, press Mute ▪ On the screen, select Menu > Mute A notification displays that the system muted your local microphones. Polycom, Inc.
  • Page 30: Unmute Your Microphones

    2. Do one of the following: ▪ Use the volume slider on a touchscreen. ▪ Press the + or - buttons on the remote control. ▪ Press the left or right navigation buttons on the remote control (when the system displays volume control). Polycom, Inc.
  • Page 31: Troubleshooting

    View Content Help Tips ▪ View Blackboard Help Tips This section includes information related to troubleshooting issues with your G7500 system. You can also find information on pairing your remote, configuring your monitors, and where to find help tips. System Diagnostics To assist in troubleshooting, access system diagnostics.
  • Page 32: Test Speakers

    A meter reading of +20 dB corresponds to 0 dBFS in the room system audio. Pair a Remote Control The remote comes paired with the G7500 system. To use a different Polycom remote control, you must pair it with the system. If your remote isn’t working, attempt to pair the remote again.
  • Page 33: Configure A Touch Monitor

    5 seconds. Move your remote control closer to the system and try to pair again. 4. To end the pairing process, select Skip Pairing. Configure a Touch Monitor In a dual-monitor setup, you must configure the touch monitors to work with your G7500 system. Note: Touch monitors in single-monitor setups don’t require configuration. Procedure 1.
  • Page 34: View Blackboard Help Tips

    Procedure 1. On the home screen, select Blackboard 2. On the toolbar, select Help The help screen opens. 3. To close the screen, tap the screen or press Back on your remote control. Polycom, Inc.

This manual is also suitable for:

P011P013P014

Table of Contents