Advertisement
Quick Links
Advertisement

Related Manuals for Belden Miranda Kaleido-X (4RU)


Summary of Contents for Belden Miranda Kaleido-X (4RU)
- Page 1 Quick Start Guide M809-9905-110 12 January 2014...
- Page 2 Copyright & Trademark Notice Copyright © 2007–2014, Miranda Technologies Partnership. All rights reserved. Belden, Belden Sending All The Right Signals, and the Belden logo are trademarks or registered trademarks of Belden Inc. or its affiliated companies in the United States and other jurisdictions.
- Page 3 Kaleido-X (4RU) Quick Start Guide Safety Compliance is equipment complies with the requirements of the following standards for safety of information technology equipment: – CSA-C22.2 No. 60950-1-07 – UL 60950-1 (2 Edition) – IEC 60950-1:2005 (2 Edition) WARNING An appropriately listed/certified mains supply power cord must be used for the connection of the equipment to the mains voltage at either 120V~ or 240V~ CAUTION...
- Page 4 Notices • EN 55022 Class A Radiated and conducted emissions • EN 61000-3-2 Limits for harmonic current emissions • EN 61000-3-3 Limitation of voltage changes, voltage fluctuations and flicker • EN 61000-4-2 Electrostatic discharge immunity • EN 61000-4-3 Radiated, radio-frequency, electromagnetic field immunity •...
-
Page 5: Table Of Contents
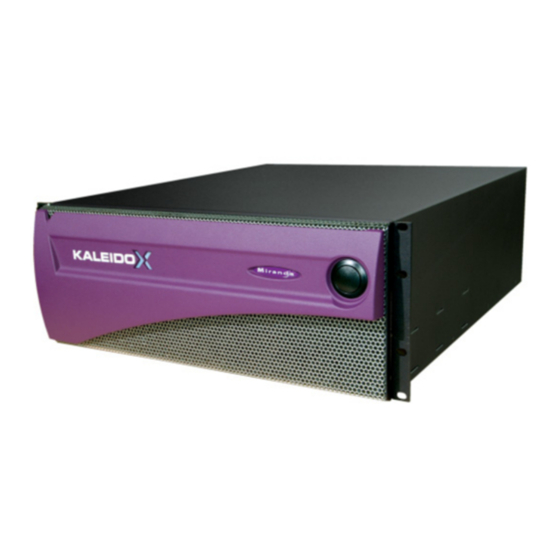
Setting Up Your Multiviewer Welcome to the Kaleido family of multiviewers! This Quick Start Guide is designed to help you get your Kaleido-X (4RU) multiviewer up and running for the first time. The following sections will guide you through the installation of a Kaleido-X (4RU) system in its default configuration. - Page 6 Setting Up Your Multiviewer Introduction Kaleido-X (4RU) system overview Kaleido-X (4RU) Frame The Kaleido-X (4RU) frame is 4 RU high. It comprises an internal midplane for interconnecting the cards. Cards are installed from the front of the frame. Each card is associated with input and/or output connectors which are mounted on a connector panel.
- Page 7 Kaleido-X Quick Start Guide match. The cards are physically configured so they cannot be installed in the wrong type of slot. Location and available slots Slots Function Color Code Card Types Main Grey KXA-GPI-GEN Output A Yellow KXO-DUAL3 Output B KXO-DUAL Input A Green...
-
Page 8: Getting Organized
Setting Up Your Multiviewer Getting Organized Getting Organized This section provides information about system requirements, and items shipped with your Kaleido-X (4RU). Required Materials Your Kaleido-X (4RU) system package includes the following: • A Kaleido-X (4RU) frame (enclosure) containing various input, output and option modules (cards) •... -
Page 9: Step 1: Physical Setup
Kaleido-X Quick Start Guide • Cables (to connect your multiviewer to video sources, to displays, and to the network): Cable type Purpose CAT-5 For Ethernet connectivity Display cables Either extension modules—for example Miranda’s DXF-200 (part number DXF-200-A)—or DVI cables Video cables Standard coaxial cables with BNC connectors Note: On all Miranda multiviewers, the network adapters are set to auto-... - Page 10 Setting Up Your Multiviewer Setting up the Kaleido-X (4RU) Hardware Notes • The Kaleido-RCP2, and Audio Bridge Terminal (ABT) are optional devices, and may not have been shipped with your Kaleido-X (4RU) system. For information on these and other Kaleido-X options, please contact your Miranda sales representative.
- Page 11 Kaleido-X Quick Start Guide Changing the Output Resolution To set a display’s output resolution from the monitor wall 1 Connect a mouse to an output card’s USB connector. 2 Right-click anywhere on the monitor wall, point to Monitor wall (if you clicked a monitor), and then click Display resolution: The Display Resolution window appears: •...
-
Page 12: Step 2: Networking Setup
Setting Up Your Multiviewer Verifying that the Cards are Ready Verifying that the Cards are Ready To verify that the cards (modules) are ready • Check the status LEDs on each card installed in the Kaleido-X frame. Make sure that none are indicating an error condition (see table below). - Page 13 Kaleido-X Quick Start Guide 5 Type the required Frame IP address, network mask, and gateway address in the appropriate boxes. 6 Type the required addresses for all outputs. 7 Click OK. 8 When prompted to restart the system to apply your changes, click Yes. The new configuration will become effective once the system restart has completed.
- Page 14 Setting Up Your Multiviewer Using the Kaleido-RCP2 with Default Settings Using the Kaleido-RCP2 with Default Settings To start using the Kaleido-RCP2 with its default settings 1 Physically connect the Kaleido-RCP2 unit to the network using an Ethernet cable. By default, the Kaleido-RCP2 is shipped with DHCP enabled, so it will automatically be assigned an IP address by a DHCP server.
- Page 15 Kaleido-X Quick Start Guide 7 Press ENTER to log on to your system as “Admin”. A message prompting you for a password appears on the LCD display. 8 Press ENTER again (by default, there is no password). The message “Access granted” will appear on the LCD display if the login is successful. If a mouse is connected to the Kaleido-RCP2, then you should be able to see and move the mouse pointer on the monitor Press any of the LAYOUT PRESETS buttons to load a predefined layout on the monitor wall.
- Page 16 Setting Up Your Multiviewer Configuring a Client PC Example of a default layout showing 16 video streams 4 Choose a layout from the layout window on the monitor wall. The video source should appear on the room displays. Configuring a Client PC The client PC that you will use to communicate with the Kaleido-X (via XAdmin and XEdit) and the Kaleido-X itself must have IP addresses within the same subnet.
- Page 17 Kaleido-X Quick Start Guide 3 On the Networking tab, under This connection uses the following items, click Internet Protocol Version 4 (TCP/IPv4), and then click Properties. The Internet Protocol Version 4 (TCP/IPv4) Properties window opens. 4 On the General tab, click Use the following IP address. 5 Type an IP address in the same range as the default IP address of the multiviewer.
- Page 18 Setting Up Your Multiviewer Configuring an Audio Bridge Terminal Changing an IP Address on Windows XP To change the IP address of a client PC that has Windows XP 1 On the Windows XP Start menu, point to Control Panel, right-click Network Connections, and then click Open on the shortcut menu.
- Page 19 Kaleido-X Quick Start Guide For more information about the ABT, refer to the Audio Bridge Terminal Guide to Installation and Operation, available on the DVD that shipped with your system. To configure the IP address and other network settings of the ABT 1 Connect a PC to a switch.
-
Page 20: Step 3: Xedit Installation
Setting Up Your Multiviewer Configuring an Audio Bridge Terminal 7 Change the ABT’s network settings, as necessary, and then click Apply & Reboot. Note: If you purchased more than one Audio Bridge Terminal unit, keep in mind that they all ship with the same default static IP address. Make sure to assign each of them a different static IP address before connecting them to the network, if DHCP is not used. - Page 21 Kaleido-X Quick Start Guide 4 Click Run. A window appears, showing the download and installation progress. At the end of the installation process, launcher icons ( ) are added to your desktop and to the Start menu (under All Programs). Once the installation has completed, the XEdit startup screen appears.
- Page 22 Setting Up Your Multiviewer Configuring an Audio Bridge Terminal Depending on your Windows Firewall settings, a security alert may appear. • Click Allow access to unblock the application. If XEdit cannot find all of the fonts it needs already on your PC or laptop, it downloads them from the multiviewer automatically, in which case a message will appear to confirm the font update, and instruct you to restart the application.
-
Page 23: Step 4: System Verification
Kaleido-X Quick Start Guide Note: Once it has been installed from the multiviewer, XEdit remains on your PC or laptop, and can be launched from the icon that was added to your desktop (see page 17). Whenever you install a new version of the Kaleido-X software on the multiviewer, the next time you open XEdit, your installed copy of the application will be automatically updated from the multiviewer. - Page 24 Setting Up Your Multiviewer Verifying the Kaleido-X Multiviewer 3 Click the XAdmin button. 4 If you see a security warning, or a certificate error message, then refer to Registering your Multiviewer's Security Credentials with your Browser, in the Kaleido-X User’s Manual. 5 If the “Log in to XAdmin”...
- Page 25 Kaleido-X Quick Start Guide Card type Serial number Version information Input signal status Input signal format 8 Click the arrow button ( ) at the end of each card’s heading row to view detailed information for this card. Expand details Refresh Reset card Note:...
- Page 26 Setting Up Your Multiviewer Verifying the Kaleido-X Multiviewer Note: See Managing Hardware and Software Options, in the Kaleido-X User’s Manual, for more information on the available options. 10 If your system includes a GPI/genlock card (KXA-GPI-GEN, optional), you can check the main system statuses of the Kaleido-X frame, to make sure that there are no errors or alerts related to system temperature, fan operation, or card fault conditions.
- Page 27 Kaleido-X Quick Start Guide The other statuses should all be normal, although if you left the door open when checking the card LEDs, you may see a warning under Chassis Door Open Status. KXA-GPI-GEN - 1.2V Status KXA-GPI-GEN - 1.8V Status KXA-GPI-GEN - 2.5V Status KXA-GPI-GEN - 3.3V Status KXA-GPI-GEN - 48V Power Supply A Fuse Status...
-
Page 28: Rs-422 Connection Diagram
Setting Up Your Multiviewer Verifying the Kaleido-RCP2 Verifying the Kaleido-RCP2 To verify that the Kaleido-RCP2 is functioning normally • Log on to the Kaleido-RCP2 (see Using the Kaleido-RCP2 with Default Settings, on page 10), and then test various operations using the Kaleido-RCP2 keyboard and the mouse (e.g. - Page 29 Kaleido-X Quick Start Guide RJ-45 DE-9 male DE-9 female Pinout of each RS-422 Pinout of straight adapter Pinout of RS-422 port’s RJ-45 connector (Miranda part no. 1737-3000-102) connector on SMPTE on the multiviewer slave device Standard wiring between multiviewer and devices wired to SMPTE “slave” specification (e.g. most routers, Ross Synergy switchers, Nevion ETH-CON) RJ-45 DE-9 male DE-9 female...
- Page 31 Contact Us Miranda Technical Support For technical assistance, please contact the Miranda Technical Support center nearest you: Americas Asia Office hours: 9:00 a.m. – 9:00 p.m. (EST) Office hours: 9:00 a.m. – 5:00 p.m. (GMT+8) Telephone: 1-800-224-7882 Telephone: +852 2539 6987 Fax: +1 514 335 1614 Fax:...
Need help?
Do you have a question about the Miranda Kaleido-X (4RU) and is the answer not in the manual?
Questions and answers