SKF LINCOLN FlowMaster II A Series Operation, Assembly, Disassembly And Troubleshooting Manual
Rotary driven 120/230 v ac, 50/60 hz, 1 phase electric pump
Hide thumbs
Also See for LINCOLN FlowMaster II A Series:
Table of Contents
Advertisement
Quick Links
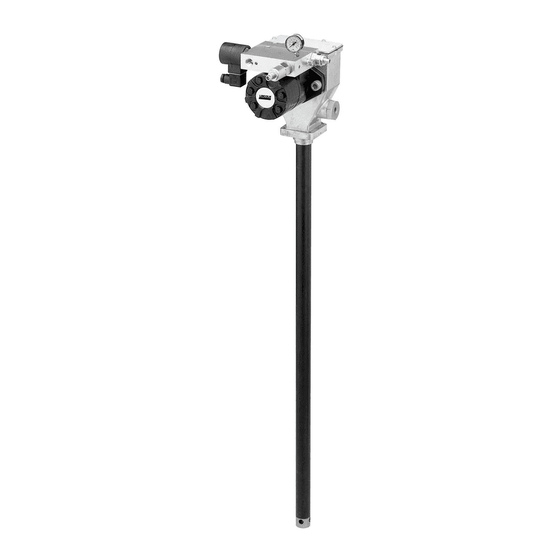
FlowMaster II rotary driven
120/230 V AC, 50/60 Hz, 1 phase
electric pump, series "A"
85743, 120 lbs.
85744, 400 lbs.
November 2012
Date of issue
Form number
404454
Section
C8
Page
366A
D a n g e r
Read manual prior to installation or use
of this product. Keep manual nearby for
future reference. Failure to follow
instructions and safety precautions may
result in death or serious injury.
Operation, assembly, disassembly and
troubleshooting guide
Advertisement
Table of Contents

Related Manuals for SKF LINCOLN FlowMaster II A Series


Summary of Contents for SKF LINCOLN FlowMaster II A Series
- Page 1 Operation, assembly, disassembly and troubleshooting guide FlowMaster II rotary driven 120/230 V AC, 50/60 Hz, 1 phase electric pump, series “A” 85743, 120 lbs. 85744, 400 lbs. November 2012 Date of issue D a n g e r Form number 404454 Read manual prior to installation or use Section...
-
Page 2: Table Of Contents
Contents Safety .................. 3 Explanation of signal words for safety ........3 Use of this manual ..............4 Overview................4 Appropriate use ..............4 General description and information ........4 Operation ................8 Disassembly ................. 9 Assembly ................12 Parts and tools ..............16 Lincoln industrial standard warranty ........ -
Page 3: Safety
Safety Explanation of signal words for safety Read and carefully observe these installation instructions before installing, operating or troubleshooting the assembly. The assembly must be installed, maintained and repaired exclusively by persons familiar with the instructions. This is the safety alert symbol. It is used Install the assembly only after safety to alert you to potential physical injury instructions and this guide have been read... -
Page 4: Use Of This Manual
Use of this manual Overview General description Inspection and information If over pressurizing of the equipment is This manual details the procedure that must believed to have occurred, contact the be followed while installing, operating, trou- The Lincoln industrial rotary V AC electric factory authorized warranty and service bleshooting and repairing the FlowMaster II pump uses a V AC motor and a two stage... - Page 5 Fig. 1 Pump with controller Control wiring diagram Control wiring diagram using Model 85530 using Model 85530 lubrication system controller lubrication system controller N.O. Terminal B Pressure Switch Power switch Terminal A 11 12 13 14 Incoming Power 120 V AC 50/60 Hz Vent 120 V AC 50/60 Hz Alarm...
- Page 6 Fig. 3 Pump dimensions 16.07 (408) 8.78 (223) 13.91 (353) 3.78 (96) 2.27 (58) 2.72 (69) 1.25 (32) 4.25 (108) Dimensions 2.75 (70) Model Dimension “A” in. (mm) Dimension “B” in. (mm) 85743 27.56 (700) 37.24 (946) 85744 34.06 (865) 43.74 (1,111) 6.75 (171) 2.25 (57)
- Page 7 Installing the Pump Table 3 D a n g e r 1 Refer to figure 4 and connect the Electric FlowMaster II pump material supply line (80) to the pump A high pressure shut-off valve (79) must 120 V AC , 50/60 Hz 19:1 gear ratio, 2 stage outlet (55).
-
Page 8: Operation
Operation Crankcase oil service interval • Check the oil level after every 750 hours of machine operation, or monthly. • Change the oil after every 2,000 hours of machine operation or every year. • Use SAE 10W30 motor oil in all units W a r n i n g used in an ambient temperature of –40 to 150 °F (–40 to 65 °C). -
Page 9: Disassembly
Disassembly Fig. 7 20 Loosen and remove the tube housing (60) († fig. 9). Pump 21 Remove the bronze bearing (56) from 1 Place pump into a vise. the tube housing (60). 2 Remove the dipstick (31). 22 Using a flat, blunt tool, remove the 3 Drain crankcase oil from the crankcase. - Page 10 Crankrod and eccentric Fig. 9 17 Insert the pin included in the tool kit 1 Remove pivot screws (11) from the (275996) through the tool and into the crankrod (7) († fig. 9). plunger link rod (20) outlet hole. 18 Turn the tool counter clockwise to re- move the lower bushing and plunger (24) from the plunger link rod (20).
- Page 11 Reciprocating tube Fig. 13 1 Loosen the check seat housing (30) with in. hex head wrench († fig. 13). 2 Remove the check seat housing (30) from the reciprocating tube (25). 3 Remove the ball cage (28), check ball (29) and o-ring seals (27) from the check seat housing (30).
-
Page 12: Assembly
Assembly Pump Fig. 16 1 Install the ball (23) into the lower bushing Crankrod and eccentric and plunger (24) († fig. 15). assembly 2 Insert the check rod (22) into the pump plunger (23). 1 Place the crankrod (7) on the 2 3 Place the spring (21) onto the check (63,5 mm) diameter steel pipe from rod (22). - Page 13 24 With the wrist pin anchor (13) still in the 34 Apply Loctite 242 or equivalent to the 41 Insert the bronze bearing (56) into the vise, align the crankrod/eccentric threads of the check seat housing (30). housing tube (60). assembly (7) holes with the wrist pin 35 Thread the check seat housing (30) into 42 Position the crankrod assembly (7) over...
- Page 14 49 Install gear box o-ring (38) in the pump 67 Install the screws (33) with o-rings (34) 73 Torque to 30–35 ft.lbf. (40,7–47,5 Nm). housing (37) groove († fig. 23). into the pump cover (35). 74 Fill the crankcase with oil up to indicator 50 Position the final stage gear set (68) in 68 Torque the screws (33) to a torque of dot on dipstick.
- Page 15 Troubleshooting Condition Possible cause Corrective action Pump does not run. Pump is seized or damaged. Disassemble pump and repair any parts that are damaged or worn. Incorrectly wired. Check wiring diagram. Pump speeds up or runs erratically. Low level of grease or reservoir Fill reservoir.
-
Page 16: Parts And Tools
Parts and tools Tool and consumable list in. open end wrench in. open end wrench in. open end wrench 12 in. adjustable wrench in. hex head wrench in. hex head wrench in. hex head wrench in. hex head wrench in. hex head wrench in. - Page 17 Parts list Item no. Description Part no. Quantity Item no. Description Part no. Quantity Flat head screw ( -28 x 1 270635 Woodruff key 272560 Counter weight 272197 Pump shaft 277397 Retaining ring 270609 Retaining ring 272561 Retaining ring 270608 Ball bearing 272556 Crank eccentric...
- Page 18 Fig. IPB 1...
- Page 19 Fig. IPB 2...
- Page 20 Fig. IPB 3...
-
Page 21: Lincoln Industrial Standard Warranty
Lincoln industrial This warranty gives you specific legal standard warranty rights. You may also have other rights that vary by jurisdiction. Customers not located in the Western Standard limited warranty Hemisphere or East Asia: Please contact Lincoln warrants the equipment manufac- Lincoln GmbH and Co. - Page 22 SKF brings innovative solutions to OEMs and production facilities in every major industry world- wide. These five competence areas include bearings and units, seals, lubrication systems, mechatronics (combining mechanics and electronics into intelligent systems), and a wide range of services, from 3-D...
Need help?
Do you have a question about the LINCOLN FlowMaster II A Series and is the answer not in the manual?
Questions and answers