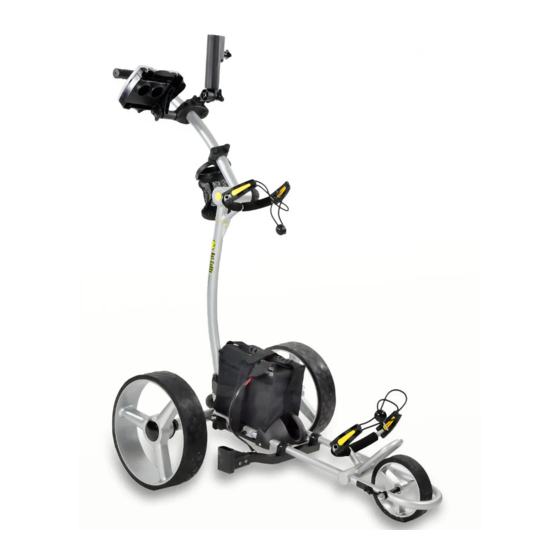
Bat-caddy X4 Series User Manual
Hide thumbs
Also See for X4 Series:
- User manual (19 pages) ,
- User manual (21 pages) ,
- User manual (18 pages)
Summary of Contents for Bat-caddy X4 Series
- Page 1 X4 Series User Manual X4 Pro X4 Classic X4 Sport ATTENTION: Please follow all assembly instructions. READ the instructions carefully to understand the operating procedures BEFORE you operate your caddy.
-
Page 2: Table Of Contents
TABLE OF CONTENTS Packing List..………………......…......……3 Parts Glossary.................………..4 Assembly Instructions.....………………........5, 6 Operating Instructions..............…....7 Imporatant Safety Notes................8 Synchronizing Your Remote ................8 Additional Instructions Braking System, Tracking, USB...............9 Testing Your Caddy..……………….............……..Recommendations ..................10 General Maintenance................…...…10 Trouble Shooting Guide................11 Technical Specifications................12... -
Page 3: Packing List
NOTE: THE MANUFACTURER IS NOT RESPONSIBLE FOR ANY RADIO OR TV INTERFERENCE CAUSED BY UNAUTHORIZED MODIFICATIONS TO THIS EQUIPMENT SUCH MODIFICATIONS COULD VOID THE USER’S AUTHORITY TO OPERATE THE EQUIPMENT Bat-Caddy X4R FCC ID: QSQ-REMOTE IC ID: 10716A-Remote... -
Page 4: Parts Glossary
PARTS GLOSSARY X4 Series 1. T- Handle w/power button & control 2. Manual Rheostat Speed Control 3. USB Port 4. Upper Bag Support 5. Bag Support Strap 6. Upper Frame Locking Knob 7. Battery w/Bag & Lead (charger not pictured) 8. -
Page 5: Assembly Instructions
ASSEMBLY INSTRUCTIONS X4 Series 1. Unpack all items carefully and check inventory. Place frame structure (one piece) on soft clean ground to protect the frame from being scratched. 2. Attach rear wheels to axles by pushing the wheel locking button (Pic-1) on the outside of the wheel and inserting the axle extension in to the wheel. - Page 6 ASSEMBLY INSTRUCTIONS (Continued) 6. Place the battery pack on the battery tray. Insert the 3-prong battery plug into the caddy outlet so the notch aligns properly and attach T-connector onto the battery. (SLA Battery lead is attached to battery) Then attach Velcro strap. Tightly fasten the Velcro strap underneath the battery tray and around the battery.
-
Page 7: Operating Instructions
A. Power Button – Holding down the button for 3-5 seconds will turn your POWER Bat-Caddy on or off. A green/red LED light will turn on behind the battery icon (On Bat-Caddys equipped with a Timer Button, the Power Button also acts... -
Page 8: Imporatant Safety Notes
SYNCHRONIZING YOUR REMOTE: If your Bat-Caddy will not respond to your Remote-Control it may need to be re-synched. A. Power off your Bat-Caddy for 5 seconds. B. Turn on your Remote-Control C. -
Page 9: Additional Instructions Braking System, Tracking, Usb
Additional Functions Braking System: The caddy drive train is designed to keep the wheels engaged with the motor/gearbox, thus acting as a brake that will maintain the caddy’s speed while going downhill. Tracking Adjustment*: Tracking behavior of all electric caddies is strongly dependent on equal weight distribution on the caddy and slope/topography of the golf course. -
Page 10: Testing Your Caddy
• The Bat-Caddy has been designed so that the user can concentrate on playing golf, while the caddy does the work of carrying your bag. In order to keep your Bat-Caddy looking its best, wipe any mud or grass from the frame, wheels and chassis after every round using a damp cloth or paper towel. -
Page 11: Trouble Shooting Guide
TROUBLE SHOOTING GUIDE Caddy does not have power • Make sure battery is plugged correctly into caddy and battery lead plug is damage free. • Make sure battery is sufficiently charged • Depress and hold power button for at least 5 seconds •... -
Page 12: Technical Specifications
Series 4 Features X4 Classic X4 Sport X4 Pro X4 R Dual-Lock Z-Fold Frame ✓ ✓ ✓ ✓ Single 200w Quiet Motor ✓ ✓ Dual 200w Quiet Motor ✓ ✓ Simple Handle Operation ✓ ✓ ✓ ✓ Speed-Recall Cruise Control ✓...


Need help?
Do you have a question about the X4 Series and is the answer not in the manual?
Questions and answers