Table of Contents
Advertisement
Quick Links
Advertisement
Table of Contents

Related Manuals for EKKO EOP68


Summary of Contents for EKKO EOP68
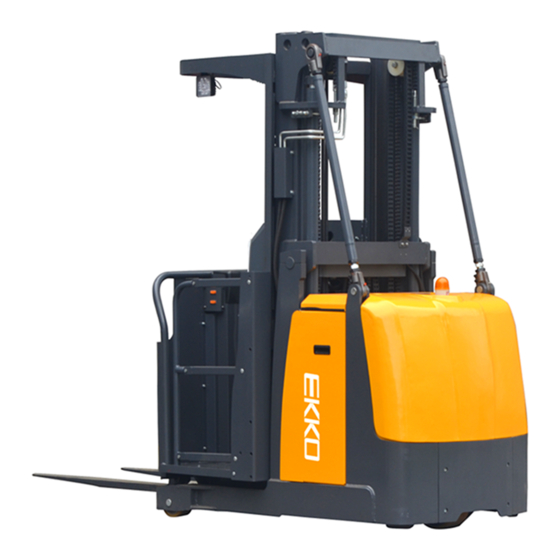
- Page 1 SPECIFICATION ORDER PICKER EOP68...
- Page 2 In order to meet the needs of the national environmental protection request, To reduce industrial pollution and improve productivity, we develop new series of EOP68 Type High level order picker . on the basis of absorption of the advantages of domestic & overseas battery order picker, they are especially suitable for cargo loading and unloading, handling, stacking, etc.
-
Page 3: Table Of Contents
Contents 1.The General Introduction..................... 1 2.Proper usage ........................2 3.Introduction of the product ..................3 3.1Overview of main components ..................3 3.2Truck schematic diagram & Model parameters ............4 3.3Safe operation and warning labels ................. 7 3.4Name plate ..........................8 4.Safety Caution ........................ - Page 4 10.1Maintenance list ........................ 24 10.2Lubrication point ......................25 10.3Check and refill hydraulic oil ..................25 10.4Check the electrical fuse ....................26 10.5 Remove and reinstall the shield ................. 26 11.Trouble shooting ..................... 27 12.After-sales service ..................... 28 13.Electrical Schematic diagram ..................29 14.Hydraulic Schematic diagram ................
-
Page 5: The General Introduction
1.The General Introduction EOP68 Type High level order picker uses a battery as the power source and AC motor as power to drive the truck through gear transmission, The lifting of the fork is driven by the AC motor hydraulic drive to push the cylinder to lift and lower the cargo. -
Page 6: Proper Usage
Proper use Please using the High-level order picker according to this specification. This is a stand on type High level order picker with autonomous control , lifting and lowering is controlled by the handle button. Improper use can cause personal injury or machine damage. Operators or operating companies need to ensure proper using, The Truck needs to be used on a firm ,flat ,intact surface and suitable surface ;the truck is designed for indoor use at room temperature from+5°C to... -
Page 7: Overview Of Main Components
3.Introduce of the product 3.1Overview of main components Figure 1 main components Figure 1 main components 1.Driving wheel 2.Cover 3.Battery cover 4.Lifting reinforcement rod 5.Door frame 6.Cockpit 7.Fork 8.Bearing wheel 9.Main frame... -
Page 8: Truck Schematic Diagram & Model Parameters
3.2Truck schematic diagram & Model parameters Figure 2 Schematic diagram... - Page 9 Table 2 EOP68 high level order picker Parameter. Table 2 EOP68 high level order picker Parameter. Model EOP68 Drive type Electric Type of operation Stand on Rated load capacity Q (lbs) 2200 Load center c (Inch) 19.68 Axle center to fork face x (Inch) 7.56...
- Page 10 4.35 Wa (Inch) 61.81 Min. Turning radius Travel speed, laden/unladen (km/h) 6.0/5.8 Lifting speed, with/without load(cabin) (mm/s) 140/150 Lifting speed, with/without load(Fork) (mm/s) 130/140 Perfor Lowering speed, with/without (mm/s) 240/250 mance load(cabin) Lowering speed, with/without (mm/s) 130/95 load(Fork) Maximum climbing ability, with/without load 5.10 Brake Type...
-
Page 11: Safe Operation And Warning Labels
3.3Safe operation and warning labels 1.Name plate 2.Load capacity chart 3Read the manual label 4.Wear safety rope sticker 5No hitchhiking 6.It is forbidden to lean out of the car 7.Hook sticker 8. It is forbidden to stand on /off the fork 9.Do not put hands in the car 10.Watch your hands 11.warning label 12.Be careful with electricity 13.Emergency discharge Figure 3 label diagram... -
Page 12: Nameplate
3.4Nameplate Figure 4 Nameplate 4.Safety Caution ! Please don’t • When travel outdoor, The stacking operation makes the lifting height of the cargo higher than the lifting point • Place the foot or hand under or into the lifting mechanism •... - Page 13 • Use this car without the manufacturer’s written consent Observing different ground condition during driving .The cargo may fall down, or the car may lose control ,Please check the loading situation frequently, If the cargo becomes unstable .Stop the operation of the truck immediately . When the cargo slide or slide off the truck, Stop the car by pressing emergency stop switch .Please refer to Chapter 6 for any truck Trouble .Maintain according to regular inspection.
-
Page 14: Test Run,Transportation,Outage
5.Test run, Transportation, Outage 5.1Test run Table 3 test data Model EOP68 Packing weight(lbs) 6270 Lifting height(Inch) 177.16 Size(Inch) 113*49.21*98.43 After receiving our new forklift or when it needs to be retest please with process with following steps before (the first )operation of the forklift : •... -
Page 15: Outage
fix the tow big ribs of the car .And fixed other side on the carrier Fig6 Fixed Point 5.3Outage When Storage remove the cargo and lowered the fork to lowest position. Grease all lubrication points mentioned in this manual (check regularly)to prevent rust and dust. -
Page 16: The Schematic Diagram Of Operating Mechanism
• Visually Check for any damaged tube or wires • If the car with Protective barrier .Check for damage and correct installation. 7.The Schematic diagram of Operating Mechanism Fig 7 Operating console Fig 8 Key Switch Figure 7.1 the steering wheel, which controls the steering of the truck by rotating the steering wheel. -
Page 17: 8Operating Specification
Fig 9 Operation switch Figure 9.1 shows the lifting & lowering switch, used to control the lifting and lowering of the fork. Figure 9.2 shows the forward and backward buttons, which are used to fine-tune the position of the truck so that the truck can pick up goods in a suitable position. Figure 9.3 shows the foot switch. -
Page 18: Loading Capacity Graph
During driving, you can brake by releasing the accelerator or the foot switch. Please always lower the forks completely and drive the car to a safe area.Turn the key counterclockwise to the OFF position and pull out the key 8.2Loading capacity Graph Do not overload, only increase the load capacity allowed by the load capacity graph The loading capacity Graph shows a given load center c [Inch] and a car with... -
Page 19: Traveling
Figure 11 Door frame main lifting Figure 12 the lifting & lowering joystick Use lift switch(Figure 9.1 shows) to control the rising and falling of the fork attached. Figure 13 Fork lifting 8.4Traveling Only drive on the slope when the cargo are facing up Don’t drive on the slope in excess the specified specifications . -
Page 20: Steering
⚫ Turn the inserted key to the "on" position to start the Truck ⚫ While depressing the foot switch, turn the accelerator button to the F direction to make the truck drive in the direction of ‘Fw’ or ‘Bw’. Release the accelerator to return to the '0' position or release the foot switch to stop the truck ⚫... - Page 21 When driving in the driving direction(as shown in the figure15 )rotate the steering wheel in the N direction, the truck rotates in the N direction, and the truck rotates in the S direction. When fork direction driving (as shown in the figure15 )rotate the steering wheel in the N direction, the truck rotates in the S direction, and the truck rotates in the N direction.
-
Page 22: Monitor
Fig:15 Steering diagram 8.6Monitor Curtis instruments are used to realize auxiliary control functions and provide a display interface for the driver's truck operating conditions. It is composed of control circuit, accumulated time counter (liquid crystal display), battery fuel gauge, fault code display and other display circuits. According to the current demand of electric trucks, this instrument has a brand new design in the control circuit and display form, which can provide the driver with intuitive truck status information, compact structure, beautiful appearance, high degree of... -
Page 23: Brake Structure &Brake Schematic
By directly moving the accelerator button (Figure 7.7) from one driving ⚫ direction to the opposite direction, the truck will regeneratively brake until it starts to drive into the opposite direction. Release the foot switch while driving to achieve truck braking. ⚫... -
Page 24: 9Changing And Replacement For Battery
9.Changing and Replacement for battery ! ⚫ Only Qualified personnel are allowed to repair or recharge the battery .Please be sure to follow this manual and battery manufacturer’s instructions. ⚫ The battery is Lead-Acid battery. ⚫ Battery recycling is subject to national regulations .Please follow these rules . - Page 25 panel and the battery baffle, remove the battery connector, pull out the battery from the side of the frame and hang it out. Caution: If the lifting equipment is not safe. The battery may tip over .Installation is the opposite procedure of remove , Please connect the positive terminal firstly .Otherwise the car is easy to damage Figure 17.Battery replacement...
-
Page 26: Charging
9.2Charging ⚫ Only be charged with included charger ⚫ Before using the charger ,Please fully understand the contents of the charger manual ! ⚫ Ensure good ventilation in charging room Park the car in a safe area that provide dedicated power .Lower fork , and remove the cargo. - Page 27 Check if there any damage and leakage for Hydraulic • connector and tubing . • Check hydraulic oil level and refill if necessary. Refill hydraulic oil(12 months or 1500 working hours) • Mechanical system. Check the fork for deformation and cracks •...
-
Page 28: Lubrication Point
Comprehensive Check if all labels are clear and complete • Check if the shield panel and protection is not damaged • • Check the caster ,to height adjust or replace it if worn Conduct a test run • 10.2Lubrication point Lubrication point according to the maintenance list .required grease specification :DIN:51825 1..Drive gear... -
Page 29: Remove And Reinstall The Shield
Code Specificatio 300A 10.5 Remove and reinstall the shield Figure 19 Fuse Do not use the car if the shield is damaged or not installed properly. If the shield needs to be removed, unscrew the fixed screw and carefully remove the shield, the screw is still on the shield. When reinstalling, place the shield in the correct position and secure each screw properly. -
Page 30: Trouble Shooting
11.Trouble shooting ⚫ If the car is still in trouble ,please follow the instruction in chapter 6 Table 8 Fault analysis Effect of fault Cause Solution Lift the cargo weight indicated Overload in Name plate Battery discharge Charging the battery Check the fuse, replace it if Fuse damage necessary... -
Page 31: After-Sales Service
Check and plug the battery Battery plug not plugged in plug Release the emergency stop Emergency stop switch pressed The forklift is not in switch operation The switch lock is off Open the switch lock Low battery Charge the battery Damaged safety device Check the safety device If the car breaks down and can’t be operated outside the working area, Lift the... -
Page 32: Electrical Schematic Diagram
Electrical Schematic diagram... -
Page 33: Hydraulic Schematic Diagram
Hydraulic Schematic diagram This manual final interpretation retained by manufacturers.
Need help?
Do you have a question about the EOP68 and is the answer not in the manual?
Questions and answers