Advertisement
Quick Links
Advertisement

Related Manuals for Kogan SMARTERHOME G40


Summary of Contents for Kogan SMARTERHOME G40
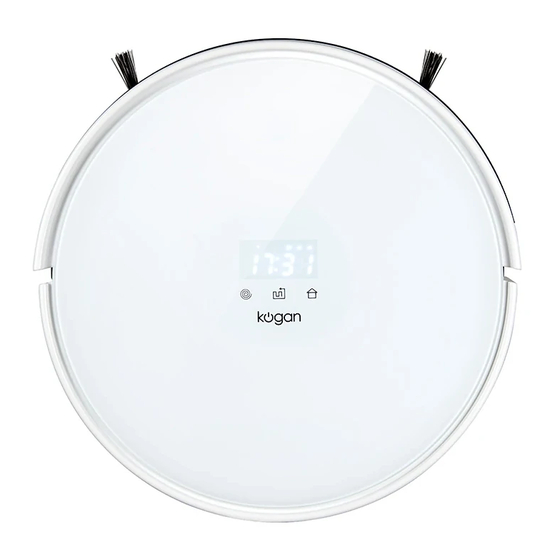
- Page 1 SMARTERHOME G40 ROBOT VACUUM WITH MOPPING FUNCTION KAVACRBG40A...
-
Page 2: Safety And Warnings
• Do not attempt to disassemble or repair this product, its charging dock or adapter. If it experiences any fault or damage, stop using it and contact Kogan.com. • Turn off the switch before you clean or maintain the device. - Page 3 OVERVIEW Bumper Display panel Touch buttons Touch Buttons Spot clean Auto clean Dock Display Panel Battery Status/Charging Status Set time, error codes, cleaning modes, etc.
- Page 4 Bottom View Anti-falling sensor Side brush Charging pole Universal wheel Drive wheel Battery box cover Fur brush Dust bin/Water tank Roller brush Brush guard release...
- Page 5 Back View Dust box/Water tank release Switch On\Off Dust bin/Water tank Charging plug Water Tank Water inlet Water tank Dust box inlet...
- Page 6 Bottom of Water Tank Mopping cloth Velcro Water leaking hole Dust Box without Water Tank Dust box Vacuuming inlet Dust vacuuming motor...
- Page 7 Charging Dock DC Charging socket Signal receiving window Charging pole Magnetic Strip (Optional) Lay the magnetic strip flat on the floor from one wall to the opposite wall to block off the area. The cleaner will recognise the strip and will not cross it.
- Page 8 Remote Standby/Wake up button Auto charging button Auto cleaning button Direction button OK button Full go button Edge cleaning button Spot cleaning button Time setting button Schedule setting button Voice On/Off button...
-
Page 9: Operation
OPERATION Sleeping Standby Cleaning • Sleeping: Power switch is On, display panel is Off. • Standby: Power switch is On, display panel is On. • Cleaning: The robot is cleaning, display panel is On. Cleaning Make sure the power switch is On and press any cleaning button on the robot or remote control to activate cleaning. - Page 10 To cancel the schedule: set the scheduling time to [00:00]. Note: Your schedule will be erased automatically if you remove or change the battery. You may need to reset the scheduling time accordingly. Cleaning Modes Spot Cleaning Auto Cleaning Edge Cleaning Auto Cleaning Mode Your SmarterHome Robot Vacuum uses inertial navigation, an advanced navigation system that calculates the most efficient path to clean your room.
- Page 11 Install App Download the “Kogan SmarterHome” app from the Play Store (Android) or App Store (iOS). Register If you do not have a Kogan SmarterHome™ account, register or sign in with a verification code sent by SMS. To register: Tap to enter registration page.
- Page 12 Set device in pairing mode When the device is first turned on, it may automatically enter pairing mode (the indicator light will be flashing rapidly). If not automatically in pairing mode when powered on, you can manually set the device in pairing mode by pressing and holding the Auto button for three seconds until you hear a beep and the indicator light begins flashing rapidly.
- Page 13 Select “AP Mode” for the set-up type. Ensure that the device is in pairing mode, with the light flashing, and tap “Confirm light is slowly flashing”. Enter your Wi-Fi details. It is important that your SmarterHome™ device and the app are connected to the same Wi-Fi network during setup.
- Page 14 10. Follow the in-app prompts to continue AP Mode connection, which will pair your mobile phone to the device’s Wi-Fi hotspot to ensure a connection. Note: If the Wi-Fi hotspot does not appear on your phone in the list of available networks, your device may not be set in AP Pairing Mode correctly.
- Page 15 Having trouble connecting? The prior steps detail the process for “AP Mode” connection. If that does not work for your connection, we suggest trying it again, and if still no success, attempting the following method for Standard (non-AP Mode) connection. Add device through network Once registered, tap “+”...
- Page 16 Notes: The device and the app have to use the same Wi-Fi network. • • The device is only compatible with 2.4Ghz networks. If neither Standard or AP Mode methods are successful, please contact kogan.com for support.
- Page 17 ” icon to access the ‘Add and manage’ page. Select ‘Set up device’, then under the Works with Google banner, select ‘Have something already set up?’ Select the search bar and type ‘Smarter Home’ to locate the Kogan SmarterHome™ service.
- Page 18 Tap ‘Authorise’ to grant Google permission to access the SmarterHome™ app and your devices. From here, you will be prompted to sign into your SmarterHome™ account using either your email or mobile phone number, depending on which method you used to register your account.
- Page 19 Please note that Google Home can only control the base/core functions of any compatible SmarterHome™ devices. To make full use of this product’s smart functionality, please use the Kogan SmarterHome™ app. Voice commands for Google Once connected, the following voice commands will be active for the robot vacuum: “Turn robot vacuum on,”...
- Page 20 AMAZON ALEXA CONTROL Note: You will need to have set up an Alexa account prior to linking your Kogan SmarterHome™ device. Adding “SmarterHome” to the Alexa app From the home page of the Alexa app, select the “ ” icon in the top-right and select Skills &...
- Page 21 Tap ‘Enable to Use’ to add the Kogan SmarterHome™ skill to Alexa. From here, you will be prompted to sign into your SmarterHome™ account using either your email or mobile phone number, depending on which method you used to register your account.
- Page 22 SmarterHome™ account. When your devices have successfully connected to the Alexa app, you will be able to control your Kogan SmarterHome™ devices via Alexa’s voice commands. Note: Please note that Google Home can only control the base/core functions of any compatible SmarterHome™...
-
Page 23: App Functions
APP FUNCTIONS Using the Kogan SmarterHome app Once the robot is successfully paired to the app, you will see the robot vacuum’s control page. The main page is divided to four zones: • top zone • grid map zone •... - Page 24 The control zone is used to control robot’s state, like Power On/OFF, Auto Clean etc. Auto button: The robot will enter Auto Clean mode and start to clean the floor, showing the cleaning path and obstacles in real-time. Auto charging button: Control the robot to enter into auto charging mode, the robot will go back to charging station and starts charging.
- Page 25 Battery Charging Place charging station against wall and remove obstacles from within 1 metre at both sides and about 2 metres in front of the station (as show in the figure). Note: Indicator light on the charging station will be on when it is connected to power supply. Auto Charging When the robot is in Auto cleaning mode, it will return to the charging station when power is low.
- Page 26 Pull up the seal cover 90 degrees to fill water and replace when water is fulfilled Water Tank Dust Box It is very convenient and easy to mop spots on the floor with the water tank and attach the cleaning cloth. Take off the dust bin, place the water tank refilled with water on the robot and start cleaning.
-
Page 27: Cleaning And Care
CLEANING AND CARE Cleaning of Side brush, Main brush and Mopping Cloth Cleaning the Side Brushes The side brushes can be easily worn from heavy use so you should check regularly to monitor their conditions. • Switch the robot cleaner off and put it up-side-down. •... - Page 28 Remove the Main Brush Set from the Robot Push the Brush guard release on the main brush and then take out the roller brush and fur brush to clean. Remove the mopping cloth from the water tank: the mopping cloth should be taken off when water tank is held still.
- Page 29 Replace the Side Brushes If the side brush is damaged, it needs to be replaced. Replacement brushes can be obtained from Kogan.com. Switch the robot cleaner off and put it up-side-down. Remove the retaining screw with a screwdriver.
-
Page 30: Troubleshooting
Wheel off the ground Put the robot on solid ground Note: If above solutions do not work, reset the robot by switching off the unit, then turning it on and checking again. If it still doesn't work after reset, contact help.kogan.com... -
Page 31: Specifications
SPECIFICATIONS Mechanical Specification Diameter 320mm Height 88mm Weight 3.0kgs Electrical Specification Rated Voltage 14.8v Rated Power Charging Station Rated Output Voltage Rated Output Current 0.6A Battery 2600mAh Lithium Remote Control Input Voltage Other Parameters Dust Box 600ml Water Tank (Optional) 300ml Cleaning Modes Auto, Spot, Edge, Schedule... - Page 32 Need more information? We hope that this user guide has given you the assistance needed for a simple set-up. For the most up-to-date guide for your product, as well as any additional assistance you may require, head online to help.kogan.com...
Need help?
Do you have a question about the SMARTERHOME G40 and is the answer not in the manual?
Questions and answers