
Related Manuals for MRC HD-3008


Summary of Contents for MRC HD-3008
- Page 1 Dew Point + Type K Thermometer HYGROMETER Model : HD-3008 PLEASE READ THIS MANUAL CAREFULLY BEFORE OPERATION 3, Hagavish st. Israel 58817 Tel: 972 3 5595252, Fax: 972 3 5594529 mrc@mrclab.com MRC.8.20...
-
Page 2: Table Of Contents
TABLE OF CONTENTS 1. FEATURES............. 1 2. SPECIFICATIONS........... 2 3. FRONT PANEL DESCRIPTION........5 3-1 Display..............3-2 Power Button............3-3 REC. Button............3-4 Hold Button............3-5 Button..............3-6 Function Button ............. 3-7 Battery Compartment/Cover........3-8 Temp. Probe input Socket ........3-9 Humidity Probe input Socket ........ -
Page 3: Features
1. FEATURES * Hygrometer + Dew point + Type K Thermometer are combined into one meter, intelligent. * Dew point measurement. * Thin-film capacitance sensor for humidity measurement, high precision. * Type K thermometer build in temperature linearity & precision cold junction compensation circuit, high accuracy. -
Page 4: Specifications
2. SPECIFICATIONS 2-1 General Specifications Circuit Custom one-chip of microprocessor LSI circuit. Display 51 mm x 32 mm, 15 mm ( 0.6" ) digit size. dual function LCD display, Hygrometer : Measurement R.H. ( Relative Humidity ) Temperature - 蚓, 蚌. Dew point : Type K thermometer : Hygrometer ( Dew Point ) meter :... - Page 5 Power Current Approx. DC 7 mA. Weight 250 g/0.55 LB. Main instrument: Dimension 195 x 68 x 30 mm ( 7.6 x 2.6 x 1.2 inch ) Humidity Sensor Probe: Round 26 mm Dia. x 160 mm. Accessories Instruction manual...... 1 PC. Included Humidity probe......
- Page 6 Dew Point Range -25.3 蚓 to 48.9 蚓 蚓 Resolution 0.1 蚓 Range -13.5 蚌 to 120.1 蚌. 蚌 Resolution 0.1 蚌. Remark : * Dew Point display value is calculated from the Humidity/Temp. measurement automatically. * The Dew Point accuracy is sum accuracy value of Humidity &...
-
Page 7: Front Panel Description
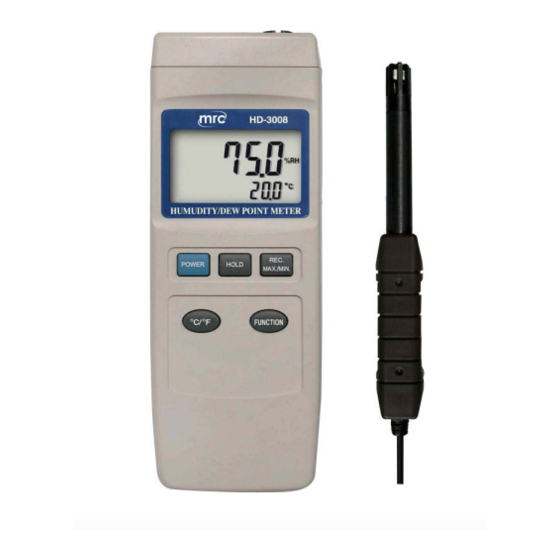
3. FRONT PANEL DESCRIPTION Fig. 1 3-1 Display 3-8 Temp. Probe input Socket 3-2 Power Button 3-9 Humidity Probe input Socket 3-3 REC. Button 3-10 RS-232 Output Terminal 3-4 Hold Button 3-11 Stand 3-5 蚓,蚌 Button 3-12 Sensor Head ( R.H., Temp. ) 3-6 Function Button 3-13 Probe Handle 3-7 Battery Compartment... -
Page 8: Measuring Procedure
4. MEASURING PROCEDURE 4-1 Hygrometer measurement ( Humidity & temperature measurement ) 1) Plug the Humidity probe into the " Humidity Probe input Socket " ( 3-9, Fig. 1 ). 2) Power on the meter by pressing the Power Button ( 3-2, Fig. -
Page 9: Data Hold
4-4 Data Hold During the measurement, press the " Hold Button " ( 3-4, Fig. 1 ) will hold the measured value & the LCD will indicate a " HOLD " symbol on the display. * Press the " Hold Button " again to release the data hold function. -
Page 10: Offset Temperature Adjustment For Type K Thermometer
5. OFFSET TEMPERATURE ADJUSTMENT Type K THERMOMETER The instrument is fully calibrated to assure the high quality measuring performance. Usually it is not necessary to execute the Offset Temperature Adjustment procedures, however the measured result could be influenced by using different type of temperature probes. - Page 11 5) Under the " Hold Button " ( 3-4, Fig. 1 ) and " REC. Button " ( 3-3, Fig. 1 ) be pressed condition, press " 蚓,蚌 Button " ( 3-5, Fig. 1 ) to add 0.1 or press "...
-
Page 12: Auto Power Off Disable
6. AUTO POWER OFF DISABLE The instrument has " Auto Power Off " function in order to prolong battery life. If there are no buttons to be pressed for around 10 minutes, the meter will power off automatically. Disable auto power off function by pressing the " REC. Button " ( 3-3, Fig. -
Page 13: Battery Replacement
The 16 digits data stream will be displayed in the following format : D15 D14 D13 D12 D11 D10 D9 D8 D7 D6 D5 D4 D3 D2 D1 D0 Each digit indicates the following status : End Word D1 & D8 Display reading, D1 = LSD, D8 = MSD For example : If the display reading is 1234, then D8 to D1 is :... -
Page 14: Optional Probes & Accessories
2) Slide the " Battery Cover " ( 3-7, Fig. 1 ) away from the instrument and remove the battery. 3) Replace with 9V battery ( Alkaline or Heavy duty type ) and reinstate the cover. 4) Make sure the battery cover is secured after changing the battery.
Need help?
Do you have a question about the HD-3008 and is the answer not in the manual?
Questions and answers