Napoleon Galaxy Series Manual
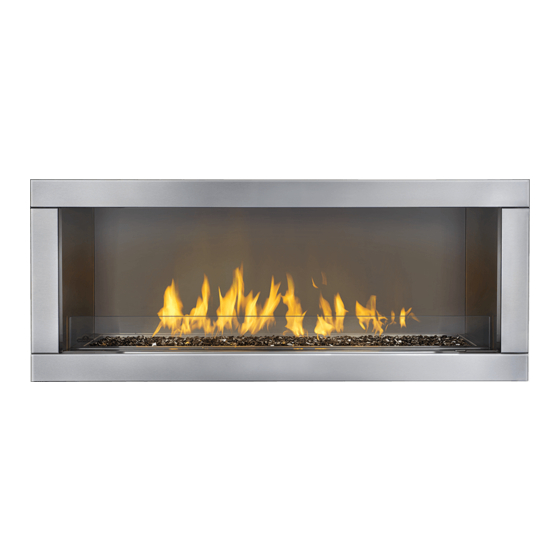
Outdoor gas fireplace
Hide thumbs
Also See for Galaxy Series:
- Installation and operation manual (88 pages) ,
- Installation and operation manual (88 pages)
Table of Contents
Advertisement
Quick Links
NOTE!
LED Light instructions are located on page 24.
DANGER!
This appliance can produce carbon monoxide, which has no odor. Using it in an
enclosed space can kill you. Never use this appliance in an enclosed space such as a
camper, tent, car or home.
!
DANGER
IF YOU SMELL GAS:
• Shut off gas to the appliance.
• Extinguish any open flame.
• If odor continues, keep away from the
appliance and immediately call your gas
supplier or fire department.
!
WARNING!
For Outdoor Use Only.
INSTALLER: LEAVE THIS MANUAL WITH THE APPLIANCE.
CONSUMER: RETAIN THIS MANUAL FOR FUTURE REFERENCE.
N415-0346-AU FEB 23.21
CARBON MONOXIDE HAZARD
Do not try to light this appliance without reading the
"LIGHTING" instructions section of this manual.
DO NOT PLACE ARTICLES ON OR AGAINST THIS
APPLIANCE.
DO NOT USE OR STORE FLAMMABLE MATERIALS
NEAR THIS APPLIANCE.
DO NOT SPRAY AEROSOLS IN THE VICINITY OF THIS
APPLIANCE WHILE IT IS IN OPERATION.
An L.P. cylinder not connected for use must not be
stored in the vicinity of this or any other appliance.
If the information in these instructions is not
followed exactly, a fire or explosion may result,
causing property damage, personal injury or death.
WARNING!
• Hot glass will cause burns.
• Do not touch glass until cooled.
• Never allow children to touch glass.
Wolf Steel Ltd.
214 Bayview Drive,
Barrie, Ontario, CANADA L4N 4Y8
grills@napoleon.com
APPLY SERIAL NUMBER LABEL FROM CARTON
Serial No.
XXXXXX000000
MODEL NO.
OUTDOOR GAS FIREPLACE
GSS48 / GSS48ST
!
WARNING
1
www.napoleon.com
Advertisement
Table of Contents

Related Manuals for Napoleon Galaxy Series


Summary of Contents for Napoleon Galaxy Series
- Page 1 • Do not touch glass until cooled. • Never allow children to touch glass. INSTALLER: LEAVE THIS MANUAL WITH THE APPLIANCE. CONSUMER: RETAIN THIS MANUAL FOR FUTURE REFERENCE. Wolf Steel Ltd. 214 Bayview Drive, Barrie, Ontario, CANADA L4N 4Y8 grills@napoleon.com N415-0346-AU FEB 23.21 www.napoleon.com...
- Page 2 NAPOLEON. NAPOLEON warrants that components in your new NAPOLEON product will be free from defects in material and workmanship from the date of purchase, for the following period: Aluminum table top and pedestal ............
-
Page 3: Safe Operating Practices
For protection of young children or the infirm, a secondary guard is required. • Do not modify this appliance. • Primarily a decorative appliance - not certified as a space heater. N415-0346-AU FEB 23.21 www.napoleon.com... -
Page 4: Getting Started
INPUT MODEL FUEL ORIFICE SIZE MAX. INPUT MJ/Hr TEST POINT GAS PRESSURE GSS48 Natural Gas #25 (3.8mm) 1.0 kPa GSS48 Propane Gas #43 (2.26mm) 2.75 kPa www.napoleon.com N415-0346-AU FEB 23.21... -
Page 5: Top View
20” to 22 1/2” (with trim) (508mm to 572mm) 1 1/2” to 4” (38mm to 102mm) 52 7/16” (1332mm) 46 7/16” (1180mm) FRONT VIEW 16 1/2” (with trim) 21 7/16” (419mm) (545 mm) 25 1/2” (648mm) N415-0346-AU FEB 23.21 www.napoleon.com... - Page 6 (537 mm) 25 1/8” to 30 1/8” (with trim) (638 mm to 765 mm) 1 1/2” to 4” (38mm to 102mm) 52 7/16” (1332mm) 46 7/16” (1180mm) FRONT VIEW 16 1/2” (with trim) 21 7/16” (419mm) (545 mm) 25 1/2” (648mm) www.napoleon.com N415-0346-AU FEB 23.21...
- Page 7 • at least 25% of the total wall area is completely open, and • at least 30% of the remaining wall area is open and unrestricted. In the case of balconies, at least 20% of the total wall area shall be and remain open and unrestricted. N415-0346-AU FEB 23.21 www.napoleon.com...
-
Page 8: Front View
6” (152mm) minimum to floor 18 7/16” 50 3/4” (1289mm) (468mm) 6” (Including 1/8” (3mm) (152mm) clearance per side) minimum 6” (152mm) REAR VIEW minimum 2 X 4 STEEL STUDS 18 7/16” (468mm) 6” (152mm) minimum www.napoleon.com N415-0346-AU FEB 23.21... -
Page 9: Installation
Minimum clearance to combustibles must be maintained or a serious fire hazard could result. Minimum Clearance To Combustibles Clearance Dimension From Ground or other surface 6” (152mm) From Sides 6” (152mm) From Ceiling 36” (915mm) Alcove Width 60” (1524mm) Minimum Alcove Depth 24” (610mm) Maximum N415-0346-AU FEB 23.21 www.napoleon.com... -
Page 10: Minimum Enclosure Clearances
Non minimum Combustible. (including to ceiling. framing, sheeting and finishing materials). Certified to ASTM E-136 1/2”(13mm) 6” Cement Board (152mm) minimum to 6”(152mm) floor Steel Stud 1 1/2” 6” (152mm) (38mm) (Minimum clearance to combustibles) www.napoleon.com N415-0346-AU FEB 23.21... - Page 11 All material in shaded area must to ceiling. be Non Combustible. (including framing, sheeting and finishing materials). Certified to ASTM E-136 Trim depth can be altered depending on finishing material. 6” (152mm) minimum to floor N415-0346-AU FEB 23.21 www.napoleon.com...
-
Page 12: Minimum Mantel Clearances
Note: When planning for the installation of the fireplace the framing height must be increased to accommodate a drain pan and any additional drainage piping required. Note: The fireplace must be installed on a level surface to ensure proper drainage. www.napoleon.com N415-0346-AU FEB 23.21... -
Page 13: Side View
Side Up Side Up FRONT VIEW WARNING! When installing the optional trim kit the installer must leave 5/8” (16mm) gap in cement board and finnishing materials on both sides to allow access to slots for frame. N415-0346-AU FEB 23.21 www.napoleon.com... - Page 14 3. Open the front access door on the appliance and loosen the thumb screws (do not remove). Lift up on the thumb screws and tighten in position at top of slot. Tighten in position at top of slot. www.napoleon.com N415-0346-AU FEB 23.21...
- Page 15 Serrated Side Up 2.5” (63.5mm) a gap will be visible between the brick ledge and the trim. 5. Loosen the thumb screw and lower until it stops. Retighten thumb screw, and close the access door. Tighten in position. N415-0346-AU FEB 23.21 www.napoleon.com...
-
Page 16: Natural Gas Hook-Up
High pressure will damage the valve, disconnect gas supply piping before testing gas line at test pressures above 1/2 psig. • Leak test all the connections by brushing on a soap and water solution. These connections can be accessed by removing the burner. (See burner removal instructions.) www.napoleon.com N415-0346-AU FEB 23.21... -
Page 17: Conversion To Lp (Propane) Gas
5. Unscrew the natural gas orifice from the inside of the burner as illustrated. 6. Replace the natural gas orifice with the LP (Propane) orifice supplied. Note: The air shutter has been factory set closed for Natural Gas and must be adjusted to full open for propane. N415-0346-AU FEB 23.21 www.napoleon.com... - Page 18 Every opening shall have minimum dimensions so as to permit the entrance of a 1/8 inch (3.2mm) diameter rod. d) The bottom of the low level (set of) opening(s) shall be at the enclosure base with the upper edge no more than 125mm above the base. www.napoleon.com N415-0346-AU FEB 23.21...
- Page 19 OPENING 5” (127mm) MAXIMUM 34” (864mm) RECOMMENDED OPENING 2” (51mm) MINIMUM NON LOCKING DOOR 1” (25.4mm) MAXIMUM PARTITION TO ISOLATE CYLINDER 5” (127mm) FROM APPLIANCE MAXIMUM CYLINDER SIZE OPENING A AREA OPENING B AREA 100cm 60cm N415-0346-AU FEB 23.21 www.napoleon.com...
- Page 20 3. Slide propane bottle into position so that the bracket slides under the head of the lag screw. 4. Tighten the lag screw onto the bracket. 5. For fastening to a concrete surface a concrete anchor will be required. (Not supplied) www.napoleon.com N415-0346-AU FEB 23.21...
- Page 21 Place the refactory rocks on top of the glass ember bed and around the burner tray as desired, making sure not to cover any burner ports or the ignition portion of the burner. ENSURE NO ROCK IS PLACED ON THE IGNITION PORTION OF THE BURNER, DIFFICULTIES IN LIGHTING MAY RESULT. N415-0346-AU FEB 23.21 www.napoleon.com...
- Page 22 Install the glass embers as described in the previous section. • Place the logs as shown in the following figures and refer to the diagram above for the identification number of each log. FIG 1. DO NOT COVER www.napoleon.com N415-0346-AU FEB 23.21...
- Page 23 FIG 2. FIG 3. FIG 4. N415-0346-AU FEB 23.21 www.napoleon.com...
- Page 24 FIG 5. FIG 6. FIG 7. www.napoleon.com N415-0346-AU FEB 23.21...
-
Page 25: Lighting Instructions
If the burner does not light within 10 seconds, turn the valve off and wait 5 minutes for any gas to dissipate before repeating the procedure. If lighting the unit with a match, clip the match into the supplied lighting rod. N415-0346-AU FEB 23.21 www.napoleon.com... -
Page 26: Operation
• Inspect the hose assembly before each use. If there is evidence of excessive abrasion or wear, or if the hose is damaged it must be replaced prior to using the appliance with a replacement hose assembly specified by your Napoleon dealer. NOTE! The appliance has been designed with several safety features, which include a safety valve. -
Page 27: Maintenance / Cleaning Instructions
WARNING! Hose: Check for abrasions, melting, cuts, and cracks in the hose. If any of these conditions exist, do not use the appliance. Have the part replaced by your Napoleon dealer or qualified gas installer. Cleaning Inside The Appliance: While washing your appliance, be sure to keep the area around the burner and pilot assembly dry at all times. - Page 28 Lift the glass tray from the fireplace, pushing from the top, disengage the thermocouple and igniter from the glass tray. Remove the flex hose and the orifice from the burner and completely remove the glass tray from the fireplace. www.napoleon.com N415-0346-AU FEB 23.21...
- Page 29 Cleaning The Outer Appliance Surface: Do not use abrasive cleaners or steel wool on any painted, or stainless steel parts of your Napoleon Appliance. Doing so will scratch the finish. Exterior surfaces should be cleaned with warm soapy water. To clean stainless surfaces, use a stainless steel or a non-abrasive cleaner.
-
Page 30: Troubleshooting
The gap can be adjusted by bending the tip in or out. Until a spark is achieved. If, after carrying out these checks, the appliance does not operate safey and correctly, contact Napoleon for further further information. www.napoleon.com N415-0346-AU FEB 23.21... -
Page 31: Ordering Replacement Parts
3. A concise description of the problem (‘broken’ is not sufficient). 4. Proof of purchase (photocopy of the invoice). In some cases, Napoleon could request to have the parts returned to the factory for inspection before providing replacement parts. Before contacting Napoleon dealer, please note that the following items are not covered by the warranty: •... -
Page 32: Parts List
MEGA glass embers - amber 1lb MEGB glass embers - blue 1lb MEGK glass embers - black 1lb MEGR glass embers - red 1lb MKGA glass embers - amber 6lb MKGC glass embers - clear 6lb www.napoleon.com N415-0346-AU FEB 23.21... - Page 33 - blue 6lb MKGR glass embers - red 6lb MKRY grey river rocks MKRM multicoloured river rocks DL45 driftwood log set x - standard p - propane units only n - natural gas units only ac - accessory N415-0346-AU FEB 23.21 www.napoleon.com...
- Page 34 GSS48 Parts Diagram www.napoleon.com N415-0346-AU FEB 23.21...
- Page 35 MEGA glass embers - amber 1lb MEGB glass embers - blue 1lb MEGK glass embers - black 1lb MEGR glass embers - red 1lb MKGA glass embers - amber 6lb MKGC glass embers - clear 6lb N415-0346-AU FEB 23.21 www.napoleon.com...
- Page 36 - blue 6lb MKGR glass embers - red 6lb MKRY grey river rocks MKRM multicoloured river rocks DL45 driftwood log set x - standard p - propane units only n - natural gas units only ac - accessory www.napoleon.com N415-0346-AU FEB 23.21...
- Page 37 GSS48ST Parts Diagram N415-0346-AU FEB 23.21 www.napoleon.com...
- Page 38 Notes www.napoleon.com N415-0346-AU FEB 23.21...
- Page 39 Notes N415-0346-AU FEB 23.21 www.napoleon.com...
- Page 40 N415-0346-AU...
Need help?
Do you have a question about the Galaxy Series and is the answer not in the manual?
Questions and answers