Table of Contents
Advertisement
NOTE!
LED Light instructions are located on page 23.
DANGER!
This appliance can produce carbon monoxide, which has no odor. Using it in an
enclosed space can kill you. Never use this appliance in an enclosed space such as a
camper, tent, car or home.
DANGER
IF YOU SMELL GAS:
• Shut off gas to the appliance.
• Extinguish any open flame.
• If odor continues, keep away from the
appliance and immediately call your gas
supplier or fire department.
WARNING!
For Outdoor Use Only.
WARNING!
• Hot glass will cause burns.
• Do not touch glass until cooled.
• Never allow children to touch glass.
CONSUMER: RETAIN THIS MANUAL FOR FUTURE REFERENCE.
214 Bayview Dr., Barrie, Ontario, Canada L4N 4Y8 Phone: 1-705-726-4278 Fax: (705)725-2564
427-O-02b-5
N415-0270 NOV 19.13
CARBON MONOXIDE HAZARD
INSTALLER: LEAVE THIS MANUAL WITH THE APPLIANCE.
Napoleon Appliance Corp.,
www.napoleongrills.com
Customer service: 1-866-820-8686 or
APPLY SERIAL NUMBER LABEL FROM CARTON
Serial No.
XXXXXX000000
MODEL NO.
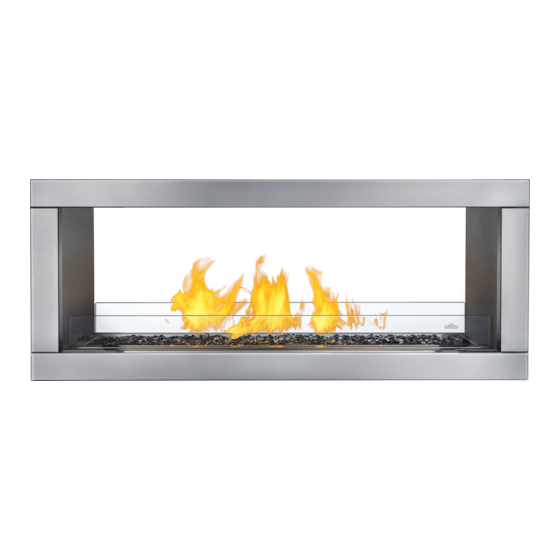
OUTDOOR GAS FIREPLACE
GSS48 / GSS48ST
WARNING
Do not try to light this appliance without
reading the "LIGHTING" instructions section
of this manual.
Do not store or use gasoline or other
flammable liquids or vapors in the vicinity of
this or any other appliance. An L.P. cylinder
not connected for use must not be stored in
the vicinity of this or any other appliance.
If the information in these instructions is
not followed exactly, a fire or explosion may
result, causing property damage, personal
injury or death.
wecare@napoleonproducts.com
1
EN
FR
PG.37
www.napoleongrills.com
Advertisement
Table of Contents

Related Manuals for Napoleon GSS48


Summary of Contents for Napoleon GSS48
- Page 1 APPLY SERIAL NUMBER LABEL FROM CARTON Serial No. XXXXXX000000 MODEL NO. PG.37 OUTDOOR GAS FIREPLACE GSS48 / GSS48ST NOTE! LED Light instructions are located on page 23. DANGER! CARBON MONOXIDE HAZARD This appliance can produce carbon monoxide, which has no odor. Using it in an enclosed space can kill you. Never use this appliance in an enclosed space such as a camper, tent, car or home. DANGER WARNING Do not try to light this appliance without IF YOU SMELL GAS: reading the “LIGHTING” instructions section • Shut off gas to the appliance. of this manual. • Extinguish any open flame.
-
Page 2: Conditions And Limitations
NAPOLEON® warrants its products against manufacturing defects to the original purchaser only. Registering your warranty is not necessary. Simply provide your proof of purchase along with the model and serial number to make a warranty claim. NAPOLEON® reserves the right to have its representative inspect any product or part thereof prior to honouring any warranty claim. -
Page 3: Safe Operating Practices
WARNING! For Outdoor Use Only. WARNING! Improper installation, adjustment, alteration, service or maintenance can cause injury or property damage. Read the installation, operating and maintenance instructions thoroughly before installing or servicing this gas appliance. Safe Operating Practices • THIS APPLIANCE IS HOT WHEN OPERATING AND CAN CAUSE SEVERE BURNS IF CONTACTED. • Installation and repair should be done by a qualified service person. The appliance should be inspected before use and at least annually by a qualified service person. More frequent cleaning may be required as necessary. It is imperative the control compartment, burners and circulating air passageways of the appliance be kept clean. • Do not operate appliance before reading and understanding operating instructions. Failure to operate appliance according to operating instructions could cause fire or injury. -
Page 4: Getting Started
INPUT MODEL FUEL ORIFICE SIZE MAX. INPUT Btu/Hr GAS INLET PRESSURES GSS48 Natural Gas 55, 000 7.0” W.C. GSS48 Propane Gas 55, 000 11.0” W.C. - Page 5 Dimensions GSS48 TOP VIEW 17 5/16” 19 9/32” (440mm) (490mm) (without trim) 50 1/2” (1283mm) 47 1/2” (1207mm) Nailing Tab FRONT VIEW 16 1/2” 3 1/2” (without trim) (419mm) (89mm) 24 1/2” 1/8” Edge Thickness (622mm) (3mm) TOP VIEW 17 5/16” (440mm) 20” to 22 1/2” (with trim) (508mm to 572mm) 1 1/2” to 4” (38mm to 102mm) 52 7/16” (1332mm) 46 7/16” (1180mm) FRONT VIEW 16 1/2”...
- Page 6 Dimensions GSS48ST TOP VIEW 24” 21 1/8” (610mm) (without trim) (537mm) 50 1/2” (1283mm) 47 1/2” (1207mm) Nailing Tab FRONT VIEW 16 1/2” 3 1/2” (without trim) (419mm) (89mm) 24 1/2” 1/8” Edge Thickness (622mm) (3mm) 1 1/2” to 4” (38mm to 102mm) TOP VIEW 21 1/8” (537 mm) 25 1/8” to 30 1/8” (with trim) (638 mm to 765 mm) 1 1/2” to 4” (38mm to 102mm) 52 7/16” (1332mm) 46 7/16” (1180mm) FRONT VIEW 16 1/2”...
- Page 7 Location Locating Your Outdoor Fireplace It is important when selecting a location for your fireplace to ensure clearances to adjacent combustibles are met. This appliance is intended for installation on an outdoor patio or in your yard. It is highly recommended that this appliance be installed in a sheltered area (following the guidelines outlined below).
-
Page 8: Installation
Installation Nailing Tabs To install the appliance face flush with the finished surface, position the framework to accommodate the thickness of the finished surface. Screw the nailing tabs to either side of the appliance and secure to the 2 x 4 steel framing. The tabs will facilitate the installation of either a 1/2"(13mm) or 3/4”(19mm) finished surface thickness. -
Page 9: Minimum Enclosure Clearances
Minimum Enclosure Clearances WARNING! Use only non-combustible materials such as steel studs, cement board, ceramic tile, marble, paint etc. When adding finishing materials to the appliance. Do not use wood or drywall. WARNING! You must have clear and easy access to the on/off valve AFTER the appliance is installed and connected to the gas supply in order to safely turn off the burner. GSS48 All material in shaded area must be Non Combustible. (including framing, sheeting and 36” finishing materials). (914mm) NON COMBUSTIBLE minimum to ceiling. 16 1/2” 16 1/2” 24 3/4” (629mm) (419mm) (VA) (419mm) (VA) Including 1/8” (3mm) clearance per side. 6 5/16” (160mm) 6” 6” (152mm) (152mm) Appliance may be placed at any height including directly 47 1/2” (1207mm) on the floor with... - Page 10 GSS48ST All material in shaded area must be Non Combustible. (including framing, sheeting and 36” finishing materials). (914mm) NON COMBUSTIBLE minimum to ceiling. 16 1/2” 16 1/2” 24 3/4” (629mm) (419mm) (VA) (419mm) (VA) Including 1/8” (3mm) clearance per side. 6 5/16” (160mm) 6” 6” (152mm) (152mm) Appliance may be placed at any height including directly 47 1/2” (1207mm) on the floor with (Viewing Area (VA) provisions for gas and 50 3/4” (1289mm) electrical connections. (Including 1/8” (3mm) clearance per side) Gas and electrical lines protude from the Nailing Tabs (4 per side) bottom of the appliance located on the right side. 21” (533mm) to All material in shaded outside of steel studs.
-
Page 11: Minimum Mantel Clearances
We recommend that all mantels are made from non-combustible material. If using combustible materials, follow the chart below. Note: When using paint or lacquer to finish the mantel, the paint or lacquer must be heat resistant to prevent discolouration. GSS48 / GSS48ST All material in shaded area must be Non Combustible. (including framing, sheeting and finishing materials). - Page 12 Trim Installation (Optional) NOTE! Most stainless steel parts are supplied with a protective plastic coating that must be removed prior to using the appliance. The trim is designed to work with facing material that protrude between 1 1/2” (38mm) to 4” (102mm) from the front of the appliance. GSS48ST GSS48 SIDE VIEW Finishing Material 1 1/2” (38mm) Minimum Finishing Material 4” (102mm) Maximum 1 1/2” (38mm) Minimum 4” (102mm) Maximum Front of Unit Front of Unit...
- Page 13 CAUTION! Assemble the trim pieces on a clean, non-abrasive surface to avoid damaging the stainless steel finish. 1. Peel protective coating from front trim pieces. 2. Assemble the trim pieces using (8) #8-32 x 3/8” screws as illustrated. Serrated Side Up 3. Open the front access door on the appliance and loosen the thumb screws (do not remove). Lift up on the thumb screws and tighten in position at top of slot.
- Page 14 4. Line up the brackets on the trim with the slots on the side of the base and insert as illustrated pushing until trim sits flush against front surface. The brackets have been designed with multiple slots (1/4” (6mm) increments to accommodate different finishing materials. Serrated Side Up 5.
-
Page 15: Natural Gas Hook-Up
Gas Hook-Up Instructions Natural Gas Hook-Up The gas appliance is designed to operate with natural gas at an inlet pressure of 7 inches water column. The piping up to the appliance is the responsibility of the installer. A flexible metal connector is included to simplify the installation of the appliance. -
Page 16: Conversion To Lp (Propane) Gas
Conversion to LP (Propane) Gas WARNING! To avoid the possibility of burns conversions should only be done when the appliance is cool. Ensure the burner is turned off. Turn the gas off at source and disconnect the appliance before beginning conversion. WARNING! Glass embers may have sharp edges wear safety glasses and gloves when handling. WARNING! This conversion must be performed by a licensed gas fitter, and all connections must be leak tested before operating the appliance. Your fireplace can be easily converted to LP (Propane) Gas by following these steps: 1. Remove the glass embers from the tray. 2. Remove the glass tray from the fireplace by removing the (8) screws that hold the tray in place. 3. -
Page 17: Propane Cylinder Specifications
7. Reconnect the stainless steel flex connector to the orifice and tighten using (2) wrenches. 8. Place the glass tray over the burner and fasten to the firepace with the screws removed in step 2. 9. Fill out the conversion label included with your fireplace and apply it to the inside of the control panel access door. - Page 18 Cylinder Connection: Ensure the gas regulator hose is kink free. Remove the cap or plug from the cylinder fuel valve. Insert the black QCC1 regulator nipple onto the QCC1 fuel valve. Hand tighten clockwise. Do not use tools. Leak test all joints prior to using the appliance. A leak test must be performed annually and each time a cylinder is hooked up or if a part of the gas system is replaced.
- Page 19 Enclosures For LP (Propane) Gas Supply Systems If you build an enclosure for an LP gas cylinder, follow these recommended specifications. You must also follow local codes. • An enclosure for an LP-gas cylinder shall be ventilated by openings at both the upper and lower levels of the enclosure.
-
Page 20: Glass Ember Installation
Finishing Glass Ember Installation WARNING! Do not use the appliance without the glass embers in place. WARNING! Glass embers may have sharp edges, wear safety glasses and gloves when handling. Do not change or substitute the glass ember material provided with this appliance. If replacing, use only replacement glass embers available from your local authorized dealer / distributor. WARNING! Glass embers may have a fine oil residue that needs to be cleaned prior to installation. Clean the glass with mild dish soap, drain, rinse thoroughly and dry before installing. 1. Carefully pour the glass embers onto the appliance ember tray as shown. 2. Spread the glass embers over the tray and burner. The distribution of clear glass over the burner will influence flame height. -
Page 21: Lighting Instructions
Lighting Instructions Open Cover Igniter Lights Burner Control WARNING! Never use the appliance when it is raining. A cover has been provided to protect the burner and glass embers when not in use. Remove the cover before starting the appliance. WARNING! Keep face and body away from burner area when lighting. WARNING! Ensure burner controls are in the off position. Slowly turn on the gas supply valve. 1. Press and hold electronic igniter button ( ). 2. Turn the burner control to the high position, press and hold in. When the burner lights, release the electronic igniter button. 3. -
Page 22: Operation
Inspect the hose assembly before each use. If there is evidence of excessive abrasion or wear, or if the hose is damaged it must be replaced prior to using the appliance with a replacement hose assembly specified by your Napoleon dealer. NOTE! The appliance has been designed with several safety features, which include a safety valve. -
Page 23: Maintenance / Cleaning Instructions
To clean the panel, use only warm soapy water or stainless steel cleaner available from your Napoleon dealer. Never apply abrasive cleaners on any stainless surfaces, especially the printed portion of the control panel or the printing will gradually rub off. - Page 24 Burner: The burner is made from heavy wall 304 stainless steel, but extreme heat and a corrosive environment can cause surface corrosion to occur. This can be removed with a brass wire brush. Inspect the burner at least annually for cracks, insect nests, excessive corrosion or any other damage. If the burner is damaged, it must be replaced with a burner specified by the manufacturer before the appliance is put into operation.
- Page 25 Cleaning The Outer Appliance Surface: Do not use abrasive cleaners or steel wool on any painted, or stainless steel parts of your Napoleon Appliance. Doing so will scratch the finish. Exterior surfaces should be cleaned with warm soapy water. To clean stainless surfaces, use a stainless steel or a non-abrasive cleaner.
-
Page 26: Troubleshooting
Troubleshooting Problem Possible Causes Solution Low heat / Low flame when For propane - improper lighting Ensure lighting procedure is followed carefully. valve turned to high. procedure. The valve must be in the off position when the tank valve is turned on. Turn tank on slowly to allow pressure to equalize. -
Page 27: Ordering Replacement Parts
KEEP YOUR RECEIPT AS PROOF OF PURCHASE TO VALIDATE YOUR WARRANTY. Ordering Replacement Parts Warranty Information MODEL: DATE OF PURCHASE: SERIAL NUMBER: (Record information here for easy reference) Before contacting the Customer Care Department, check the NAC Website for more extensive cleaning, maintenance, troubleshooting and parts replacement instructions at www.napoleongrills.com. Contact the factory directly for replacement parts and warranty claims. Our Customer Care Department is available between 9 AM and 5 PM (Eastern Standard Time) at 1-866-820-8686 or fax at 1-705-727-4282. -
Page 28: Parts List
Parts List Item Part # Description GSS48 n010-0761 base assembly firebox n010-0779 tray burner / glass n300-0002 glass embers - topaz 2 x 7.5lb n570-0008 #8 x 1/2" screw n570-0020 #8-32x3/8 screw n080-0274 bracket electrode - thermocouple n680-0001 thermocouple n240-0028 electrode c/w lead... - Page 29 Parts List Item Part # Description GSS48 mkry grey river rocks mkrm multicoloured river rocks dl45 driftwood log set x - standard p - propane units only n - natural gas units only ac - accessory www.napoleongrills.com...
- Page 30 www.napoleongrills.com...
- Page 31 Parts List Item Part # Description GSS48ST n010-0762 base assembly firebox n010-0779 tray burner / glass n300-0002 glass embers - topaz 2 x 7.5lb n570-0008 #8 x 1/2" screw n570-0020 #8-32x3/8 screw n080-0274 bracket electrode - thermocouple n680-0001 thermocouple n240-0028 electrode c/w lead n585-0077 wind shield n325-0074...
- Page 32 Parts List mkry grey river rocks mkrm multicoloured river rocks dl45 driftwood log set x - standard p - propane units only n - natural gas units only ac - accessory www.napoleongrills.com...
- Page 33 www.napoleongrills.com...
- Page 34 FAX TO: 705 727 4282 ACCESSORIES & PARTS ORDER FORM PLEASE PRINT CLEARLY CONTACT NAME:______________________________________________________________________ SHIP TO :_____________________________________________________________________________ _________________________________________________________________________________________ _________________________________________________________________________________________ _________________________________________________________________________________________ TEL :_________________________________ FAX :______________________________ EMAIL: __________________________________________________________________ VISA OR MASTERCARD # :_______________________________________ EXPIRY DATE: _____________ SIGNATURE:_____________________________________________________________________________ QUANTITY PART NUMBER DESCRIPTION TAXES MAY APPLY SHIPPING EXTRA IF CONFIRMATION IS REQUIRED PLEASE INCLUDE A FAX NUMBER OR EMAIL ADDRESS...
- Page 35 NOTES www.napoleongrills.com...
- Page 36 NOTES www.napoleongrills.com...
Need help?
Do you have a question about the GSS48 and is the answer not in the manual?
Questions and answers