Table of Contents
Advertisement
Quick Links
Advertisement
Table of Contents
Troubleshooting

Related Manuals for cytiva Kvick Lab Cassette Holder


Summary of Contents for cytiva Kvick Lab Cassette Holder
- Page 1 Learning to Use the Kvick Lab Cassette Holder User Manual cytiva.com...
-
Page 2: Table Of Contents
Stage 3 – Storing the cassette and holder ..........................51 Troubleshooting ..........................52 Troubleshooting guide ..................................53 10 Maintenance ............................55 10.1 Inspection ........................................ 56 10.2 Maintenance ......................................57 Learning to Use the Kvick Lab Cassette Holder User Manual 18117269 AI... - Page 3 11.3 Operating parameters ..................................62 12 Appendix ............................... 63 12.1 Chemical compatibility ..................................64 12.2 Cassette sanitizing Agents ................................65 12.3 Parts and accessories ..................................66 Index ................................67 Learning to Use the Kvick Lab Cassette Holder User Manual 18117269 AI...
-
Page 4: Important User Information
Waste electrical and electronic equipment must not be disposed of as unsorted municipal waste and must be collected separately. Please contact an authorized representative of the manufacturer for information concerning the decommissioning of the equipment. Learning to Use the Kvick Lab Cassette Holder User Manual 18117269 AI... -
Page 5: About This User Guide
2 About this user guide 2 About this user guide This user guide describes how to use the Cytiva Kvick Lab cassette holder. Topics include how to integrate and connect the holder to your cross-flow system, how to install cassettes, and how to use and clean the holder and cassettes. -
Page 6: Audience
Kvick Lab cross-flow system. If you need assistance with the instructions in this guide, contact Cytiva for more information. -
Page 7: Where To Find More Information
Lab cross-flow system, reservoir, feed pump, and accessories. Supplied with Kvick Lab cross-flow systems. • Learning to Use the Kvick Lab Cassette Holder — Describes how to use the Kvick Lab cassette holder. Topics include: installation in a cross-flow system, operation, and cleaning. Supplied with Kvick Lab cassette holder. -
Page 8: Safety
If you do not understand an instruction, you should stop working with the Kvick Lab holder and contact Cytiva for guidance. You should save the user and safety guides and make them available to all users of the Kvick Lab holder. -
Page 9: Warnings, Cautions, And Tips
Ensure you assemble the holder correctly following the instructions in this guide. Wear the appropriate personal protection devices and clothing when operating and cleaning the system. Learning to Use the Kvick Lab Cassette Holder User Manual 18117269 AI... - Page 10 To prevent damage to the pump, ensure that fluid is present in the reservoir and feed line whenever you run the pump. Learning to Use the Kvick Lab Cassette Holder User Manual 18117269 AI...
- Page 11 In this user guide, the term clean water means 0.2-μm filtered water or WFI. Learning to Use the Kvick Lab Cassette Holder User Manual 18117269 AI...
-
Page 12: Kvick Lab Cassette Holder
3 Kvick Lab Cassette Holder 3 Kvick Lab Cassette Holder In this chapter Section See page Unpacking and lifting the cassette holder Package contents Learning about the holder Features Learning about cassettes Learning to Use the Kvick Lab Cassette Holder User Manual 18117269 AI... -
Page 13: Unpacking And Lifting The Cassette Holder
3.1 Unpacking and lifting the cassette holder Your Kvick Lab cassette holder arrives packed in a cardboard box that includes the torque wrench and documentation. To unpack the system, place the box on the ground. Open the top of the box and remove foam insert. -
Page 14: Package Contents
3 Kvick Lab Cassette Holder 3.2 Package contents 3.2 Package contents Each shipment of a Kvick Lab cassette holder includes the following components: • Kvick Lab holder • Torque wrench, socket, and torque wrench instructions • User guide • Certificate of analysis... -
Page 15: Learning About The Holder
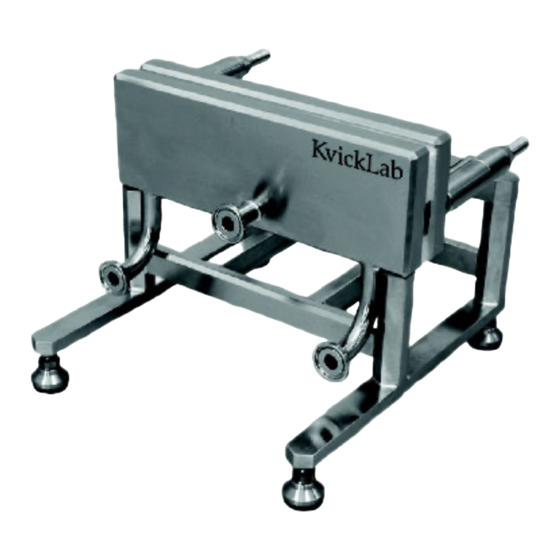
3.3 Learning about the holder 3.3 Learning about the holder The Kvick Lab cassette holder is designed to hold 1 to 5 cassettes. Together, the holder and the cassettes enable you to separate, concentrate, and diafiltrate biological solutions with precision. For example, you can complete ultrafiltration at laboratory volumes (starting volumes of less than 1 liter). -
Page 16: Features
The Kvick Lab holder simplifies operation with fewer parts and connections than other types of cross- flow cassette holders. Cytiva cassette holders share the following features: (1) three forward facing ports for convenience, (2) vertically orientated hardware for best drainage and product recovery, (3) -
Page 17: Learning About Cassettes
The two sizes of Kvick Lab cassettes share design components, including inlet and outlet ports, labeling, and alignment notches (see the Figure below). Figure 3.2: The main parts of a Cytiva cassette Learning to Use the Kvick Lab Cassette Holder User Manual 18117269 AI... -
Page 18: Connecting The Holder To Your System
4 Connecting the Holder to Your System 4 Connecting the Holder to Your System In this chapter Section See page Where to install the holder How to install the holder Learning to Use the Kvick Lab Cassette Holder User Manual 18117269 AI... -
Page 19: Where To Install The Holder
(see the Figure below). To learn about alternate system configurations for special applications, contact Cytiva. Diafiltration Solution Retentate Pressure gauge Kvick Lab Feed holder reservoir Valve Pump Feed Drain Collection line Permeate vessel Figure 4.1: Basic cross-flow system configuration Learning to Use the Kvick Lab Cassette Holder User Manual 18117269 AI... -
Page 20: How To Install The Holder
4.2 How to install the holder 4.2 How to install the holder Gathering materials Gather the following materials to install your Cytiva cassette holder into your cross-flow system: • A cross-flow system including a feed reservoir, feed pump, a minimum of two glycerin-filled pressure gauges, and three flow control valves •... -
Page 21: Installing Cassettes In The Holder
5 Installing Cassettes in the Holder 5 Installing Cassettes in the Holder In this chapter Section See page Introduction Determining how many cassettes you can install Installing the cassettes Learning to Use the Kvick Lab Cassette Holder User Manual 18117269 AI... -
Page 22: Introduction
You must tighten the nuts to a specific torque value to ensure the proper clamping force is applied to seal the cassette in place. Learning to Use the Kvick Lab Cassette Holder User Manual 18117269 AI... -
Page 23: Determining How Many Cassettes You Can Install
Nut torque Kvick Lab Packet 100 cm (0.11 ft 1 to 10 13.5 Nm (120 in-lb) Kvick Lab 0.11 m (1.2 ft 1 to 5 20.3 Nm (180 in-lb) Learning to Use the Kvick Lab Cassette Holder User Manual 18117269 AI... -
Page 24: Installing The Cassettes
If the nut torque is too low, insufficient clamping force can cause leaks or give false integrity test results. Learning to Use the Kvick Lab Cassette Holder User Manual 18117269 AI... - Page 25 Flow distribution manifold Back plate Gasket Cassette with integral gasket facing the backing plate Tie rod Spacer Washer Guide rod Figure 5.1: Top view of Kvick Lab holder showing assembly Learning to Use the Kvick Lab Cassette Holder User Manual 18117269 AI...
-
Page 26: Preparing A Cassette For Use
Stage 2 – Measuring water flux Stage 3 – Test the integrity of the cassette Stage 4 – Sanitizing the Kvick Lab cassette Stage 5 – Conditioning the system with buffer Learning to Use the Kvick Lab Cassette Holder User Manual 18117269 AI... -
Page 27: Introduction
If you need help in developing a pump curve, contact Cytiva technical support team. Learning to Use the Kvick Lab Cassette Holder User Manual 18117269 AI... -
Page 28: Stage 1 - Rinse Storage Solution From The Cassette
Fig. 6.1, on page 29). Close the feed, retentate, and permeate valves. Fill the reservoir with an appropriate volume of clean water (6 liters per 0.11 m [1.2 ft cassette). Learning to Use the Kvick Lab Cassette Holder User Manual 18117269 AI... - Page 29 If needed, circulate buffer to prepare the cassette and system for processing. You can analyze the rinse water using analytical techniques or with residual indicator kits readily available from scientific equipment supply houses. Learning to Use the Kvick Lab Cassette Holder User Manual 18117269 AI...
-
Page 30: Stage 2 - Measuring Water Flux
Cytiva recommends that you measure water flux when the cassette is new and before each use. By tracking the water flux measurements, you can; (1) determine the effectiveness of cleaning cycles, and (2) determine when a cassette reaches the end of its service life. - Page 31 Convert the permeate flow rate measurements to flux using this equation: Flux in LMH (l/m /hr) = {permeate flow in ml/min ÷ cassette surface area in square meters} × 0.06 Learning to Use the Kvick Lab Cassette Holder User Manual 18117269 AI...
- Page 32 115 LMH x 1.053 = 121 LMH/10 psig To standardize the flux value to 1 psig, divide the normalized water flux value by 10 psig. For example, 121 LMH ÷ 10 = 12.1 LMH/psig Learning to Use the Kvick Lab Cassette Holder User Manual 18117269 AI...
- Page 33 60 to 80 percent of the normalized flux value when the cassette was new. If after cleaning, the flux is low, you can try alternative, aggressive cleaning processes. Contact Cytiva for more information.
-
Page 34: Stage 3 - Test The Integrity Of The Cassette
500-ml beaker, 50-ml graduated cylinder, stopwatch, and a piece of flexible tubing (Fig. 6.2, on page 31). Test the integrity of the system and cassette manually by following the procedure described below. Learning to Use the Kvick Lab Cassette Holder User Manual 18117269 AI... - Page 35 Waste Permeate Pump Feed Air shutoff valve Drain line Pressure regulator Instrument quality compressed air Figure 6.4: Flow diagram for testing a cross-flow system and cassette before use Learning to Use the Kvick Lab Cassette Holder User Manual 18117269 AI...
- Page 36 When the Kvick Lab cassette passes integrity testing, you can sanitize it (Stage 4), condition it with buffer (Stage 5), or process product as required. If the Kvick Lab cassette fails the integrity test, contact your Cytiva representative for help.
-
Page 37: Stage 4 - Sanitizing The Kvick Lab Cassette
Section 5.1 Introduction, on page Pressure gauge Feed reservoir Valve Retentate Kvick Lab Permeate cassette Pump Feed Drain line Figure 6.5: Typical setup for sanitizing a Kvick Lab cassette and system Learning to Use the Kvick Lab Cassette Holder User Manual 18117269 AI... -
Page 38: Stage 5 - Conditioning The System With Buffer
Remove the buffer from the feed reservoir. Keep buffer in other parts of the system to prevent air from entering the system. Learning to Use the Kvick Lab Cassette Holder User Manual 18117269 AI... - Page 39 6.6 Stage 5 – Conditioning the system with buffer Pressure gauge Feed reservoir Valve Retentate Kvick Lab holder Permeate Pump Feed Figure 6.6: Typical configuration for conditioning the system with buffer Learning to Use the Kvick Lab Cassette Holder User Manual 18117269 AI...
-
Page 40: Using The Holder
Introduction Stage 1 – Starting the cross-flow process Stage 2 – Operating the system in a steady state Stage 3 – Shutting the system down and recovering product Learning to Use the Kvick Lab Cassette Holder User Manual 18117269 AI... -
Page 41: Introduction
(1.2 ft ) cassette If your feed is particularly viscous or has other unusual physical characteristics, contact the technical support team at Cytiva. The team can show you how to optimize your cross-flow process. Other recommended operating parameters include these: •... - Page 42 Diafiltration solution (optional) Retentate Pressure gauge Feed reservoir Valve Kvick Lab holder Pump Feed Drain line Collection Permeate vessel Figure 7.1: Typical process flow path for cross-flow processes Learning to Use the Kvick Lab Cassette Holder User Manual 18117269 AI...
-
Page 43: Stage 1 - Starting The Cross-Flow Process
Typically, in biopharmaceutical processes, six volume exchanges of buffer are commonly processed through the feed tank. Continue processing following the steps in Section 7.3 Stage 2 – Operating the system in a steady state, on page Learning to Use the Kvick Lab Cassette Holder User Manual 18117269 AI... -
Page 44: Stage 2 - Operating The System In A Steady State
• Product temperature • Feed volume (initial and final) • Diafiltrate volume • Permeate flow rate • Permeate volume • Retentate cross-flow rate • Various product quality analyses Learning to Use the Kvick Lab Cassette Holder User Manual 18117269 AI... -
Page 45: Stage 3 - Shutting The System Down And Recovering Product
If maximum recovery is required, you can remove product from the system by applying a lowpressure nitrogen flow to the retentate side of the system. Contact your Cytiva representative for additional details. Learning to Use the Kvick Lab Cassette Holder User Manual 18117269 AI... - Page 46 As you near the end of processing, collect 200 to 500 ml of permeate for flushing the system. Figure 7.2: Typical process flow path for shutting the system down and recovering product Learning to Use the Kvick Lab Cassette Holder User Manual 18117269 AI...
-
Page 47: Cleaning And Storing
In this chapter Section See page Introduction Stage 1 – Cleaning a cassette after use Stage 2 – Measuring water flux Stage 3 – Storing the cassette and holder Learning to Use the Kvick Lab Cassette Holder User Manual 18117269 AI... -
Page 48: Introduction
Store the Cassette and Holder – Storing the cassette and holder involves adding a storage solution and preparing the system for short-term or long-term storage. The goal is to keep the membrane wet and to prevent microbial growth during storage. Learning to Use the Kvick Lab Cassette Holder User Manual 18117269 AI... -
Page 49: Stage 1 - Cleaning A Cassette After Use
0.5 M NaOH, then 0.5 M H 30 minutes at room temperature for each solution Double cleaning with 0.5 M NaOH 30 minutes at room temperature for each cycle with 300 ppm NaOCl Learning to Use the Kvick Lab Cassette Holder User Manual 18117269 AI... -
Page 50: Stage 2 - Measuring Water Flux
If, after all cleaning attempts, the post-cleaning flux values are still less than 60 to 80 percent of the new flux values, you may want to replace the cassette. Learning to Use the Kvick Lab Cassette Holder User Manual 18117269 AI... -
Page 51: Stage 3 - Storing The Cassette And Holder
10 to 15 Nm (88 to 133 in-lbs). On hydraulic systems, keep the cassettes and gasket in the holder and pressurize the hydraulic system to 35 to 69 barg (500 to 1000 psig) to prevent fluid from leaking from the cassette holder. Learning to Use the Kvick Lab Cassette Holder User Manual 18117269 AI... -
Page 52: Troubleshooting
9 Troubleshooting 9 Troubleshooting In this chapter Section See page Troubleshooting guide Learning to Use the Kvick Lab Cassette Holder User Manual 18117269 AI... -
Page 53: Troubleshooting Guide
Locate leaking area by feeling testing air leak with hand, or by Improperly seated cassette or applying soapy water and gasket looking for bubbles. Remove, inspect, and reinstall cassette and gasket Learning to Use the Kvick Lab Cassette Holder User Manual 18117269 AI... - Page 54 Remove cassette and gasket and inspect sealing surface of flow manifold, backing plate, and cassette Faulty valve Check integrity of valves and replace as needed. Learning to Use the Kvick Lab Cassette Holder User Manual 18117269 AI...
-
Page 55: Maintenance
In this chapter Section See page 10.1 Inspection 10.2 Maintenance 10.3 Storing the holder Learning to Use the Kvick Lab Cassette Holder User Manual 18117269 AI... -
Page 56: Inspection
Check the rigidity of the stand. If the stand wobbles, tighten the screws that hold the legs and cross braces together. If the mating surfaces of the flow manifold and backing plate become excessively scratched, contact your Cytivarepresentative for assistance. Learning to Use the Kvick Lab Cassette Holder User Manual 18117269 AI... -
Page 57: Maintenance
The nut torque values are based on the tie rod threads being dry. You should not oil the tie rod threads. Oiled tie rod threads will result in too much clamping pressure being applied to the cassette. Learning to Use the Kvick Lab Cassette Holder User Manual 18117269 AI... -
Page 58: Storing The Holder
Install the spacers, washers, and nuts, and lightly hand tighten to hold the cloth and backing plate in place. Place the holder in a dry, protected area such as a cabinet to prevent contamination or accidental dropping. Learning to Use the Kvick Lab Cassette Holder User Manual 18117269 AI... -
Page 59: Specifications
11 Specifications 11 Specifications In this chapter Section See page 11.1 Size and dimensions 11.2 Materials of construction 11.3 Operating parameters Learning to Use the Kvick Lab Cassette Holder User Manual 18117269 AI... -
Page 60: Size And Dimensions
Dimensions (approximate W x D x H) – 23 x 25 x 19 cm (9 x 10 x 7.5 in.) Shipping weight (approximate) – 7.7 kg (17 lb) Learning to Use the Kvick Lab Cassette Holder User Manual 18117269 AI... -
Page 61: Materials Of Construction
Flow distribution manifold – Polished 316L stainless steel, Ra <0.8 um Back plate – Polished 316L stainless steel Nonwetted parts: Tie rods, washers, stand – Stainless steel Tie rod nuts – Bronze Learning to Use the Kvick Lab Cassette Holder User Manual 18117269 AI... -
Page 62: Operating Parameters
Type and number of cassettes: Kvick Lab – 0.11 m (1.2 ft ), maximum of 5 cassettes installed Kvick Lab – 100 cm (0.11 ft ), maximum of 10 cassettes installed Learning to Use the Kvick Lab Cassette Holder User Manual 18117269 AI... -
Page 63: Appendix
12 Appendix 12 Appendix In this chapter Section See page 12.1 Chemical compatibility 12.2 Cassette sanitizing Agents 12.3 Parts and accessories Learning to Use the Kvick Lab Cassette Holder User Manual 18117269 AI... -
Page 64: Chemical Compatibility
12.1 Chemical compatibility 12.1 Chemical compatibility You can damage a Kvick Lab cassette holder by exposing it to chemicals incompatible with stainless steel. The gaskets used to connect piping to the sanitary fittings of the holder are made of EPDM, and are resistant to many types of chemicals (see the Table below). -
Page 65: Cassette Sanitizing Agents
12 Appendix 12.2 Cassette sanitizing Agents 12.2 Cassette sanitizing Agents Sanitizing Agent Sanitizing Conditions 0.5 to 1 N sodium hydroxide Minimum contact time for sanitization = 60 minutes Learning to Use the Kvick Lab Cassette Holder User Manual 18117269 AI... -
Page 66: Parts And Accessories
½-inch SS blanking cap KLSY0105SSC01 56-4112-98 ½-inch TC by 3/8-inch HB adaptor KLSY0105HBF01 56-4112-37 ½-inch TC by ¼-inch HB adaptor KLSY0105HB4F01 56-4113-26 Kvick Lab valve and pressure gauge kit KLSY0105PRKIT 56-4113-69 Learning to Use the Kvick Lab Cassette Holder User Manual 18117269 AI... -
Page 67: Index
Cross-flow system process flow, Customer Support, troubleshooting, use, Holder accessories, Holder assembly, Description of holder, Holder operation, Documentation, Holderinstalling cassettes, cassette installation, How to install the holder, Learning to Use the Kvick Lab Cassette Holder User Manual 18117269 AI... - Page 68 Warnings, cautions, and tips, Preparing a new cassette for use, Web site, Preparing the system for use, 27, Who should use this guide, buffer conditioning, Process flow, 19, Product recovery, Learning to Use the Kvick Lab Cassette Holder User Manual 18117269 AI...
- Page 69 Page intentionally left blank...
- Page 70 © 2020–2021 Cytiva All goods and services are sold subject to the terms and conditions of sale of the supplying company operating within the Cytiva business. A copy of those terms and conditions is available on request. Contact your local Cytiva representative for the most current information.
Need help?
Do you have a question about the Kvick Lab Cassette Holder and is the answer not in the manual?
Questions and answers