Table of Contents
Advertisement
Quick Links
Advertisement
Table of Contents

Related Manuals for Martin Alien LED Downlight


Summary of Contents for Martin Alien LED Downlight
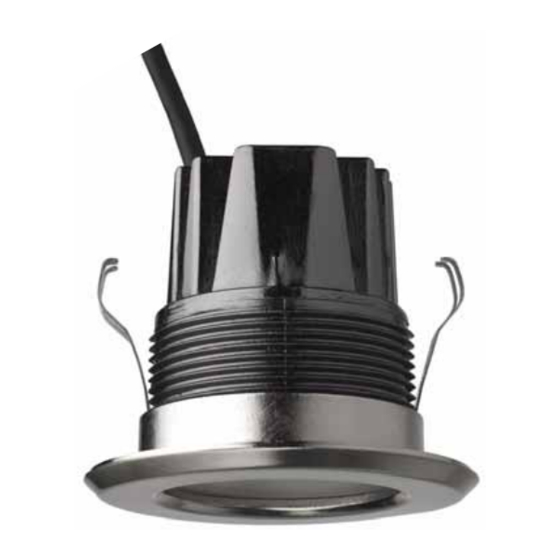
- Page 1 Alien LED Downlight™ user manual...
-
Page 2: Dimensions
The Martin logo, the Martin name and all other trademarks in this document pertaining to services or products by Martin Professional A/S or its affiliates and subsidiaries are trademarks owned or licensed by Martin Professional A/S or its affiliates or subsidiaries. -
Page 3: Safety Information
If you have questions about how to operate the fixture safely, please contact your Martin supplier or call the Martin 24-hour service hotline on +45 8740 0000, or in the USA on 1-888-tech-180. PROTECTION FROM ELECTRIC SHOCK •... - Page 4 • Do not modify the devices in any way not described in this manual or install other than genuine Martin parts. Do not stick filters, masks or other materials directly onto LEDs. Use only Martin approved accessories to mask or modify the light beam.
-
Page 5: Table Of Contents
Contents Dimensions ............... . 2 Safety Information . - Page 6 Notes Alien LED Downlight user manual...
-
Page 7: Introduction
DK-8200 Aarhus N Denmark Unpacking The Alien LED Downlight standard model, high-power model and driver unit are supplied packed separately. Labels on the luminaire or luminaire wiring identify standard and high-power luminaires. The following items are included with the Alien LED Downlight standard model, P/N 90353030: •... -
Page 8: Physical Installation
Physical installation Warning! Read "Safety Information" on page 3 before installing the Alien LED Downlight. The safety and suitability of installation location, anchoring method, mounting hardware and electrical installation is the responsibility of the installer. All local safety regulations and legal requirements must be observed when installing and connecting the Alien LED Downlight. -
Page 9: Mounting And Fastening Driver Units And Transformers
Plasterboard clip mounting 1. See Figure 1. Check that the trim ring is fully fastened onto the luminaire and that the first of the supplied nitrile O-rings is located in the recess in the trim ring. 2. Clip the plasterboard mounting collar supplied with the fixture over the luminaire housing and place the second nitrile O-ring (arrowed in Figure 1) over the collar so that the collar is sandwiched between two O-rings. -
Page 10: System Overview
System overview Figure 2 gives a schematic overview of the Alien LED Downlight system layout. DMX CONTROLLER DMX control data (e.g. Light Fox system) DRIVER UNIT link (max. 500 m) Mains power input 100-120/208-240 V, 50/60 Hz DMX in RJ-45... -
Page 11: Maximum Cable Lengths
The Alien LED Downlight™ system comprises: 1. A driver unit that relays signals from a DMX controller such as the Martin Light Fox™ to the rest of the system via combined power/data cables. The driver unit also stores stand-alone programs that it can run on the rest of the system without the need for a DMX controller. -
Page 12: Ac Power
Alien LED Downlight system, please contact your Martin supplier for assistance. The Alien LED Downlight driver unit is protected by a 5 A slow-blow primary fuse (note that fuses are not user-serviceable). See "Specifications" on page 27 for details of typical current drawn. -
Page 13: Power Source Quality
1. Shut down power at source and ensure that it cannot be reapplied, even accidentally, by removing a distribution circuit fuse for example. 2. Connect the conductors in the Alien LED Downlight driver unit power cable to the distribution circuit as follows:... -
Page 14: Connecting Heads
Observe these markings carefully, or you will damage the circuits in the T-connector. Power cables that carry a strong current can affect the data signal in Alien LED Downlight cables (see “Power source quality” on page 13). Route Alien LED Downlight system cables as far as possible from potential sources of interference. -
Page 15: Control Data Link
• Devices that are connected to a controller via a data link must be ‘daisy-chained’, i.e. the data cable must be connected in one single chain. • Each chain may contain a maximum of 32 Alien LED Downlight driver units or similar devices. • An optically isolated amplifier-splitter such as the Martin RS-485 Opto-Splitter (P/N 90758060) must be used to: - extend a control data link beyond 500 meters (1640 ft.), or... -
Page 16: Connecting The Data Link
Many DMX lighting controllers have XLR output connectors. To connect these to the RJ-45 connectors in the Alien LED Downlight system, use an XLR to RJ-45 adapter, (included with driver unit). If you need to rewire XLR connectors, pin numbers are normally marked on connectors. - Page 17 • Pins 7 (White/brown) and 8 (Brown): Common Pins 3 and 6 are available for Data 2 connections in DMX 512-A or similar systems. They must be wired as follows: • Pin 3 (White/green): Available for Data 2 hot (+) Pin 1 Pin 8 •...
-
Page 18: System Setup
System setup The Alien LED Downlight system is set up using the DIP switch (see Figure 4) and the yellow Program button on the side of the driver unit. Figure 4: DIP switch Setting up stand-alone operation In stand-alone operation, no DMX controller is required. Instead, pre-programmed lighting effects stored in the driver unit memory are sent to the Alien LED Downlight luminaires for display when stand-alone operation is enabled. - Page 19 Value DIP switch setting Stand-alone program 10 987654321 x 111100000 All off x 111100001 W 100% x 111100010 RGB 100% x 111100011 RGBW 100% x 111100100 Cyan x 111100101 Blue x 111100110 Light green x 111100111 Green x 111101000 Light yellow x 111101001 x 111101010 Pink...
-
Page 20: Setting Up Dmx Operation
If you want to show different lighting effects on different heads connected to the same driver unit, continue Alien LED Downlight, you must first assign the heads into groups. All heads are supplied assigned to group 1 by default. To assign them to a different group, you must first... - Page 21 LEDs. To set the Alien LED Downlight to HSI mode, set pin 10 of the DIP switch on the driver unit to ON. The first 3 DMX channels used for each head connected to that driver unit will now control hue.
- Page 22 • DIP switch pin 10 is reserved for setting driver units to RGBW or HSI modes. • DMX addresses from 480 and upwards are not available because the DIP switch settings that correspond to these addresses are reserved for setting stand-alone operation. Alien LED Downlight user manual...
-
Page 23: Operation
When the Alien LED Downlight system is set up for DMX-controlled operation, faders on the DMX controller are used to control color and intensity. The control method depends on which color control mode the Alien LED Downlight system is set to (see “Setting the color control mode to RGBW or HSI” on page 21): In RGBW mode, four channels on the controller are used to control the intensity of red, green, blue and white from 0% to 100%. -
Page 24: Service And Maintenance
Any service procedures not described in this section must be carried out by the Martin Service organization or its authorized agents. It is Martin policy to use the best quality materials available to ensure optimum performance and the longest possible component lifetimes. However, optical components in all lighting fixtures are subject to wear and tear over the life of the fixture, resulting in gradual changes in color rendition, for example. -
Page 25: Dmx Protocol
DMX protocol RGBW Mode Channel Value Percent Function → 0 - 255 0 - 100% Intensity 0 100% Green → 0 - 255 0 - 100% Intensity 0 100% Blue → 0 - 255 0 - 100% Intensity 0 100% White →... -
Page 26: Troubleshooting
Unacceptable loss of step Noisy mains power or interference from a different mains circuit. in multiple installations. from noisy mains cables. Check that Alien LED Downlight cables are not too close to other power cables. Table 5: Troubleshooting Alien LED Downlight user manual... -
Page 27: Specifications
Specifications P h y s i c a l Luminaire Installation depth ..........69 mm (2.7 in.) Maximum protrusion from mounting surface . - Page 28 Total heat dissipation, 1 driver unit + 1 head (calculated, +/- 10%) ....62 BTU/hr. Total heat dissipation, 1 driver unit + 10 heads (calculated, +/- 10%) ... 620 BTU/hr. Alien LED Downlight user manual...
- Page 29 O r d e r i n g I n f o r m a t i o n Alien LED Downlight Standard Luminaire Set ......P/N 90353000 Alien LED Downlight High-power Luminaire Set .
- Page 32 • Olof Palmes Allé 18 • 8200 Aarhus N • Denmark Tel: +45 8740 0000 • Fax +45 8740 0010...
Need help?
Do you have a question about the Alien LED Downlight and is the answer not in the manual?
Questions and answers