Advertisement
Available languages
Available languages
Quick Links
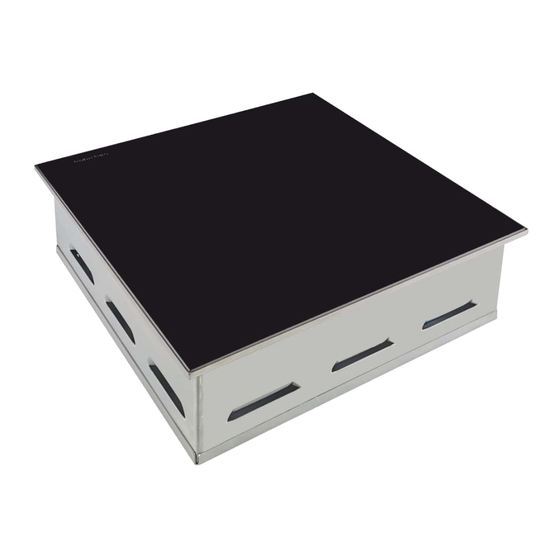
BUFFET A INDUCTION PROFESSIONNEL
IE 1000 F DIR
Guide d'utiliiattion
de votre tpptreili de mtintien tu chtud à
induction
Chère cliente, cher client,
Nous vous félicitons pour l'achat de ce produit.
Celui-ci a été fabriqué selon les connaissances les plus récentes et avec des
éléments électriques et électroniques modernes et sûrs.
Avant d'utiliser cet appareil, prenez le temps de lire ce guide d'utilisation. Nous
vous remercions de votre confiance.
FX00645-A
Advertisement

Related Manuals for Adventys IE 1000 F DIR


Summary of Contents for Adventys IE 1000 F DIR
- Page 1 BUFFET A INDUCTION PROFESSIONNEL IE 1000 F DIR Guide d’utiliiattion de votre tpptreili de mtintien tu chtud à induction Chère cliente, cher client, Nous vous félicitons pour l'achat de ce produit. Celui-ci a été fabriqué selon les connaissances les plus récentes et avec des éléments électriques et électroniques modernes et sûrs.
- Page 2 Informttiona techniquea Modèlie: IE 1000 F DIR Nom: Appareil de maintien au chaud induction encastrable/intégrable Puiaatnce: 1000 Watts Réaetu éliectrique: 220-240V mono (50 / 60 Hz) Courtnt : 10 A Commtnde : Clavier à 3 touches capacitives, 12 niveaux de réglage.
- Page 3 Utiliiaer votre tpptreili en toute aécurité Si cet appareil doit être mis en place très près d'un mur, d'une cloison, d'un meuble de cuisine, de bordures décoratives, etc., il est recommandé que ceux-ci soient faits d'un matériau non combustible; si ce n'est pas le cas, ils doivent être recouverts d'un matériau approprié, isolant thermique et non combus- tible, une attention toute particulière étant accordée aux rè- glements de prévention des incendies.
- Page 4 Inattlilittion de votre produit Inattlilittion type n°1 : Installation du produit en encastrement avec son joint Réalisez une découpe de dimensions 270 x 270 mm dans votre plan de travail. Fixez le joint d’encastrement fourni sur votre produit à l’aide du scotch double face prévu. Insérez votre ensemble produit + cadre dans votre découpe et fixez le au plan de travail à...
- Page 5 Inattlilittion de votre produit Inattlilittion type n°2 : Intégration du produit en affleurement Intégration dans un plan de travail en inox : Réalisez une découpe de 286 x 286 mm dans votre plan de travail. Réalisez un cadre afin de maintenir le produit en affleurement par rapport à votre plan de travail. Réalisez un joint silicone autour de votre vitrocéramique afin de garantir l’étanchéité...
- Page 6 Comment fonctionne votre tpptreili Utilisez votre appareil en toute simplicité Commtndea : Réglage (-) Niveau de réglage Réglage (+) Bouton Marche / Arrêt Niveau de réglage...
- Page 7 Comment fonctionne votre tpptreili Utilisez votre appareil en toute simplicité Utilisez votre appareil en toute simplicité Réglitge de nivetu Loraqu’une ctaaerolie compttiblie tvec lit technoliogie induction eat poaée aur lie foyer, l’afficheur affiche le niveau de réglage. L’appareil comporte 12 niveaux de réglage. Dèa que li’tcceaaoire eat retiré...
- Page 8 Ctaaerolierie Votre tpptreili de mtintien tu chtud à induction • Récipienta en tliuminium à fond apécitli. eat ctptblie de reconntître lit pliuptrt dea réci- Les récipients dont le fond n'est pas parfaitement pienta. plat peuvent fonctionner dans la mesure où le fond n’est pas trop déformé.
- Page 9 Comment préaerver et entretenir votre tpptreili Avtnt toute intervention pour démonter lie filitre ili eat IMPERATIF de dé- brtncher li’tliimentttion du produit. Eviter liea choca avec les récipients. Ne pta préchtuffer des aliments sur le niveau Le dessus en verre est très résistant , mais n’est de puiaatnce mtximum réglié, lorsque vous utilisez un toutefois pas incassable.
- Page 10 Petitea ptnnea et remèdea Voua tvez un doute aur lie bon fonctionnement de votre tpptreili ..ceci ne signifie pas forcément qu'il y a une panne. Dtna toua liea cta, vérifiez liea pointa auivtnta : Indicttion tu clitvier Ctuaea Action Mettre en conformité...
- Page 11 Gtrtntie Pour bénéficier de la garantie sur votre table, n’oubliez pas de garder une preuve de la date d’achat. Toute modification ou intervention de type perçage, soudage, sertissage, clinchage, etc., n'est pas autorisée et entraînera la perte de la garantie constructeur. Toute intervention ayant pour origine une installation ou une utilisation non conforme aux prescriptions de cette notice ne sera pas acceptée au titre de la garantie constructeur et celle-ci sera définitivement suspendue.
- Page 13 PROFESSIONNAL INDUCTION BUFFET IE 1000 F DIR Uaer’a guide for your induction buffet Dear Customer, We congratulate you for the purchase of this product. This products has been manufactured according to the most recent knowledge and with modern and safe electrical and electronic components. Before using this appliance, please take time to read this user guide.
- Page 14 Technictli informttion Modeli: IE 1000 F DIR Ntme: Induction warming drop in / integrated Power: 1000 watts Eliectrictli mtina: 220-240V mono (50/60 Hz) Current: 10 A Controli: Keyboard with 3 capacitive keys. 12 setting levels. Product dimenaiona: L 280 x P 280 x H 90 mm...
- Page 15 Uaing your hob atfety If this unit is to be placed in close proximity to a wall, parti- tion, kitchen cabinet, decorative trim, etc., it is recommended that they be made of non-combustible materials. If this is not the case, they must be covered with a suitable material, ther- mal insulation and non-combustible, with particular attention being paid to fire prevention regulations.
- Page 16 Inattlilittion de votre produit Typictli inattlilittion n ° 1: Inattlilittion of the builit-in product with ita aetli 1) Make a cutout of dimensions 270 x 270 mm in your work plan. 2) Glue the supplied silicone frame joint to your product using the double-sided tape provided. 3) Insert your product + frame set into your cutout and fix it to the worktop using the double-sided tape under the silicone frame joint.
- Page 17 Inattlilittion de votre produit Typictli inattlilittion n ° 2: Integrttion of the product in outcrop Integration into a stainless steel worktop: 1) Make a 286 x 286 mm cutout in your work plan. 2) Create a frame to keep the product flush with your worktop. 3) Create a silicone seal around your ceramic glass to ensure the product is watertight.
- Page 18 How doea your tppliitnce work? Use your appliance simply. Controlia : Setting (-) Setting level Setting (+) On / Off button Setting level...
- Page 19 How doea your tppliitnce work? Use your appliance simply. Setting lieveli : When t ptn compttiblie with induction technoliogy ia plitced on the cooking zone, the display shows the setting level. The appliance has 12 setting levels. Aa aoon ta the tcceaaory ia removed from the cooking zone, the diaplity ahowa the tbaence of t diah by t fltahing liight.
-
Page 20: How To Proceed
How to preaerve tnd mtinttin your tppliitnce Avoid hitting it with pans. The glass top is very tough, but it is not unbreakable. Do not prehett food on the maximum set power level when you use a container with a non-stick Avoid rubbing containers on the top of the inside coating (type Teflon) without liquid or with very appliance. - Page 21 Cookwtre Your induction buffet ia tblie to recognize moat • Aliuminium conttinera with a special bottom. ptna. Containers with a bottom that is not perfectly flat can work if the bottom is not too distorted. Cookwtre teat : place your cookware on the •...
- Page 22 Smtlili probliema tnd their remediea You doubt that your appliance is working properly. This does not necessarily mean that there is a prob- lem. In all cases, check the following points: ERROR CODE Whtt'a htppening To do Make the connection of the device compliant Hi.
- Page 23 Wtrrtnty To benefit from the warranty on your hob, do not forget to keep a proof of the date of purchase. Any modification or intervention such as drilling, welding, crimping, clinching, etc., is not permitted and will result in the loss of the manufacturer's warranty. Any intervention resulting from installation or use not in accordance with the requirements of these instructions will not be accepted under the manufacturer's warranty and the latter will be cancelled.
Need help?
Do you have a question about the IE 1000 F DIR and is the answer not in the manual?
Questions and answers