Table of Contents
Advertisement
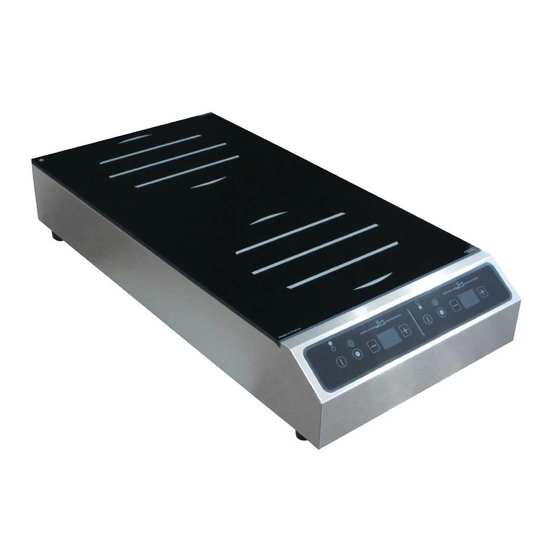
Professionnal induction
hob
GL2 F
Uaer'a guide
For your induction hob
Dear Customer,
We would like to congratulate you on the purchase of your ADVENTYS product.
This one has been manufactured according to the very latest developments, using modern,
safe electrical and electronic components.
Please take the time to read this user's guide before using this appliance.
Thank you for your confidence in our products.
13
Advertisement
Table of Contents

Related Manuals for Adventys GL2 F


Summary of Contents for Adventys GL2 F
- Page 1 Uaer’a guide For your induction hob Dear Customer, We would like to congratulate you on the purchase of your ADVENTYS product. This one has been manufactured according to the very latest developments, using modern, safe electrical and electronic components. Please take the time to read this user’s guide before using this appliance.
-
Page 2: Table Of Contents
Contenta Declaration of Compliance Technical information Electrical connection Using your hob safety Operating instruction - Switch ON and Switch OFF the device - Timer setting - Power setting - Display specific message Cookware recomended How to maintain and care for your hob Small problems and their remedies Garantee Throughout this guide: this simbol... -
Page 3: Technical Information
Technictli apecificttiona GL2 F Modeli: Ntme: Standing induction hob Mttéritlia: Stainless steel Power: 3000W, 3500W, 5000W, 6000W or 7000W depend of the version Eliectricity auppliy: single phase 230V +/-10% 50Hz Current: 2 x 6,5 A Max,2 x 8 A Max, 2 x 11A Max, 2 x 13A Max, 2x16A Max... -
Page 4: Using Your Hob Safety
Uaing your hob atfety The induction principle After the appliance is switched on and a power level is se- lected, electronic circuits produce induced currents in the base of the pan which instantly transmits the heat produced to the foodstuffs. Cooking takes place with prtctictliliy no energy lioaa with a very high energy output. -
Page 5: Switch On And Switch Off The Device
Opertting inatruction Switch On the device Press the « ON/OFF » touch to switch on the device. The value « 0 » displays on the indi- cator of power. Still no power is sent at that point. Press either the power touches (+) to send power to the pan. The power display indicates the power set into the pan. -
Page 6: Power Setting
Opertting inatruction Power setting Place an induction-friendly pan on the cooktop to start using the product. The power display indicates the level of regulation. Make sure the pan is not empty. To adjust the power level press (+) or (-) POWER Powers levels: form 1 to 20. -
Page 7: Display Specific Message
Opertting inatruction Display of specific message The device is extremely safe. It makes a permanent control of the values of temperature and other electric parameters to guarantee to the user the best level of performance and safety at every moment. A flashing error code «... -
Page 8: Cookware Recomended
Cookwtre Recommended Your induction hob ia tblie to recognize the mtjority of ptna tnd recipienta. • NOTE Teating t ptn: place the pan on the cooking Pans made from glass, ceramic material, clay, zone with a power level set : if indicttor attya on, aluminium (without special pan base), and your pan is compttiblie, if it fltahea, your pan hta copper, as well as certain non-magnetic stainless... - Page 9 How to mtinttin tnd ctre for your hob Clean approximately every week with soapy water the filter placed under your device (or put it in the dishwasher). Put it back very dry before any use. This filter protects your device from dust and fats. Your device ia clietned etailiy, to helip you, here ia aome tdvice: Type of apota How to proceed...
-
Page 10: Small Problems And Their Remedies
Smtlili probliema tnd their remediea If you think thtt your hob ia not functioning correctliy ..this does not necessarily mean that a fault has occurred. Plietae verify the foliliowing in tlili ctaea : YOU NOTICE THAT ... POSSIBLE CAUSES WHAT YOU CAN DO When putting into service, a bright Regular functioning... -
Page 11: Garantee
Any modification such as drilling, welding, criimping, clinching, etc., is not permitted and is not covered by the manufacturer’s warrenty. Any wrong modification or installation, which does not respect ADVENTYS’ standards, is not covered by the manufacturer’s warranty and will be permanently suspended.
Need help?
Do you have a question about the GL2 F and is the answer not in the manual?
Questions and answers