Advertisement
Quick Links
sauder.com
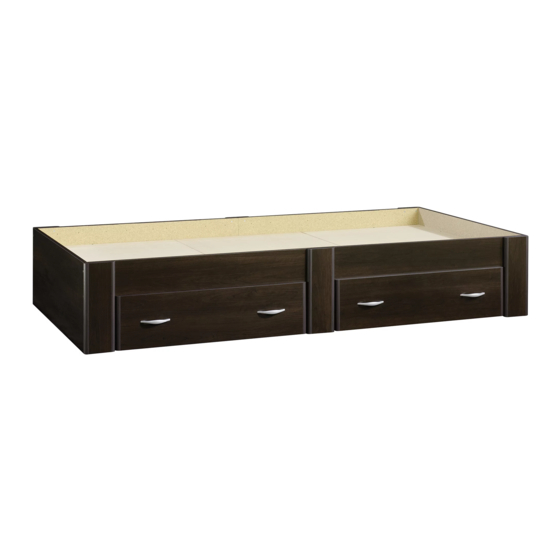
Twin Platform Bed
Beginnings Collection | 415465
Need help? Visit Sauder.com to view video assembly tips or chat with a live rep.
Prefer the phone? Call 1-800-523-3987.
Share your journey!
You won't just fall in
love with it. You'll fall
asleep in it.
NOTE: THIS INSTRUCTION
BOOKLET CONTAINS IMPORTANT
SAFETY INFORMATION.
PLEASE READ AND KEEP FOR
FUTURE REFERENCE.
English pg 1-18
Français pg 19-20
Español pg 21-22
Lot # 372912
05/21/15
Purchased: __________________
Be sure to give us a ring before
making any returns. 1-800-523-3987
Advertisement

Related Manuals for Sauder 415465


Summary of Contents for Sauder 415465
- Page 1 Beginnings Collection | 415465 NOTE: THIS INSTRUCTION BOOKLET CONTAINS IMPORTANT SAFETY INFORMATION. Need help? Visit Sauder.com to view video assembly tips or chat with a live rep. PLEASE READ AND KEEP FOR FUTURE REFERENCE. Prefer the phone? Call 1-800-523-3987. English pg 1-18 Français pg 19-20...
- Page 2 FOOTBOARD (1) SUPPORT (6) PLATFORM (3) SMALL SUPPORT (4) LEG (6) RIGHT DRAWER SIDE (2) DRAWER FRONT (2) LEFT DRAWER SIDE (2) LARGE SUPPORT (2) D219 DRAWER BACK (2) DRAWER BRACE (4) D987 DRAWER BOTTOM (2) Page 2 415465 www.sauder.com/services...
- Page 3 Part Identifi cation D219 D987 D219 D987 www.sauder.com/services 415465 Page 3...
-
Page 4: Table Of Contents
BROWN 1-1/2" FLAT HEAD SCREW - 8 SILVER 7/8" MACHINE SCREW - 8 30S BLACK 1-9/16" FLAT HEAD SCREW - 12 BLACK 9/16" PAN HEAD SCREW - 16 113S BLACK 1-15/16" FLAT HEAD SCREW - 16 Page 4 415465 www.sauder.com/services... - Page 5 å Turn four CAM SCREWS (8F) into the DRAWER FRONTS (E2). å Arrow Hole The arrow in the HIDDEN CAM must point toward the hole in the edge of the board. Arrow www.sauder.com/services 415465 Page 5...
- Page 6 Larger holes Short Surface unfi nished edge with holes Surface with holes Larger holes Short Surface unfi nished with holes edge Surface with holes Short fi nished edge Surface with holes Page 6 415465 www.sauder.com/services...
- Page 7 SILVER 1-1/8" FLAT HEAD SCREWS (10S). This hole must be here. SILVER 1-1/8" FLAT HEAD SCREW (16 used in this step) This hole must be here. This hole must be here. This hole must be here. www.sauder.com/services 415465 Page 7...
- Page 8 Fasten the SUPPORTS (K2) to the HEADBOARD (A2) å and FOOTBOARD (B2). Use sixteen SILVER 1-1/8" FLAT HEAD SCREWS (10S). SILVER 1-1/8" FLAT HEAD SCREW Edge with holes (16 used in this step) Edge with holes Long fi nished edge Page 8 415465 www.sauder.com/services...
- Page 9 Step 5 Fasten the SUPPORTS (K2) to the LARGE SUPPORTS (F). å Use eight SILVER 1-1/8" FLAT HEAD SCREWS (10S). SILVER 1-1/8" FLAT HEAD SCREW (8 used in this step) Edge with holes Edge with holes www.sauder.com/services 415465 Page 9...
- Page 10 SUPPORTS (K2). Use eight BLACK 1-15/16" FLAT HEAD Don't worry. It isn't SCREWS (113S). Rome. This can be built in a day. Edge with holes Edge with holes 113S BLACK 1-15/16" FLAT HEAD SCREW (8 used in this step) Page 10 415465 www.sauder.com/services...
- Page 11 U n fi u r f a i s h e F i n u r f a The LARGE SUPPORTS (F) i s h e must be on the fl oor. F i n www.sauder.com/services 415465 Page 11...
-
Page 12: Black 9/16" Large Head Screw
Fasten the FOOTBOARD (B2) to the LEGS (D2). Use two BLACK 9/16" LARGE HEAD SCREWS (1S) through the METAL å BRACKETS on the FOOTBOARD and into the LEGS. 113S BLACK 9/16" LARGE HEAD SCREW (4 used for the METAL BRACKETS) BLACK 1-15/16" FLAT HEAD SCREW (4 used for the FOOTBOARD) Long fi nished edge Page 12 415465 www.sauder.com/services... -
Page 13: Brown 1-1/2" Flat Head Screw
Fasten the outer PLATFORMS (C) to the SUPPORTS (K2). å Use eight BROWN 1-1/2" FLAT HEAD SCREWS (14S). BROWN 1-1/2" FLAT HEAD SCREW (8 used for the PLATFORMS) Long fi nished edge 113S BLACK 1-15/16" FLAT HEAD SCREW (4 used for the HEADBOARD) www.sauder.com/services 415465 Page 13... -
Page 14: Black 9/16" Pan Head Screw
å down toward the DRAWER BRACES. Be sure the fl at part of the SWIVEL ROLLER is down toward the DRAWER BRACES. BLACK 9/16" PAN HEAD SCREW (16 used in this step) (8 used) (16 used) Page 14 415465 www.sauder.com/services... -
Page 15: Black 1-15/16" Flat Head Screw
Fasten two DRAWER BRACES (G) to the DRAWER å å SIDES (D16 and D17) and DRAWER BRACES (G). Use six BLACK 1-9/16" FRONT (E2). Tighten two HIDDEN CAMS. FLAT HEAD SCREWS. Repeat this step for the other drawer. www.sauder.com/services 415465 Page 15... -
Page 16: Silver 7/8" Machine Screw
Step 12 Fasten two PULLS (45K) to the DRAWER FRONT (E2). å Use four SILVER 7/8" MACHINE SCREWS (24S). Repeat this step for the other drawer. å SILVER 7/8" MACHINE SCREW (8 used in this step) Page 16 415465 www.sauder.com/services... - Page 17 NOTE: You have the option to position the drawers on the å right or left side of your unit. DRAWERS ON LEFT SIDE OF BED a r d DRAWERS ON RIGHT SIDE OF BED a r d www.sauder.com/services 415465 Page 17...
- Page 18 This completes assembly. Clean with your favorite å furniture polish or a damp cloth. Wipe dry. And to celebrate, why not share your success story? 30 lbs. 30 lbs. Page 18 415465 www.sauder.com/services...
- Page 19 élément et conserver le livret pour future référence. TÊTE DE LIT ..............1 EXCENTRIQUE ESCAMOTABLE .....4 Pour contacter Sauder PIED DE LIT ...............1 VIS D'EXCENTRIQUE ..........4 en ce qui concerne cet PLATEFORME ..............3 CONSOLE EN MÉTAL ..........2 élément, faire référence...
- Page 20 49 mm NOIRES (113S). Fixer le PIED DE LIT (B2) aux PIEDS (D2). Utiliser deux VIS TÊTE LARGE 14 mm NOIRES (1S) à travers les CONSOLES À ÉQUERRE situées sur le PIED DE LIT, et dans les PIEDS. Page 20 415465 www.sauder.com/services...
- Page 21 CABECERA................1 EXCÉNTRICO ESCONDIDO .......4 et conserver le livret pour future référence. PIE DE CAMA ..............1 BIELA DE EXCÉNTRICO ........4 Pour contacter Sauder PLATAFORMA ..............3 SOPORTE DE METAL ..........2 en ce qui concerne cet PATA ..................6 ARANDELA ..............16 élément, faire référence au numéro de lot et...
- Page 22 Fije el PIE DE CAMA (B2) a las PATAS (D2). Utilice dos TORNILLOS NEGROS DE CABEZA GRANDE de 14 mm (1S) a través de los SOPORTES DE METAL sujetados al PIE DE CAMA y dentro de las PATAS. Page 22 415465 www.sauder.com/services...
- Page 23 GARANTIE LIMITÉE DE 1 AN 1. Sauder Woodworking Co. (Sauder®) off re une couverture de garantie limitée à l’ a cheteur 4. La présente garantie ne s’ a pplique qu’ a ux défauts garantis qui se produisent pour initial du présent produit pendant une période un an à...
- Page 24 Dear Valued Customer: So, how did it go? Thanks so much for choosing Sauder® furniture. I hope the Set a world record for speed? purchase and assembly process was a positive experience Feeling good about yourself? and you feel good about the furniture you just built. If you Nice.
Need help?
Do you have a question about the 415465 and is the answer not in the manual?
Questions and answers