Table of Contents
Advertisement
Quick Links
Advertisement
Table of Contents

Subscribe to Our Youtube Channel
Related Manuals for Buchi Rotavapor R-220 Pro Continuous


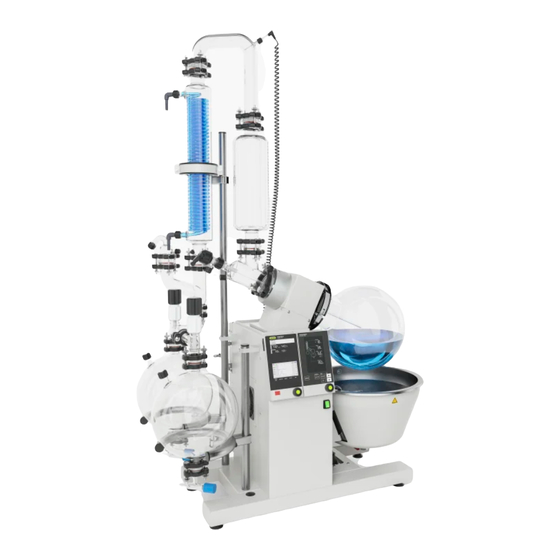
Summary of Contents for Buchi Rotavapor R-220 Pro Continuous
- Page 1 Rotavapor® R-220 Pro Continuous Operation Manual 11593790A en...
- Page 2 E-Mail: quality@buchi.com BUCHI reserves the right to make changes to the manual as deemed necessary in the light of experience; especially in respect to structure, illustrations and technical detail. This manual is copyright. Information from it may not be reproduced, distributed, or used for competitive purposes, nor made available to third parties.
-
Page 3: Table Of Contents
Warning signs on the device 4 2 3 Glassware configuration of the Rotavapor R-220 Pro Continuous 4 2 4 Function keys of the Rotavapor R-220 Pro Continuous in the I-300 Pro display 4 2 5 Schema of the "Automatic" function Tubing scheme... - Page 4 Table of contents 5 12 Heating bath setup for 2×1800 W heating element 5 13 Heating bath setup for 4 2 kW heating element 5 14 Level sensors 5 14 1 Receiving flask and safety sensor 5 14 2 Evaporating Flask Sensor 5 15 Water 5 16...
-
Page 5: About This Manual
No technical modifications may be made to the instrument without the prior written agreement of BUCHI Unauthorized modifications may affect the system safety or result in accidents Technical data are subject to change without notice NOTE... -
Page 6: Safety
2 Safety Safety This chapter highlights out the safety concept of the instrument and contains general rules of behavior and warnings from direct and indirect hazards concerning the use of the product For the users' safety, all safety instructions and safety messages in the individual chapters shall be strictly observed and followed Therefore, the manual must always be available to all persons performing the tasks described herein User qualification... -
Page 7: 4 Safety Warnings And Safety Signals Used In This Manual
2 Safety Safety warnings and safety signals used in this manual DANGER, WARNING, CAUTION and NOTICE are standardized signal words for identifying levels of hazard seriousness of risks related to personal injury and property damage All signal words, which are related to personal injury are accompanied by the general safety sign For your safety it is important to read and fully understand the below table with the different signal words and their definitions! - Page 8 2 Safety Explosive gases, explosive environment Harmful to life-forms Hot item, hot surface Device damage Inhalation of substances Explosive substances Flammable substances Fragile items / content Warning, heavy item Environmental pollution hazard Do not dispose of in household trash R-220 Pro Continuous Operation Manual, Version A...
- Page 9 2 Safety Use of water is mandatory (non-standard symbol) Wear protective mask Wear laboratory coat Wear protective goggles Wear protective gloves Heavy weight, lifting requires more than one person Additional user information Paragraphs starting with NOTE transport helpful information for working with the device / software or its supplementaries NOTEs are not related to any kind of hazard or damage (see example below) NOTE Useful tips for the easy operation of the instrument / software...
-
Page 10: 5 Product Safety
2 Safety Product safety Safety warnings in this manual (as described in section 2 4) serve to make the user alert and to avoid hazardous situations emanating from residual dangers by giving appropriate counter measures However, risks to users, property and the environment can arise when the instrument is damaged, used carelessly or improperly 2 5 1 General hazards... -
Page 11: Warning Labels On Housing
2 Safety NOTICE Risk of instrument short-circuits and damage by liquids • Do not spill liquids over the instrument or its component parts • Wipe off any liquids instantly • Ensure a safe positioning of the evaporating flask for storage •... -
Page 12: Personal Safety Measures
2 Safety 2 5 3 Personal safety measures Always wear personal protective equipment such as protective eye goggles, protective clothing and gloves when working with the instrument Wear inhalation protection when working with hazardous solvents and all kind of respirable material or material of unknown composition WARNING Death or serious poisoning by contact or incorporation of harmful media at use •... -
Page 13: 6 General Safety Rules
Modifications to the instrument are only permitted after prior consultation with and with the written approval of the manufacturer Modifications and upgrades shall only be carried out by an authorized BUCHI technical engineer The manufacturer will decline any claim resulting from unauthorized modifi- cations... -
Page 14: Technical Data
3 Technical data Technical data This chapter introduces the reader to the instrument and its specifications It contains an overview of available glassware configurations, technical data, requirements and performance data System dimensions 1750 1200 R-220 Pro Continuous Operation Manual, Version A... -
Page 15: 2 Technical Data
3 Technical data Technical data Electrical Maximum dimensions (WxDxH) R-220 Pro Continuous 1200 x 710 x 1750 mm Maximum weight (dry) R-220 Pro Continuous 100 kg Voltage 200 V (1Ph, N, G) 220 - 240 V (1Ph, N, G) 400 V (3Ph, N, G) Frequency 50 –... - Page 16 3 Technical data Display Bath temperature 1 °C steps Cooling temperature (option) 1 °C steps Vapor temperature 1 °C steps Set rotation speed 1 rpm steps Set bath temperature 1 °C steps Actual vacuum 1 mbar steps Set vacuum 1 mbar steps Heating (bath) Medium Water or oil...
-
Page 17: Description Of Function
4 Description of function Description of function This chapter explains the basic working principle of the Rotavapor R-220 Pro It also shows how the ® instrument is structured and provides a general functional description of its assemblies Functional principle of a Rotavapor evaporation ®... - Page 18 4 Description of function Safety reserve Cooler with cooling medium Optimal condensation zone range (~ 80% cooler height) Rotation drive for evaporating flask Evaporating solvent Condensated solvent Heating bath with heating liquid Evaporation area The solvent is heated by means of a heating bath The turbulent mixing inside the rotating evaporating flask results in an increased evaporation rate The drive unit offers a wide range of rotational speeds to perfectly match different evaporation tasks It also leads to an even mixing of the sample, thus preventing stationary overheating in...
-
Page 19: 2 Rotavapor ® R-220 Pro Continuous Front Side
4 Description of function Rotavapor R-220 Pro Continuous front side ® a Vacuum connection Draining valve b Condenser Evaporating flask c Receiving flask R-220 Pro Continuous Operation Manual, Version A... -
Page 20: 2 1 Type Plate
4 Description of function 4 2 1 Type plate The type plate is located on the right side of the Rotavapor R-220 Pro Continuous 4 2 2 Warning signs on the device The symbol warns of risk of burns when touching the hot surface of the heating bath... -
Page 21: 2 3 Glassware Configuration Of The Rotavapor R-220 Pro Continuous
4 Description of function 4 2 3 Glassware configuration of the Rotavapor R-220 Pro Continuous Valve 1 (Fill) Sensor evaporating flask Valve 2 Sensor receiving flask Valve 3 (Drain) Overflow sensor Valve 4 (Aerate) ... -
Page 22: Function Keys Of The Rotavapor R-220 Pro Continuous In The I-300 Pro Display
4 Description of function 4 2 4 Function keys of the Rotavapor R-220 Pro Continuous in the I-300 Pro display Ein-/Aus- Schalter Button Function AUTO The following process runs after pressing the AUTOMATIC button: • If sensor 2 (of the receiving flask) detects solvent for at least 5 seconds, valve 2 closes and valve 4 opens to aerate the system •... -
Page 23: 2 5 Schema Of The "Automatic" Function
4 Description of function 4 2 5 Schema of the "Automatic" function R-220 Pro Continuous Operation Manual, Version A... -
Page 24: 3 Tubing Scheme
4 Description of function Tubing scheme R-220 Pro Continuous Operation Manual, Version A... - Page 25 4 Description of function Vacuum / gas circuit Vacuum pump (recommended type: For most applications a vaccum is used to significantly reduce Vacuum Pump V-600) the boiling point of the liquid content inside the evaporating flask 2 + 3 Aeration / inert gas inlet at the The aeration valves at the optional vacuum controller and Vacubox the aeration valve of the Rotavapor...
-
Page 26: 4 User Interface Front-Side
4 Description of function User interface front-side Interface I-300 Pro (see separate Operation Manual of the I-300 Pro) Turning knob to adjust rotational speed and bath temperature ON / OFF switch Button Functionality Set the bath temperature, change value with the turning knob Heater: Switches the heating bath ON / OFF ON/OFF... -
Page 27: 5 Connection Field At The Rear-Side
4 Description of function Connection field at the rear-side R-220 Pro Continuous Operation Manual, Version A... - Page 28 It must be installed in serial after the cooling water source See Operation Manual of the BUCHI COM bus sockets with power over bus connector Suit- connected device(s)! able BUCHI devices: Vacuum pump, vacuum controller, chiller ...
- Page 29 4 Description of function Position Drawing Description Vacubox For a detailed description see I-300 Pro operation manual See master drawing for appearance Aerate valve (parallel to controller aeration valve) and mounting position Fuse ok Resettable fuses Gently push them back into prestressed posi- ...
-
Page 30: Putting Into Operation
Put the instrument on a stable, horizontal surface Consider the maximum product dimensions and weight Obtain the environmental conditions as described in section 3 2, technical data Installation on the dedicated mobile trolley (order no 041257) or the BUCHI Recirculating Chiller F-325 is also possible Installation prerequisites: •... -
Page 31: 2 Electrical Connections
5 Putting into operation NOTICE Risk of instrument damage by liquids or mechanical shocks • Do not spill liquids over the instrument or its components • Do not move the instrument when it is loaded with sample liquid • Do not drop the instrument or its components •... - Page 32 5 Putting into operation WARNING Death or serious burns by electric current at installation • The instrument must be installed by an electrician or equivalent specialist • After installation, the instrument must be tested for electrical safety NOTICE Risk of instrument damage by wrong mains supply •...
-
Page 33: 3 Sensor Setup And Adjustments
5 Putting into operation Sensor setup and adjustments Sensor setup menu These instructions are valid for the setup menu of the cooling water sensor and level sensors connected at the rear connection field Lift Keep the "LIFT UP" button pressed while switching on the Rotavapor®... -
Page 34: 4 Connection Of The Rotavapor
5 Putting into operation Connection of the Rotavapor R-220 Pro to the Recirculating Chiller F-325 and ® the Vacuum Pump V-600 Communication link between Rotavapor® R-220 Pro and Recirculating Chiller F-325 Communication link between Rotavapor R-220 Pro and Vacuum Pump V-600 ®... -
Page 35: Cooling Water Flow Sensor
5 Putting into operation 5 4 1 Cooling water flow sensor The switching threshold of the flow sensor can be adjusted by shifting the sensor element up and down CW Flow Adjustment instructions Make sure the flow sensor is installed in an upright position! Loosen the locking screw a Switch on the Rotavapor®... -
Page 36: 4 2 Vapor Temperature Sensor
5 Putting into operation 5 4 2 Vapor temperature sensor Description of function: Enables the vapor temperature reading at the Rotavapor display ® Installation instructions: Turn the ring nut a of the sensor to fasten and tighten the temperature sensor Insert the sensor plug at the "VAPOR TEMP "... -
Page 37: Cooling Water Temperature Sensor
5 Putting into operation 5 4 3 Cooling water temperature sensor Description of function: Enables the cooling water temperature reading at the Rotavapor display ® Condenser output Cooling water temperature sensor Sensor socket CW TEMP. To sink / chiller input Installation instructions: Use hose clamps to install the sensor at the hosing between condenser output and sink or chiller input The sensor has no preferred flow direction... -
Page 38: 6 Glass Assembly
5 Putting into operation Glass assembly 5 6 1 Glassware and configurations All original glassware parts and accessories are of superior quality However, glassware is generally fragile and must be handled with appropriate care to achieve a long lifetime and safe use Every glassware part must be inspected visually prior to use to ensure safe and proper functionality Visually inspect glassware for: •... -
Page 39: 6 1 Glass Assembly Front View
5 Putting into operation 5 6 1 Glass assembly front view Front view R-220 Pro Continuous Operation Manual, Version A... -
Page 40: 6 2 Glass Assembly Side Views
5 Putting into operation 5 6 2 Glass assembly side views Left side view Right side view R-220 Pro Continuous Operation Manual, Version A... -
Page 41: 7 Condenser Clamps
5 Putting into operation Condenser clamps Flat spring Turn the lever counterclockwise to loosen / open the clamp It is not necessary to completely open the clamp! Pull the support o-ring onto the rod Shift the opened clamp with the flat spring side onto the rod until it touches the o-ring The clamp weight is now supported by the o-ring Insert the condenser with the mounted holder (here illustrated without condenser!) into the free end of the clamp Turn the fixation screw clockwise to fixate the condenser in its position... -
Page 42: 8 Easyclamps
5 Putting into operation EasyClamps EasyClamps can be found at glassware connections EasyClamps can be cleaned assembled or dissassembled in an ultrasonic bath, e g with a soapy detergent if cleaning is necessary Stage 1 Turn counterclockwise to loosen the thumb nut Stage 2 Type: DN45 Type: DN 25... -
Page 43: 9 Setting Up The Glass Assembly
5 Putting into operation Setting up the glass assembly Putting together the glass assembly in the following order: Distribution piece a with sensor b Expansion vessel c U tube Condenser ... -
Page 44: 10 Tubing Scheme
5 Putting into operation 5 10 Tubing scheme Connection to the initial mixture Drainage of distillate Vacuum connection to the aeration valve at the rear side of the device R-220 Pro Continuous Operation Manual, Version A... -
Page 45: 11 Heating Bath Filling Level
5 Putting into operation 5 11 Heating bath filling level The optimal filling level of the heating transfer medium in the bath ensures maximum evaporation performance and safe handling Depending on the evaporating flask size, the level has to be adjusted Filling procedure •... -
Page 46: 12 Heating Bath Setup For 2×1800 W Heating Element
5 Putting into operation 5 12 Heating bath setup for 2×1800 W heating element The heating element holder is labelled with the heating power data The heating bath of the 2×1800 W version can be filled with different kinds of liquid heating transfer medium Depending on the maximum heating bath temperature for the target application, a suitable medium must be used How to set the maximum setpoint temperature Limiting the maximal temperature set-point to a value below 180 °C can help to eliminate processing... - Page 47 5 Putting into operation Basic heating transfer medium requirements • Do not use media which are corrosive against the heating bath and its subcomponents or the evaporating flask E g add a sufficient amount of borax when deionized water is used! •...
-
Page 48: 13 Heating Bath Setup For 4 2 Kw Heating Element
5 Putting into operation 5 13 Heating bath setup for 4 2 kW heating element The heating element holder is labelled with the heating power data For the 4 2 version only water must be used as heating transfer medium Because of the enormous heat input there is a risk of smoke formation and fire when using other heating transfer media than water! How to set the maximum setpoint temperature Limiting the maximal temperature set-point to a value below 100 °C can help to eliminate processing... - Page 49 5 Putting into operation Basic heating transfer medium requirements Do not use water which is corrosive against the heating bath and its subcomponents or the evapo- rating flask E g add a sufficient amount of borax when deionized water is used! DANGER Risk of fire by use of flammable heating transfer media •...
-
Page 50: Level Sensors
5 Putting into operation 5 14 Level sensors Description of function: The sensitivity of the capacitive level sensors must be adjusted to safely detect the liquid level between different products 5 14 1 Receiving flask and safety sensor Rear view ➡ The crosshair marks the sensitive area Adjustment screw Front view Status LED... -
Page 51: 14 2 Evaporating Flask Sensor
5 Putting into operation 5 14 2 Evaporating Flask Sensor Installation instructions for evaporating flask sensor: Remove screw a Turn inner screw to adjust the sensitivity † If left red LED b is on, this means "no detection" If left red LED b is off, this means that product has been detected irrespective of how many of †... -
Page 52: 15 Water
5 Putting into operation 5 15 Water With the heating bath in lowest position, install the level drain output tube with a level difference of > 5 cm towards the sink to ensure safe draining Fixate all tube connections with hose clamps! NOTICE Risk of damage caused by heating transfer mediums •... -
Page 53: Heating Transfer Media With High Boiling Point
5 Putting into operation Draining tap with Ø 12 mm hose connector, let into sink Heating and cooling water source If a water tap is used, the optional cooling water shut-off tap is recom- mended Control cable to cooling water valve connection at the Rotavapor connection panel (rear side) ®... -
Page 54: Attaching And Removing Evaporating Flasks
5 Putting into operation 5 17 Attaching and removing evaporating flasks Evaporating flasks are available in different types and sizes to meet all kinds of application require- ments However, the maximal load on the rotational flange must not exeed 20 kg! CAUTION Risk of minor or moderate injury by heavy weight of the evaporating flask •... - Page 55 5 Putting into operation Push down the unlock rocker at the left half of the snap flange Open the snap flange completely and carefully take away the evaporating flask Using the flask handler The handler can increase the level of safety when placed on top of the heating bath at flask exchange However, the flask handler is not suitable as an installation support! The lift mechanism does not stop automatically when the evaporating flask has reached its individual installation height! Using the flask handler installed on the heating bath to lift or lower the evaporating flask...
-
Page 56: 18 Adjusting The Snap Flange
5 Putting into operation 5 18 Adjusting the snap flange System tightness is essential when working with a Rotavapor Thus, the snap flange assembly should ® be checked at every evaporating flask installation This is necessary since every glassware has its unique fitting accuracy Clockwise = increasing the tension Counterclockwise = decreasing the tension... -
Page 57: Removing The Interface For Remote Control
5 Putting into operation 5 19 Removing the interface for remote control Tilt the I-300 Pro display towards you Remove the I-300 Pro display from the holder You can fill the space with a blind cover (see chapter 10 4 "Miscellaneous parts") For reinstallation proceed in reverse order NOTE •... -
Page 58: 21 Final Installation Check
5 Putting into operation 5 21 Final installation check After installation has been completed and before performing the first distillation make sure the installa- tion has been carried out correctly: Inspect glassware visually for possible damage Inspect safe and correct routing of all cables and hoses Check that all connections (steam, water, vacuum) have been fixed properly Check all supply hoses for tightness If applicable: Check overall system vacuum tightness (see operation manual I-300 Pro) -
Page 59: Operation
6 Operation Operation This chapter gives examples of typical instrument applications and instructions on how to operate the instrument properly and safely See also section 2 5 “Product safety” for general warnings NOTE Operation of the interface is explained in the operation manual of the Interface I-300 Pro Evaporation in three steps a Preparational steps •... -
Page 60: Optimal Distillation Conditions
6 Operation Optimal distillation conditions To achieve optimal distillation conditions, all distillation energy supplied by the heating bath must be removed by the condenser The physical cooling capacity of the condenser must not be exeeded in order to avoid steam emission by overpressure inside the assembly! NOTE: A temperature gradient of 20 °C between 'heating bath →... -
Page 61: Solvent Table
6 Operation Solvent table Molar mass Evaporation energy Boiling point Density in Vacuum in mbar for Solvent Formula in g / mol in J / g at 1013 mbar g / cm boiling point at 40 °C Acetone 58 1 0,790 n-amylalcohol, n-pentanol 88 1... -
Page 62: Maintenance And Repairs
Such training and knowledge can only be provided by BUCHI Addresses of official BUCHI customer service offices are given on the BUCHI website under: www buchi com If malfunctions occur on your instrument or you have technical questions or applica- tion problems, contact one of these offices The customer service offers the following: •... -
Page 63: Regular Service And Checks
7 Maintenance and repairs Regular service and checks To maintain the system in good working order the checks described in this section should be performed regularly Defective or worn out parts must be exchanged directly to ensure safe use and optimal efficiency 7 2 1 System tightness... -
Page 64: Snap Flange Coupling, Flask Seal And Vapor Duct
7 Maintenance and repairs Heating bath Use a commercially available decalcification agent to dissolve residues of calcium and other minerals in the bath Subsequently rinse the bath thoroughly! All housing parts must be completely dried before the system can be connected to mains again! WARNING Death or serious burns by electric current at cleaning... - Page 65 7 Maintenance and repairs Open both levers of the snap flange Use the seal tool (order no 20075) to unlock the metal reed and free the snap flange Carefully pull off the snap flange from the metal reed locking For reinstallation plug the coupling back onto the flange The metal reed snaps into locking position with a noticable click sound ➡...
- Page 66 7 Maintenance and repairs Removal / installation of the vapor duct With the flask seal removed, the (glass) vapor duct can easily be pulled out At reinstallation, the keyway at the vapor duct end must be aligned to the spring loaded notch at the gearbox to lock rota- tion between the drive and the duct Remove the snap flange coupling and the flask seal first Pull out the vapor duct by hand To install the vapor duct proceed in reverse order Make sure the notch blocks rotational...
-
Page 67: 4 Distribution Head Seal And Vacuum Seal
7 Maintenance and repairs Distribution head seal and vacuum seal Removal of the seal holder Remove the snap flange coupling and the flask seal first Pull out the vapor duct by hand Loosen the EasyClamp (DN70) and take off the distribution head (glass part) Subsequently, completely remove the EasyClamp from the gearbox Pull out the seal holder by hand •... - Page 68 7 Maintenance and repairs Installation of the seal unit Place the vacuum seal onto the seal holder with the ring-shaped metal insert facing upwards Take the seal holder into both hands and gently push in the seal with both thumbs in several steps Rotate the seal holder while doing this to avoid canting! NOTE Clean seal rings, seal holder and vapor duct before reinstallation to ensure a clean seal face for good...
-
Page 69: Troubleshooting
8 Troubleshooting Troubleshooting This chapter helps to resume operation after a problem has occurred with the instrument which does not require special technical training It lists possible occurrences, their probable cause and suggests how to remedy the problem The troubleshooting table below lists possible malfunctions and errors of the instrument The operator is enabled to correct some of those problems or errors by him/herself For this, appropriate corrective measures are listed in the column “Remedy”... -
Page 70: 2 Error Messages And Their Remedy
The error messages are shown in the rotational speed display Errors which are not listed in the table are to be corrected by a BUCHI trained technician who has access to official service manuals In this case, please refer to your local BUCHI customer service... - Page 71 8 Troubleshooting Errors and their remedy Error Additional error indicator on display Possible cause Remedy E01 Heating bath icon flashes Bath temp sensor not connected or • Switch off the unit Wait for the bath defective to cool down a little before restart Call service if problem is persistent E02 Heating bath icon flashes The bath does not reach the •...
- Page 72 8 Troubleshooting E08 n a Shortcut at vacuum valve • Unplug valve and restart system for causal research • Exchange valve if defective Call service if problem is persistent Error Addition error indicator on display Possible cause Remedy E11 ‘SHIELD OPEN’ message Shield not closed at the time of •...
- Page 73 8 Troubleshooting E14 ‘LEVEL 2’ message appears Filling level reached • Empty receiving vessel 2 and press the “Aerate” button to confirm the error message • Check cable and plug of the flow sensor • Exchange sensor if defective or run evaporation with user controlled filling level Call service if problem is persistent...
- Page 74 8 Troubleshooting E32 Heating bath icon flashes • Heating bath runs dry • Switch off the unit Let the heating bath cool down below 180 °C • Temperature >200 °C • Refill transfer medium at least to minimum level Call service if problem is persistent E33 Heating bath icon flashes •...
-
Page 75: 3 Resettable Automatic System Fuses
8 Troubleshooting Other error situations In case the temperature reading at the display for vapor or cooling water is missing, check the respec- tive sensor cable and plug Exchange a defective sensor and call service if the problem is persistent Resettable automatic system fuses Fuse ok F1 —... -
Page 76: Shutdown, Storage, Transport And Disposal
9 Shutdown, storage, transport and disposal Shutdown, storage, transport and disposal This chapter instructs how to shut down and disposal of the instrument Information about storage and shipping conditions can also be found here Storage and transport Switch off the instrument and remove the power cord To disassemble the Rotavapor follow the ®... -
Page 77: Disposal
9 Shutdown, storage, transport and disposal Disposal For instrument disposal in an environmentally friendly manner, a list of materials is given in chapter 3 3 This helps to ensure that the components can be separated and recycled correctly by a specialist for disposal For disposal of liquids and consumables such as heating transfer media, see supplementary data sheets of these chemicals! - Page 78 9 Shutdown, storage, transport and disposal Health and Safety Clearance Declaration concerning safety, potential hazards and safe disposal of waste. For the safety and health of our staff, laws and regulations regarding the handling of dangerous goods, occupational health and safety regulations, safety at work laws and regulations regarding safe disposal of waste, e.g.
-
Page 79: Spare Parts
This chapter lists spare parts, accessories and options including their ordering information Only order spare parts and consumables from BUCHI to maintain the warranty status and to assure best performance and reliability of the system and affected components Any modifications to the... -
Page 80: 10 2 Spare Parts
10 Spare parts 10 2 Spare Parts 005155 041130 027519 027289 041130 11055299 041120 041270 041151 041151 Order no Description Order no Description 005155 O-ring 041130 EasyClamp DN25 kpl 027289 Fitting SVL 22 041151 Pivoting clamp, cpl 027519 O-ring 125 x 5, FKM 041270 Clamp 041120... -
Page 81: 10 3 Sensors
10 Spare parts 10 3 Sensors 41076 27519 41747 41746 40084 41756 41755 41747 Order no Description Order no Description 27519 O ring 125 x 5 FKW 41747 Level sensor small 40084 Sensor support ring 41755 O ring 247 x 5 7 FKW 41076 Vapor temperature sensor 41756... -
Page 82: 10 4 Valves
10 Spare parts 10 4 Valves 040046 041749 041298 041748 040047 040841 003577 040046 041749 041298 041749 041298 041748 041298 041298 041298 040841 003577 041272 005155 Order no Description Order no Description 003577 Screw cap SVL 22 040841 Adapter SVL22 - G-3/8" 005155 O ring 041272... -
Page 83: Miscellaneous Parts
10 Spare parts 10 5 Miscellaneous parts Part name Order no Nylflex tubing, inner Ø 8 0 per m 004113 Vacuum tubing, inner Ø 9 5 x 15 9 11065051 per m Plastic tubing, inner Ø 10 0 x 2 0 per m 027146 PTFE tubing, outer Ø... - Page 84 10 Spare parts Metal reed (at gearbox flange) 041110 041110 Snap flange coupling, cpl 041112 041112 Set of 5× O-ring 64 x 5 0 041229 041229 EasyClamp element, DN 70 041135 R-220 Pro Continuous Operation Manual, Version A...
- Page 85 10 Spare parts PTFE coated silicone gasket 11056381 for DN 25 (set of 5) Small glassware joint ∅~ 30 mm 11056381 PTFE coated silicone gasket 11056382 for DN 40 (set of 5) Large glassware joint ∅~ 47 mm 11056382 20 L evaporating flask 027468 Cover for evaporating flask, PE 11057349...
-
Page 86: Optional Equipment And Upgrade Parts
10 Spare parts 10 6 Optional equipment and upgrade parts For more information about the following parts go to www buchi com or contact your local BUCHI representative Optional parts Part name Order no Safety shield for D, D2, R and C for... - Page 87 10 Spare parts Trolley 041257 Blind cover for Interface I-300 Pro 11064152 Manual flask handler 041400 Cooling water temp sensor 11055988 R-220 Pro Continuous Operation Manual, Version A...
- Page 88 10 Spare parts Cooling water valve 041191 Cooling water flow sensor 11055971 R-220 Pro Continuous Operation Manual, Version A...
- Page 89 10 Spare parts R-220 Pro Continuous Operation Manual, Version A...
- Page 90 T +971 4 313 2860 T +52 55 9001 5386 F +66 2 862 08 54 F +971 4 313 2861 latinoamerica@buchi.com bacc@buchi.com middleeast@buchi.com www.buchi.com/es-es www.buchi.com/th-th www.buchi.com We are represented by more than 100 distribution partners worldwide. Find your local representative at: www.buchi.com...
Need help?
Do you have a question about the Rotavapor R-220 Pro Continuous and is the answer not in the manual?
Questions and answers