
Subscribe to Our Youtube Channel
Related Manuals for inbody 720


Summary of Contents for inbody 720
- Page 1 Thank you for purchasing the InBody720. Please read this manual carefully and operate with care. Keep for future reference.
- Page 2 InBody Co., Ltd, according to the copyright laws. This user’s manual and product pertinent to this manual may have misprints or technical flaws, which can be modified without prior notice to the readers. InBody is not liable for any damage caused by a failure to meet the requirements in this user’s manual.
- Page 3 InBody earned recognition in the international market for technical expertise demonstrated through InBody 2.0 and 3.0. Based on the experience and technicality accumulated over the last 10 years, InBody released the InBody720, taking the body composition analysis to a new height. The body composition analyzer InBody720 is accurate for all body types and for any possible distribution of body water, measuring the progress of clinical treatment, weight loss program or exercise therapies reliably.
-
Page 4: Table Of Contents
Contents Ⅰ How to use this manual Ⅱ Safety Information Ⅴ Indicators & Safety Symbols Ⅶ Workplace Requirements Chapter 1 Installation and Maintenance Chapter 4 Problems and Solutions 1. Contents of the box 1. Error Messages 2. Exterior and Functions 2. - Page 5 How to use this manual The User’s Manual explains the functions of the InBody720. Follow the instructions below for effective use of this manual. 1. Please read this manual thoroughly before you use InBody720 and use it with proper operation. 2.
- Page 6 9. Do not dismantle the equipment or open the back cover. Internal parts are not for customer use. If the equipment is dismantled, the warranty is void, and service costs will be charged. If service is required, contact InBody or the supplying agency.
- Page 7 1. Cross Contamination Individuals with any kind of contagious disease or infection must not use or come in contact with the equipment. Please be sure to clean the equipment with appropriate disinfectant after each use. Never pour any liquid directly on the equipment, as it may leak and cause internal damage.
- Page 8 4. Use this equipment only for the purpose of body composition analysis. 5. Repair and examination should be conducted only by InBody’s professional A/S staff. Please contact InBody if needed.
- Page 9 Indicators & Safety Symbols A. Indication B. Safety signs...
- Page 10 Disposal of old Electrical & Electronic Equipment (Application in the European Union and other European countries with separate collection system.) This symbol indicates that this product shall not be treated as household waste. Instead, it shall be handed over to the applicable collection point for the recycling of electrical and electronic equipment. By ensuring this product is disposed of correctly, you will help prevent potential negative consequences for the environment and human health, which could otherwise be caused by inappropriate waste handling of this product.
- Page 11 Workplace Requirements □ Operation Environment 10 ~ 40 ℃ (50℉ ~ 104℉) Temperature range Relative humidity 30 ~ 75 % Atmospheric pressure range 70 ~ 106 kPa □ Storage Environment -20 ~ 70 ℃ (-4℉ ~ 158℉) Temperature range Relative humidity 10 ~ 95 % (No condensation) Atmospheric pressure range 50 ~ 106 kPa...
-
Page 12: Chapter 1 Installation And Maintenance
Chapter 1. Installation and Maintenance 1. Contents of the box 2. Exterior and Functions 3. Installation Instructions 4. Transportation 5. Repacking 6. Maintenance VIII... - Page 13 ⑨ Results sheet box (500 Sheets/1EA, 2 Box) (Optional) ⑩ Results interpretation poster (1EA) (Optional) 1. USB Cable is to be purchased separately for connecting to the printer. 2. The printer is needed for printing the results sheets. Please check the compatibility of the printer with InBody.
- Page 14 ⑥ Elastic band 2 unit To reduce the physical impact on the equipment, use the wrapping material provided by the InBody during shipment or transit. For information on how to relocate the equipment, refer to the “Chapter1, Section 4. Transportation”...
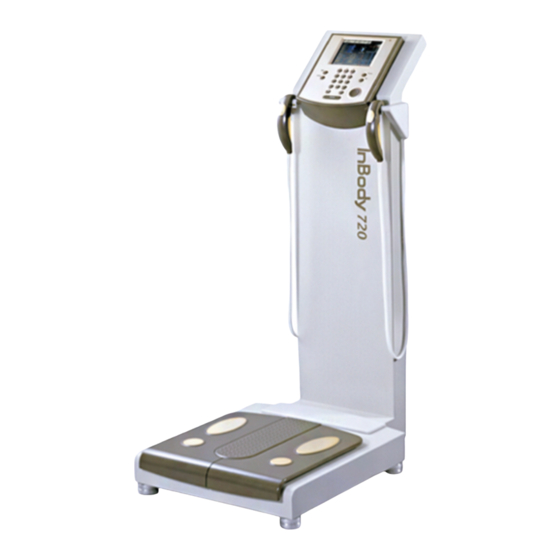
- Page 15 2. Exterior and Functions Individual part identification and functions with schematic sketches are provided below. Please inspect each component of the InBody720 before installation to ensure there are no scratches or damage. A. Operation Part B. Upper Part C. Lower Part D.
- Page 16 A. Operation Part LCD Monitor (640 X 480 TFT Color LCD) This displays the analysis procedure, messages and results. Key Pad (20 buttons) The keypad is divisible into input buttons and function buttons. These are used to input data required for body composition analysis, to set up the operating environment and to print out test results.
- Page 17 C. Lower part Front Sole Electrode The examinee stands on the foot electrode placing their forefoot on here during testing. Rear Sole Electrode The examinee places their heels on this foot electrode during testing. Base Frame (Loadcell) The loadcell is connected to the base frame where the examinee stands. Hinge Cover The hinge cover with hinges in the middle separates the area connecting the upper and lower part of the equipment.
- Page 18 InBody is not responsible for damages done on the product or injury caused by the user’s unauthorized opening of the back cover. InBody is not responding to any request for repair or upgrade, when damage is done on the warning sticker or there is any indication that the...
- Page 19 The 25pin parallel port is used to connect to printer. If you intend to use USB printer, connect it to the USB port. Only the peripherals provided by InBody can be connected to InBody720. For any inquiry about peripherals, contact InBody. Only the peripherals provide by InBody can be connected to InBody720. For any inquiry about peripherals, contact InBody.
- Page 20 (3) Power & Safety Unit Power Socket Plug the 3-pin plug to the power socket to supply the power to the equipment. Fuse Socket The fuse holders (two fuses) are embedded in the equipment. Equipotential Terminal The equipotential terminal can be connected to the external equipotential line to prevent danger caused by the difference in the potentials between the other devices.
- Page 21 3. Installation Instructions A. Workplace requirements (1) Location: Indoor only. Any outdoor area where the equipment is to be located should meet all the conditions below. (2) Operation environment: 50 ~ 104℉ (10 ~ 40℃), 30 ~ 75% RH (3) Optimum pressure: 70 ~ 106kPa B.
- Page 22 (2) Place the equipment Tighten the screws connecting upper and lower part with a hexagonal wrench. The hexagonal wrench is located underneath the hinge cover. Hold the upper part and center of lower part with two people and take the equipment out of the carton. Place the equipment at desired area and tighten the 4 screws connecting upper and lower parts with a hexagonal wrench.
- Page 23 (3) Balance the InBody720 The bubble level indicator is located at the center of connecting part and leveling screws under the lower part. Check the bubble level indicator. You may adjust 5 leveling screws under the lower part to level the equipment. (4) Close the hinge cover Attach the hexagonal wrench back underneath of hinge cover.
- Page 24 (5) Insert the fuse and connect the power Insert the fuse holder which contains the rated fuses into the ⓐ fuse socket. Connect the power cable into the ⓑ power socket. Put the spare fuses in a small plastic bag and attach it to the back of the equipment with tape. When the fuse is broken, you can easily replace it with the spare fuse.
-
Page 25: Transportation
(3) Optimum Pressure: 50kPa~106kPa (No condensation) B. Transporting Before Installation Before installation, the equipment is in a packaging box provided by InBody. Use a carrier to move the box over or have two people hold both sides for safe transportation. -
Page 26: Repacking
5. Repacking Be sure to turn off the power switch and unplug the power cable before repacking. Be careful not to damage foot and hand electrodes while repacking. Turn off the power and remove the power cable. Use elastic bands to hold hand electrode cables. Lift up the rear end slightly, hook the elastic band to the rear level screw, pass it through the cable and hook it again to the rear level screw. -
Page 27: Maintenance
6. Maintenance (1) Do not pull the electrode cable from the hand electrode or from the mainframe of the equipment. Treat it with care. (2) Do not leave anything on the stand or make a physical impact on it. (3) Leave the power off, if you do not use the equipment for over a day. (4) Unplug, and cover the equipment, if the equipment is not used for an extended period. -
Page 28: Chapter 2 Management & Results Description
Chapter 2. Management & Results Description 1. Cautions Before Measurement 2. Exterior and Function of Keypad 3. Power Connection & Getting Started 4. Home Screen 5. Personal Profile 6. Proper Posture 7. How to Operate the Equipment 8. Results 9. Facts for Normal Range... - Page 29 1. Cautions Before Measurement To observe changes of the human body through body composition analysis, it is crucial to perform the analysis each time under the same conditions, temperature, posture, etc. Bear in mind, the following factors affect the result of body composition analysis, and as a result, affect the reproducibility of analysis.
- Page 30 2. Exterior and Functions of Keypad The keypad as illustrated below is divided into two sections by their functions. A. Input Button (15 buttons) Number buttons (0~9) / Alphabet buttons (A ~ Z) The input buttons are used to enter numeric and character data such as the examinee’s age, height and I.D.. When a button is pressed, the LCD screen shows the numeric and then character representations of the button in the alphabetical order.
-
Page 31: Setup
B. Function Button (5 buttons) SETUP This button is used to update or modify the user environment. DATABASE This button is used to view the archives. EXIT / MODE Button The Exit / Mode button is used to modify the user environment easily in the startup window. And this button is used to stop the process that is in progress or go back to the previous process. - Page 32 3. Power Connection & Getting Started (1) Plug the power cable to the outlet. (2) Once power is turned on, the LCD monitor displays a sequence of characters, indicating the sequential process of loading up the operating system to the system. This is equivalent to the process through which PC loads up Windows to the memory and gets the operating systems ready for the user.
- Page 33 (4) When the system boots up, the home screen comes up, allowing the user to enter data into the system.
- Page 34 4. Home Screen The home screen in the InBody720 provides a variety of the functions for the convenience of the examinee and the user. The configuration of home screen is categorized into four groups by function. A. Personal Information Window This area is where the personal information of the examinee including I.D., age, height, gender and weight will be entered.
- Page 35 5. Personal Profile Age, height, gender and weight are the key personal information required to analyze the body composition. To reduce the probabilities of an error and to obtain reliable results, follow the instructions presented below. A. I.D. (permissible range of input : 20 characters) Use the numeric buttons to enter data.
- Page 36 You can correct the data, when the input data is incorrect. Error occurs with key operation prior to the entry of data. Press the backspace key (◀) to delete the entry and enter data again. Error occurs with the text field data entries before the current text field. Use the direction button (◀) to move to the text field where an error occurs and press the backspace key (◀) to delete the existing data and re-enter data.
- Page 37 6. Proper Posture Observing the following methodology is essential to achieving reliable results and accuracy. Palms, fingers and soles should be in contact with electrode during the testing. Keep the following instructions in mind during testing. A. How to hold hand electrodes (1) Four fingers should be touching the surface of the electrode as shown below.
- Page 38 The electrolyte tissues provided by the InBody are specifically manufactured for InBody and thus is completely different from the generic wet tissues in the market. It is strongly recommended to use the electrolyte tissues specifically designed for InBody720.
- Page 39 7. How to Operate the Equipment This procedure begins with the home screen, which is the initial environment settings of the InBody720, when it is factory-released. The InBody720 goes back to the home screen, as the examinee steps down from the stand. (1) See if the InBody720 is in test-ready status.
- Page 40 (5) Enter the examinee’s information including I.D., age, height, and gender using the keypad buttons. After finishing the data entry, press the ‘Enter’ button and see the information window prompting the examinee to get ready for a test. (6) Follow the test instructions displayed on the information windows. The InBody720 checks your posture on the equipment continuously.
- Page 41 If data entered is out of the permissible data range, the following message will pop up on the monitor. Go back to the test field where you were and re-enter data. Refer to the “Chapter 2, Section 5. Personal Profile” for the permissible range of each data.
- Page 42 (9) The examinee should place the hand electrode back to where it was, and step down from the stand. Do not drop the hand electrode, as it contains electronic parts inside. (10) Soon after the examinee steps down from the equipment, the InBody720 prints out the test results sheet and goes back to the home screen.
- Page 43 8. Results A. Result Screen During the test, information on body composition analysis is displayed on analysis result window on the LCD. As long as the examinee is on the stand, the monitor retains the data of the body composition analysis. Once the examinee steps down, the InBody720 goes back to the home screen and sets itself back to test-ready status.
- Page 44 PCL3 interface or higher version. For details on printer, refer to the “Chapter 5.Consumables.” As for the installation of a printer, consult the User’s manual provided by the printer manufacturer. (2) Results sheet Form The results sheet is shown below. It is one of the consumable products provided by InBody.
- Page 45 The following are the explanations for each item. The normal range on the results sheet is the standard provided by InBody based on reference data Basically the results sheet shows measured values for each test item. Regarding the standard result as 100%, it shows the ratio of measured value to standard value with the bar graph’s length.
- Page 46 ① Intracellular Water, Extracellular Water and Total Body Water (lbs.) InBody720 measures Total Body Water by using a multi-frequency technique that separates TBW into Intracellular Water and Extracellular Water. Intracellular water (ICW) indicates the quantity of water within the cellular membrane. Extracellular water (ECW) indicates the total quantity of water in the interstitial fluid and blood.
- Page 47 ④ Lean Body Mass (lbs.) Lean Body Mass refers to the entire body weight with exception of Body Fat Mass. Athletes have a higher proportion of Lean Body Mass than regular people. As such, it is important for athletes to measure their Lean Body Mass. The InBody720 provides both basic and comprehensive data which can be used to evaluate the health of an examinee.
- Page 48 *BMI method ( ㎡ ) Standard Weight(kg) = ideal BMI * Height The Obesity Index indicates the level of obesity. Generally, a BMI of 18.5 – 24.9 is used to determine the normal weight range. With the InBody720, the normal weight range is ±15% of standard value, very similar to one based on BMI (18.5 – 25).
- Page 49 (5) Obesity Analysis By analyzing the examinee’s weight using BMI and Percentage of Body Fat, the InBody720 Analyzer makes it possible to screen for sarcopenic obesity. People included in this sarcopenic obesity type fall within the normal range when it comes to BMI and weight, but are regarded as obese when their percentage of body fat is calculated.
- Page 50 Determination 1) WHO Standard BMI(kg/㎡) Classification Diagnosis < 18.5 Underweight Under Infectious disease, malnutrition related disease 18.5~24.9 Normal Standard Least risk at most disease 25.0~29.9 Overweight May cause health problem 30.0~34.9 Obese1 Over Increase of the risk of cardiac disease, 35.0~39.9 Obese2 Severely Obese...
- Page 51 (6) Segmental Lean Analysis With the InBody720, you can measure the lean mass of your body parts. It is achieved through the use of one of the InBody720’s measuring principles, bioelectrical impedance measurements of body parts. The measurement of soft lean mass for body parts is based on the following theory.
- Page 52 Hence, though it is not possible to check the increase or decrease of the lean mass as with the upper graph, it will directly reflect changes in the examinee’s weight, thereby allowing you to determine whether or not there is actual lean mass appropriate to his or her weight.
- Page 53 (8) Body Fat & LBM The InBody720 also offers the body fat and Lean Body Mass control guide that is aimed at optimizing the examinee’s body composition rather than simply increasing or decreasing his/her weight. Here, ‘+’ refers to the mass that must be increased, and ‘-‘...
- Page 54 (10) Impedance , Reactance & Resistance, Phase Angle The InBody720 measures each body part’s impedance, reactance, resistance, and phase angle separately with different frequencies; right arm, left arm, trunk, right leg, left leg. It uses 6 different frequencies to measure impedance; 1kHz, 5 kHz, 50 kHz, 250 kHz, 500 kHz, 1000 kHz.
- Page 55 85%~115% is the range corresponding to 18.5~25 which is the normal BMI range specified by the WHO. Cf. For children under the age of 18, 85~115% of standard weight is the normal range. Children’s standard weight in the results sheet refers to InBody’s own...
- Page 56 ■ Used Reference 1. Characterisitics of obesity : An overview. Ann NY Acad Sci. 499:4-13, 1987 2. WHO and the National Heart, Lung, and Blood Institute : Clinical guideline on the Identification, Evaluation, and treatment of overweight and obesity in adults, the evidence report.
- Page 57 6. BMI For adults, the normal range of BMI is 18.5~25 specified by the WHO standard. The standard result is 22 for males, and 21.5 for females. ■ Used Reference 1. Simopoulos AP. Characterisitics of obesity : An overview. Ann NY Acad Sci. 499:4-13, 1987 *For children under the age of 18, the normal range of BMI is 土...
- Page 58 2) Lohman TG. Advanced in body composition assessment - Current issues in exercise science series. Champaign-IL: Human Kinetics. pp 80. 1992 Figure 7.1 Percent body fat standards for men and women in relation to health Minimal weight Below average Above average At risk Women Minimal weight...
- Page 59 6) Brown JE. Nutrition Now 2nd edition. Wadsworth Publishing Company. pp 9-3. 1999 Obesity is defined by science as excess of body fat. An “excess” is an amount that interferes with health. For women, having more than 28% of body weight as fat is considered excessive. For men, the figure is 20%. Also defined as a BMI of 30 or higher, or a weight-for-height over 120% of standard.
- Page 60 8) Advanced fitness assessment and exercise prescription. Heyward VH. Human Kinetics. pp. 162 Table8.1 Percent body fat standards for adults, Children, and Physically Active adults Recommended %BF levels for adults and children Upper Obesity Males 18-34years <8 >22 33-55years <10 >25 55+years <10...
- Page 61 8. Segmental Lean Analysis In Segmental Lean Analysis, the normal range of an arm’s lean mass is 80~120% of the standard, while the normal ranges of trunk and leg lean mass are 90~120% of the standard of each one. Each body part’s standard lean mass means the lean mass that is supposed to be in each body part at the standard weight.
-
Page 62: Setup Menu
Chapter 3. Setup Establishment 1. Setup Menu 2. Quick Setup 3. DATABASE 4. Modification Example... - Page 63 1. Setup The InBody720 has a function to modify the setting for the user’s preference. The below setup screen appears after pressing the ‘SETUP’ key at the standby screen. The setup menu consists of Environment, Region, Printer, Result Sheet, Result Option, Others and Interface. How to modify settings (1) Use the direction buttons (▲▼) to move and select one option of Environment, Region, Printer, Result Sheet, Result Option, Others and Interface.
- Page 64 2. Setup Menu A. Environment It shows the environmental status of the InBody720. No items can be changed by users. (1) Environment Summary Language : displays the current language. Result Sheet : displays the number of results sheet automatically printed after measurement. BMI Basis : displays a selected standard range of BMI.
- Page 65 (1) Mode Select the type of results sheet. Printed : to use printed results sheet provided by InBody. Built-in : to use Letter size. All formatting of the results sheet will be printed out. (2) Number of Result Sheet Printing You can decide the numbers of results sheet automatically printed after measurement.
- Page 66 F. Others (1) Measure Weight Enable : Weight is automatically measured and added to the personal information window. Disable : Directly enter the examinee’s weight in the personal information window. (2) Adjust Weight Used to adjust weight offset value. When you want to adjust weight due to heavy clothes or accessories, set the offset value.
- Page 67 3. Quick setup Users can modify the user environment easily. The changeable items are results sheet selection, weight adjustment and mode. <In the case of ‘Result sheet selection’ is selected > A. How to modify the quick setup Press the ‘EXIT/MODE’ button in the standby screen.. Select the item to change.
- Page 68 (1) Result sheet selection This option is used to select the type of results sheet. : The results are printed on the printed results sheet provided by InBody. : The results are printed on Letter – sized paper. (2) Weight adjustment You can adjust the measured weight.
- Page 69 4. DATABASE Press the DATABASE key on the Keypad to bring up the database screen as shown below. On the top right of the screen, the current number of examinee and the total number of examinee that can be saved are displayed.
- Page 70 SETUP. If you would like to copy the entire database in the InBody720, move the cursor to the I.D. search field and then press SETUP. Contact InBody or an authorized distributor for information of the compatible USB storage devices with the InBody720. (5) Backup/Restore You can easily backup or restore all the data saved in the InBody720 using a USB storage device.
- Page 71 Select ‘Printed’ using a direction buttons. (▲▼) After pressing EXIT/MODE button 3 times, the screen asking whether you want to save modified settings will pop up. Press ‘Enter’ button to quit setup. Use the printed results sheet provided by InBody only.
-
Page 72: Chapter 4 Problems And Solutions
Chapter 4. Problems and Solutions 1. Error Messages 2. Troubleshooting 3. Frequently Asked Questions (FAQs) - Page 73 1. Error Messages The InBody720 displays the following error messages to warn the user of the problems run into during operations and to guide the users to take steps. The following are the most common error messages and the steps to handle the corresponding errors.
- Page 74 2. Troubleshooting This section lays out the order of steps you have to take for each particular problem, on the assumption that you have some basic knowledge on how to operate the InBody720. If you still have the problem after taking the following steps, contact our customer service representatives listed in the warranty certificate appended to the end of this user’s manual.
- Page 75 C. The measurements don’t seem right. (When the measurements seem too high or too low) Cause 1 The examinee loses contact with the electrodes or fails to maintain the recommended posture during the testing. Action 1 Refer to the “Chapter 2, Section 6. Proper Posture” to correct the examinee’s posture and maintain the recommended posture until after the testing is finished.
- Page 76 A problem arises when the orientations of printing set in the printer doesn’t correspond with that of the InBody720. Refer to the user’s manual of the printer to change the orientations of printing in the printer. The orientation of printing set in the InBody720 is portrait. As error message, the misprints, and burnt-out fuse are something that technical service representatives can examine in the process of troubleshooting, keep them in a safe spot or keep records of them.
- Page 77 C. Can an amputee or people who cannot stretch their hands or feet to the electrode be tested? It is impossible to test people who cannot contact the electrode. InBody has a line of products that conduct body composition analysis on the examinee in bed, without having to get examinee out of bed during the tests. For more information on this product line, contact InBody.
- Page 78 E. Can the jewelry or other metallic wear affect the testing? The ideal test methodology is where the examinee doesn’t wear anything metallic. As the weight of clothes and other wear affects the results of body composition analysis, it is strongly recommended to take off any heavy clothing or metallic wear. Except for the weight, jewelry doesn’t exact any effects on the body composition analysis, as the contact points with InBody720 are hands and feet that are usually free of jewelry.
-
Page 79: Chapter 5 Consumables
Chapter 5. Consumables 1. Consumables... - Page 80 1. Consumables A. Results sheet When using the InBody720 with a printer, it is strongly recommended to use the results sheets supplied by InBody. If more results sheets are needed, please contact InBody. Results sheet Size : 8.5 * 11 “ (Letter type)
-
Page 81: Appendix
Appendix 1. More About InBody720 2. Specifications 3. Customer Service Information... - Page 82 1. More about the InBody720 A. More About InBody720 The Bioelectrical Impedance Analysis (BIA) method is based on the fact that the human body consists of conductors and non-conductors. Generally 50~70% of the human body consists of water which functions as a conductor, whereas body fat functions as a non-conductor.
- Page 83 The body composition analyzer InBody720 is precision clinical diagnostic tool featuring the world-leading technology of InBody. The advanced technology used in the InBody720 is recognized both in Korea and abroad, as InBody obtained CE for exports to Europe and signed a technology royalty agreement with Yamato of Japan. The key features of the InBody720 built on the advanced technologies patented both in Korea and abroad.
- Page 84 C. Classifications - Type of protection against electric shock : Class I - Type of the applied parts : BF Type - Degree of protection against water infiltration : IPXO - EMC Immunity : Level A - EMC Emission : Level A - Equipment not suitable for use in the presence of flammable mixture Any changes or modifications in construction of this device which are not expressly approved by the party responsible for compliance could void the user authority to operate the equipment.
- Page 85 RS-232C 3EA, USB Host 2EA, Ethernet(10/100 Base-T) 1EA, IEEE1284 (25pin parallel) External Interface Compatible Printer Laser/inkjet PCL 3 or above and SPL(Printer recommended by InBody) 20.4(W) X 34.3(L) X 47.2(H) : inch Dimensions 520(W) X 870(L) X 1200(H) : mm 99lbs.(45 ㎏)
- Page 86 13850 Cerritos Corporate Dr., Unit C, Cerritos, CA 90703, USA TEL: +1-323-932-6503 FAX: +1-323-952-5009 Website: http://www.inbodyusa.com E-mail: info@inbodyusa.com InBody Co., Ltd. [HEAD OFFICE] InBody Bldg., 54, Nonhyeon-ro 2-gil, Gangnam-gu, Seoul 135-960 KOREA TEL: +82-2-501-3939 FAX: +82-2-578-2716 Website: http://www.inbody.com E-mail: info@inbody.com...
Need help?
Do you have a question about the 720 and is the answer not in the manual?
Questions and answers