Sign In
Upload
Download
Table of Contents
Contents
Add to my manuals
Delete from my manuals
Share
URL of this page:
HTML Link:
Bookmark this page
Add
Manual will be automatically added to "My Manuals"
Print this page
×
Bookmark added
×
Added to my manuals
Manuals
Brands
Hioki Manuals
Measuring Instruments
PR8111
Instruction manual
Hioki PR8111 Instruction Manual
Pen recorder
Hide thumbs
1
2
Table Of Contents
3
4
5
6
7
8
9
10
11
12
13
14
15
16
17
18
19
20
21
22
23
24
25
26
27
28
29
30
31
32
33
34
35
36
37
38
39
40
41
42
43
44
page
of
44
Go
/
44
Contents
Table of Contents
Troubleshooting
Bookmarks
Table of Contents
Table of Contents
Basic Operation
Confirming Package Contents
Introduction
Safety Information
Operating Precautions
Chapter 1 Overview
Product Overview and Features
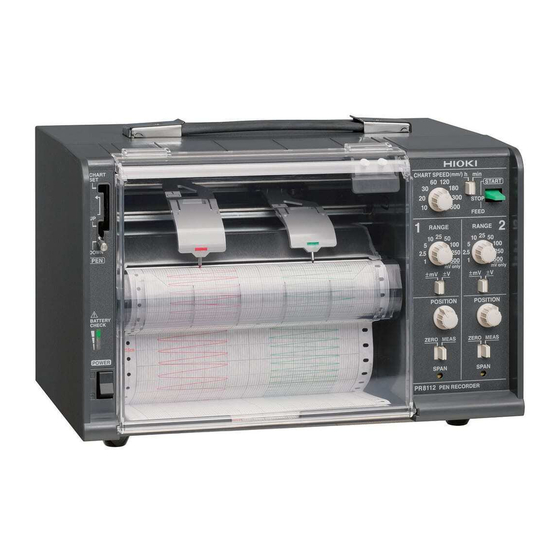
Names and Functions of Parts
SPAN (Span Adjustment)
Chart Cover
Chapter 2 Measurement Preparations
Pre-Operation Inspection
Loading Recording Paper
Loading Fanfold Recording Paper
Loading Roll Recording Paper
Installing the Pens
Installing Pens and Using the Pen Caps
Connecting the Power Source (Alkaline Batteries or AC Adapter)
Installing Alkaline Batteries
Connecting the AC Adapter
Using a DC Power Source
Turning the Instrument on and off
Connecting Measurement Cables to the Input Terminals
Attaching and Detaching the
Attaching the Drip-Proof Vinyl Cover
Chapter 3 Configuring the Instrument and Taking Measurements
Configuration and Measurement Process
Basic Measurement
Select a Measurement Range (RANGE)
Move the Pen Position (POSITION)
Set the Paper Feed Speed (CHART SPEED)
Lower the Pens (Pen Lever)
Start Measurement
Stop Measurement
Remove the Recording Paper
Cap the Pens
Using Only One Channel (PR8112 Only)
Example Printout
Chapter 4 Specifications
Chapter 5 Maintenance and Service
Inspection, Repair, and Cleaning
Transporting
Storing the Instrument
Replaceable Parts and Operating Lifetimes
Cleaning
Troubleshooting
Before Returning for Repair
Outline Drawings
Advertisement
Quick Links
Download this manual
PR8111
PR8112
Instruction Manual
PEN RECORDER
EN
Feb. 2020 Revised edition 3
PR8111A981-03 20-02H
Table of
Contents
Previous
Page
Next
Page
1
2
3
4
5
Advertisement
Table of Contents
Need help?
Do you have a question about the PR8111 and is the answer not in the manual?
Ask a question
Questions and answers
Related Manuals for Hioki PR8111
Measuring Instruments Hioki PR8112 Instruction Manual
Pen recorder (44 pages)
Measuring Instruments Hioki PW3198 Instruction Manual
Power quality analyzer (264 pages)
Measuring Instruments Hioki PW3198 Manual
Power quality analyzer (16 pages)
Measuring Instruments Hioki PW3335 Instruction Manual
Power meter, communication command (124 pages)
Measuring Instruments Hioki PQ3100 Instruction Manual
Power quality analyzer (242 pages)
Measuring Instruments Hioki PW3390 Instruction Manual
Power analyzer (108 pages)
Measuring Instruments Hioki PW3365-20 Quick Start Manual
Clamp on power logger power meter (12 pages)
Measuring Instruments Hioki PQ3198-94 Instruction Manual
Power quality analyzer (304 pages)
Measuring Instruments Hioki PQ3198-92 Instruction Manual
Power quality analyzer (304 pages)
Measuring Instruments Hioki PW8001-01 Instruction Manual
Power analyzer (262 pages)
Measuring Instruments Hioki PW8001-02 Instruction Manual
Power analyzer (262 pages)
Measuring Instruments Hioki PW8001-12 Instruction Manual
Power analyzer (262 pages)
Measuring Instruments Hioki PW8001-13 Instruction Manual
Power analyzer (262 pages)
Measuring Instruments Hioki PQ3100-94 Instruction Manual
Power quality analyzer (278 pages)
Measuring Instruments Hioki PQ3100-92 Instruction Manual
Power quality analyzer (278 pages)
Measuring Instruments Hioki PW8001 Ld Instruction Manual
Lq analyzer (20 pages)
This manual is also suitable for:
Pr8112
Table of Contents
Print
Rename the bookmark
Delete bookmark?
Delete from my manuals?
Login
Sign In
OR
Sign in with Facebook
Sign in with Google
Upload manual
Upload from disk
Upload from URL


Need help?
Do you have a question about the PR8111 and is the answer not in the manual?
Questions and answers