Table of Contents
Advertisement
Quick Links
Components
A. Left Side
Panel x 1
B. Right Side
Panel x 1
F. Top Panel x 1
G. Base Panel x 1
I. Left Door x 1
Fittings
L. Screw Cap x 16
M. Shelf Support x 24
Q. Triangle Board x 4 R. Wall Plug x 4
C. Left Internal
Panel x 1
E1. S Shelf x 4
D. Rignt Internal
Panel x 1
E2. L Shelf x 2
H. Back Panel x 1
J. Middle Door x 1
K. Right Door x 1
N. Straight
O. Hinge
P. Curving
Hinge x
4
Screw x 36
S. Wall Screw x 4
T. Assembly Screw x 16
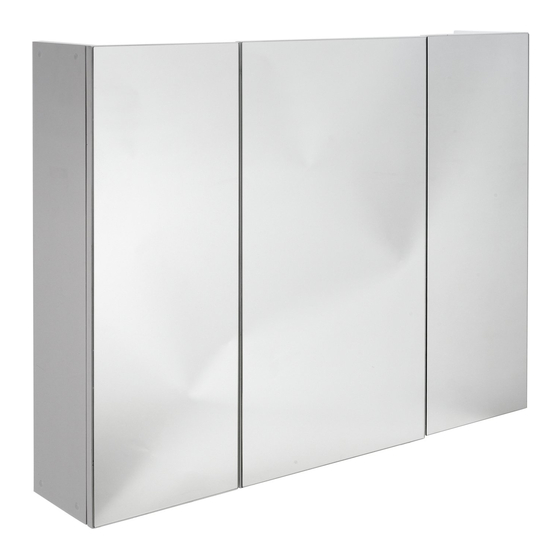
Triple Mirrored Door Cabinet
Simple Assembly Instructions -
IMPORTANT
1. Familiarise yourself with the procedure
before assembling the unit.
2. Check that you have all the component
parts following the list on the BACK
Hinge x 2
cover and familiarise yourself with
each part before proceeding.
3. Take all the fittings out of the plastic bag
and separate them into their groups.
Please keep for future reference
4. Ensure you have enough space to lay out
all the parts before assembly.
5. To avoid scratching it is recommended
that you assemble the article on a soft
level surface.
6. The Maximum Safe Load of this item is
10KGS
Advertisement
Table of Contents

Related Manuals for Argos Mirrored Cabinet


Summary of Contents for Argos Mirrored Cabinet
- Page 1 Components Triple Mirrored Door Cabinet Simple Assembly Instructions - Please keep for future reference A. Left Side C. Left Internal Panel x 1 Panel x 1 E1. S Shelf x 4 B. Right Side D. Rignt Internal Panel x 1 Panel x 1 E2.
- Page 2 Assembly Instructions Fitting the Support Frame NOTE: It would be useful to ask someone 6. Fit the curving hinges (P) into the pilot holes Fig. 1 to help you to assemble this unit. of left internal panel(C) to attach the middle door (J) with hinge screws (O).
- Page 3 BS7449 : 1991 Keep these instructions for future use: Catalogue Number: 833/0332(D) Manufacture date: Retailer: Argos Retailer address: 489-499 Avebury Boulevard WARNINGS Saxon Gate West Central Milton Keynes *Do not place very hot or very cold items against or in...
- Page 4 A Guide to A Guide to Wall Mounting & Fixings Wall Mounting & Fixings IMPORTANT: No.3 "Shield Anchor" Wall Plug No.5 "Cavity Fixing - Heavy Duty" When drilling into walls always check Heavy Loads Wall Plug that there are no hidden wires or pipes etc.
- Page 5 Mirrored Cabinet Assembly Instructions 833/0332 - please keep for future reference Dimensions Width - 80cm Depth - 15.5cm Height - 64cm Important – Please read these instructions fully before starting assembly If you need help or have damaged or missing parts, call the Customer Helpline: 0845 640 0800...
-
Page 6: Care And Maintenance
Safety and Care Advice Important – Please read these instructions fully before starting assembly • Check you have all the • Do not stand or put weight on • We do not components and tools listed on the product, this could cause recommend the pages 1 and 2. - Page 7 Components - Panels Please check you have all the panels listed below 1 Side x 2 2 Left middle x 1 3 Right middle x 1 (64(h)cm x 13.7(d)cm) (59(h)cm x 12.5(d)cm) (59(h)cm x 12.5(d)cm) 4 Top / bottom x 2 5 Back x 1 6 Outer door x 2 (77(w)cm x 13.7(d)cm)
- Page 8 Components - Fittings If you have damaged or missing components, call the Customer Helpline: 0845 640 0800 Please check you have all the fittings listed below Note: The quantities below are the correct amount to complete the assembly. In some cases more fittings may be supplied than are required.
- Page 9 Assembly Instructions Step 1 Connect the 2 x side the left middle the right middle 1 x top/bottom using 8 x 40mm screw shown. Insert a screw cover over the head of each screw. Note: ensure the slots of the side panels both point toward the rear of the unit.
- Page 10 Assembly Instructions Step 4 Connect 2 x outer door to the side panels using 4 x spring hinge and 16 x hinge screw as shown. Hinge adjustment: a: To adjust doors up or down, loosen screws shown and move doors to suit.
- Page 11 Assembly Instructions Step 7 Position 4 x corner bracket to the rear of the unit as shown to allow wall mounting. Step 8 The unit can be mounted onto a wall by fixing through the back panel using 2 x 40mm screw , 2 x washer 2 x rawl plugs Note: see the back cover...
-
Page 12: Important Note
A Guide to Wall Mounting & Fixings Important: when drilling into walls always check Important note: that there are no hidden wires or pipes etc. Make sure that the screws and wall plugs being used are suitable for If plastic wall plugs (rawl plugs) supporting your unit. - Page 13 Triple Mirrored Cabinet 833/0332 80cm 15.5cm 64cm Issue 2 - 8/20/12...
- Page 15 Components - Panels If you have damaged or missing components, call the Customer Helpline:08456 400800 Please check you have all the panels listed below Top & Bottom Panel x 2 Left & Right Side Panel x 2 Internal panel x 2 Left &...
-
Page 16: Tools Required
Components - Fittings Please check you have all the fittings listed below Note:The quantities below are the correct amount to complete the assembly .In some cases more fittings may be supplied than are required. Straight Hinge x 6 12mm Screw x 24 35mm Screw x 16 Screw Cap x 16 Plastic Support x 24... - Page 17 Assembly Instructions Step 1 Assembling straight hinge a:Loosen straight hinge screw till it can be moved to large hole on the right as shown. Separate straight hinge into two parts with screw & with screw b:Use 12mm screw to attach straight hinge &...
- Page 18 Assembly Instructions Step 2 Step 4 Assembling internal panels,top panel and back panel NOTE:It would be useful to ask someone to help you at this stage. a:Use 35mm screws to fix internal panels to bottom panel Pls make sure the grooves on internal panels &...
- Page 19 Assembly Instructions Step 3 Step 4 Assembling back panel and side panel NOTE:It would be useful to ask someone to help you at this stage. Carefully slide left & right back panels into grooves of the unit. Use 35mm screws to fix left &...
-
Page 20: Hinge Adjustment
Assembly Instructions Step 4 - Step 4 continued Assembling door NOTE:It would be useful to ask someone to help you at this stage. b: Repeat step a to fix middle door to the unit . See "Hinge adjustment" in next step if the doors need adjusting. - Page 21 Carefully put the adjustable shelves & on it. NOTE: Please make sure the unit is secure before use. NOTE:If you have damaged or missing components, call the Customer Helpline:08456 400800 The assembly is now complete. Argos LTD,489-499 Avebury Boulevard, Central Milton Keynes, MK9 2NW...
-
Page 22: A Guide To - Wall Mounting & Fixings
A Guide to - Wall Mounting & Fixings Important: When drilling into walls always Important note: check that there are no hidden wires or pipes etc. If plastic wall plugs Make sure that the screws and wall plugs being used are supplied with your are suitable for supporting your unit.
Need help?
Do you have a question about the Mirrored Cabinet and is the answer not in the manual?
Questions and answers