Advertisement
Quick Links
WindGarden
b y
p r e m i e r
d e s i g n s
w w w . p r e m i e r k i t e s . c o m
Body Sleeve
Velcro
Seam
Step 1
The Strut Assembly of your Vintage RV spinner is shipped in two sections. The Front Strut Assembly comes already inserted into the RV
Body Sleeve. There is also a Sti ener Rod within the Sleeve. Open the Velcro seam on the RV Body Sleeve and connect the Front Strut
Assembly to the Sti ener Rod. (diagram A)
Step 2
Insert the Rear Strut Assembly into the Body Sleeve and connect to the Front Strut Assembly. (Diagram B)
Front Strut Assembly
(Internal Body
Struts)
Internal Strut Assembly
will have to be connected
to Internal Sti ener
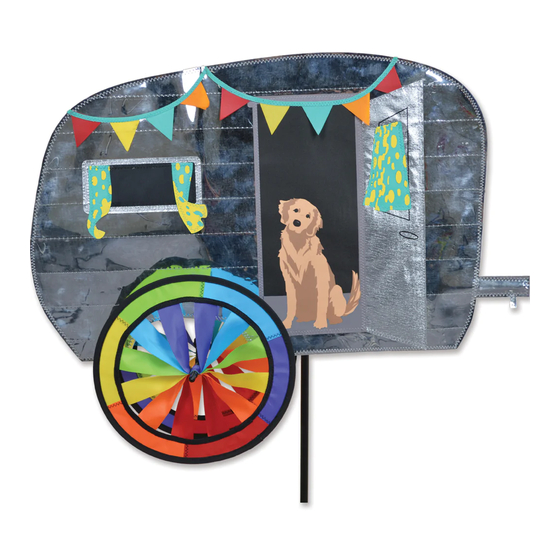
Vintage RV Spinner
sku #26827
Rear Strut Assembly
will have to be
connected to
Internal Body Struts
Sti ener
Rod
Body Sleeve
Plastic Tip of Support Pole
Completed Internal Strut Assembly.
Make sure all parts connect as shown.
Push Star Lock Hub rmly
onto Plastic Tip of Support Pole
NOTE: To make insertion process
easier, place bottom of Support Pole
on a hard, at surface and push
Support Pole
down on Star Lock Hub.
assembly
instructions
Front Strut Assembly
(Internal Body Struts)
Star Lock Hub
Advertisement

Related Manuals for Premier designs WindGarden 26827


Summary of Contents for Premier designs WindGarden 26827
- Page 1 Vintage RV Spinner WindGarden assembly p r e m i e r d e s i g n s instructions w w w . p r e m i e r k i t e s . c o m sku #26827 Completed Internal Strut Assembly.
- Page 2 Vintage RV Body Slide Spinner Wheels onto Spinner First, slide Spinner Axle, then hammer Axle onto Axle Cap onto end Strut Assembly Axle Cap Second, tighten knob on "T" Joint Wheels on same axle Spinner "T" Joint should spin Axle in opposite directions Spinner...
Need help?
Do you have a question about the WindGarden 26827 and is the answer not in the manual?
Questions and answers