Advertisement
Quick Links
Quick Start Guide
This installation is not for the electronic novice or the PC illiterate!
Use this system with EXTREME caution! If you are not well versed in
electronics and vehicle instrumentation or are not PC literate, please
do not attempt the installation. Refer the installation to an AEM
trained tuning shop. A list of AEM trained tuning shops is available
at
423-0046. You should also visit the AEM Performance Electronics
!
Forum at http://www.aemelectronics.com.
NOTE: AEM holds no responsibility for any engine damage that
results from the misuse of this product!
NOTE: All supplied AEM calibrations, Wizards and other tuning
information are offered as potential starting points only. IT IS THE
RESPONSIBILITY OF THE ENGINE TUNER TO ULTIMATELY
CONFIRM IF THE CALIBRATION IS SAFE FOR ITS INTENDED USE.
AEM holds no responsibility for any engine damage that results from
the misuse or mistuning of this product!
This product is legal in California for racing vehicles only and should never be
used on public highways.
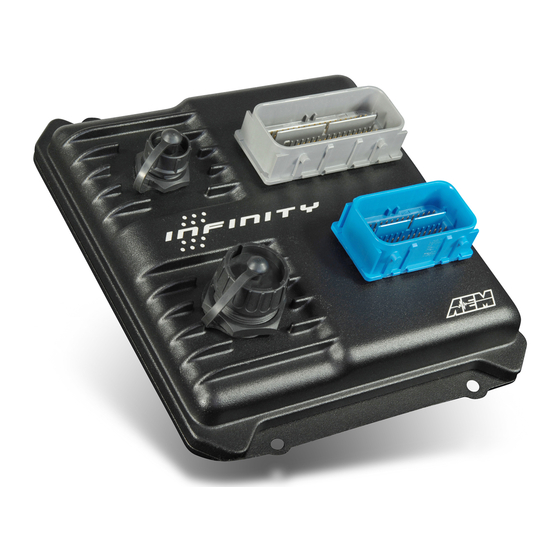
INFINITY
WARNING:
www.aemelectronics.com/dealer_locator.php
AEM Performance Electronics
th
2205 126
Street Unit A, Hawthorne, CA. 90250
Phone: (310) 484-2322 Fax: (310) 484-0152
http://www.aemelectronics.com
Instruction Part Number: 10-7100
2013 AEM Performance Electronics
or by calling 800-
Advertisement

Related Manuals for AEM INFINITY ECU


Summary of Contents for AEM INFINITY ECU
- Page 1 Use this system with EXTREME caution! If you are not well versed in electronics and vehicle instrumentation or are not PC literate, please do not attempt the installation. Refer the installation to an AEM trained tuning shop. A list of AEM trained tuning shops is available www.aemelectronics.com/dealer_locator.php or by calling 800- 423-0046.
- Page 2 Important! The latest firmware for your Infinity ECU is available at http://www.aeminfinity.com. Follow the instructions in this manual to install InfinityTuner then go directly to aeminfinity.com to download your firmware. RevC 07/15/13 Page 2...
- Page 3 Unlike previous AEM Setup Wizards in older products like AEM Pro and AEM Tuner, the InfinityTuner Setup Wizard “plug in” is a completely stand-alone application that will evolve with InfinityTuner. It is much...
- Page 4 A built-in logging playback/controls synchronization feature allows tuners to view live plot data and make changes to their calibration values on the fly, knowing exactly where the ECU was accessing table data. For more detailed post processing of data, AEM offers its new analysis package, AEMdata.
- Page 5 Send to>Desktop (create shortcut). Device Driver Installation For these next steps the Infinity ECU will need to be installed and powered up. Refer to your harness instructions details. You will need the ignition key in the on position. Connect your computer to the ECU via the USB cable.
- Page 6 “Manage”. Select “Device Manager”. You should see a window that looks similar to the Device manager shown above on the right hand side. Next look for a device labeled “AEM Infinity-10 EMS” (or similar). It may be listed under “Other devices”. Right click “AEM Infinity-10 EMS” and select Update Driver Software.
- Page 7 **If AEM Infinity-10 EMS does not appear on the list please verify that the USB plug is securely plugged into your computer and the ECU. Also make sure that the ECU is in fact powered up and connected correctly. If problem persists, try turning the key off and then back to the on position or try a different USB port on the PC.
- Page 8 AEM recommends restarting your PC after making changes to your device driver installation. Note: To confirm the driver installed properly you can return to your device manager window. The “AEM Infinity-10 EMS” device will now be recognized and fall under the tab “AEM EMS Controllers”. Infinity ECU: Serial Number...
- Page 9 ECU. AEM Infinity Account Registration Infinity ECUs must be registered before use. The following procedure describes how to register your new Infinity ECU. The aeminfinity.com site will always have the latest software available for your system. 1) Go to http://www.aeminfinity.com...
- Page 10 3) A confirmation email will be sent to the supplied email address. Choose one of the following options: a. Click on the “click here” link b. Or, copy the code and enter it into the Confirmation Code Box. 4) After entering the code, click on the “Confirm” button RevC 07/15/13 Page 10...
- Page 11 5) Click on the “your account page” to continue with ECU registration, otherwise click the “Log Off” button. AEM Infinity ECU Registration 1) Go to http://www.aeminfinity.com a. Log in to your account RevC 07/15/13 Page 11...
- Page 12 2) Click on the “Register New Product” button 3) Enter the Serial Number and Security Code a. Serial Number found on sticker on ECU case b. Security Code included in ECU packaging RevC 07/15/13 Page 12...
- Page 13 4) Enter Product Registration Information a. You must first read and accept the Agreement 5) Read and then accept Usage Agreement by selecting the “I Agree” button. RevC 07/15/13 Page 13...
- Page 14 6) Click the “Complete Registration” button once the Usage Agreement has been accepted. RevC 07/15/13 Page 14...
- Page 15 Firmware and Configuration Updates 1) Go to http://www.aeminfinity.com a. Log in to your account 2) Locate Firmware and Configuration updates a. Check for Firmware Updates since last downloaded b. Click the “INFO” button to locate Firmware and Configuration files. RevC 07/15/13 Page 15...
- Page 16 3) Locate the desired Configuration file and click the “Download” button. a. The Configuration file includes the Firmware and the Configuration files as a .pakgrp file 4) Save the .pakgrp file in the AEM InfinityTuner directory a. C:/Program Files (x86)/AEM/InfinityTuner RevC 07/15/13...
- Page 17 In the event of a conflict, please follow the instructions included in the dialog windows themselves or any supplemental documentation provided by AEM. a. Select the desired Configuration “Image” on the left b.
- Page 18 9) Follow the message at the bottom, and turn the ignition switch OFF when instructed to do so. 10) Follow the message at the bottom, and turn the ignition switch back ON when instructed to do so. RevC 07/15/13 Page 18...
- Page 19 “Done” button. InfinityTuner: Calibration Data Connecting and Saving the Session File The default calibration data provided by AEM should be sufficient to start an engine with similar displacement, sensor setup, and injectors. Every vehicle must be tuned before use.
- Page 20 InfinityTuner: Setup Wizard Setup Wizard The ECU setup wizard is designed to simplify the initial configuration of the Infinity ECU. AEM recommends using the wizard only when connected to the ECU via USB with the power on. Most of the setup wizards require the engine to NOT be running.
- Page 21 Universal Application a. In the Ignition Sync wizard, select the checkbox “Lock ignition timing at” and set the “degrees BTDC” (10.0 deg BTDC is the default). Do NOT attempt to start the engine. Disable (unplug) the fuel injectors and/or fuel pump. c.
- Page 22 If the Primary (and Secondary, if used) Injector Flow Wizard Selection does not contain your specific injectors, the Injector Flow Rate table can be modified in the InfinityTuner main layout after the setup wizard is complete. For now, choose the injector type that most closely matches your injectors.
- Page 23 If an oil pressure sensor is connected, “Oil Pressure Protection” can be enabled. d) Select “Lambda 1 Protection Enable” if an AEM sensor and harness are connected to the ECU. Set the activation criteria, and then select “Lean Fuel Cut Enable”...
- Page 24 Infinity: Table Edits and Hot Keys Table selection and direct math function edits Any math function can be directly applied to cell selections. In the first image below, a small section of the VE Table is selected using mouse left click and drag or shift + arrow selection.
- Page 25 “c” Two-way interpolation fill using only the selection area corners “e” Two-way interpolation fill using the selection edges Infinity: Plot Data and Controls Synchronization AEM supplied layout files will come pre-loaded with several “Plot Control” windows RevC 07/15/13 Page 25...
- Page 26 (users can always add, delete or edit them as desired). These are special controls that allow real time data logging and playback. To begin a PC log, go to the Log menu and select Start recording or hit the “CTRL + L” hot key. Select Stop recording or hit the “CTRL + L”...
- Page 27 Controls Synchronization When the plot control is populated with data, using the selection tool and dragging through the plot will cause InfinityTuner to synchronize all control windows to the plot data. This happens when connected to the simulator offline or when connected to the ECU via USB.
- Page 28 Infinity: Fuel Injector Flowrate The InjFlowRate [cc/min] table can be modified in each cell. The cells are populated based on the Setup Wizard selections, however unique applications/unlisted injectors can be described by double clicking on the individual upper cells in the table. If you need to modify the InjFlowRate table, and you do not know the different flow rates at different fuel pressures, choose a flow rate (based on Manufacturers specs) at a known pressure and populate the entire row with that value.
- Page 29 A higher number gives priority to Coolant Temperature, and is seen at lower Engine RPM. Once Mass Airflow has been calculated using the tables above, the Infinity ECU will look up the Target Lambda (AFR) and then calculate the fuel requirements. Target AFR will be used as a main parameter in determining fuel injector flow rate.
- Page 30 Now that the base injector flow rate has been determined, the Infinity ECU applies a few more compensating factors. Wall Wetting is a function of fuel condensing in the intake manifold at the injection point.
- Page 31 LamdaAfterStartTrim is a 2-axis table that is used to modify the Lambda (AFR) for specified time after starting the engine. This table adds a lambda offset for a small period of time after the engine is started. By allowing a slightly richer mixture target, it will keep the engine from stalling or running rough immediately after starting and the lambda correction to a minimum.
- Page 32 INFINITY INSTALLATION REQUIREMENTS Pre-installation check Check the following before installation: Fuel pressure (must be set to factory specs) Spark plugs (recommend starting with new plugs) Ignition timing (must be set to factory specs) Fuel filter (recommend starting with new filter) ...
- Page 33 The 2 center pins (Black-Red wires) supply 12V power to the stepper motor in the factory setup, however these pins MUST BE DISCONNECTED before powering on the AEM Infinity ECU. Step 1: Disconnect connector from IACV housing and gently remove the retainer from the connector.
- Page 34 Step 2: Use a small flat-blade screwdriver/pick to move the terminal locks while pulling the Black-Red wires out from the backside of the connector. Step 3: Use heat shrink to insulate both 12V wires and then zip tie the insulated wires to a nearby loom.
- Page 35 RevC 07/15/13 Page 35...
- Page 36 Need additional help? Contact the AEM Performance Electronics tech department at 1-800-423-0046 or tech@aempower.com, or visit the AEM Performance Electronics forum at http://forum.aempower.com/forum/ RevC 07/15/13 Page 36...
Need help?
Do you have a question about the INFINITY ECU and is the answer not in the manual?
Questions and answers