Table of Contents
Advertisement
Available languages
Available languages
Advertisement
Table of Contents

Related Manuals for urmet domus Nexo 1708/1


Summary of Contents for urmet domus Nexo 1708/1
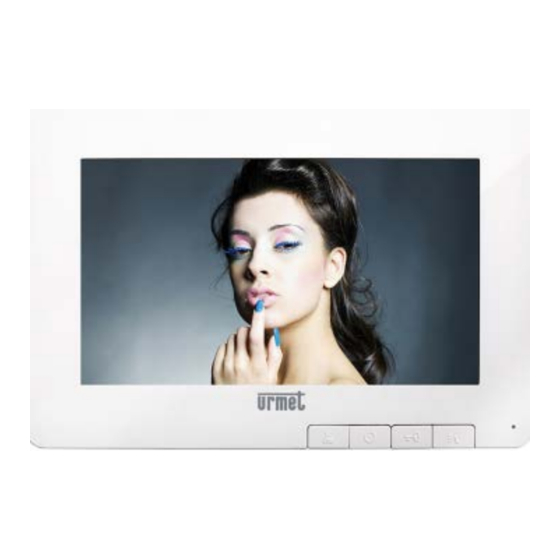
- Page 1 Mod. 1708 DS 1708-001C LBT 8626 VIDEOCITOFONO 7” PER SISTEMA COAX 7” COAX VIDEO DOOR PHONE VIDÉOPHONE 7” POUR SYSTÈME COAX VIDEOINTERFONO 7” PARA SISTEMA COAX 7” VIDEOSPRECHANLAGE FÜR KOAXIAL-SYSTEM Sch./Ref. 1708/1...
-
Page 2: Installazione
1 INSTALLAZIONE ITALIANO • Fissare la staffa ad una scatola incasso • Collegare i connettori al videocitofono e alla scheda morsettiere fornita a corredo • Collegare la scheda morsettiere all’impianto Le principali prestazioni del videocitofono a colori Sch.1708/1 sono: • Inserire il videocitofono sulla staffa •... -
Page 3: Funzionamento
1.1 DESCRIZIONE DEI MORSETTI 3 REGOLAZIONI Positivo di alimentazione videocitofono secondario 3.1 REGOLAZIONE LUMINOSITÀ E COLORE (30 LIVELLI) Positivo alimentazione videocitofono Segnale video composito per collegamento entra-esci di un secondo videocitofono (se non Quando è in corso un’autoinserzione o a seguito della ricezione di una chiamata a) Premere il pulsante Menu per accedere al controllo della luminosità, quindi premere presente inserire la resistenza da 75 Ohm spostando il jumper di terminazione) Massa segnale video... -
Page 4: Installation
1 INSTALLATION ENGLISH • Fix the bracket to a fl ush mounting box • Connect the connectors to the video door phone and to provided terminal board card • Connect the terminal board card to the system • Insert the video door phone in the bracket The main features of the colour video door phone Ref. -
Page 5: Operation
1.1 TERMINAL PINS DESCRIPTION 3 ADJUSTMENTS Secondary video door phone power supply positive 3.1 BRIGHTNESS AND COLOUR ADJUSTMENT (30 LEVELS) Video door phone power supply positive Composite video signal for in-out connection of a second video door phone (if not present, insert During auto-on or after a call has been received a) Press Menu button to access brightness adjustment, then press for adjustment. - Page 6 1 INSTALLATION FRANÇAIS • Fixer l’étrier à un boîtier en encastrement livré • Raccorder les connecteurs au vidéophone et à la carte des borniers livrée • Raccorder la carte des borniers au système Les prestations principales du vidéophone couleurs Réf. 1708/1 sont:: •...
-
Page 7: Caractéristiques Techniques
1.1 DESCRIPTION DES BORNES 3 RÉGLAGES Positif d’alimentation du vidéophone secondaire 3.1 RÉGLAGE LUMINOSITÉ ET COULEUR (30 NIVEAUX) Positif d’alimentation du vidéophone Signal vidéo composite pour connexion entrée/sortie d’un deuxième vidéophone (s’il n’est pas Quand une auto-insertion est en cours ou après la réception d’un appel a) Appuyer sur la touche Menu pour accéder au réglage de la luminosité, puis appuyer sur la touche présent, introduire une résistance 75Ohm en déplaçant le jumper de terminaison) Masse signal vidéo... -
Page 8: Instalación
1 INSTALACIÓN ESPAÑOL • Fijar el soporte con una caja de encaje • Conectar los conectores con el videointerfono y con la tarjeta de bornes anexa al dispositivo • Conectar la tarjeta de bornes con el sistema Las principales prestaciones del videointerfono a colores Ref.1708/1 son: •... -
Page 9: Caracteristicas Tecnicas
1.1 DESCRIPCIÓN DE LOS BORNES 3 REGULACIÓN Positivo de alimentación videointerfono secundario 3.1 REGULACIÓN LUMINOSIDAD Y COLOR (30 NIVELES) Positivo alimentación videointerfono Señal vidéo compuesto para conexión entrada-salida de un segundo videointerfono (si no está Cuando está en curso una autoactivación o en seguida de la recepción de una llamada a) Presionar la tecla Menú... - Page 10 1 INSTALLATION DEUTSCH • Die Halterung in einem Unterputz-Kasten befestigen • Die Klemmen an die Video-Türstation und ans mitgelieferte Klemmenbrett anschliessen • Das Klemmenbrett an die Anlage anschliessen Die Hauptleistungsmerkmale des Farb-Videohaustelefons BN 1708/1 sind: • Die Video-Türstation in die Halterung einsetzen •...
-
Page 11: Technische Merkmale
1.1 BESCHREIBUNG DER KLEMMEN 3 EINSTELLUNGEN Positiver Pol der Stromversorgung der Neben-Video-Türstation 3.1 EINSTELLUNG DER HELLIGKEIT UND FARBE (30 STUFEN) Positiver Pol der Stromversorgung der Video-Türstation Composite Videosignal zum Ein- und Ausgabeanschluss einer zweiten Video-Türstation (wenn Während einer Selbsteinschaltung oder bei Erhalt eines Anrufs a) Die Taste Menü... - Page 12 ESEMPIO DI COLLEGAMENTO NOTE LEGATE AGLI SCHEMI NOTES ON DIAGRAMS CONNECTION EXAMPLE REMARQUES CONCERNANT LES SCHÉMAS EXEMPLE DE CONNEXION NOTAS REFERIDAS A LOS ESQUEMAS EJEMPLO DE CONEXIÓN HINWEISE IN VERBINDUNG MIT DEN PLÄNEN BEISPIEL EINES ANSCHLUSSES VX.001 - Per impiegare l’uscita U5 del Distributore Video tagliare la resistenza da 75 Ohm montata sollevata sul circuito stampato oppure rimuovere il jumper (se presente).
- Page 13 DS 1708-001C LBT 8626 URMET S.p.A. Area tecnica 10154 TORINO (ITALY) servizio clienti +39 011.23.39.810 VIA BOLOGNA 188/C http://www.urmet.com Telef. +39 011.24.00.000 (RIC. AUT.) e-mail: info@urmet.com +39 011.24.00.300 - 323 MADE IN P.R.C. MFS0692URMET V120112...
Need help?
Do you have a question about the Nexo 1708/1 and is the answer not in the manual?
Questions and answers