
Subscribe to Our Youtube Channel
Related Manuals for urmet domus nexo2 1708/2


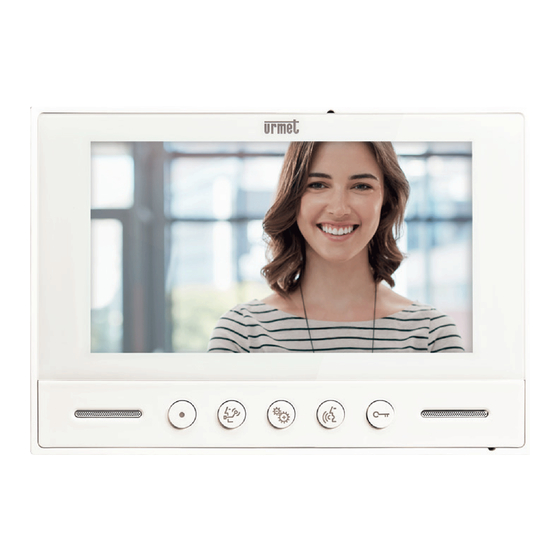
Summary of Contents for urmet domus nexo2 1708/2
- Page 1 Mod. 1708 DS 1708-004 LBT 20522 VIDEOCITOFONO 7” NEXO2 NEXO2 7” VIDEO DOOR PHONE MONITEUR 7” NEXO2 VIDEOINTERFONO 7” NEXO2 7”-VIDEOSPRECHANLAGE NEXO2 Sch./Ref. 1708/2...
-
Page 2: Table Of Contents
ITALIANO INDICE DESCRIZIONE ..............................2 INSTALLAZIONE ............................3 DESCRIZIONE DEI COMPONENTI ......................3 MODALITÀ D’INSTALLAZIONE ........................3 DESCRIZIONE DEI MORSETTI ........................4 FUNZIONAMENTO ............................5 RISPOSTA AD UNA CHIAMATA ........................ 5 ATTIVAZIONE SERRATURA ELETTRICA ....................5 MENU IMPOSTAZIONI ........................... 5 CARATTERISTICHE TECNICHE ........................ -
Page 3: Installazione
INSTALLAZIONE DESCRIZIONE DEI COMPONENTI 10 11 Display LCD 7” TFT. Tasto ausiliario Tasto ausiliario Tasto del menu impostazioni Tasto attivazione/disattivazione della fonia Tasto apriporta Microfono. Altoparlante. Connettore a 8 vie per il collegamento alla scheda morsettiere. Connettore a 9 vie per il collegamento alla scheda morsettiere. Jumper per inserimento resistenza di terminazione da 75 Ohm. -
Page 4: Descrizione Dei Morsetti
• Collegare i cavetti con connettore al videocitofono e alla scheda morsettiere. Collegare i conduttori dell’impianto alle morsettiere. Scheda morsettiere • Accostare il videocitofono alla staffa centrando gli appositi agganci (1) e farlo scorrere verso il basso fi no al suo arresto (2). •... -
Page 5: Funzionamento
Massa di alimentazione Comando tasto apriporta Morsetti tasto ausiliario (Per l’attivazione di carichi elettrici occorre utilizzare una scatola a relé). Morsetti tasto ausiliario (Per l’attivazione di carichi elettrici occorre utilizzare una scatola a relé). Se il videocitofono è installato alla fi ne di una linea il jumper deve essere in posizione 75 Jumper Ohm, in caso contrario deve essere in posizione ∞... -
Page 6: Caratteristiche Tecniche
Accesso alle regolazioni • Quando il videocitofono è acceso, premere il tasto per almeno 1,5 secondi. • Durante la conversazione: premere brevemente il tasto Variazione dei parametri Premere il tasto per accedere alla regolazione del volume dell’altoparlante nella fase di fonia, quindi premere il tasto per ottenere le seguenti variazioni: 1.1. -
Page 7: English
ENGLISH INDEX DESCRIPTION ..............................7 INSTALLATION ............................... 8 DESCRIPTION OF COMPONENTS ......................8 INSTALLATION INSTRUCTIONS ........................ 8 DESCRIPTION OF TERMINALS ......................... 9 OPERATION ..............................10 ANSWERING A CALL ..........................10 ELECTRIC LOCK ACTIVATION ........................ 10 SETTINGS MENU ............................10 TECHNICAL SPECIFICATIONS ........................11 ESEMPIO DI COLLEGAMENTO ........................ -
Page 8: Installation
INSTALLATION DESCRIPTION OF COMPONENTS 10 11 LCD 7” TFT display. Auxiliary button Auxiliary button Settings menu button Audio on/off button Door opening button Microphone. Speaker. 8-way connector for connecting to the terminal board. 9-way connector for connecting to the terminal board. Jumper for inserting 75 Ohm terminal resistor. -
Page 9: Description Of Terminals
• Connect the wires with connector to the video door phone and to the terminal boards. Connect the system conductors to the terminal boards. Terminal board • Approach the video door phone to the bracket centring the specifi c couplings (1) and making it slide downwards until it stops (2). -
Page 10: Operation
Power ground Door opener control Auxiliary button terminals (use a relay box to actuate electric loads). Auxiliary button terminals (use a relay box to actuate electric loads). If the video door phone is installed at the end of a line, the jumper must be in 75 Ohm Jumper position, otherwise it must be in the ∞... -
Page 11: Technical Specifications
Accessing settings • When the video door phone is on, press for at least 1.5 seconds. • During the conversation: press briefl y. Adjusting parameters Press the button to access speaker volume settings during the audio function, then press the button to adjust as follows: 1.1. -
Page 12: Français
FRANÇAIS SOMMAIRE DESCRIPTION .............................. 12 INSTALLATION ............................. 13 DESCRIPTION DES COMPOSANTS ......................13 MODES D’INSTALLATION ........................13 DESCRIPTION DES BORNES ........................14 FONCTIONNEMENT ............................ 15 REPONDRE A UN APPEL ........................15 ACTIVATION DE LA SERRURE ELECTRIQUE ..................15 MENU DES REGLAGES ..........................15 CARACTÉRISTIQUES TECHNIQUES...................... -
Page 13: Installation
INSTALLATION DESCRIPTION DES COMPOSANTS 10 11 Affi cheur LCD TFT 7’’. Touche auxiliaire Touche auxiliaire Touche du menu des réglages Touche d’activation/désactivation de la phonie Touche ouvre-porte Microphone. Haut-parleur. Connecteur à 8 voies pour le branchement à la carte des borniers. Connecteur à... -
Page 14: Description Des Bornes
• Brancher les câbles avec connecteur au moniteur et à la carte des borniers. Raccorder les conducteurs de l'installation aux borniers. Carte des borniers • Rapprocher le moniteur de l'étrier, veillant à centrer les attaches (1) et à le faire glisser vers le bas jusqu'en butée (2). -
Page 15: Fonctionnement
Masse d’alimentation Commande de la touche ouvre-porte Bornes de la touche auxiliaires (Pour l’activation de dispositifs électriques il faut utiliser un boîtier à relais). Bornes de la touche auxiliaires (Pour l’activation de dispositifs électriques il faut utiliser un boîtier à relais). Si le moniteur est installé... -
Page 16: Caractéristiques Techniques
Access aux réglages • Quand le moniteur est allumé, appuyer sur la touche pendant au moins 1,5 secondes. • Pendant la conversation : appuyer brièvement sur la touche Variation des paramètres Appuyer sur la touche pour accéder au réglage du volume du haut-parleur en phase de phonie, donc appuyer sur la touche pour atteindre les variations suivantes : 1.1. -
Page 17: Español
ESPAÑOL ÍNDICE DESCRIPCIÓN ............................. 17 INSTALACIÓN .............................. 18 DESCRIPCIÓN DE LOS COMPONENTES ....................18 MODO DE INSTALACIÓN ........................18 DESCRIPCIÓN DE LOS BORNES ......................19 FUNCIONAMIENTO ............................. 20 RESPUESTA A UNA LLAMADA ....................... 20 ACTIVACIÓN DE LA CERRADURA ELÉCTRICA ..................20 MENÚ... -
Page 18: Instalación
INSTALACIÓN DESCRIPCIÓN DE LOS COMPONENTES 10 11 Pantalla LCD 7” TFT. Botón auxiliar Botón auxiliar Botón del menú de confi guraciones Botón de activación/desactivación de la fonía Botón de apertura de la puerta Micrófono. Altavoz. Conector de 8 vías para la conexión a la tarjeta con tableros de bornes. Conector de 9 vías para la conexión a la tarjeta con tableros de bornes. -
Page 19: Descripción De Los Bornes
• Conectar los cables con conector en el videointerfono y en la tarjeta con tablero de bornes. Conectar los conductores del sistema en los tableros de bornes. Tableros de bornes • Acercar el videointerfono al soporte, centrando los correspondientes enganches (1), y deslizarlo hacia abajo hasta el tope (2). -
Page 20: Funcionamiento
Masa de alimentación Mando del botón de apertura de la puerta Bornes del botón auxiliar (Para la activación de cargas eléctricas se debe utilizar una caja de relés). Bornes del botón auxiliar (Para la activación de cargas eléctricas se debe utilizar una caja de relés). -
Page 21: Características Técnicas
Acceso a los ajustes • Cuando el videointerfono está encendido, pulsar el botón al menos durante 1,5 segundos. • Durante la conversación: pulsar brevemente el botón Variación de los parámetros Pulsar el botón para acceder a la regulación del volumen del altavoz en la fase de fonía y luego pulsar el botón para hacer las siguientes variaciones: 1.1. -
Page 22: Deutsch
DEUTSCH INHALT DESCRIZIONE ..............................2 INSTALLAZIONE ............................3 DESCRIZIONE DEI COMPONENTI ......................3 MODALITÀ D’INSTALLAZIONE ........................3 DESCRIZIONE DEI MORSETTI ........................4 FUNZIONAMENTO ............................5 RISPOSTA AD UNA CHIAMATA ........................ 5 ATTIVAZIONE SERRATURA ELETTRICA ....................5 MENU IMPOSTAZIONI ........................... 5 CARATTERISTICHE TECNICHE ........................ - Page 23 INSTALLATION BESCHREIBUNG DER BAUTEILE 10 11 7”-LCD-Display TFT. Hilfstaste Hilfstaste Taste des Menüs Einstellungen Taste zum Aktivieren/Deaktivieren des Gesprächs Türöffnertaste Mikrofon. Lautsprecher. 8-Wege-Verbinder für den Anschluss an die Klemmenleistenplatine. 9-Wege-Verbinder für den Anschluss an die Klemmenleistenplatine. Jumper zum Einschalten des 75 Ohm-Endwiderstands. INSTALLATIONSHINWEISE •...
- Page 24 • Die Kabel mit Verbinder an die Videosprechanlage und die Klemmenleistenplatine anschließen. Die Verbinder der Anlage an die Klemmenleisten anschließen. Klemmenleistenplatine • Die Videosprechanlage an die Anbauhalterung annähern und dazu die entsprechenden Befestigungen (1) zentrieren und bis zum Anschlag (2) nach unten gleiten lassen. •...
- Page 25 Versorgungserdanschluss Türöffnertastensteuerung Hilfstastenklemmen (Zur Aktivierung der elektrischen Lasten muss ein Relaiskasten verwendet werden). Hilfstastenklemmen (Zur Aktivierung der elektrischen Lasten muss ein Relaiskasten verwendet werden). Ist die Videosprechanlage am Ende einer Leitung installiert, muss der Jumper sich in Jumper Position 75 Ohm befi nden, andernfalls muss er sich in Position ∞ (Standard) befi nden. FUNKTIONSWEISE RUFBEANTWORTUNG Im Anschluss an einen Anruf von einer Außenstelle der Videosprechanlage, klingelt die Videosprechanlage...
- Page 26 Zugriff auf die Regelungen • Bei eingeschalteter Videosprechanlage die Taste mindestens 1,5 Sekunden lang betätigen. • Während des Gesprächs: kurz die Taste betätigen. Änderung der Parameter Die Taste betätigen, um auf die Lautsprecherlautstärkeregelung in der Gesprächsphase Zugriff zu erhalten, dann die Taste betätigen, um die folgenden Änderungen zu erzielen: 1.1.
-
Page 27: Esempio Di Collegamento
ESEMPIO DI COLLEGAMENTO CONNECTION EXAMPLE EXEMPLE DE CONNEXION EJEMPLO DE CONEXIÓN BEISPIEL EINES ANSCHLUSSES SV102-3927B DS1708-004... -
Page 28: Note Legate Agli Schemi
NOTE LEGATE AGLI SCHEMI NOTES ON DIAGRAMS REMARQUES CONCERNANT LES SCHÉMAS NOTAS REFERIDAS A LOS ESQUEMAS HINWEISE IN VERBINDUNG MIT DEN PLÄNEN VX.001 - Per impiegare l’uscita U5 del Distributore Video tagliare la resistenza da 75 Ohm montata sollevata sul circuito stampato oppure rimuovere il jumper (se presente). To use Video Distributor U5 output, cut the 75 Ohm resistor spaced from the PCB, or remove the jumper (if present). -
Page 29: Legenda
LEGENDA LEGENDE LEYENDA KURZZEICHEN A - Ai successivi videocitofoni To the next video door phones Aux vidéophones suivants Hacia los videointerfonos siguientes An die nachfolgenden Video-Türstationen B - Videocitofono Sch. 1708/2 Video door phone Ref. 1708/2 Vidéophone Réf. 1708/2 Videointerfono Ref. 1708/2 Videosprechanlage BN 1708/2 C - Distributore video Sch. - Page 30 DS1708-004...
- Page 31 DS1708-004...
- Page 32 ITALIANO DIRETTIVA 2012/19/UE DEL PARLAMENTO EUROPEO E DEL CONSIGLIO del 4 luglio 2012 sui rifi uti di apparecchiature elettriche ed elettroniche (RAEE) Il simbolo del cassonetto barrato riportato sull’apparecchiatura o sulla sua confezione indica che il prodotto alla fi ne della propria vita utile deve essere raccolto separatamente dagli altri rifi uti. L’utente dovrà, pertanto, conferire l’apparecchiatura giunta a fi...
Need help?
Do you have a question about the nexo2 1708/2 and is the answer not in the manual?
Questions and answers