Table of Contents
Advertisement
Advertisement
Table of Contents

Related Manuals for GEPRC CineLog25 HD PRO


Summary of Contents for GEPRC CineLog25 HD PRO
- Page 1 Born For FPV...
-
Page 2: Table Of Contents
Catalog Summary..............................1 Feature............................2 Specifications:...........................3 Warranty policy........................... 4 Install Bateflight...........................5 Install Driver..........................5 Download address:........................5 Install Betaflight...........................6 How to use betaflight via phone....................8 Bind with Air Unit..........................9 Bind with DJI Goggle......................... 10 Bind with Remote Controller....................11 Definition of DJI Remote Controller....................12 ARM Switch.......................... -
Page 3: Summary
The F411-20A-F4 AIO and GEPRC NEW 1204 3750KV motors are used in flight system and power system. The power battery can be compatible with 450mah ~ 750mah. -
Page 4: Feature
Feature 1.New camera damping system The New camera damping system basically eliminates the video’s jelly and FPV camera’s vibration in terms of designing, The damping construction can be adjusted the harder or softer to suit the Flight State. There are Three, Four and Five damping rings can be used to provide sufficient stability in vibration and noise. -
Page 5: Specifications
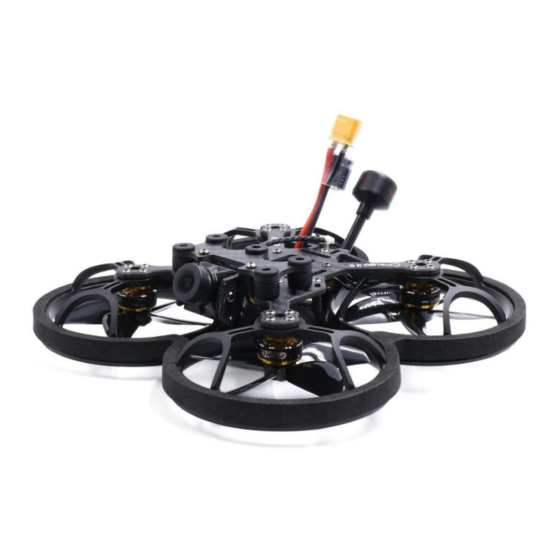
Specifications: Item Cinelog25 Brand GEPRC Frame GEP-CL25 Motor to motor 109mm System GEP-20A-F4 STM32F411 MPU6000(SPI) BetaFlight OSD w/AT7456E chip BLheliS 20A Caddx Vista/5.8G 500mW VTX Camera Caddx Nebula Pro/Caddx Nebula Micro/Caddx Nano EOS2 Propellers GEMFAN D63-5 Motor GR1204 3750KV CineLog25HD Weight 125.6g(weight without batteries) -
Page 6: Warranty Policy
Please trust our profession and service. Support e-mail: support@geprc.com In principle, GEPRC not responsible for the impact caused by drone operation or the lack of parts or functions caused by personal reasons. We all willing to remain open and sincere. -
Page 7: Install Bateflight
Install Bateflight Install Driver The driver must be installed before FC connect to the computer. MacOS and Linux systems will pre install the required drivers. Windows system need to manually install the driver. Download address: -CP210x Drivers (https://www.silabs.com/products/development-tools/software/usb-to-uart-bridge-vcp-driv ers) ... -
Page 8: Install Betaflight
Install Betaflight Download address below: https://github.com/betaflight/betaflight-configurator/releases Enter the page, pull to the bottom and select the appropriate installation package to download It should be noted that different computer systems need to download their own installation packages exe is windows system ... - Page 9 After the installation, open betaflight; then connect FC to the computer Via USB cable, select the correct COM port (Ignore COM1) in the upper right corner of betaflight, and click on "Connect" to enter FC setting interface. 7/24 Born For FPV...
-
Page 10: How To Use Betaflight Via Phone
How to use betaflight via phone To use mobile betaflight to tune parameters, you need to download the mobile betaflight APP and purchase an OTG adapter. Use OTG cable to connect betaflight and FC. (Note: refresh firmware unavailable in this way) ... -
Page 11: Bind With Air Unit
Bind with Air Unit If you buy cinelog25 PNP (DJI receiver), You need to pair with DJI remote control and DJI Goggle ,The Cinelog25 HD is ready to fly. The bind sequence must be DJI Goggle first, and then DJI remote control. If the bind sequence is wrong, Otherwise the Air Unit will disconnect from the remote control, The remote control should be rebind. -
Page 12: Bind With Dji Goggle
Bind with DJI Goggle Turn on the power of FPV Goggles and FPV Air Unit Module.Press the FPV Goggles binding button,the FPV Googles buzzer will make continuous sound.Indicates entering the binding state. Press the FPV Air Unit Module binding button ,the indicator light changes from green to red.Indicates entering the binding state. -
Page 13: Bind With Remote Controller
Bind with Remote Controller Turn on the power of FPV Remote Controller.At the same time,long press the REC,the custon key C and the right wheel button of the FPV Romote Controller,the Remote Controller buzzer will make a continuous sound and the indicator turns blue and flashes slowly. -
Page 14: Definition Of Dji Remote Controller
Definition of DJI Remote Controller SA: ARM SB: MODES SWITCHING SC: BEEPER SD: GOPEO REC 12/24 Born For FPV... -
Page 15: Arm Switch
ARM Switch Two Required Conditions before Arm Low Throttle Arm Switch should be put into unlocking mode When unlocking, the throttle must be pulled to the lowest position, otherwise, when the unlocking switch is turned, the motor will not have any action. If the buzzer is installed, a warning sound will be launch, indicating that the throttle lever is not in the lowest position. -
Page 16: Modes Switch
Modes Switch There are three Flight mode in CineLog 25 HD ANGLE HORIZON If you are novice, Recommend Angle Mode, Easy to control. The main feature of Arm mode is that the FPV attitude will not keep horizontal automatically. Must rely on the pilot's fingers and experience to maintain balance, It can perform a series of difficult Freestyle movements. -
Page 17: Beeper
BEEPER The buzzer has been set in SC switch in Cinelog. Set the switch to the start gear, the FPV will emit a beep, It should be open when the FPV is lost, and search for the FPV according to the sound. 15/24 Born For FPV... -
Page 18: Gopro Rec
GOPRO REC First, Connect MODE and FND of GOPRO Second plug in GOPRO through the connector Connect the Betaflight and fill in these orders below: resource LED_STRIP 1 NONE resource PINIO 1 A08 set pinio_box = 40,255,255,255 Save 16/24 Born For FPV... - Page 19 When the flight control restarts, start the USE1 Mode in the Modes option, add range, and toggle the SD switch on the remote control, which will be mapped to Aux4. Range threshold to the second segment. preserve setup. Disconnect the betaflight and plug out USD, Plug in battery on CineLog The definition of SD switch(Control the recording)
-
Page 20: Diy Osd
In the OSD tab, you can select the data you need to see on the Goggle screen when flying. Use the element toggle on the left to enable and disable individual elements. You can rearrange individual OSD elements on the screen by dragging the mouse over the screen 18/24 Born For FPV... -
Page 21: Install The Propellers
Install the propellers The propeller of FPV has two directions: clockwise (CW) and counter clockwise (CCW). A propeller has a front and a back. Front side up please. Cinelog25 uses the reverse installation method. During reverse installation, motors 2 and 3 rotate clockwise, while motors 1 and 4 rotate counterclockwise. -
Page 22: Install Battery
Install battery Cinelog25 adopts the method of carrying the battery on the top and fixing it with a strap. Before fixing the battery, it's better to fix the power plug together in the strap, so as to avoid being cut down by the propeller and damaged during flight. In addition, the battery should not be placed too far forward or backward near the center of gravity of the FPV 20/24 Born For FPV... -
Page 23: Install Gopro
Install GoPro Here is instruction picture of the CineLog with GOPRO LITE, The Mount and Naked camera you should separately purchase. 21/24 Born For FPV... -
Page 24: The Essential Inspection Before Flight
The Essential inspection before flight. Most of the time, the cause of FPV crash is not checked before takeoff. For the safety, we suggest that you should take a check before each flight. The steps are as follows: 1. Turn on the remote control and select the correct model; please confirm that the unlock switch is in the locked state and the throttle position is in the lowest position;... -
Page 25: Fpv Community Rule
FPV Community Rule We use the 5.8GHz analog image transmission, If many people fly together, the picture between each other will produce interference. There's nothing more troubling than FPV Clashing! Although Cinelog25 HD uses DJI Digital signal with high anti-interference performance, It still uses 5.8GHz, which may cause interference to analog image transmission. - Page 26 TaoBao store:https://geprc.taobao.com/ Official Website:https://geprc.com/ DJI System Website:https://www.dji.com/cn/fpv?site=brandsite&from=nav Official Tencent’s QQ Group:499699918 Instagram Facebook facebook.com/geprc Instagram.com/geprc YouTube BiLiBiLi bilibili.com/geprc Manual geprc.com/support 24/24 Born For FPV...
Need help?
Do you have a question about the CineLog25 HD PRO and is the answer not in the manual?
Questions and answers