Table of Contents
Advertisement
Advertisement
Table of Contents

Subscribe to Our Youtube Channel
Related Manuals for DIEBOLD NIXDORF NextGen D1150


Summary of Contents for DIEBOLD NIXDORF NextGen D1150
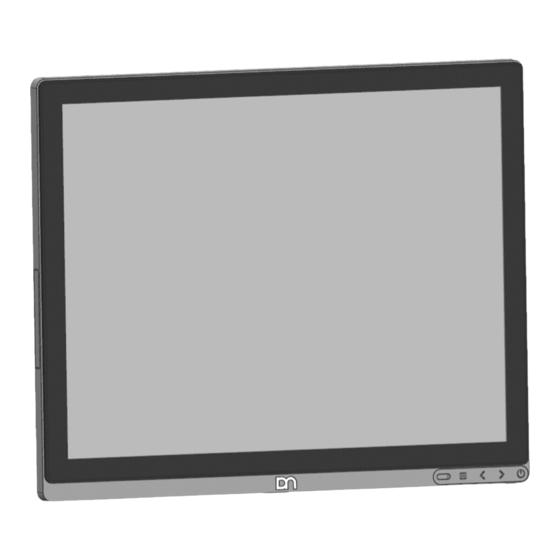
- Page 1 NextGen AIO D1150 Display User Manual 01750348355A...
-
Page 2: Table Of Contents
Installing system to the stand (with cable covers) ..........8-4 Connecting the display.......................8-8 9 Ergonomic Terminal Workplace ....................9-1 10 Technical data ..........................10-1 10.1 Dimensions (mm) .......................10-2 10.2 Projected Capacitive Touch Screen...................10-3 10.3 Supported resolution ......................10-3 Copyright © 2020, Diebold Nixdorf 01750348355A... -
Page 3: Manufacturer's Declaration And Approval
Repair work on the devices should only be carried out by authorized and specially trained personnel. Improper repairs will lead to the loss of any guarantee and liability claims. Extension boards with electrostatically endangered components can be identified with this label. Copyright © 2020, Diebold Nixdorf 01750348355A... - Page 4 DIN VDE 0100, part 540, Appendix C2, as well as EN50174-2, §5.4.3. Warranty Diebold Nixdorf guarantees generally a warranty engagement for 12 months beginning with the date of delivery. This warranty engagement covers all those damages which occur despite a normal use of the product.
- Page 5 There are still some parts that are not reusable. Diebold Nixdorf guarantees the environmentally safe disposal of these parts in a Recycling Center, which is certified pursuant to ISO 9001 and ISO 14001.
-
Page 6: Supplier's Declaration Of Conformity
2 Supplier’s Declaration of Conformity Product Description: LCD Monitor Model: Display D1150, Display D1150 /pc-touch Party issuing Supplier’s Declaration of Conformity Diebold Nixdorf Singapore PTE. LTD. 30A Kallang Place, #04-01 Singapore 339213 Phone: +65 6747 3828 Responsible Party – U.S. Contact Information... -
Page 7: Introduction
There is also a non-touch version available. The D1150 features the unique Diebold Nixdorf PanelLink2™ interface. This allows for operation of the displays via a single cable solution. In addition, the screen also offers standard interfaces such as DVI-D and USB-C DP. -
Page 8: About This Manual
Same parts of this book require familiarity and experience in working with operating systems and instal- lation and configuration procedures. NOTE Notes in the manual are marked by this symbol. WARNING This symbol is used for warnings. Copyright © 2020, Diebold Nixdorf 01750348355A... -
Page 9: Display Overview
1024x768 pixels. Application programs should use this resolution. Touch screen per model Model Screen Size Touch Screen Display D1150 /pc-touch 15” Projected Capacitive Touch Display D1150 15” No Touch, Protective Glass Copyright © 2020, Diebold Nixdorf 01750348355A... -
Page 10: User Interfaces
When the D1150 is connected via PLINK2™ interface to a BEETLE system, the button also switches the system on or off, provided that the system supports the feature. See section Display Settings / RMT en- able/disable for details. Copyright © 2020, Diebold Nixdorf 01750348355A... -
Page 11: Connector Panel
USB connection to the PC system. NOTE For BEETLE systems with PLINK2 interface, a PLINK2 cable can be used to as a single wire interface to supply power, video and data signal to the display. Copyright © 2020, Diebold Nixdorf 01750348355A... -
Page 12: On-Screen Display (Osd)
OSD to time-out (saves changes and exit). The adjustments will be saved in each way. There are a number of parameters that can be set via the OSD menu. Please refer to the table on the next page for details. Copyright © 2020, Diebold Nixdorf 01750348355A... -
Page 13: Display Settings
The OSD can be locked by pressing and holding the menu button for approx. 6 seconds. The display shows a message on the screen that the OSD is now locked. OSD lock OSD Unlock Copyright © 2020, Diebold Nixdorf 01750348355A... -
Page 14: Rmt Enable/Disable
System no reaction; Display remains off. System no reaction; Display switches off. NOTE 1 For FW 2.10 onwards. For information about the power button behavior of previous FW versions, please contact a Diebold Nixdorf sales representative. Copyright © 2020, Diebold Nixdorf 01750348355A... -
Page 15: Power Button - Lock/Unlock
If the power button is locked, the user cannot manually switch the display on or off. NOTE If RMT is enabled, power button will initiate RMT signal to host system but will not switch the display off. Copyright © 2020, Diebold Nixdorf 01750348355A... -
Page 16: Touch Technologies
Dampen the cloth slightly and then clean the screen. NOTE A wrong maintenance may cause damages to the screen, which are not covered by guar- antee or warranty. Copyright © 2020, Diebold Nixdorf 01750348355A... -
Page 17: Initial Setup
Lf damage has occurred during shipping or if the package contents do not match the delivery note, immediately inform your Diebold Nixdorf sales outlet. Transport the device only in its original packaging (to protect it against impact and shock). - Page 18 Installing system to the stand Fit the system on the stand while holding it in place. Tighten the 4 M4x6 countersunk screws (1) (that came with the stand) to secure the sys- tem to the stand. Copyright © 2020, Diebold Nixdorf 01750348355A...
- Page 19 Remove the cable cover (1). Plug the USB-C cable into the port indicated (1). Replace the cable cover. Tilt the system back to its operating position. Replace the VESA cover (1) by pushing it upwards. Copyright © 2020, Diebold Nixdorf 01750348355A...
-
Page 20: Installing System To The Stand (With Cable Covers)
*Observe the safety precaution mentioned on the next page when you remove the back cover of stand. WARNING To avoid damage to the back cover of the stand, be careful of how you would remove it. Copyright © 2020, Diebold Nixdorf 01750348355A... - Page 21 Installing system to the stand Fit the system on the stand while holding it in place. Tighten the 4 M4x6 countersunk screws (1) (that came with the stand) to secure the sys- tem to the stand. Copyright © 2020, Diebold Nixdorf 01750348355A...
- Page 22 Remove the cable cover (1) at the bottom of the system display. Plug the USB-C cable into the port indicated (1). Route the cables from the connector panel in the path as illustrated (arrows). Replace the cable cover previously removed. Copyright © 2020, Diebold Nixdorf 01750348355A...
- Page 23 Tilt the system back to its operating position Tug the cables neatly into their respective cable channels as illustrated (arrows). NOTE The arrow paths are for illustration pur- pose only and are not meant to be ex- haustive. Copyright © 2020, Diebold Nixdorf 01750348355A...
-
Page 24: Connecting The Display
11. Align the back cable cover (1) with the front cable cover (2). 12. Replace back cable cover (1) by sliding it up- wards. Connecting the display NOTE Before connecting cables switch off the system and disconnect it from the main supply. Copyright © 2020, Diebold Nixdorf 01750348355A... -
Page 25: Ergonomic Terminal Workplace
Avoid reflective glaring caused by electric light sources. Position the screen within a preferred and permit- ted range of vision, so that you can look vertically Preferred range of vision onto the screen. Preferred range of vision Copyright © 2020, Diebold Nixdorf 01750348355A... -
Page 26: Technical Data
Viewing Horizontal angle 85 °/ 85 ° Vertical 400 cd/ m Brightness Projected Capacitive 400 cd/ m Non-Touch 700:1 Contrast Projected Capacitive 700:1 Non-Touch Backlight 7,8 W Power Typical consumption 13 W Maximum Copyright © 2020, Diebold Nixdorf 10-1 01750348355A... -
Page 27: Dimensions (Mm)
Technical data 10.1 10.1 Dimensions (mm) D1150 with wall mount D1150 with stand Copyright © 2020, Diebold Nixdorf 10-2 01750348355A... -
Page 28: Projected Capacitive Touch Screen
720 x 400 70Hz 31.467 70.080 640 x 480 60Hz 31.469 59.940 SVGA 800 x 600 60Hz 37.879 60.317 1024 x 768 (Native) 60Hz 48.363 60.004 WXGA 1280 x 720 60Hz 45.000 60.000 Copyright © 2020, Diebold Nixdorf 10-3 01750348355A... - Page 29 Low Voltage Differential Signal On Screen Display Point Of Sales SVGA Super Video Graphics Array Thin Film Transistor Technology (LCD Tech- nology) Underwriters Laboratory (standards) Universal Serial Bus Verband Deutscher Elektrotechniker (German Electricians Association) Copyright © 2020, Diebold Nixdorf 01750348355A...
- Page 30 DIEBOLD NIXDORF 5995 Mayfair Road | North Canton, OH 44720 | United States © 2020 Diebold Nixdorf, Incorporated. All Rights Reserved.
Need help?
Do you have a question about the NextGen D1150 and is the answer not in the manual?
Questions and answers