Table of Contents
Advertisement
Quick Links
Advertisement
Table of Contents

Subscribe to Our Youtube Channel
Related Manuals for Brother 515


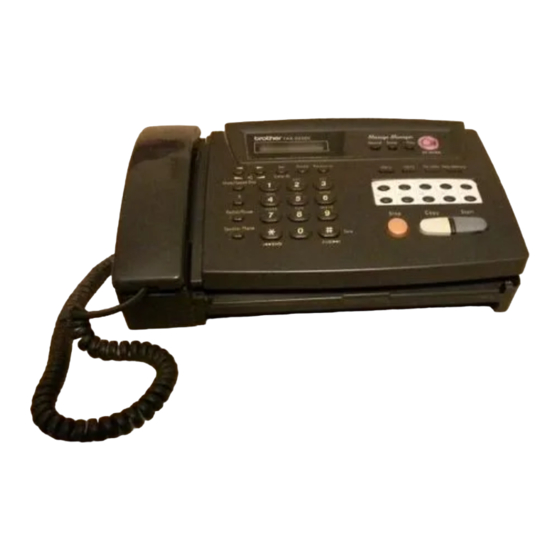
Summary of Contents for Brother 515
- Page 2 © 1999 Brother Industries, Ltd.
- Page 3 Pan European Approvals Information Your Brother Fax-515/525DT has been granted a Pan European Approval via KCS in the Netherlands. The machines are designed to interwork with the basic network functions of the following countries telecoms networks within the scope of the approval.
- Page 4 Brother advises that this product will not function correctly in a country other than that in which it was originally offered for sale, and does not offer any warranty in the event that this product is used on public telecommunication lines in a country other than that in which it is approved.
-
Page 5: Table Of Contents
Symbols Used In This Manual ... 2 About Fax Machines ... 2 Fax Tones and Handshake ... 2 ECM (Error Correction Mode) (For FAX-525DT Only) ... 3 FAX-515 Control Panel Overview ... 4 FAX-525DT Control Panel Overview ... 6 Installation Packing List ... 9 Choosing a Location ... - Page 6 BT Call Sign (For U.K. Only) ... 48 Set the BT Call Sign ... 48 To select or change your Answer Mode ... 37 To transfer telephone call to the fax machine ... 41 To change Remote Codes ... 42 Rings ... 44 Helpful Hints ...
- Page 7 Polling ... 49 Secure Polling ... 49 Setup for Polling Receive ... 49 Setup for Polling Receive with Secure Code ... 50 Setup Delayed Polling Receive ... 51 Sequential Polling (Only For FAX-525DT) ... 51 Cancelling a Scheduled Job ... 52 Setting PC Interface Mode (Only for FAX-525DT with Multi-Function Link Pro for Fax option) ...
- Page 8 T A B L E O F C O N T E N T S On Hook Dialling ... 71 Answering Calls with the Speakerphone (Only for FAX-525DT) ... 72 Tel Key (Only for FAX-515) ... 72 Message Manager Message Manager Mode ... 73 (Only for FAX-525DT) Flexible Memory Settings (Message Store) ...
- Page 9 Top and Bottom of Sentences Cut Off ... 94 Vertical Black Lines When Receiving ... 95 Phone Line or Connections ... 95 Fax Machine Does Not Answer When Called ... 95 No Dial Tone on the Handset ... 95 Sending Faxes ... 95 Poor Transmitting Quality ...
- Page 10 T A B L E O F C O N T E N T S...
-
Page 11: Using This Manual
O N E Introduction Using This Manual Thank you for purchasing a Brother fax machine (FAX). This machine has been designed to be simple to use, with LCD screen prompts to guide you through functions. However, you can use your machine to its fullest potential by taking a few minutes to read this manual. -
Page 12: Symbols Used In This Manual
Symbols Used In This Manual About Fax Machines If you’re a first-time fax machine user, fax operation might seem a little mysterious. You’ll soon get used to the unusual fax tones on your phone line, and be able to send and receive faxes easily. -
Page 13: Ecm (Error Correction Mode) (For Fax-525Dt Only)
I N T R O D U C T I O N When your fax machine is in FAX/TEL (F/T) mode, it answers with a short beep. After this beep, the fax machine listens for CNG tones, and, if heard, it will respond with receiving tones. -
Page 14: Fax-515 Control Panel Overview
C H A P T E R O N E FAX-515 Control Panel Overview Mute/Speed Dial Redial/Pause Mute/Speed Dial Lets you put calls on hold. Also, lets you dial stored phone numbers by pressing a two-digit number. Use this key to gain access to an outside... - Page 15 Adjust speaker and ring volume. Liquid Crystal Display The LCD displays messages to help you set up and operate your fax machine. I N T R O D U C T I O N FAX - 515 Tel - Index Help Star t (Volume)
-
Page 16: Fax-525Dt Control Panel Overview
Dial Pad Dials phone and fax numbers, and can be used as a keyboard for entering information into the fax machine. RWD( ) FWD(#) Use to repeat or skip to the next voice message during playback. - Page 17 Resolution Sets the resolution when you send a fax or make a copy. Mode Use to select how the fax machine will handle incoming calls. Caller ID (For U.K. only) Stores a function setting into the fax machine. Also, lets you view or print the Caller ID List.
- Page 18 C H A P T E R O N E...
-
Page 19: Installation
Paper Guide Whenever you transport the machine, use the packing materials that came with your machine and pack the machine correctly. T W O Document support One roll of Brother Therma PLUS recording paper (Starter roll 10m) Owner’s manual Brother... -
Page 20: Choosing A Location
C H A P T E R T W O Choosing a Location Place your fax machine on a flat, stable surface, such as a desk. Select a place that is free of vibration and shocks. Locate the machine near a telephone jack and a standard, grounded power outlet. -
Page 21: Assembly
Brother. Brother advises that this product may not function correctly and does not offer any warranty should this product be used on any other public exchange equipment other than that of the original country of sale. - Page 22 210mm). If you use 210mm recording paper roll size, please set recording paper after attaching the paper guides as below. The recording paper roll size for your fax machine is limited to a diameter of 70mm. Raise the paper enough to pass it over the front of the machine.
-
Page 23: Connect The Handset
Handset curled cord I N S T A L L A T I O N *PC I/F jack is for use with the Brother MFL Pro for Fax option. If have purchased this option then ignore this part. -
Page 24: Connect The Power Cord
C H A P T E R T W O Connect the Power Cord When you connect the power, the screen displays 01/01 00:00 FAX. NOTICE: 1) This fax must be earthed using a 3-pin plug. 2) Since the machine is earthed through the power outlet, you can protect yourself from potentially hazardous electrical conditions on the telephone network by keeping the power to your machine on when you connect it to a telephone line. -
Page 25: Attach The Document Support
IMPORTANT: The PC interface is a SELV (Safety Extra Low Voltage) port as defined in EN41003. It must only be connected with a SELV circuit; only the MFL Pro for Fax cable kit (available in an option pack), satisfies this requirement. Attach the document support. -
Page 26: Ringer Equivalence Number (Ren)
C H A P T E R T W O Ringer Equivalence Number (REN) This equipment has a REN value of 1. A BT line has a “bell ringing” capacity, or REN, of 4. This means that adding downstream-connected extension telephones and/or extension bells to a total REN of greater than 4 may cause a reduction in the bell volume. -
Page 27: Using Extension Telephones
RECOMMENDED CONNECTION OF EXTENSION SOCKETS I N S T A L L A T I O N EXTENSION MASTER SOCKET SOCKET INCOMING LINE Fig. 1. DISCONNECT EXTENSION MASTER SOCKET SOCKET INCOMING LINE FAX MACHINE MUST BE PLUGGED INTO MASTER SOCKET Fig. 2. -
Page 28: Connecting An External Telephone Answering Device (Tad)
U.K.) Set the number of rings to one or two on your external TAD. (The fax machine’s Ring Delay setting does not apply.) Record the outgoing message on your external TAD (see below). Set the external TAD to answer calls. -
Page 29: Sequence Of External Tad Reception
End your message by giving your Remote Activation Code for people sending manual faxes. For example: “After the beep, leave a message or send a fax manually by pressing 51.” Please note that some faxes that are sent manually cannot be received automatically because some fax machines do not send a fax tone in manual mode. -
Page 30: Connecting An External Telephone
C H A P T E R T W O Connecting an External Telephone Your machine is equipped with a handset that you can use as a regular phone. However, you can also connect a separate telephone to your machine, as shown below. (Example for U.K.) Whenever this external phone (or TAD) is in use, the screen displays... -
Page 31: On-Screen Programming
C H A P T E R On-Screen Programming User-Friendly Programming We have designed your fax machine with on-screen programming and a “Using This Help key. User-friendly programming helps you take full advantage of all Manual” the functions your machine has to offer. -
Page 32: Alternating Displays
C H A P T E R T H R E E Alternating Displays The LCD sometimes alternates between the currently selected option, and a help message giving brief instructions about how to proceed. The display you’ll probably see most often is shown below, showing you that when you place a document in the feeder, you can either dial a number to send it as a fax or press the copy key to make a copy of the document. - Page 33 DECT cordless phone to the machine. 5. POLLING RX You call another fax machine to -- receive a fax from it. 6. PC INTERFACE Fax Receive Only/PC Priority/ (With MFL Pro for Fax) PC Receive Only (For FAX-525DT Only) 3.
- Page 34 C H A P T E R T H R E E 4. CANCEL JOB Function 5. INTERRUPT Function 6. SET QUICK-DIAL Function 1. ONE-TOUCH DIAL Dial numbers stored in memory -- 2. SPEED-DIAL 3. SETUP GROUPS (For FAX-525DT Only) broadcasting. 7.
- Page 35 Select maximum length of incoming messages. 5. ICM REC.MONITR Select ON or OFF for voice messages as they come in. 6. FAX FWD/PAGING Set fax machine to forward fax/message––OR––to dial a pre-set number and play the paging message when a fax or voice message is received.
- Page 36 C H A P T E R T H R E E...
-
Page 37: Initial
C H A P T E R Initial Setup Getting Started Setting the Dialling Mode (Tone/Pulse) Your machine is initially set to TONE. If you are using a PULSE dial line, you can change the setting to PULSE by following the steps below. Press Menu, 1, 1. -
Page 38: Setting The Station Id
C H A P T E R F O U R Press Menu, 1, 2. The screen prompts you to enter the year. Enter the last two digits of the year. The screen displays your entry. Press Set. The screen prompts you to enter the month. Enter two digits for the month (for example, enter 09 for September, or 10 for October). -
Page 39: Entering Text
Press Menu, 1, 3. The screen prompts you to enter your fax number. Enter your fax number (up to 20 digits). The screen displays your entry. Press Set. The screen prompts you to enter your name or your “Entering company name. Text”... -
Page 40: Inserting Spaces
C H A P T E R F O U R Inserting spaces If you want to enter a blank space, press X twice. Making corrections If you entered a letter incorrectly and want to change it, press Z to move the cursor after the last correct letter. -
Page 41: Pabx And Transfer
PABX by just pressing R. You can transfer a call to another extension by pressing R. If your fax machine is connected to a PABX, you may need to insert an additional number prefix (e.g. “9”) and a “pause”, do not press R, before each fax or telephone number, in order to again access to the outside line. -
Page 42: Setting The Speaker Volume
C H A P T E R F O U R Press Z or X to select Summer Time to gain an hour or Winter time to lose an hour. Press Set. Press 1 to change to Winter Time or Summer Time––OR––Press 2 to exit without changing. -
Page 43: Memory Storage
I N I T I A L S E T U P Memory Storage Your machine is equipped with an internal battery that will keep the date and time information for up to about 15 hours after power has been cut off. - Page 44 C H A P T E R F O U R...
-
Page 45: Setup
F/T Ring Time features (on the following pages). chapter TAD (For FAX-515)––This is the only setting in which you can use an external answering machine. Your telephone answering device is connected to your machine, and answers every call. Once the external telephone answering device (TAD) answers, the machine listens for fax tones. - Page 46 C H A P T E R F I V E NGT (For FAX-515)––This is the Night Mode setting. The fax machine receives incoming fax calls without ringing. In case of a voice call, the fax machine does not ring and it doesn’t receive the voice call. The caller hears fax tones after few rings.
-
Page 47: To Select Or Change Your Answer Mode
To select or change your Answer Mode Press Mode. The screen displays your current selection. The options on the FAX-515 are: FAX ONLY TAD:ANSWER MACH. The options on the FAX-525DT are: FAX ONLY Or, if TAD Mode is switched ON by pressing... -
Page 48: Setting The Ring Delay
The Ring Delay setting determines the number of times the machine External or rings before it answers. Extension Press Menu, 2, 1. If you have a FAX-515, go to Step 4. Telephone” Press Z or X to select RING DELAY. “For F/T Press Set. -
Page 49: Recording The Fax/Tel Outgoing Announcement (F/T Message) (Only For Fax-525Dt)
TAD “For F/T (Fax/Tel) connected to the machine. Selecting SEMI lets the fax machine receive Mode Only” the call only if you’ve answered it at the machine. Selecting OFF means in this you’ll have to activate the machine yourself, by pressing Start or by... -
Page 50: Advanced Receiving Operations
C H A P T E R F I V E In case Fax Detect does not work, because of a poor phone line connection, just press Start or press the Activation Code Press Menu, 2, 3. Use Z or X to select ON, SEMI or OFF. Press Set when the screen displays your selection. -
Page 51: For F/T (Fax/Tel) Mode Only
This function works when you receive the incoming Voice call at the remote DECT cordless phone externally connected to the fax machine. You can transfer voice call to the fax machine. But you can not transfer the incoming voice call from the fax machine to the DECT cordless phone. -
Page 52: Changing Remote Codes
C H A P T E R F I V E Changing Remote Codes Remote Codes might not work with some telephone systems. The preset Activation Code is present Activation Voice Code is If you are always disconnected when accessing your external TAD remotely, try changing the Activation Code from Deactivation Code from # 5 1 to 1 1 1. -
Page 53: Caller Id (Caller Identification)
To PABX Users : Calling line identification signals are not generally delivered to your Brother fax machine if it is connected behind a private branch exchange (PBX) system or other call routing device. -
Page 54: How Does Caller Id Work
* Depends on network Function. The Caller ID is Stored in Your Machine’s Memory The machine can store a maximum of the last 10 (FAX-515), 30 (FAX- 525DT) incoming caller IDs in the memory, along with the time and date of reception. -
Page 55: Selecting A Caller Id From The Memory For Call Reply
You can display the caller IDs that are stored in the memory and select the caller you want your machine to dial. Call Reply is a convenient feature whereby your Brother fax can dial back a voice/fax call “on- hook” to the opposite party associated with a Caller ID number which has been captured into memory. -
Page 56: To Activate Certain Network Services When Using Call Reply
“Direct Dial Inward (DDI)” private exchange system may fail to connect, or may be answered in the first instance by the called premises’ main switchboard rather than by the intended extension. Brother is not liable for any call charges thus incurred. -
Page 57: Clearing The Caller Ids Stored In Memory (Only For Fax-525Dt)
Clearing the Caller IDs Stored in Memory (Only for FAX-525DT) For the most effective use of the machine’s memory, it is recommended that you should clear the Caller IDs stored in the machine’s memory. Press Erase when the display shows the number. Press 1 to erase. -
Page 58: Bt Call Sign (For U.k. Only)
C H A P T E R F I V E BT Call Sign (For U.K. Only) This machine feature lets you use the BT Call Sign subscriber service which allows you to have at least two separate telephone numbers on one phone line. -
Page 59: Polling
Secure Polling is a way to keep your documents and others’ from falling into the wrong hands while the fax machines are set up for polling. You can use Secure Polling only with another Brother fax machine. Your four-digit ID number must be entered on the fax machine that polls for your documents. -
Page 60: Setup For Polling Receive With Secure Code
The screen displays Press Z or X to choose SECURE. Press Set. Enter a four-digit number. This is the same as the security code of the fax machine you are polling. Press Set. Enter the fax number you are polling. -
Page 61: Setup Delayed Polling Receive
Setup Delayed Polling Receive You can set your machine to begin Polling Receive at a later time. Press Menu, 2, 5. The screen displays POLLING:STANDARD SELECT { } & SET Press Z or X to choose TIMER. Press Set. The screen prompts you to enter the time you want to begin polling. SET TIME=15:25 Enter the time (in 24-hour format) you want to begin polling. -
Page 62: Cancelling A Scheduled Job
C H A P T E R F I V E If you selected STANDARD, the screen prompts you to enter the fax number you want to poll, and then to press Start. • • Specify the destination fax machines, which you wish to poll by using One Touch, Speed Dial or a Group. -
Page 63: Setting Pc Interface Mode (Only For Fax-525Dt With Multi-Function Link Pro For Fax Option)
Setting PC Interface Mode (Only for FAX-525DT with Multi-Function Link Pro for Fax option) If you connect your machine to your PC, you can receive faxes into your PC. See the Quick Start Guide to set up for Multi-Function Link for Fax. After completing the setup for Multi-Function Link Pro for Fax, you can select PC INTERFACE Mode (PC PRIORITY/PC RECEIVE ONLY/ FAX RECEIVE ONLY) for routing incoming faxes. - Page 64 C H A P T E R F I V E If you get a “Memory Full” message while you are scanning the first page, press Stop and restart to make a single copy. If the “Memory Full” message appears while scanning subsequent pages, you can press Copy to copy the portion that is in memory, or press Stop to cancel.
-
Page 65: Setup
Before You Begin Documents must be between 14.8 and 21.6 cm wide, and 15 and 60 cm long. Your fax machine can only scan an image 20.8 cm wide, regardless of how wide the paper is. Make sure you insert documents face down, top edge first. -
Page 66: Manual Transmission
C H A P T E R S I X DO NOT use • curled paper DO NOT use • cardboard DO NOT use • paper on which correction fluid has been used Make sure documents written with ink are completely dry. Manual Transmission Manual transmission lets you hear the dial tone, ringing and fax receiving tones before sending the fax. -
Page 67: Basic Sending Operations
Basic Sending Operations Contrast If your document is very light or very dark, you might want to set the contrast accordingly. Use LIGHT to send a light document. Use DARK to send a dark document. Insert the document, face down, in the feeder. Press Menu, 3, 1. -
Page 68: Advanced Sending Operations
C H A P T E R S I X Advanced Sending Operations Overseas Mode After you send a fax using this feature, the feature turns itself off. Insert the document. Press Menu, 3, 3. Press Z or X to select ON (or OFF). Press Set when the screen displays your selection. -
Page 69: Delayed Transmission (Timer)
The machine will not start scanning the document until the time it is due to be sent, so the document must be left in the feeder. (For FAX-515 Only) Broadcasting (For FAX-525DT Only) Using the numbers you have stored in Groups, One Touch and Speed “Setting Up... -
Page 70: Next-Fax Reservation
C H A P T E R S I X Next-Fax Reservation Even if your fax is receiving another fax, you can set your machine to send your fax next. This way, you don’t have to wait for it to finish sending or receiving the other fax. -
Page 71: Setup For Polling Transmit
Setup for Polling Transmit Polling Transmit is when you set up your fax machine to wait with a document so another fax machine can retrieve it. Place document to be retrieved in feeder. Press Menu, 3, 5. The screen displays Press Z or X to choose STANDARD. -
Page 72: Cancelling A Scheduled Job
C H A P T E R S I X Enter a four-digit number. Press Set. The screen displays Press 1 if you want to select additional settings. The display returns to the Setup Send menu––OR––Press 2 if you are finished choosing settings and go to Step 9. - Page 73 Press Start. After the transmission is finished, return the first document to the feeder. Press Menu, 5 to restore the timer. If you set Timer or Polling Transmit using Help/Memory (that is, if you have already scanned the document into the machine’s memory and will send it from there), you don’t have to interrupt to send a fax or make a copy.
- Page 74 C H A P T E R S I X...
-
Page 75: Setup
C H A P T E R Setup Quick-Dial Numbers Storing Numbers for Easy Dialling You can set up your machine to do two or three types of easy dialling: One Touch, Speed Dial and Groups for Broadcasting of faxes. Storing One Touch Dial Numbers You can store 10 fax/phone numbers that you can dial by pressing one “One Touch... -
Page 76: Storing Speed Dial Numbers
C H A P T E R S E V E N Press Set. Return to Step 2 to store another One Touch dial number—OR— Press Stop to exit. When you dial a One Touch dial number, the screen displays the name you’ve stored, or, if you haven’t stored a name, the number you’ve stored. -
Page 77: Changing One Touch And Speed Dial Numbers
S E T U P Q U I C K - D I A L N U M B E R S Changing One Touch and Speed Dial Numbers If you try to store a One Touch or Speed Dial number in a location where a number is already stored, the screen displays the current name stored there, then prompts you to either 1. - Page 78 C H A P T E R S E V E N To include One Touch or Speed Dial numbers in the Group, enter them as if you were dialling. For example, for One Touch key 05, press One Touch key 05. For Speed Dial location 09, press Mute/ Speed Dial, then press 0, 9 on the dial pad.
-
Page 79: Telephone (Voice) Operation
C H A P T E R Telephone (Voice) Operation Making Voice Calls You can use your machine to make voice telephone calls, by dialling manually or by using One Touch or Speed Dial memory. You can use the handset or if you have the FAX-525DT you can use the Speakerphone to make and receive calls. -
Page 80: One Touch Dialling
NOT ASSIGNED. The display returns to normal after 2 seconds. If you are sending a fax, press Start after pressing One Touch key. If you picked up the handset, press Start when the receiving fax machine answers with fax tones. Speed Dialling Pick up the handset—OR—Press Speaker Phone. -
Page 81: Mute
Pause Press Redial/Pause to insert a pause between digits to be dialled. If your fax machine is connected to a PABX, you may need to insert an additional number prefix (e.g. “9”) and a “pause” before each fax or telephone number to gain access to the outside line. When you press Redial/Pause, a dash “-”... -
Page 82: Answering Calls With The Speakerphone (Only For Fax-525Dt)
Pick up the handset. Tel Key (Only for FAX-515) You can also switch the call from the external telephone to fax machine by lifting the fax machine’s handset and pressing Tel. Then in the telephone conversation if you press the Tel key and then replace the handset, then you will be listening through the monitor speaker, but the other party will not be able to hear you. -
Page 83: Message Manager
You can use the Fax Forwarding or Paging features and retrieve voice and fax messages remotely. You need an external answering machine connected to the fax machine for this setting. Fax messages are stored in the Message Manager memory, but voice messages are stored in your external answering machine. -
Page 84: Setting Up Message Manager
Incoming faxes will print on paper. You can use the Paging feature, and retrieve voice messages remotely. connected to the fax machine for this setting. Incoming faxes are not stored in memory, but will print on paper. Voice messages are stored in the external answering machine. -
Page 85: Recording The Message Manager's Outgoing Message (Tad Message )
M E S S A G E M A N A G E R ( O N L Y F O R F A X - 5 2 5 D T ) Press Z or X to select your setting from the list (ON, OFF or EXT). -
Page 86: Erasing The Outgoing Message (Ogm)
C H A P T E R N I N E Erasing the Outgoing Message (OGM) Press Menu, 8, 3. Press Z or X to select TAD MESSAGE (or F/T MESSAGE or PAGING MSG.). Press Set when the screen displays your selection. Press Erase. -
Page 87: Playing Voice Messages And Memos
M E S S A G E M A N A G E R ( O N L Y F O R F A X - 5 2 5 D T ) Playing Voice Messages and Memos Follow the steps below to listen to voice messages and memos. Press Play. -
Page 88: Backup Printing Option
C H A P T E R N I N E Backup Printing Option When you choose DOC:ON in the Message Manager mode, all incoming fax messages are stored in the available memory for retrieval. To print a backup copy automatically, turn this option on. Press Menu, 8, 2. -
Page 89: To Erase Messages All At Once
M E S S A G E M A N A G E R ( O N L Y F O R F A X - 5 2 5 D T ) To erase messages all at once Press Erase. The screen prompts you to choose what kind of messages you want to erase. -
Page 90: Icm Recording Monitor
C H A P T E R N I N E Press Menu, 2, 1. Press Z or X to select TOLL SAVER (or RING DELAY). Press Set when the screen displays your selection. Press Z or X to select ON (or OFF). Press Set. -
Page 91: Programming A Fax Forwarding Number
M E S S A G E M A N A G E R ( O N L Y F O R F A X - 5 2 5 D T ) When Fax Forwarding is set to ON, your machine dials the fax machine phone number you’ve programmed, and forwards any faxes you’ve... -
Page 92: Programming The Paging Number
Remote Retrieval You can call your machine from any touch tone phone (or remote Group 3 fax machine set for tone) and use a Remote Access Code and other button presses to retrieve voice (and fax) messages. You can also program and change some settings for your Message Manager. -
Page 93: Changing The Remote Access Code
Press 9 0 to reset the machine when you finish. Hang up. If your fax machine is set to MANUAL mode, you can access the Message Manager remotely by phoning your machine and letting it ring for about 100 seconds. Your fax machine will answer the phone after 100 seconds of ringing, and you then have 30 seconds to enter your Remote Access Code. -
Page 94: Remote Control Commands
Status List by entering 9 6 1 to make sure that the Fax Forwarding number you registered is correct in the List. Enter the number of a remote fax machine to receive a report or stored fax messages. (See “Retrieving the Memory Status List” and “Retrieving Fax Messages”.) -
Page 95: Retrieving The Memory Status List
M E S S A G E M A N A G E R ( O N L Y F O R F A X - 5 2 5 D T ) Retrieving the Memory Status List You can retrieve the Memory Status List from a remote fax machine to see if you have any fax messages. -
Page 96: Changing The Fax Forwarding Number
# #. You cannot use store a pause, press #. Also, if your fax machine is connected to a PABX, you can press # first before the fax machine’s number. The # works as well as R key. -
Page 97: Printing
T E N Choose if Transmission Verification Report is printed after all Faxes sent. Journal lists information about the last 15 (FAX-515), 30 (FAX- 525DT) incoming and outgoing faxes. TX means Transmit; RX means Receive. Lists names and numbers stored in One Touch and Speed Dial memory, in numerical order. -
Page 98: Transmission Verification (Xmit) Report
C H A P T E R T E N Press Start. Press Stop to exit. Transmission Verification (Xmit) Report You can use the Xmit Report as proof that you sent a fax. This report lists the name or fax number of the receiving party, the time and date of transmission, and if the transmission was successful. -
Page 99: Important
C H A P T E R E L E V E N Important Information Important Safety Instructions Read all of these instructions. Save them for later reference. Follow all warnings and instructions marked on the product. Unplug this product from the wall outlet before cleaning. Do not use liquid or aerosol cleaners. - Page 100 C H A P T E R E L E V E N Do not place anything in front of the machine that will block received faxes. Do not place anything in the path of received faxes. Do not touch a document during printing. Never push objects of any kind into this product through cabinet slots, since they may touch dangerous voltage points or short out parts resulting in a risk of fire or electric shock.
-
Page 101: Troubleshooting And Maintenance Troubleshooting
C H A P T E R Troubleshooting and Maintenance Troubleshooting Error Messages You may occasionally encounter a difficulty with your machine or telephone line. If this happens, your machine often identifies the problem and displays an error message. The list below explains the most common error messages. - Page 102 The other party has disconnected during a call or fax. Try calling the other party. The documents were not inserted or fed properly, or were too long. Open the cover. Pull the documents toward the front of the fax machine, in the same direction they were feeding. CONNECTION FAIL COVER OPEN...
- Page 103 Front cover MACHINE ERROR XX PRESS STOP KEY Then contact your Brother dealer for service. NO RESPONSE/BUSY The number you called does not answer or is busy. You may also have reached a number not connected to a fax. Check the number and call again.
-
Page 104: Other Problems
C H A P T E R T W E L V E Try cleaning the white bar and the glass under the bar. If you still get a scanner error, contact Brother dealer for service. Front cover Other Problems... -
Page 105: Vertical Black Lines When Receiving
The sender’s scanner may be dirty. Ask the sender to make a copy to see if the problem is with the sending machine. Try receiving from another fax machine. If the problem continues, contact the Brother dealer for service. Phone Line or Connections... -
Page 106: Vertical Black Lines When Sending
Activation Code (the factory setting is 51). When your machine answers, hang up. Fax Machine “Hears” Voice as CNG Tone If your machine is set to Fax Detect ON, and it answers voice calls by trying to receive a fax, try turning Fax Detect to OFF . -
Page 107: Specifications Specifications
Display Polling types Contrast contr ol Resolution Memory capacity * “Pages” refers to the “Brother Standard Chart No.1” (a typical A4 business letter, Standard resolution). T H I R T E E N Desktop facsimile transceiver ITU-T Group 3 Modified Huffman (MH) 14400/12000/9600/7200/4800/2400;... - Page 108 50 stations 4 times at 2 minute intervals 3 times at 2 minute intervals (Only for Ireland) Full Duplex, Digital (FAX-525DT) Monitor (FAX-515) 1, 2, 3 or 4 rings 2, 3 or 4 rings (Only for Ireland) Public switched telephone network 5 –...
-
Page 109: Glossary
CNG tones The special tones (beeps) sent by fax machines during automatic transmission to tell the receiving machine that they are from a fax machine. Communication Error (or Comm. Error) An error during fax sending or receiving, usually caused by line noise or static. - Page 110 ICM (incoming message) A recorded voice message received into an Interrupt Temporarily puts a waiting job on hold while you perform Journal Lists information about the last 15 (FAX-515), 30 (FAX- Journal Period The preprogrammed time period between automatically LCD (Liquid crystal display) The display screen on the machine that Manual Fax When you press Speaker Phone––OR––lift the handset...
- Page 111 Photo Mode A resolution setting that uses varying shades of grey for the best representation of photographs. Polling The process of a fax machine calling another fax machine to retrieve waiting fax messages. Pulse A form of dialling on a telephone line.
- Page 112 G L O S S A R Y...
-
Page 113: Index
Index Activation Code ... 40 Activation Voice Code ... 41 Alternating Displays ... 22 Answer Mode ... 35 Answering Machine ... 18, 73 Assembly ... 11 Automatic Document Feeder (ADF) ... 55 Automatic Transmission ... 56 Backup Printing ... 78 Beeper Volume ... - Page 114 I N D E X Fax Tones and Handshake ... 2, 23 Fine (Resolution) ... 57 Flexible Memory Settings (Message Store) ... 73 Function Mode ... 21 Function Selection Table ... 22 Grey Scale ... 97 Groups ... 59, 67 Hold ...
- Page 115 Remote Call Transfer ... 41 Remote Codes (Changing) ... 42 Remote Commands ... 84 Remote Retrieval ... 82 Reports ... 87 Resolution ... 57 Ring Delay ... 38 Ring Volume ... 32 Safety Instructions ... 89 Scroll ... 21 Sequential Polling ... 51 Sort ...
- Page 116 I N D E X...
- Page 117 Dial your fax machine phone number from a touch tone phone. 2 Enter your Remote Control Access Code (159 ) after the beep. The fax machine signals the kinds of messages received: 1 long beep — Fax message(s) 2 long beeps — Voice message(s) 3 long beeps —...
-
Page 118: Changing Remote Access Code
# #. Press 9 6 1 after two short beeps, then enter the number of remote fax machine, and then # # to retrieve Memory Status List. Retrieve a Fax Press 9 6... - Page 119 Declaration of Conformity Brother International Europe Ltd. Brother House, 1, Tame Street, Audenshaw, Manchester, M34 5JE United Kingdom declare that this product is in conformity with the following normative documents: Safety: EN60950 including amendment A1:1993, A2:1993, A3:1995 and A4:1997 EMC:...
- Page 120 This machine is approved for use in the country of purchase only, local Brother companies or their dealers will only support fax machines purchased in their own countries. * Manufactured by Brother Industries (U.K.) Ltd., whose quality system is registered by BSI.
Need help?
Do you have a question about the 515 and is the answer not in the manual?
Questions and answers