Brother FAX-575 User Manual
Hide thumbs
Also See for FAX-575:
- User manual (114 pages) ,
- Quick setup manual (1 page) ,
- Service manual (198 pages)
Table of Contents
Advertisement
Quick Links
Advertisement
Table of Contents

Related Manuals for Brother FAX-575


Summary of Contents for Brother FAX-575
- Page 1 FAX-575 ®...
- Page 2 Register your product on-line at http://www.brother.com/registration By registering your product with Brother, you will be recorded as the original owner of the product. Your registration with Brother: ■...
-
Page 3: Brother Numbers
Frequently Asked Questions (FAQs) You can find more information about Brother products on the World Wide Web. From product specification sheets to Frequently Asked Questions (FAQs), it is all there. Visit us at: http://www.brother.com... -
Page 4: Ordering Accessories And Supplies
Visa, MasterCard, Discover, or American Express credit card, you can order accessories directly from Brother. (In the USA, you can visit us online for a complete selection of the Brother accessories and supplies that are available for purchase.) -
Page 5: Compilation And Publication Notice
The contents of this User’s Guide and the specifications of this product are subject to change without notice. Brother reserves the right to make changes without notice in the specifications and materials contained herein and shall not be responsible for any damages (including consequential) caused by reliance on the materials presented, including but not limited to typographical and other errors relating to the publication. - Page 6 (collectively referred to in this warranty as "this Product"). • If you purchased a product from someone other than an authorized Brother reseller in the United States or if the product was used (including but not...
- Page 7 Machine, supply the required proof of purchase information, together with the Machine that Brother agreed to replace. You are then expected to pack the Machine that Brother agreed to replace in the package from the replacement Machine and return it to Brother using the pre-paid freight bill supplied by Brother in accordance with the instructions provided by Brother.
- Page 8 Brother Authorized Service Representative, or from the use of supplies or consumable items that are non-Brother products. Operation of...
-
Page 9: Safety Precautions
Safety precautions To use the fax machine safely Please refer to these instructions for later reference and before attempting any maintenance. WARNING There are high voltage electrodes inside the fax machine. Before you clean the fax machine, make sure you have unplugged the telephone line cord first and then the power cord from the AC power outlet. -
Page 10: Choosing A Location
WARNING IMPORTANT SAFETY INSTRUCTION When using your telephone equipment, basic safety precautions should always be followed to reduce the risk of fire, electric shock and injury to persons, including the following: 1. Do not use this product near water, for example, near a bath tub, wash bowl, kitchen sink or washing machine, in a wet basement or near a swimming pool. -
Page 11: Quick Reference Guide
Quick Reference Guide Sending faxes Storing Speed-Dial numbers Automatic transmission Press Menu/Set, 6, 2. Using the dial pad, enter a Insert the document face two-digit Speed-Dial down in the ADF (up to 10 location number (00-99), pages). and then press Menu/Set. Enter the fax number you Enter a number (up to 20 want to call. - Page 12 Using Search Insert the document face down in the ADF. Press Search/Speed Dial and use the dial pad to enter the first letter of the name you are looking for. Press to search the memory. Press Fax Start, when the LCD shows the name you want to call.
-
Page 13: Table Of Contents
Table of Contents Introduction Using this Guide ............. 1-1 Finding information ............ 1-1 Fax Test Sheet and Product Registration (USA only)............... 1-2 Part names ..............1-3 Control panel overview ........... 1-4 About fax machines ............1-6 Custom features ............1-6 Fax tones and handshake ......... - Page 14 Setup Receive Basic receiving operations ..........5-1 Choosing the Receive Mode........5-1 Setting the Ring Delay ..........5-2 Setting the F/T Ring Time (FAX/TEL mode only) ..5-3 Easy Receive............. 5-3 Printing a reduced incoming fax (Auto Reduction) ..5-4 Setting Paper Size .............
- Page 15 Quick-Dial numbers and dialing options Storing numbers for easy dialing ........7-1 Storing One-Touch Dial numbers ......7-1 Storing Speed-Dial numbers........7-2 Changing One-Touch and Speed-Dial numbers..7-3 Setting up Groups for Broadcasting......7-4 Dialing options ..............7-5 Manual dialing............7-5 One-Touch dialing ............
- Page 16 Trademarks..............11-5 Shipment of the fax machine ........11-5 Troubleshooting and routine maintenance Troubleshooting ............12-1 Error messages ............12-1 Compatibility ............12-4 Document Jam or Paper Jam ........12-4 If you are having difficulty with the fax machine ..12-6 Routine maintenance ............
-
Page 17: Introduction
Introduction Using this Guide Throughout this Guide you’ll see special symbols alerting you to important warnings, notes and actions. Special fonts identify keys you should press, messages that appear on the LCD, and important points or related topics. Bold Bold typeface identifies specific keys on the fax machine control panel. -
Page 18: Fax Test Sheet And Product Registration (Usa Only)
Fax Test Sheet and Product Registration (USA only) After setting your Station ID, please fill in the Test Sheet included with the fax machine and fax it to Brother’s Automated Fax Response System as your first transmission. This will check that your fax machine is working properly. -
Page 19: Part Names
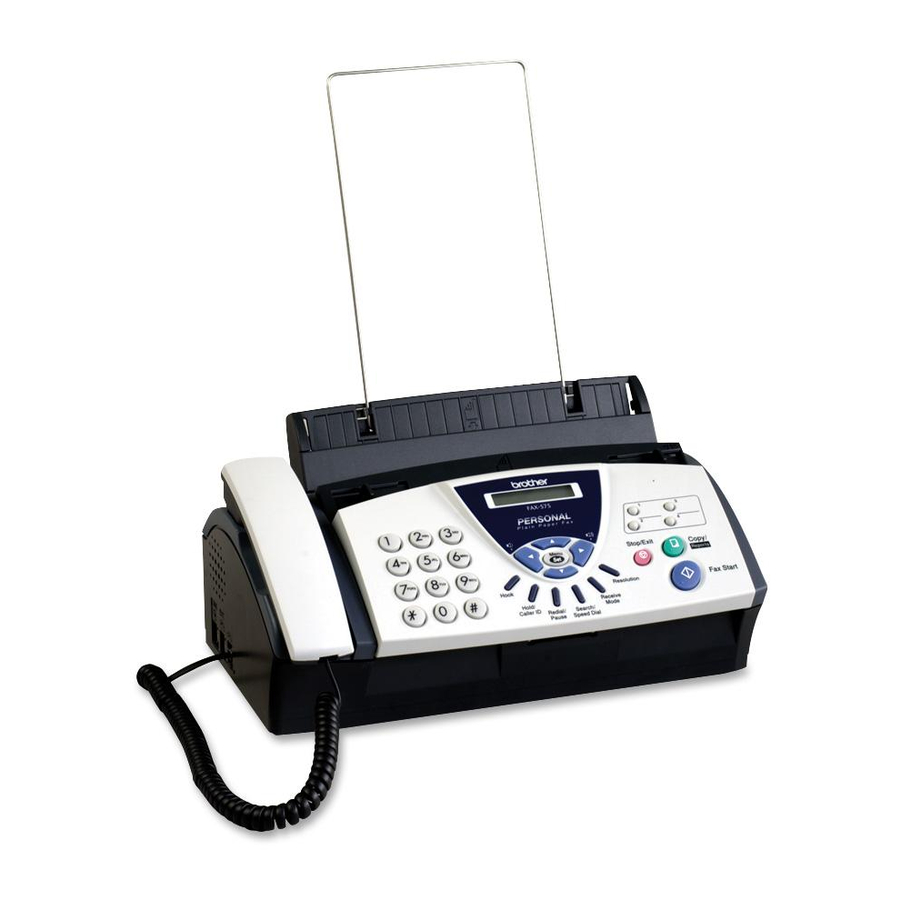
Part names ■ Front view 4 Document Support 5 Paper Wire 1 Telephone Extension Line Cord 6 Paper Tray 2 Telephone Handset 7 Paper Guides 8 Control Panel 3 Handset Curled Cord 9 Cover Open Lever No. Name Description Telephone Line Cord Connect the fax machine to a telephone wall jack. -
Page 20: Control Panel Overview
Control panel overview LCD (Liquid Crystal Display) Displays messages on the screen to help you set up and use your fax machine. Dial Pad Use these keys to dial telephone and fax numbers and as a keyboard for entering information into the fax machine. The # key lets you temporarily switch the dialing type during a telephone call from "PULSE"... - Page 21 One-Touch Keys These keys give you instant access to previously stored Quick-Dial numbers. Navigation Keys: Menu/Set The same key is used for menu and set operations. Lets you access the menu to program and store your settings in the fax machine. Press to scroll forward or backward to see a menu selection.
-
Page 22: About Fax Machines
About fax machines Custom features Do you have Voice Mail on the phone line? If you have Voice Mail on the phone line where you will install your new fax machine, there is a strong possibility that Voice Mail and the fax machine may conflict with each other while receiving incoming calls. -
Page 23: Fax Tones And Handshake
Fax tones and handshake When someone is sending a fax, the fax machine sends fax calling tones (CNG tones). These are quiet, intermittent beeps every 4-seconds. You’ll hear them after you dial and press Fax Start and they will continue for about 60 seconds after dialing. During that time, the sending machine must begin the “handshake”... -
Page 24: Connections
Connections Connecting an external telephone You can connect a separate telephone (or telephone answering device) directly to your fax machine as shown in the diagram below. Connect the telephone’s line cord to the jack labeled EXT. in the side of the fax machine. Extension Telephone External... - Page 25 If you subscribe to your telephone company’s Distinctive Ring service: You may connect an external TAD to a separate wall jack only if you subscribe to your telephone company’s Distinctive Ring service, have registered the distinctive ring pattern on the fax machine, use that number as a fax number and set your fax machine’s Receive mode to MANUAL.
- Page 26 Unless you are using Distinctive Ring, do not connect a TAD elsewhere on the same phone line. Connections The external TAD must be plugged into the side of the fax machine, into the jack labeled EXT. The fax machine cannot work properly if you plug the TAD into a wall jack (unless you are using Distinctive Ring).
-
Page 27: Special Line Considerations
We recommend beginning your OGM with an initial 5-second silence because the fax machine cannot hear fax tones over a resonant or loud voice. You may try omitting this pause, but if the fax machine has trouble receiving, then you must re-record the OGM to include it. - Page 28 Installing fax machine, external two-line TAD and two-line telephone When you are installing an external two-line telephone answering device (TAD) and a two-line telephone, the fax machine must be isolated on one line at both the wall jack and at the TAD. The most common connection is to put the fax machine on Line 2, which is explained in the following steps.
-
Page 29: Multi-Line Connections (Pbx)
Multi-Line connections (PBX) Most offices use a central telephone system. While it is often relatively simple to connect the fax machine to a key system or a PBX (Private Branch Exchange), we suggest that you contact the company that installed your telephone system and ask them to connect the fax machine for you. -
Page 30: Paper
Paper About paper Handling and using plain paper Store paper in its original packaging, and keep it sealed. Keep the paper flat and away from moisture, direct sunlight and heat. Paper specifications for the paper tray Size: letter, legal Weight: 17 to 24 lb (64 to 90 g/m Thickness: 0.003 to 0.0047 in. -
Page 31: How To Load Paper
How to load paper To load paper Before you add paper, remove all of the paper from the paper tray. Fan the stack of paper well to avoid paper jams and mis-feeds. Tap the stack of paper so the edges are even. Gently insert the paper. -
Page 32: On-Screen Programming
On-Screen Programming User-friendly programming The fax machine is designed to be easy to use with LCD on-screen programming using the navigation keys. User-friendly programming helps you take full advantage of all the menu selections the fax machine has to offer. Since your programming is done on the LCD, we have created step-by-step on-screen instructions to help you program the fax machine. -
Page 33: Navigation Keys
Navigation keys Access the menu Go to the next menu level Accept an option Scroll through the current menu level Go back to the previous menu level Go forward to the next menu level Exit the menu You can access the menu mode by pressing Menu/Set. When you enter the menu, the LCD ↑... - Page 34 Press the Menu numbers. (ex. Press 1, 1 for Date/Time) —OR— exit to select to select to accept Main Menu Options Descriptions Page Menu Selections 1. DATE/TIME — Puts the date and time on the LCD and in the headings of faxes you send.
- Page 35 Press the Menu numbers. (ex. Press 1, 1 for Date/Time) —OR— exit to select to select to accept Main Menu Options Descriptions Page Menu Selections You can answer all calls 4. REMOTE ( 51, #51) at an extension or CODE external phone and use codes to turn the fax machine on or off.
- Page 36 Press the Menu numbers. (ex. Press 1, 1 for Date/Time) —OR— exit to select to select to accept Main Menu Options Descriptions Page Menu Selections — Set the time of day in 24 6-10 7. DELAYED hour format that the delayed faxes will be sent.
- Page 37 Press the Menu numbers. (ex. Press 1, 1 for Date/Time) —OR— exit to select to select to accept Main Menu Options Descriptions Page Menu Selections Sets the fax machine to 1. FWD/PAGE/ forward fax messages, to STORE FAX FORWARD call your pager, or to PAGING store incoming faxes in FAX STORAGE...
-
Page 38: Initial Setup
Initial Setup Getting started Setting the Date and Time When the fax machine is not in use, it will display the date and time. If you set up the Station ID the date and time displayed by your fax machine will be printed on every fax you send. If there is a power failure, you may have to reset the date and time. -
Page 39: Setting The Station Id
Setting the Station ID You should store your name or company name and fax number so they print on all fax pages that you send. The telephone number will appear only on cover pages and call back messages. Press Menu/Set, 1, 2. 2.STATION ID Enter your fax number (up to 20 digits). -
Page 40: Inserting Spaces
Inserting spaces To enter a space in the fax number, press once between numbers. To enter a space in the name, press twice between characters. Making corrections If you entered a letter incorrectly and want to change it, press move the cursor under the incorrect character. Then press Stop/Exit. -
Page 41: Setting The Beeper Volume
Setting the Beeper Volume You can change the beeper volume. The default (factory) setting is LOW. When the beeper is on, the fax machine will beep when you press a key, make a mistake or after you send or receive a fax. Press Menu/Set, 1, 3. -
Page 42: Setting Volume Amplify
VOLUME AMPLIFY: ON–TEMPORARY This setting is appropriate if some of the users are hearing-impaired. During a conversation, users can press on the control panel to adjust the volume to LOW or HIGH. When the handset is replaced, the handset volume returns to the default setting of LOW. -
Page 43: Setting The Ring Volume
Setting the Ring Volume You can turn the ring off or you can select a ring volume level when your machine is idle (not being used). Press to adjust the volume level. Every time you press these keys, the fax machine will ring so you can hear the active setting as the LCD shows it. -
Page 44: Setup Receive
Setup Receive Basic receiving operations Choosing the Receive Mode There are four different Receive Modes for the fax machine. You can choose the mode that best suits your needs. How it works When to use it The fax machine For dedicated fax lines. FAX ONLY (automatic automatically... -
Page 45: Setting The Ring Delay
Current Receive Mode MAN:MANUAL 09/06 15:25 FAX: FAX ONLY F/T: FAX/TEL TAD: ANSWER MACH. To select or change your Receive Mode Press Receive Mode. The LCD shows your current selection. FAX ONLY FAX/TEL TAD:ANSWER MACH. Continue to press Receive MANUAL Mode until your new selection appears. -
Page 46: Setting The F/T Ring Time (Fax/Tel Mode Only)
Setting the F/T Ring Time (FAX/TEL mode only) If you set the Receive Mode to FAX/TEL, you’ll need to decide how long the fax machine will signal you with its special pseudo/double-ring when you have a voice call. (If it’s a fax call, the fax machine prints the fax.) This pseudo double ringing happens after the initial ringing from the phone company. -
Page 47: Printing A Reduced Incoming Fax (Auto Reduction)
Printing a reduced incoming fax (Auto Reduction) If you choose ON, the fax machine automatically reduces an incoming fax to fit on one page of Letter or Legal size paper, regardless of the paper size of the document. The fax machine calculates the reduction ratio by using the page size of the document and your Paper Size setting (Menu/Set, 2, 6). -
Page 48: Advanced Receiving Operations
Advanced receiving operations Operation from extension telephones If you answer a fax call on an extension telephone, or an external telephone in the EXT. jack of the machine, you can make the fax machine take the call by using the Fax Receive Code. When you press the Fax Receive Code 5 1, the fax machine starts to receive a fax. -
Page 49: Changing The Remote Codes
Changing the remote codes Remote Codes might not work with some telephone systems. The preset Fax Receive Code is 5 1. The preset Telephone Answer Code is # 5 1. If you are always disconnected when accessing your external TAD remotely, try changing the Fax Receive Code, Telephone Answer Code, or Activation Voice Code to other three-digit codes using numbers 0-9, or #. -
Page 50: Setting Up Sequential Polling Receive
Setting up Sequential Polling Receive The fax machine can ask for faxes from several fax units in a single operation (Sequential Polling Receive). Afterwards, a Sequential Polling Report will be printed. Press Menu/Set, 2, 7. 7.POLLING RX Enter the fax machines you want to poll using One-Touch, Speed-Dial, a Group, or Search. -
Page 51: Telephone Services
Please call your telephone company for availability and rates. What does Brother’s ‘Distinctive Ring’ do? The Brother fax machine has a Distinctive Ring feature that allows you to use your machine to take full advantage of the telephone company’s Distinctive Ring service. The new phone number on your line can just receive faxes. -
Page 52: Registering The Distinctive Ring Pattern
Before you choose the ring pattern to register You can only register one Distinctive Ring pattern with the machine. Some ring patterns cannot be registered. The ring patterns below are supported by the Brother machine. Register the one your telephone company gives you. Ring... -
Page 53: Caller Id
Turning off the Distinctive Ring Press Menu/Set, 0, 2. 2.DISTINCTIVE Press ▲ or ▼ to select OFF. Press Menu/Set. Press Stop/Exit. If you turn off Distinctive Ring, the machine will stay in MANUAL receive mode. You will need to set the Receive Mode again. (See To select or change your Receive Mode on page 5-2.) Caller ID The Caller ID feature lets you use the Caller ID subscriber... -
Page 54: Viewing The Caller Id Log
Viewing the Caller ID Log Press Hold/Caller ID. CALLER ID LOG After two seconds, press ▲ or 01)MARY ▼ to scroll through the Caller 02)TOM HENDERSON ID Log. 03)ABC COMPANY When you want to see detailed 03)ABC COMPANY information for a displayed ID 03)9087772837 (phone number and date and time call was received) press... -
Page 55: Registering A Caller Id Number
Registering a Caller ID number You can set up a caller in the Caller ID Log as a One-Touch or Speed Dial number. Press Hold/Caller ID. CALLER ID LOG After two seconds, press ▲ or ▼ to scroll through the Log and when you see a caller you want to register, press Menu/Set. -
Page 56: Call Waiting/Caller Id
Call Waiting/Caller ID The Call Waiting/Caller ID feature lets you use the Call Waiting/Caller ID subscriber service offered by many local telephone companies. This feature displays the telephone number (or name, if available) of Call Waiting Callers on your machine’s LCD. -
Page 57: Setup Send
Setup Send How to dial You can dial in any of the following ways. Manual dialing Press all of the digits of the phone or fax number. One-Touch dialing Press the One-Touch key of the location you want to call. If the LCD shows NOT REGISTERED when you enter the One-Touch number, a number has not been stored for it. -
Page 58: Fax Redial
Fax Redial If you are sending a fax manually and the line is busy, press Redial/Pause, and then press Fax Start to try again. If you want to make a second call to the last number dialed, you can save time by pressing Redial/Pause and Fax Start. -
Page 59: Manual Transmission
Manual transmission Manual transmission lets you hear the dialing, ringing and fax-receiving tones while sending a fax. Insert the document face down in the ADF. Pick up the handset and listen for a dial tone. —OR— Press Hook listen for a dial tone. Enter the fax number you want to call. -
Page 60: Contrast
Contrast If your document is very light or very dark, you may want to set the contrast. Use LIGHT to make the document darker. Use DARK to make the document lighter. Insert the document face down in the ADF. Press Menu/Set, 3, 3. 3.CONTRAST Press ▲... -
Page 61: Multiple Resolution Transmission
Multiple Resolution Transmission Use this feature to select separate resolution settings for each page of the fax you are sending. This could be useful if you are sending a fax with photos and text, or some pages with small print and others with larger print. -
Page 62: Advanced Sending Operations
Advanced sending operations Composing the electronic Cover Page The cover page is sent to the receiving party’s machine. Your cover page includes the name or number stored in the One-Touch or Speed-Dial memory. If you are dialing manually, the name is left blank. - Page 63 Cover page for next fax only This feature does not work unless you have set up the Station ID. (See Setting the Station ID on page 4-2.) If you only want to send a cover page with a particular fax, this cover page will include the number of pages in your document.
-
Page 64: Broadcasting
Using a printed Cover Page If you prefer using a printed cover page that you can write on, you can print the sample page and attach it to your fax. Press Menu/Set, 3, 1. 1.COVERPG SETUP Press ▲ or ▼ to select PRINT SAMPLE. -
Page 65: Call Reservation
Call Reservation You can send a fax and let the other party know that you want to speak to him after the fax transmission is completed. The other fax machine will ring as if it were receiving a telephone call; if the other party picks up the handset, your machine will ring. -
Page 66: Delayed Fax
Delayed Fax Depending on the amount of the data, you can use this menu setting to send up to 3 faxes at later times within the next 24 hours. Insert the document face down in the ADF. Press Menu/Set, 3, 7. 7.DELAYED FAX Enter the time you want the fax to be sent (in 24-hour format). -
Page 67: Setting Up Polled Transmit
Setting up Polled Transmit Polled Transmit is when you set up the fax machine to wait with a document so another fax machine can call and retrieve it. Insert the document face down in the ADF. Press Menu/Set, 3, 8. 8.POLLED TX Press ▲... -
Page 68: Memory Transmission
Memory Transmission This feature allows the fax machine to scan a fax into its memory and send it as soon as the scan is complete. This way, you don’t have to wait for the entire fax to be transmitted before you retrieve your document. -
Page 69: Interrupting Delayed Fax And Polled Transmit Jobs
Interrupting Delayed Fax and Polled Transmit jobs Even if you have your machine set to send a fax later, or if you have it set to be polled, you can interrupt the scheduled job to send a fax or make a copy now. However, you cannot use automatic redial or the Menu mode. -
Page 70: Quick-Dial Numbers And Dialing Options
Quick-Dial numbers and dialing options Storing numbers for easy dialing You can set up the fax machine to do following types of easy dialing: One-Touch, Speed-Dial and Groups for Broadcasting faxes. When you dial a quick-dial number, the LCD shows the name, if you stored it, or the number. -
Page 71: Storing Speed-Dial Numbers
Storing Speed-Dial numbers You can store Speed-Dial numbers, so that when you dial you will only have to press a few keys (Search/Speed Dial, #, the two-digit number, and Fax Start). The fax machine can store 100 Speed-Dial numbers. Press Menu/Set, 6, 2. 2.SPEED-DIAL Use the dial pad to enter a #05:... -
Page 72: Changing One-Touch And Speed-Dial Numbers
Changing One-Touch and Speed-Dial numbers If you try to store a One-Touch or Speed-Dial number where a number has already been stored, the LCD will show the name stored there (or number) and will ask you to do one of the following: Press 1 to change the stored 1234567 number. -
Page 73: Setting Up Groups For Broadcasting
Setting up Groups for Broadcasting Groups, which can be stored on a One-Touch key location, allow you to send the same fax message to many fax numbers by pressing only a One-Touch key and Fax Start First, you will need to store each fax number as a One-Touch or Speed-Dial number. -
Page 74: Dialing Options
Dialing options You can use the fax machine to make voice telephone calls by dialing manually or by using Search, One-Touch or Speed-Dial memory. You can use the handset to make calls. When you dial a quick-dial number, the LCD shows the name you’ve stored, or if you haven’t stored a name, the fax number you’ve stored. -
Page 75: Speed-Dialing
Speed-Dialing Pick up the handset. —OR— Press Hook. When you hear a dial tone, press Search/Speed Dial, press #, and then press the two-digit Speed-Dial number. If you pressed Hook to dial the call, pick up the handset when the other party answers. (The speaker works only one way; the other party won’t be able to hear you unless you pick up the handset.) To hang up a voice call, replace the handset. -
Page 76: Search
Search You can search for names you have stored in One-Touch and Speed-Dial memories. (See Storing One-Touch Dial numbers on page 7-1 and Storing Speed-Dial numbers on page 7-2.) Pick up the handset. Press Search/Speed Dial, then enter the first letter of the name you are looking for by using the dial pad. -
Page 77: Remote Fax Options
Remote Fax Options Fax Forwarding You can only use one remote fax option at a time: Fax Forwarding—OR—Paging—OR—Fax Storage—OR— Off. You can change your selection at any time (Menu, 8, 1). (See Turning off Remote Fax Options on page 8-3.) Setting up Fax Forwarding When you select Fax Forward, your fax machine stores the received fax in the memory. -
Page 78: Programming Your Pager Number
Programming your pager number When Paging is selected, your fax machine dials the pager number you’ve programmed, and then dials your Personal Identification Number (PIN). This activates your pager so you will know that you have a fax message in the memory. Press Menu/Set, 8, 1. -
Page 79: Setting Fax Storage
Setting Fax Storage If you select Fax Storage, your fax machine stores the received fax in the memory. You will be able to retrieve fax messages from another location using the Remote Retrieval commands. Press Menu/Set, 8, 1. 1.FWD/PAGE/STORE Press ▲ or ▼ to select FAX STORAGE. -
Page 80: Remote Retrieval
Remote Retrieval You can call your fax machine from any touch tone telephone or fax machine, then use the Remote Access Code and remote commands to retrieve fax messages. Be sure to cut out the Remote Retrieval Access Card on the last page and keep it with you at all times. -
Page 81: Remote Commands
Remote commands Follow the commands below to access features when you are away from the fax machine. When you call the fax machine and enter your Remote Access Code (3 digits followed by ), the system will give two short beeps and you must enter a remote command. -
Page 82: Retrieving Fax Messages
Retrieving fax messages Dial your fax number. When your fax machine answers, immediately enter your Remote Access Code (3 digits followed by ). If you hear one long beep, you have messages. As soon as you hear two short beeps, use the dial pad to press 9 6 2. -
Page 83: Printing Reports
Printing reports FAX settings and activity Your fax machine can print a Transmission Verification Report after each fax you send. Also, a journal of sent and received faxes can be printed at specified intervals. Customizing the Transmission Verification Report You can use the Transmission Report as proof that you sent a fax. This report lists the time and date of transmission and whether the transmission was successful (OK). -
Page 84: Printing Reports
Printing reports Following reports are available: Prints a Transmission Verification 1.TRANSMISSION Reports for the last fax that was sent. This information will remain until you pick up the handset. Prints the Help List so you can see 2.HELP LIST at-a-glance how to quickly program your fax machine. -
Page 85: Making Copies
Making copies Using the fax machine as a copier You can use this fax machine as a copier. Always make sure you have paper in the paper tray before making copies. Copy Key Incoming faxes cannot be received on paper or into the memory while the fax machine is copying. -
Page 86: Copy Options: Single Or Multiple Copies, Sort/Stack, Reduce/Enlarge
Copy options: Single or Multiple copies, Sort/Stack, Reduce/Enlarge You can choose additional copy options. First, you can select the number of copies. Next, you can choose whether multiple copies will be STACKED (all copies of page 1, then all copies of page 2, etc.) or SORTED (collated). -
Page 87: Important Information
Important information Standard telephone and FCC Notices These notices are in effect on models sold and used in the United States only. This equipment is hearing-aid compatible. When programming emergency numbers or making test calls to emergency numbers: ■ Remain on the line and briefly explain to the dispatcher the reason for the call before hanging up. -
Page 88: Federal Communications Commission (Fcc) Declaration Of Conformity (Usa Only)
If trouble is experienced with this equipment, for repair or warranty information, please contact Brother Customer Service. (See Brother numbers on page i.) If the equipment is causing harm to the telephone network, the telephone company may request that you disconnect the equipment until the problem is resolved. - Page 89 ■ Call the dealer or an experienced radio/TV technician for help. Important Changes or modifications not expressly approved by Brother Industries, Ltd. could void the user’s authority to operate the equipment. Industry Canada Compliance Statement (Canada only) This Class B digital apparatus complies with Canadian ICES-003.
-
Page 90: Important Safety Instructions
Refer all servicing to Brother Authorized Service Personnel. A list of Authorized Service Centers has been included for your convenience, or you may contact Brother Customer Service for your nearest Brother Authorized Service Center. -
Page 91: Trademarks
(Surge Protector). Trademarks The Brother logo is a registered trademark of Brother Industries, Ltd. Brother is a registered trademark of Brother Industries, Ltd. © 2004 Brother Industries, Ltd. All rights reserved. All other brand and product names mentioned in this manual are registered trademarks of their respective companies. -
Page 92: Troubleshooting And Routine Maintenance Troubleshooting
The most common error messages are shown below. You can correct most problems by yourself. If you need more help, call the Brother fax back system (USA only). In USA only: 1-800-521-2846 ERROR MESSAGES ERROR... - Page 93 ERROR MESSAGES ERROR CAUSE ACTION MESSAGE You tried to access a Set up the One-Touch or NOT REGISTERED One-Touch or Speed-Dial Speed-Dial number. (See number that is not Storing One-Touch Dial programmed. numbers on page 7-1 and Storing Speed-Dial numbers on page 7-2.) The data is too large for (Fax sending or copy...
- Page 94 3. Press Fax Start. If you have not set up your Station ID, you cannot enter fax transfer mode. If the error message still continues, call Brother Customer Service. In USA: 1-800-284-4329 In Canada: 1-877-BROTHER 12 - 3...
-
Page 95: Compatibility
Compatibility If you are having difficulty sending or receiving a fax due to possible interference on the phone line, we recommend that you try setting the compatibility to BASIC. Press Menu/Set, 0, 1. 1.COMPATIBILITY Press ▲ or ▼ to select BASIC (or NORMAL). -
Page 96: Paper Jam
Paper Jam The paper is jammed in your fax machine. Remove any paper that is not jammed. Open the top cover by lifting the lever on the right side of the top cover. Top Cover Pull the jammed paper gently from the paper feeder toward the front of the fax machine as per diagram A. -
Page 97: If You Are Having Difficulty With The Fax Machine
If your copy looks good, you probably had a bad and white streaks connection, with static or interference on the phone across the page or line. If the copy looks bad, call Brother Customer the top and bottom Service at 1-800-284-4329 (in USA) or of sentences are 1-877-BROTHER (in Canada). - Page 98 DIFFICULTY SUGGESTIONS Sending Faxes Cannot send a fax Ask the other party to check that the receiving machine has paper. Print the Transmission Verification Report and check for an error. (See Printing reports on page 9-1.) Poor sending Try changing your resolution to FINE or S.FINE. Make quality.
-
Page 99: Routine Maintenance
Routine maintenance Cleaning the print head Clean the print head when you want to improve the print quality and also as part of your routine maintenance. After you have just used the fax machine, some internal parts of the fax machine are extremely HOT! So please be careful. Before you clean inside the fax machine, unplug the telephone line cord first, and then the power cord from the AC power outlet. -
Page 100: Cleaning The Scanner
Cleaning the scanner Before you clean inside the fax machine, unplug the telephone line cord first, and then the power cord from the AC power outlet. Open the top cover by lifting the lever on the right side of the top cover. - Page 101 Take the used ribbon out of the cartridge: 1 Snap out the upper and lower right white spools. 2 Slide the roll off the blue gear and lower left white spool. (Do not remove the blue gear and lower left white spool). Blue Used Ribbon Gear...
- Page 102 Turn the left blue gear to tighten the ribbon as shown in the illustration. Turn the cartridge over and re-install it in your fax machine: Insert the recessed first and place the cartridge into its four holders. Press down on both sides of the top cover to close it securely. 12 - 11 Troubleshooting and routine maintenance...
-
Page 103: Glossary
Delayed Fax Sends your fax at a specified later time that day. Distinctive Ring A subscriber service purchased from the telephone company that gives you another phone number on an existing phone line. The Brother fax machine uses the new number to simulate a dedicated fax line. G - 1... - Page 104 External telephone A TAD (telephone answering device) or telephone that is plugged into the EXT jack of the fax machine. F/T Ring Time The length of time that the Brother fax machine rings (when the receive mode setting is FAX/TEL) to notify you to pick up a voice call that it answered.
- Page 105 Pause Allows you to place a 3.5 second delay in the dialing sequence stored on One-Touch keys or Speed-Dial numbers. Photo resolution A resolution setting that uses varying shades of gray for the best representation of photographs. Polling The process of a fax machine calling another fax machine to retrieve waiting fax messages.
-
Page 106: Specifications
Specifications General Type Desktop facsimile transceiver Memory Capacity 512 KB Paper Tray 17-24 lb (64 g/m – 90 g/m ): Up to 50 sheets (Temperature: 23°C, Humidity 50% ) Paper Output 17-24 lb (64 g/m – 90 g/m ): Up to 20 sheets Printer Type Line Thermal with Ribbon... -
Page 107: Fax
Compatibility ITU-T Group 3 Coding System Modified Huffman (MH) Modem Speed 9600/7200/4800/2400 bps; Automatic Fallback Document Size Scanner Width: Max. 8.5" (216 mm) Paper Size Letter, Legal Automatic Document Up to 10 pages Feeder (ADF) Gray Scale 64 levels Polling Types Standard, Sequential Contrast Control Automatic/Light/Dark (manual setting) -
Page 108: Index
Broadcasting ......6-8 Quick-Dial numbers ..... 7-5 setting up Groups ....7-4 Distinctive Ring ......5-8 Brother accessories and supplies ..ii Brother numbers ...... i Easy Receive ......5-3 Customer Service ....i ECM (Error Correction Mode) FAQs (frequently asked ..........1-7 questions) ...... - Page 109 sending at end of conversation ..6-3 Navigation keys ......3-2 Broadcasting ....6-8 contrast ......6-4 delayed ......6-10 One-Touch ....... 1-5 fax redial ......7-7 changing ......7-3 manual ......6-3 dialing ........7-5 Memory Transmission ...6-12 setting up ......7-1 multiple settings ....6-3 overseas ......6-8 Polling Transmit .....6-11 Paging .......
- Page 110 Remote Retrieval access code ....8-3, 8-4 Warranties ........iii changing the code ....8-3 Canada ........vi commands ......8-5 Notice-Disclaimer ....iii getting your faxes ....8-6 USA ........iv Reports ........9-2 World Wide Web ......i Fax Journal ......9-2 Journal Period ....9-1 Help List .......9-2 Memory Status .....9-2 Quick-Dial List ......9-2 Tel.Index ......9-2...
-
Page 111: Remote Retrieval Access Card
Remote Retrieval Access Card If you plan to receive fax messages while away from the fax machine, carrying the Remote Retrieval Access Card printed below will serve as a convenient reminder of the retrieval procedures. Simply cut out the card and fold it to fit your wallet or organizer. - Page 112 Fold Fold R - 2...
- Page 113 EQUIPMENT ATTACHEMNT LIMITATIONS (Canada only) NOTICE This product meets the applicable industry Canada technical specifications. NOTICE The Ringer Equivalence Number is an indication of the maximum number of devices allowed to be connected to a telephone interface. The termination on an interface may consist of any combination of devices subject only to the requirement that the sum of the RENs of all the devices does not exceed five.
- Page 114 ® Brother International Corporation 100 Somerset Corporate Boulevard P.O. Box 6911 Bridgewater, NJ 08807–0911 USA Brother International Corporation (Canada) Ltd. 1 rue Hôtel de Ville, Dollard-des-Ormeaux, QC, CANADA H9B 3H6 Visit us on the World Wide Web http://www.brother.com These machines are made for use in the USA and CANADA only.
Need help?
Do you have a question about the FAX-575 and is the answer not in the manual?
Questions and answers
When I attempt to fax something, they are asking for an access code. Where can I obtain an access code?
To obtain an access code for the Brother FAX-575, press Menu/Set, then 8, then 2. Enter a three-digit code using numbers 0–9 and press Menu/Set. To deactivate the code, press Stop/Exit in Step 2.
This answer is automatically generated
I INSTALLED NEW RIBBON ,BUT MY FAX MACHINE READS RESET OR REPLACE RIBBON EMPTY?
The Brother FAX-575 may display a message to reset or replace the ribbon after installing a new one because the ribbon cartridge installation process requires proper resetting. If the ribbon is not installed correctly or the machine does not recognize the new ribbon, it will continue to show this message. Ensure the ribbon is properly positioned, the spools are securely snapped in place, and the blue gear is correctly aligned. Additionally, confirm that the ribbon is not damaged or improperly loaded.
This answer is automatically generated