Table of Contents
Advertisement
Quick Links
Advertisement
Table of Contents

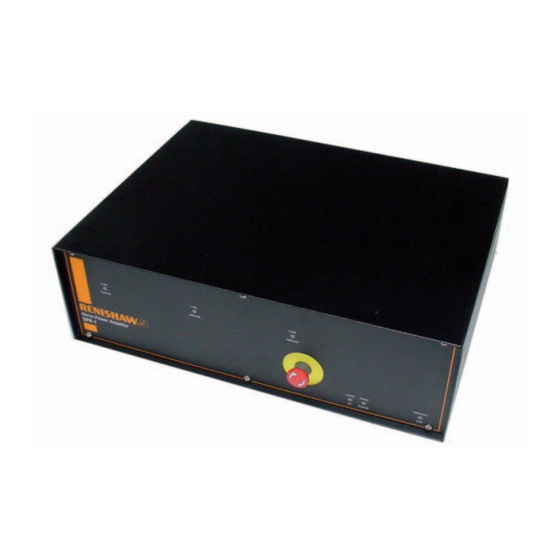
Related Manuals for Renishaw SPA1


Summary of Contents for Renishaw SPA1
- Page 1 Installation guide H-1000-5227-06-B SPA1 servo tuning guide...
- Page 2 However, Renishaw makes no warranties with respect to the contents of this document and specifi cally disclaims any implied warranties. Renishaw reserves the right to make changes to this document and to the product described herein without obligation to notify any person of such changes.
- Page 3 SPA1 servo power amplifier tuning guide...
- Page 4 Renishaw equipment previously sold. Warranty Renishaw plc warrants its equipment for a limited period (as set out in our Standard Terms and Conditions of Sale) provided that it is installed exactly as defined in associated Renishaw documentation.
-
Page 5: Table Of Contents
Contents Contents 1 Introduction............................5 2 SPA1 commissioning sequence ......................6 Initial machine ini file creation ....................6 2.1.1 Common parameters ....................6 2.1.2 Machine and move configuration................8 Renicis sequence.........................9 2.2.1 Initial steps......................9 2.2.2 Close position loop .....................10 2.2.3 Set offset PA controls ..................11 2.2.4... - Page 6 Contents 5 Glossary of terms..........................29 6 Revision history ..........................30 What’s new in release 01-A....................30 What’s new in release 02-A....................30 What’s new in release 03-A....................30 What’s new in release 04-A....................30 What’s new in release 05-A....................30 What’s new in release 05-B....................
-
Page 7: Introduction
Introduction Introduction The object of this UCC servo tuning user’s guide is to provide a user-friendly publication to assist in the task of setting up the servo response of the CMM. When used in conjunction with our “RENICIS” installation / fault finding software, this document should enable a competent technician to set up a CMM either at the assembly plant or on-site. -
Page 8: Spa1 Commissioning Sequence
SPA1 commissioning sequence SPA1 commissioning sequence The following section outlines the recommended procedure to commission the SPA1 or analogue based party servo power amplifiers. This procedure assumes that the system being installed is a new installation and little information is known about the machine’s servo system characteristics. - Page 9 SPA1 commissioning sequence MachineIOLogic AmpifierOK Logic level active high or low CMMdeclutch Logic level active high or low ESTOPtripped Logic level active high or low AirPressureLow Logic level active high or low ZaxisCrash Logic level active high or low MotorsEngaged...
-
Page 10: Machine And Move Configuration
SPA1 commissioning sequence 2.1.2 Machine and move configuration This is a very important part of the machine set-up where all the physical and motion properties are defined. CAUTION: Particular care is needed in specifying the maximum move speed and acceleration since this defines the velocity gain of the remainder of the CMM servo system (the motors, the tacho-generators (if fitted) and the drive gearing). -
Page 11: Renicis Sequence
SPA1 commissioning sequence Renicis sequence 2.2.1 Initial steps Start the commissioning process by ensuring the step icon on the toolbar is not indented and then click on the GO icon on the toolbar, as shown in the figure 1 below:... -
Page 12: Close Position Loop
SPA1 commissioning sequence If problems are experienced with any of the above steps, refer to the Renicis user guide (Renishaw part number H-1000-5058) or the appropriate UCC1, UCClite or UCC2 installation guide. 2.2.2 Close position loop For the following tests the CMM motors will frequently be engaged by Renicis in either open or closed loop modes. -
Page 13: Set Offset Pa Controls
SPA1 commissioning sequence 2.2.3 Set offset PA controls The purpose of this step is to permit any servo offset apparent on the UCC controllers to be matched with the servo power amplifier fitted to the system. The following system preparations are advised prior to the operator progressing through the steps of the Renicis commissioning process: •... -
Page 14: Calc Servo Gain
SPA1 commissioning sequence 2.2.4 Calc servo gain The purpose of this step is to set the velocity gain of the system to the theoretical value (MaximumMoveSpeed / 10) The velocity gain which Renicis will use as a target is calculated from the Maximum Move Speed as specified in the Machine ini file, such that this speed will correspond to the maximum value of motor command signal from the controller, i.e. -
Page 15: Velocity Loop Tuning
SPA1 commissioning sequence 2.2.5 Velocity loop tuning This test moves the CMM forwards and backwards by the distance entered. This movement will normally be shown complete on the graph against time. Selecting 'fwd + rev. move superimposed' will invert the reverse trace and display it against the forward trace so that an easier comparison may be made. -
Page 16: Adjustment Of Proportional And Integral Gains
SPA1 commissioning sequence 2.2.6 Adjustment of proportional and integral gains Initially the response displayed may look as shown in figure 7 below: Figure 7 The objective is to get the machine response (blue line) as close to the demand (red line) but with no or minimal overshoot. -
Page 17: Renicis Position Loop Tuning
SPA1 commissioning sequence Renicis position loop tuning NOTE: To keep the machine response “balanced”, the same tuning parameter values must be used for all axes, with the exception of acceleration feedback. 2.3.1 Setting the uncompensated gain In this section we will be increasing the uncompensated gain K to a safe maximum before switching on any conditioning filters. - Page 18 SPA1 commissioning sequence Figure 10 Figure 11 If any axes become unstable (Y axis in figure 11), reduce KP1 by 20% and check again, see step 2. NOTE: All axes must have the same K . The value of K...
-
Page 19: Applying Acceleration Feedback
SPA1 commissioning sequence 2.3.2 Applying acceleration feedback Acceleration feedback is another level of control that selectively increases the apparent inertia of the machine, allowing us to increase the gain still further before the machine becomes unstable. Machines react in different ways to acceleration feedback so the amount of gain increase can vary between zero and ten times. - Page 20 SPA1 commissioning sequence Figure 12 Figure 13 NOTE: At this point, if the positioning is good enough (within specifications), then no further tuning will be necessary.
-
Page 21: Servo Tuning Test
SPA1 commissioning sequence Servo tuning test The servo tuning test is used to check the steady state error for the installation Ensure button is not depressed and operate the button on the RENICIS toolbar. Highlight the “Servo Tuning” step on the list of steps, run the “Servo Tuning” test by clicking the “Go to Step” button. - Page 22 SPA1 commissioning sequence Start the test by clicking on the ‘Start’ button. The test may be aborted at any time after starting. The following dialog picture (figure 15) shows the first move in progress: Figure 15 At the beginning of this test, four different moves are performed and a worst-case steady-state error value determined and displayed.
-
Page 23: Servo Tuning Objectives
SPA1 commissioning sequence 2.4.1 Servo tuning objectives The servo tuning objective is to find the controller parameters that meet the performance requirements for a specific application. Typical requirements are: • Stability • High disturbance rejection (reflected through a high proportional gain) •... -
Page 24: Applying Velocity Feed-Forward
SPA1 commissioning sequence 2.4.2 Applying velocity feed-forward Activate the manual servo tuning test. Select tests 3 and 4 as shown in figure 17 below: Figure 17 Click the Start button to run the selected tests initially with no value in the Vff input box. When the test has completed note the values of peak following error and overshoot for all axes. -
Page 25: Scanning Tuning Procedure
2.4.3 Scanning tuning procedure For information with respect to best tuning practices when using the Renishaw controller product range, the commissioning tool used to enable the system to be tuned for scanning capability is UCCassist, please refer to H-1000-5224 for further information. -
Page 26: Rotary Table Tuning Procedure
Rotary table tuning procedure Rotary table tuning procedure Overview To activate the tuning procedure within Renicis for the rotary table, it is necessary to have a suitable system hardware configuration and the machine’s configuration file must indicate that a rotary table is installed in the system. -
Page 27: Tuning
Rotary table tuning procedure Tuning 3.2.1 Velocity loop tuning Select the W check box, this will only be active (enabled) when a rotary table is both detected and enabled. NOTE: It is not possible to perform a move in all four axes simultaneously. Selecting the 'W' axis will automatically disable the other axes. -
Page 28: Position Loop Tuning
Rotary table tuning procedure 3.2.2 Position loop tuning Initially run with the default values. Figure 22 By clicking the ‘Edit’ button you can change the proportional gain. The default value of 1 for W proportional gain should be suitable in most cases. A graph of position demand similar to the one shown should be seen. -
Page 29: Definitions
Definitions Definitions Uncompensated gain The maximum stable gain (with a safety margin) that can be used to compensate the position error without the use of the lead and lag filters. Acceleration feedback A high proportional gain is desirable for a high disturbance rejection and better precision (smaller steady state error). -
Page 30: I 2 T Time
Definitions t Time The amount of time for which peak motor current is allowed to flow. If this is exceeded a fault is software generated to protect against motor over heating. Continuous current, or anything less, will be allowed to flow for unlimited time without fault. - Page 31 Revision history Glossary of terms The frequency corresponding to the –3dB point Acceleration feedback gain Acceleration feedback gain for the “X” axis A(X) Acceleration feedback gain for the “Y” axis A(Y) Acceleration feedback gain for the “Z” axis A(Z) Dynamic integrator gain Dynamic integrator gain for the “X”...
- Page 32 What’s new in release 05-A Minor graphical and grammatical clarification. What’s new in release 05-B Document title changed from ‘UCC1 universal CMM controller servo tuning guide’ to ‘SPA1 servo tuning guide’. What’s new in release 06-A Major document re-structure to follow the structure used in other Renishaw tuning guides and changes in Renicis software.
- Page 33 Renishaw plc +44 (0)1453 524524 +44 (0)1453 524901 New Mills, Wotton-under-Edge, uk@renishaw.com Gloucestershire, GL12 8JR United Kingdom www.renishaw.com Renishaw worldwide Australia India Spain +61 3 9521 0922 +91 80 25320 144 +34 93 663 3420 australia@renishaw.com india@renishaw.com spain@renishaw.com Austria Israel...
Need help?
Do you have a question about the SPA1 and is the answer not in the manual?
Questions and answers