
Subscribe to Our Youtube Channel
Related Manuals for ADIROffice ADI629-206


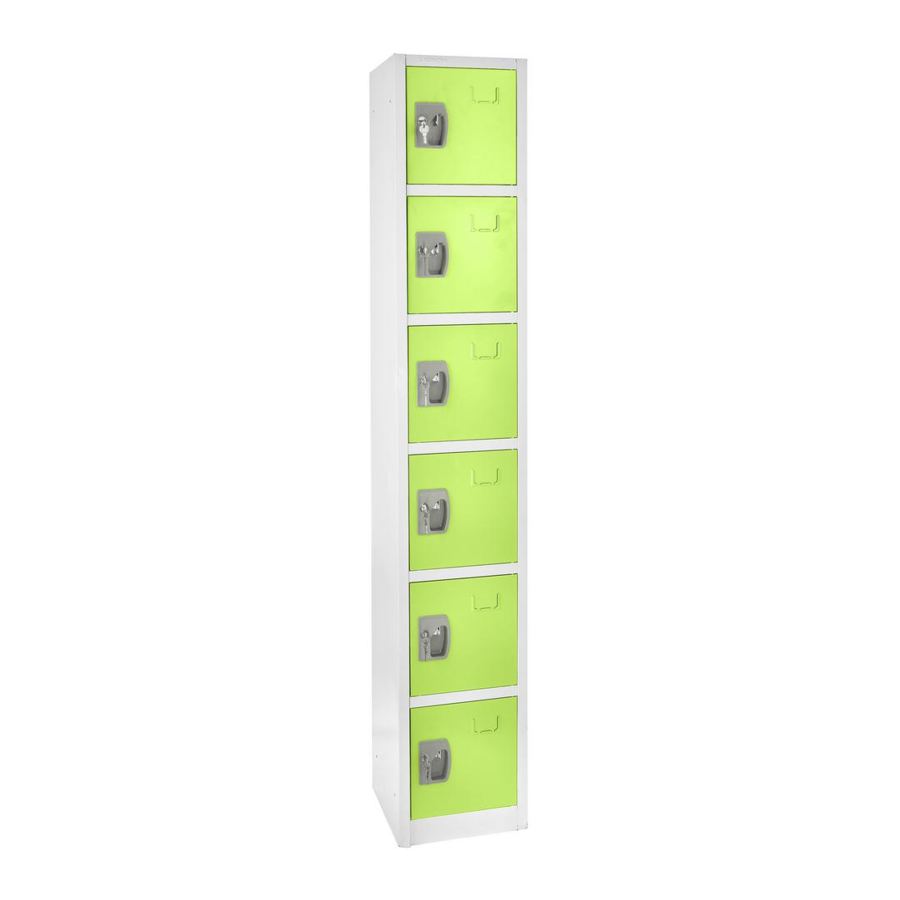
Summary of Contents for ADIROffice ADI629-206
- Page 1 Model # 629-206 6 CUBBY LOCKER Assembly & installation guide Six Cubby Locker ADI629-206 USER GUIDE...
- Page 2 Thank you for your purchase. AdirOffice has a commitment to deliver quality and stylish office furniture and equipment. We understand starting and maintaining a business is expensive enough. We can help you make it cost effective and beautiful. Plus, our expert team...
-
Page 3: Table Of Contents
Table of Contents Introduction Parts List Assembly Instructions Installation Instructions 11 Limited Warranty 12 Disclaimer... -
Page 4: Introduction
Introduction INTRODUCTION The AdirOffice 6-Cubby Locker Locker is designed to provide storage and security for your home or office. The lockers are conveniently designed so that they can be installed with multiple units if desired. The AdirO ice 6-Cubby Locker Locker is designed to provide storage and security for your home or o ice. - Page 5 Parts Included INCLUDED HARDWARE: Flat Head Screws Keys Bolts + Washers Nuts 1. Bolts (x4) 3. Nuts (x4) 4. Flat Head Screws (x12) 5. Keys (6 Sets of 2) 6 sets of 2 keys 2. Washers (x4) Round Head Screw Coat Hooks Wall Anchors 6.
- Page 6 PARTS Parts Included 6-Cubby Locker A. Door Panel E. Right Panel B. Left Panel F. Middle Panels C. Top Panel G. Bottom Panel D. Back Panel Back Panel Left Panel Right Panel Top Panel Door Panel Middle Panel Middle Panel Middle Panel Middle...
- Page 7 Assembly Instructions ASSEMBLY INSTRUCTIONS STEP 1: 6-Cubby Locker A. Place the Left Panel (B) onto the left side of the Back Panel (D). B. Line up the “C” shape of the Left Panel (B) so that it hooks under the “L” shape of the Back Panel (D). C.
-
Page 8: Assembly Instructions
ASSEMBLY INSTRUCTIONS 6-Cubby Locker Assembly Instructions STEP 2: Attach right panel to back panel A. Place the Right Panel (E) onto the right side of the Back Panel (D). B. Line it up so that the “C” shape of the Right Panel (E) hooks under the “L” shape of the Back Place the right panel onto the right side of the back panel. - Page 9 ASSEMBLY INSTRUCTIONS Assembly Instructions 6-Cubby Locker STEP 3: A. Stand the 3 assembled sides of the locker up. B. To attach the Door Panel (A) piece, move the Door Panel (A) into the locker at an angle so that it is completely inside of the enclosure. Attach door panel C.
- Page 10 ASSEMBLY INSTRUCTIONS Assembly Instructions 6-Cubby Locker STEP 4: A. Once the Door Panel (A) is attached, it is time to secure the Door Panel (A) by attaching the Top Panel (C), Middle Panels (F) and Bottom Attach the top, middle & bottom panels Panel (G).
- Page 11 ASSEMBLY INSTRUCTIONS Assembly Instructions 6-Cubby Locker STEP 5: A. Attach the Double Hooks (8) to the Back Panel (D) using a Phillips screwdriver and the included Flat Head Screws (4). Attach coat hooks Attach the coat hooks to the back panel using a Phillips screwdriver and the included screws.
-
Page 12: Installation Instructions
INSTALLATION INSTRUCTIONS 6-Cubby Locker Installation Instructions Multiple Locker Units Before you begin A. If you are using multiple locker units, secure them to each other for safety and security. B. Set the lockers next to each other. Ensure the mounting holes towards the top of the Right Mount the locker(s) to a wall for optimal safety. - Page 13 INSTALLATION INSTRUCTIONS Installation Instructions 6-Cubby Locker Mounting Locker Units A. There are two holes near the top of the Back Panel (D) of your locker. B. Place your locker where you want to install it. Using a pencil, mark Mounting the locker unit(s) to the wall the location of each of these holes on the wall.
-
Page 14: Limited Warranty
Limited Warranty 1. AdirCorp (the company) warrants to the purchaser that the product will be free from defects in workmanship and materials for a period of one (1) year from the date of purchase. 2. These warranties are not assignable or transferable to any other person. 3. -
Page 15: Disclaimer
Disclaimer By purchasing products from AdirCorp, user agrees as follows: TO THE MAXIMUM EXTENT PERMITTED BY LAW, THE PRODUCTS AND INFORMATION ON THIS SITE IS PROVIDED “AS IS” AND WITH ALL FAULTS AND ADIRCORP. MAKES NO PROMISES, REPRESENTATIONS, OR WARRANTIES, EITHER EXPRESS, IMPLIED, STATUTORY, OR OTHERWISE, WITH RESPECT TO THE PRODUCTS AND INFORMATION, INCLUDING ITS CONDITION, ITS CONFORMITY TO ANY REPRESENTATION OR DESCRIPTION, OR THE EXISTENCE OF ANY LATENT OR PATENT DEFECTS, AND ADIRCORP. - Page 16 ADI629-206 27 Selvage Street • Irvington, NJ • 07111 • © 2021 AdirCorp adircorp.com...
Need help?
Do you have a question about the ADI629-206 and is the answer not in the manual?
Questions and answers